• Skip to primary navigation
  • Skip to main content
  • Skip to primary sidebar
  • Skip to footer
  • Home
  • Interior Decor
    • D.I.Y
    • DIY Interior
    • Tips
  • Hobbie Crafts
    • Furniture Upcycle
  • Garden
  • News
  • Write For Us
  • Contact Details

A2B Crafts

DIY Crafts & Upcycling

A2Bcrafts

26th August 2021 D.I.Y

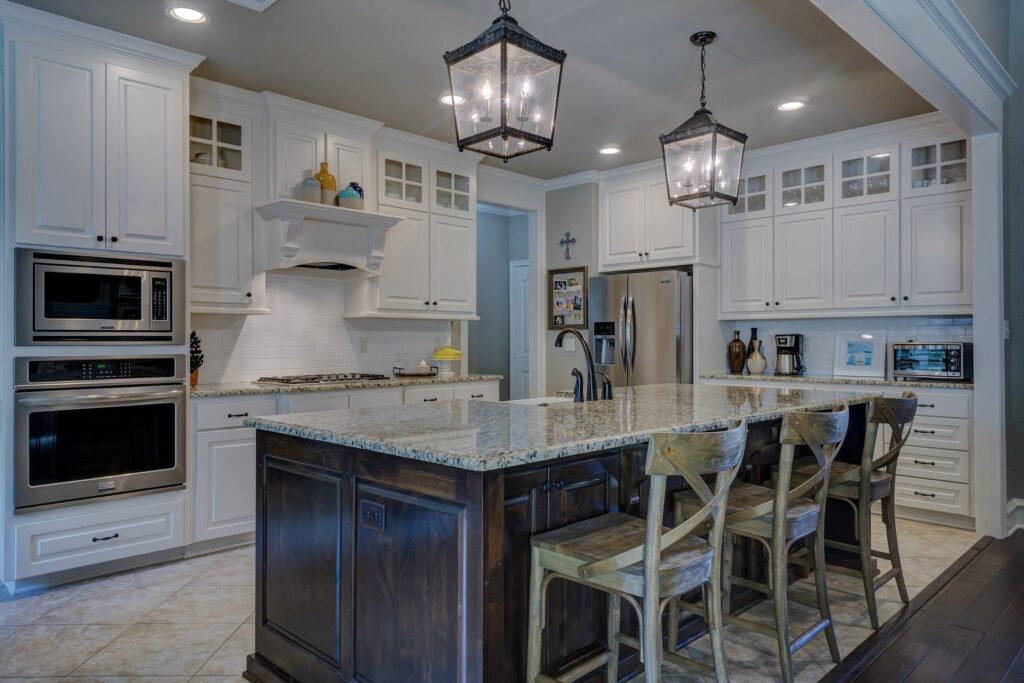
How & Why You Should Paint Your Tired Kitchen Cabinets

Painting Kitchen Cabinets - A Guide
Breathing new life into your kitchen doesn’t have to cost a bomb!

There is nothing that spruces a home quite like a new kitchen but, as we all know, a new kitchen can be expensive. The average cost of a new kitchen in the UK is £8,000 and £5,000 of that is the new cabinets. If you don’t want to spend quite that much but still want to update your kitchen’s look, then why not just paint your kitchen cabinets? It costs around £80 per cabinet, so you could end up saving thousands. It is frankly amazing the difference adding a lick of paint can make to your kitchen, and your home. But how do you even get started? What paint should I use? How do I prepare for this home improvement task? Well-read on for our handy, informative guide on how to paint, kitchen cabinets.

Make sure that your cabinets are in good enough condition to be painted
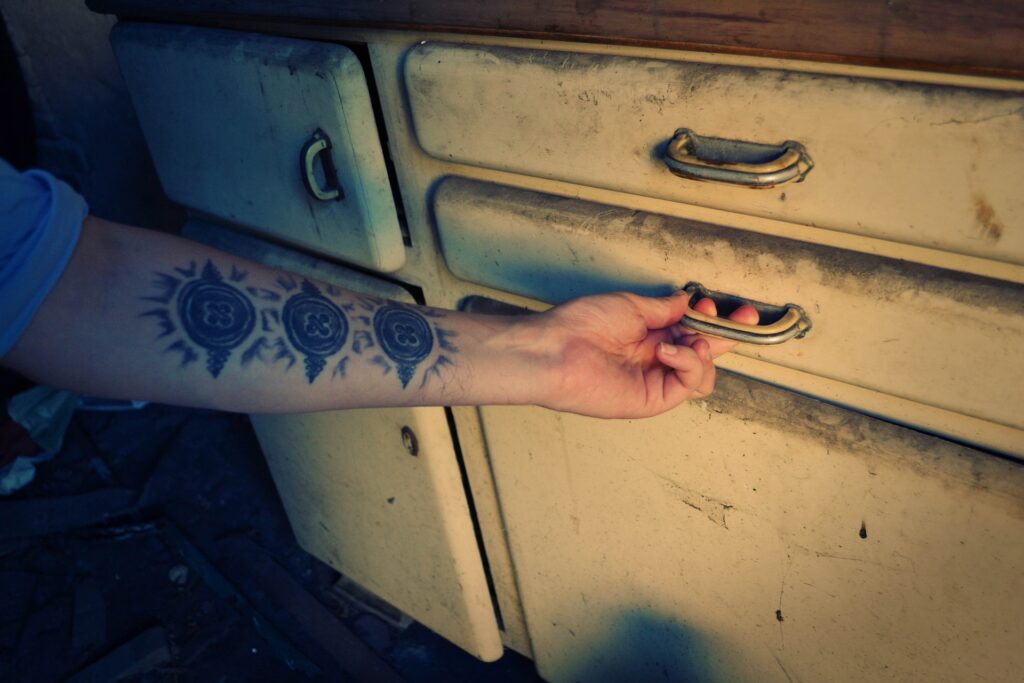
Old Kitchen Cabinets

Unfortunately, some kitchen cabinets just aren’t in a good enough state to be renewed. If your cabinets are fragile, the bottoms are starting to sag, the doors aren’t hanging right, or the veneers are starting to become delaminated, it might be better for you to bite the bullet and shell out for some new ones.

You should also take into account the material that your cabinets are made from, this is important as wood cabinets are perfect for painting. If your cabinets are laminated, don’t worry, you can still paint on this material! Just look out for any peeling, cracked or bulking, as painting over these blemishes isn’t going to make much difference. If your laminate cabinets have these signs, you may need to replace them completely. But you can also opt to use your old cabinets for other upcycling projects!

Decide what type of paint you want
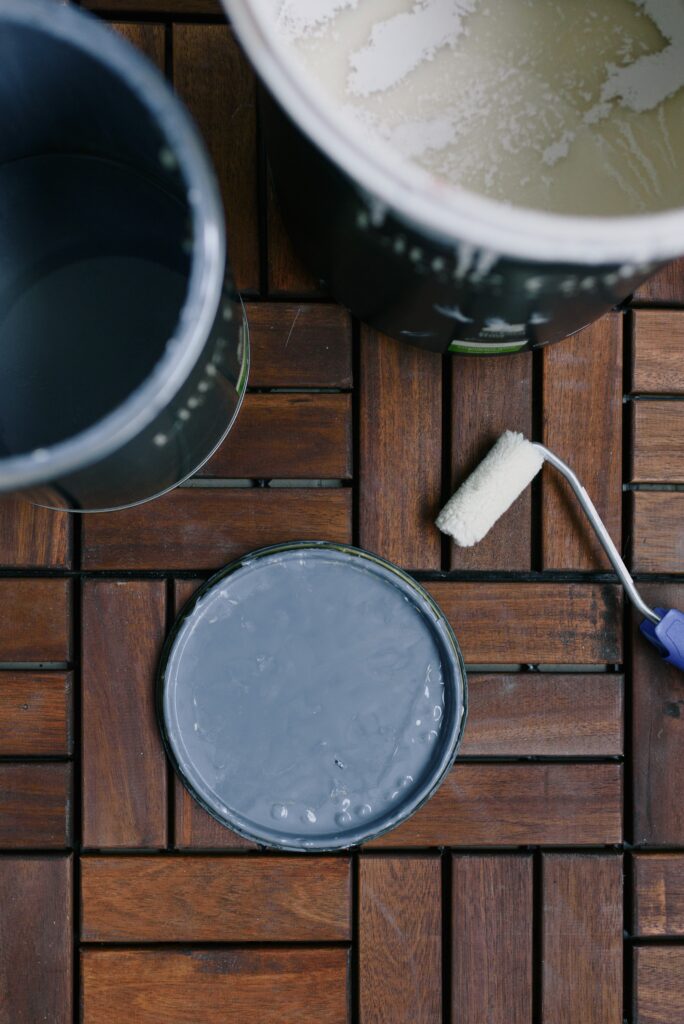
Types Of Paint Oil Paint, Matt Paint, Silk Paint

Let’s get the fun bit out of the way first: choosing the look you will go for. This is actually an important decision because painting kitchen cabinets is a big job and you really don’t want to end up having to do it twice in quick succession. The colour scheme is, of course, a matter of personal preference but choosing the right paint does have some impact on how easy the cabinets are to paint and how durable they will be.

Matt/chalk –

These types of paints can give a great rustic/country kitchen look and they are easy to paint with. This type of paint will stick to most surfaces with little to no sanding. They are less durable, however, and are more prone to chipping and scratching, so you may end up having to redecorate slightly sooner than you would have liked to.

Satin –

With its smooth finish and shiny sheen when it’s dried, satin paint is a fantastic option to pain your cabinets with thanks to its hardy nature and is holds up when washed. But this type of paint does not hide blemishes and imperfection on the surface or when you have to do touch ups.

Gloss –

Gloss paint is incredibly durable and reflects light with excellence, gloss pain also has a high resilience to moisture thanks to its density. If you choose gloss paint preparation is key as gloss will show every imperfection upon application, make sure that the surface is clean and smooth before you apply.

Oil Based Paints –

Also known as solvent based paint, this type of paint is often used by professionals for its hard finish that is durable and resists moisture and water than other paints. This type of paint is perfect for stained cabinets. If you are wanting a finish that will look great for years and years, an oil based paint is your best option. While this type of paint offers great resistance, this comes at the price that oil based paint take a long time to dry, and we mean a long time. So, if you wish to paint cabinets with oil paint, make sure you are prepared to have a large drying area and don’t mind waiting.

Latex Paints –

Latex paints are your friendly easy to use paint that requires little prep beforehand such as priming, this type of paint latches onto wooden surfaces such as your cabinet frames with ease. This style of paint also comes in a range of finishes, giving your cabinets texture. The only drawback with latex paint is its durability, with it being thin also it is easy to leave brush marks.

Deciding whether to strip your kitchen cabinets

The great debate: to strip or not to strip. There is a school of thought that says you should always fully strip off the previous layer of paint before you put a new one on, but doing so is quite time consuming and may not always be necessary. The purpose of stripping is that a painted surface is much less rough than a bare wood surface, which means that a new layer of paint will adhere to it less well. But you can make a painted surface rougher, and easier for the new paint to adhere to, by sanding it down.

Sanding down painted cabinets is the go-to method of stripping a cabinet door but do be careful as to much vigorous sanding can damage the wood lying underneath. So, when sanding wood make sure to sand evenly to avoid making unwanted delves and gouges. You can use either sandpaper or power tools, but the advice remains the same, keep a consistent level of sanding to avoid any accidents.

You can also use a hot air gun, this method removes paint quickly and with ease, but you must be incredibly carful as you can scorch the wood! Also do note that a hot air gun removes paint and cannot be used to remove varnish as it will turn the varnish into an almost glue-like substance that will ruin your cabinets.

Using a chemical stripping agent is another option, this is best for intricately designed cabinets and cabinets that have multiple paint layers present while also providing the best results! When using a chemical method, you must take care. Read the safety instructions thoroughly and make sure you have all the equipment needed.

It is important, however, to make sure that you thoroughly clean and degrease the surface before you start painting on it. Cooking creates so much grease in your kitchen, which sticks to the surface of your cabinets, and this will make it much harder for your new paint to stick.

It’s probably a good idea to take off all the doors

Not everyone takes off their kitchen cabinet doors, and instead use masking tape to cover hinges and other metalwork, but it is usually a good idea to take the doors off berfore painting them. It is going to be much harder for you to do a neat and professional-looking job with the cabinet doors in situ, and the whole process will be more difficult and stressful.

If you’re able to, it can be wise to invest in painter’s pyramid. Painter’s pyramids will suspend the door in the air so that you can paint the front, back, and sides all in one go without having to wait for it to dry before you turn it over. Using painter pyramids in addition to your setup, regardless of how you choose to paint your cabinet doors, Painter’s Pyramids are a simply a must-have.

It’s probably a good idea to take off all the doors

It is also a good idea to clearly label exactly where each door goes. You might think it’ll be obvious to you where each door came from, but when you’re standing over a sea of kitchen cabinet doors it suddenly gets a lot more difficult. We recommend drawing a diagram of the kitchen and labelling not only the doors but the corresponding cabinet where the cabinet door has come from. This makes it far easier when reassembling your kitchen cabinets, as with any D.I.Y paint job the more your prep that better the outcome.

Prep the room before you start

Painting your kitchen cabinets is a big job and it takes a relatively long time, so you need to be prepared before you start. You may well not be able to use your kitchen as you normally would, so think about how you are going to be eating while the job is happening and get everything ready and in place.

If you have the space that doesn’t get used as much as the kitchen and has ample room to dry your cabinet doors, setup in there as the kitchen is usually a heavy traffic area within the home and it can be difficult to complete this job within confined spaces.

You will need to empty all of your cabinets of their food and products and clear all of the kitchen sides of their appliances. Then cover all of the fixed appliances with sheeting, as well as the counters, and use masking tape along the edges of the cabinets to protect your walls. Remove the cabinet doors if you are going to, and take out their hinges and handles.

If you are lacking the appropriate space or cannot remove them cover the hinges with masking tape, but do take the handles off.

Paint the cabinets!

You will usually need to do around one or two coats unless you are going for a much lighter colour than you currently have, in which case you might need more. Before you begin, you should use a primer and wait for it to dry. Then start by filling in the nooks and crannies before moving onto the main part of the cabinet. Always work from top to bottom when painting the cabinets, and make sure that you are painting across the grain rather than with it. Most people use a brush and/or a roller, but if you want a smoother finish, you could opt for a spray gun instead if your local paint store or D.I.Y store sells them. Each has their own pros and cons, which we talk about below.

Paint Brush –

The old faithful paint brush is usually the first port of call when you are deciding to go ahead painting cabinets. Brushes can be a natural bristle brush or can be a synthetic bristle brush, either is fine for painting your cabinets also your standard bush works with nearly all types of paint including oil based paints, latex paints, etc.

Pros –

Come in range of sizes

Cheap & works with nearly all paints

Perfect for small detailing such as to paint edges and getting into nooks

Cons –

Bristles breaking off and mixing with your paintwork

Considerably slower painting large surfaces in comparison to a roller

Roller –

Using a roller for a job like this may seem like overkill for painting doors, but if you have especially large cabinet doors, a roller is a perfect option for speeding up the job while spreading an even coat across the surface. Rollers also can come in a variety of materials such as foam, felt, polyester and multiple others.

Pros –

Speedy application of paint for those larger areas that would usually take up more time using a traditional paintbrush.

Smooth finish, even and consistent paint application, leaving a seamless appearance.

Less labour intensive

Cons –

Some high-quality rollers can be expensive in comparison

Can’t be used to paint smaller areas such as nooks and bevels in the cabinet design.

Paint Sprayer –

If you want to save time while getting a professional finish, then a sprayer might be the answer that you are looking for. As using a spray paint gun can save you loads of time from having to put on multiple coats of paint as you just spray paint!

Pros –

Considerably faster paint time.

Paint dries faster.

Even paint application.

More professional looking result

Cons –

Cleaning the paint sprayer takes longer than brushes or rollers.

Expensive

Any touch ups can only be done with the sprayer

All these items can be found at your local hardware shop or can be easily purchased via online retailers like Amazon.

Now that you have a more information on the ways that you can paint, take your time and see if you have the budget or the time to get started on this paint job.

Wait for the paint to cure

It is tempting to get your kitchen back in order as quickly as possible, but it really is worth your while to wait for your wet paint to cure. If you don’t, you could end up with smudged paint, in which case you will have an even bigger job on your hand. When selecting your paint, take into account on how much time your paint will take to dry. Different paint types take different lengths of time to cure, so make sure that you read the instructions carefully, and use your judgement to make sure that it really is ready!

Painting Cabinets – The bottom line

It is definitely possible to completely update your kitchen on a budget, just by painting your kitchen cabinets. It is a big job, but it can save you a lot of money, so it is often well worth it. Just make sure that you have everything ready before you start and have a good feel for how to paint kitchen cabinets, and you will have a kitchen that feels just like new in no time!

Just remember to take your time as it isn’t a race, flying through this job rushing along every step of the way is a sure-fire way to be left with, yes, a revitalised kitchen but all the tell-tale signs of a rush job, scuffs, sloppy paint application and a blotchy uneven finish. Slow and steady wins the race as you want the best possible result, preparation is key and carful application of paint is vital for this project to go swimmingly.

13th May 2021 Hobbie Crafts

How to Make a Bath Bomb: Ingredients, Smells and Types

Have you ever wondered what it would be like to make your own bath bomb? Well, in this blog post we will talk about how to make a bath bomb. There are five easy steps that you can follow in order to create the perfect bath time experience for yourself or someone else. We will discuss ingredients, smells and types of bath bombs. 

Bath bombs have been popular since the early 1900s when they were first created by an American company called “Luna.” They became more mainstream after 2000 and now there is a huge market for them!

What ingredients do I need to make bath bombs?

  • Baking Soda – This is an alkali that loosens dirt and grime in the pores. It also fights odours, so it can be used to make your bath smell fresh!
  • Citric Acid – This ingredient will provide a citrusy scent for you when you’re scrubbing away at those rough spots on your skin. The acid also helps with breaking down oils and fats from food and other substances which makes some of them dissolve better than others. Citrus fruits contain citric acid naturally, but if you don’t want any brightening effects (or prefer not to use products made with natural ingredients) then this is something we recommend avoiding since it’s one of the main factors that causes discolouration.)
  • Coconut Oil – This is a nice addition to your bath bomb because it helps with moisturising the skin. It also has antibacterial properties, which means that you can use this oil for disinfecting and soothing minor burns.
  • Essential Oils – These provide fragrance (and therapeutic benefits) but they come in many different scents such as lavender or peppermint! Lavender offers calming qualities while Peppermint provides an invigorating experience!
  • Glycerine – This ingredient will give your skin some extra moisture when combined with coconut oil! It’s usually found near products like soaps and lotions. Glycerine is used in these instead of water because it maintains its consistency better over time.
  • Gelatine – Flavourless starches like gelatine help bind ingredients together because they act as thickening agents when mixed with water or liquid. They also make bath bombs softer which leads to better shape retention (i.e., not flattening out).
  • Mica Powder – This powder gives off sparkles in the tub, but it has many more benefits besides just being pretty! It’s used as a moisturiser, it has a cleansing effect on your skin because of the abrasive particles that are in it.
  • Almond Oil – This is a great choice for both sweet and savoury scents! It’s also good to use when making bath bombs with soothing essential oils because almond oil will help strengthen and soothe any fragrances you’re trying to create. Plus, this ingredient can moisturise dry skin as well!
Coconut Oil in Clear Glass Jar

How do you make a simple bath bomb?

To make a bath bomb, you will need:

  • Baking soda
  • Citric acid
  • Epsom salt or sea salt

Mix the baking powder, citric acid and Epsom (or sea) salts together in a bowl. Add to this mixture your desired colourant of choice, whether it’s food colouring or powdered clay! Next add oils from a few different scents because smelling like flowers all day can be overwhelming sometimes. 

Mix these ingredients until they are fully combined and then roll them into balls with small amounts of water at room temperature for about three minutes before chilling in the refrigerator for hours on end. When chilled enough, take them out and package as desired.

If you want an even more moisturising bath bomb, feel free to add in a few tablespoons of cocoa butter or shea butter!

Read our previous article on how to clean a dressing table with sugar soap

Other ways to make bath bombs

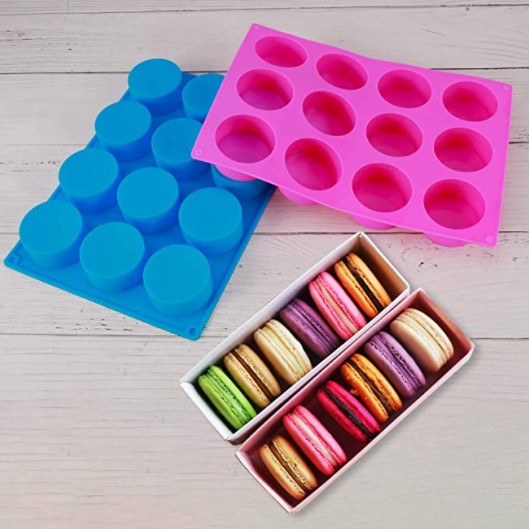
Use a candy mould to make your bath bomb. You can use any type of candy that is hard and will hold the shape (i.e., rock candy, chocolate or clear). The downside with this method is you have less control over ingredients since it’s already mixed together in the moulds. Plus, some people don’t like eating their bath bombs!

If using these types of moulds, I recommend adding cocoa butter for moisturising purposes too!

Instead of rolling them into balls before chilling in the refrigerator, add all your dry ingredients and oils into a bowl first then pour boiling water over top before mixing at room temperature until combined – then let it chill overnight instead.

Silicone Cake Moulds

Are bath bombs toxic?

Bath bombs are not toxic in any way.

There are a few different types of chemicals that can be used to make bath bombs, and the only ingredients you should be worried about when it comes to toxicity is baking soda.

Baking soda is something that I would personally avoid or use sparingly if sensitive skin – especially because some people find them itchy. The fragrances and dyes are the most common ingredients that may cause irritation for some people, but if you don’t have sensitive skin then they should do just fine. 

Bath bombs are safe to use around kids and pets as long as you’re careful with them – especially because bath time is a lot of fun for everyone!

Do you need baking soda for bath bombs?

In order to make a bath bomb it is necessary to have baking soda.

Baking soda is the main ingredient of bath bombs and for them to work you need it in there so that they can dissolve quickly.

Otherwise, your bathroom will be covered with a powdery mess! Without this chemical other ingredients would not do their job but you can use alternative ingredients.

What can you use instead of baking soda for bath bombs?

Instead of baking soda you can use Epsom salts or baking powder.

Epsom salt is a type of mineral that has been used for its medicinal purpose in therapeutic baths and soaks since the 19th century! It’s known to help relieve muscle aches, joint pain, swelling, and even reduce fever.

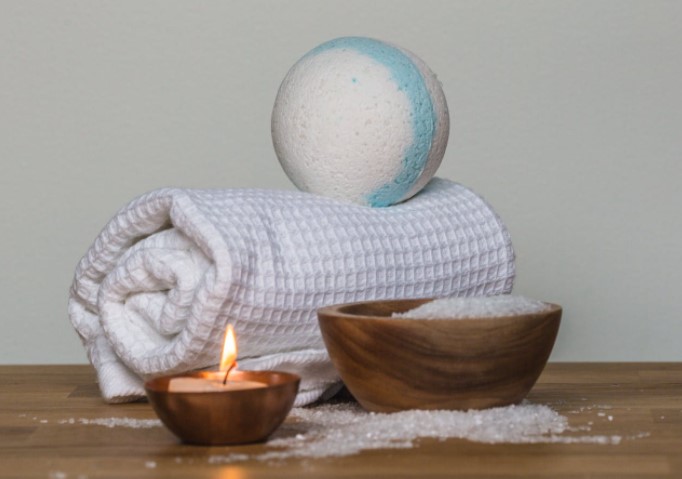
Bath bomb with Towel, Salt and Candle

28th April 2021 Tips

What Does a Diverter Valve Do?

Toaster radiators, hot water, and steam showers are all essential things in most homes, and a combi boiler makes it easier to switch from one to another thanks to a diverter valve.

A diverter valve diverts water to the faucet you need it. Therefore, if this crucial component starts to malfunction, then you will experience intermittent heating, lukewarm water, or even no heating at all.

It is, therefore, important to understand what a diverter valve is and how it works so that you can be in a better position to understand how to fix it in case it becomes faulty.

In this guide, we discuss what a diverter valve does, how it works, and how to know when it is at fault.

Let’s get started…

What Does a Diverter Valve Do?

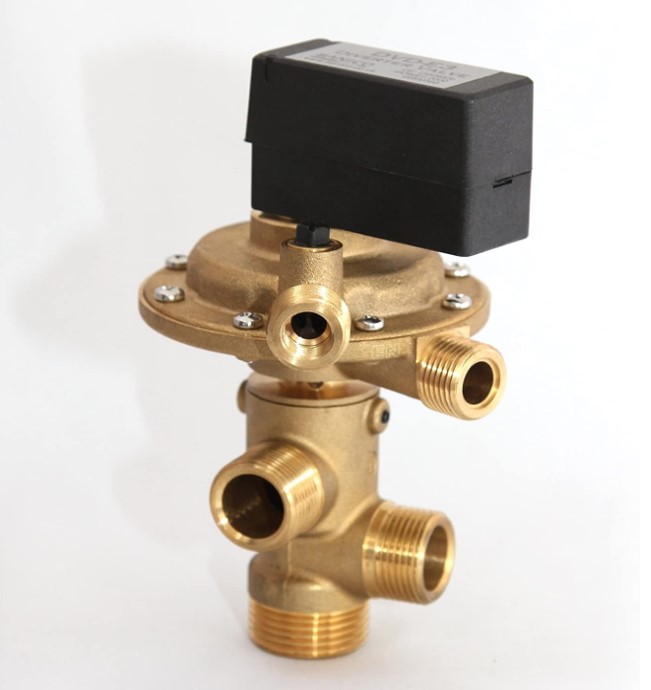
The diverter valve in your combi boiler is a valve that opens and closes to allow heat to your radiators or hot water to your faucets.

In other words, when you turn on your hot tap, it is the diverter valve that directs hot water to the faucet. This means you get hot water instantly whenever you want it. Also, if you switch on your central heating unit, then hot water will be sent to your radiators.

However, it is important to mention that the diverter valve prioritizes hot water to your faucet over radiators and thus will close the heating supply until you switch off hot water taps. Once you turn off hot water taps or shower, the hot water will be directed to your radiator.

How Does A Diverter Valve Work?

As we mentioned earlier, the diverter valve responds to your hot water requirement, whereby it makes water available to your shower or hot taps whenever you need it.

In terms of how it works, we can simply say that it acts as a gatekeeper for hot water, whereby it sends water that is heated in your combi-boiler to where you need it at that moment.

This means that when you switch on hot water taps, the diverter valve closes off the central heating supply and sends water to the plate heat exchanger for heating, and this is how you get the hot water in your tap or shower.

When you turn off the hot tap or shower, the diverter valve closes off the water supply and directs it back to the plate heat exchanger to feed your radiator with hot water.

Check price for this Combi Boiler 3 way Diverter here

Common Diverter Valve Problems

Thanks to our friend and heating engineer Ben Race from the Easy Boiler Company for the facts below.

To execute its function of diverting water to where it is needed, the diverter valve is fitted with several moving parts that control water flow and direction. These parts tend to degrade over time. Here are the common issues that can signify there is a problem with your combi-boilers diverter valve;

Having lukewarm water in your hot taps and shower

If the water coming out of your showers and taps is only lukewarm, this can be an issue with your diverter valve. In most cases, the problem comes because the valve is getting stuck, which means that hot water that should go to the showers and tap is getting lost.

This may cause an increase in annual energy bills as more heat is getting lost. If this happens, you will want your valve to be repaired as soon as possible.

You have hot water but no heat

Another indicator that your diverter valve has a problem is when you have hot water in your showers and taps but no heat from your radiators.

This often indicates the diverter valve is stuck on the hot water side. As we mentioned earlier, the diverter valve prioritizes hot water in your faucets over radiators. Therefore, when it gets stuck on the hot water side, then you will have hot water coming out of your taps, but the radiator won’t heat.

No hot water

This is the clearest indicator that your diverter valve is at fault. If the water won’t heat up, even after letting it flow for some time, then there is something wrong with your diverter valve.

In most cases, all these problems result from the diverter getting stuck due to the build-up of limescale or moving parts getting worn out.

Check Prices Of Diverter Valves Here

How do you fix a faulty diverter valve?

If you are experiencing hot water issues emanating from the diverter valve, we recommend that you call a registered plumber or gas engineer to fix the problem.

A professional will assess the heating system and see whether the diverter valve is to blame or there is a serious underlying problem. They can advise you on the way forward.

A detailed look at how diverter valves work

28th April 2021 Exterior Decor

Monocouche rendering: what is it?

Rendering your house is a very popular option for many people. There are lots of different rendering options, such as sand and cement, K-rend, pebbledash, wet dash, and monocouche rendering. Monocouche means “one coat” in French, and unlike other rendering options such as sand and cement, it can be applied in one go. But what exactly is monocouche rendering? And why is it so popular?

Monocouche rendering: what is it?

This and other types of rendering have been described in much more detail by Render Hero who are exterior rendering specialists from Newcastle from whom we have gathered most of this information but we are going to simplify it a little.

Monocouche render is a dry powdered render. It sometimes confused with cement render, but its properties are actually quite different. While it does have cement as an ingredient, it uses white cement rather than the grey cement that is used in traditional rendering. This gives it a very different finish.

Because of this difference in materials, monocouche rendering has through colour. White cement is more porous than grey cement, and this allows the render to be pigmented in whatever colour you want. And it never needs to be painted.

Monocouche render can also be finished in a variety of ways (although it is usually scraped to give a pitted effect) and it provides a chalkier flat finish overall. This can make the exterior of your property look crisp and fresh. This crispness as well as its low maintenance makes it a popular choice for new-build homes but it can also be applied to older homes to refresh them.

a house rendered with through coloured monocouche render

What are the benefits of monocouche rendering?

If you’re considering whether monocouche rendering is right for your home, there are lots of elements to consider.

1) It is convenient

Monocouche rendering can be applied in one go. It is applied in two passes, and can be troweled (or sprayed) and scraped on the same day. This is obviously an advantage both in terms of how long it takes to finish the project and in terms of reducing costs such as scaffolding and labour.

2) It is less prone to cracking

One of the big downsides of using sand and cement render is that it is fairly inflexible. Your home will expand and contract depending on weather conditions, and because sand and cement render is inflexible, this can make it prone to cracking. In contrast, monocouche render is flexible, meaning that it can expand and contract with the house without cracking.

3) It is durable

Monocouche render is guaranteed to last at least 10 years. So once it is on your home, you don’t have to worry about rendering for at least that long.

4) It is low-maintenance

Sand and cement render isn’t capable of holding any pigmentation because of the type of cement used, so requires painting around every four years. Painting a whole house of render is a big job, and can sometimes be costly. With monocouche render, you never need to paint it because it has through colour. This means that the colour goes all the way through the render. So even if you get any scrapes or scratches on it, the same colour will show through and they will be barely noticeable.

5) It has a lot of variety

You can choose exactly how you want your house to look with monocouche render. There is a huge range of colours available, and also a range of finishes. These include scraped, roughcast, or dry-dashed, and you can also make ashlar and quoin features using it.

6) It is weatherproof

As we all know, the weather in the UK can be dismal at times, so you really need your home to be able to stand up to all sorts of weather conditions. Monocouche render is both waterproof and weatherproof, so will protect your home from the elements, whatever they are.

7) It is insulating

Another important feature of monocouche rendering is that it is insulating. What this means for you is that you won’t need to use your central heating as much to heat your home. And not only will this save you on your energy bills, but it is also better for the environment.

In summary

Monocouche rendering can be a really good choice for all sorts of different homes, from new-builds to much older houses. It is convenient, less prone to cracking, durable, low-maintenance, weatherproof, insulating, and there is a lot of variety in terms of colour and finish. There is a good reason why it has become one of the more popular rendering choices in recent years.

22nd December 2020 D.I.Y

How To Upcycle Your Old Dressing Table

If you’re struggling to find exactly what you’re looking for, you want to save a bit of money or you’re desperate for a new project, then upcycling an old dressing table could be for you. You will save lots of money and have plenty of fun in the process. So, before buying something new, look for an old piece of furniture that will have more character than anything you can buy in the shops and get started!

Find A Dressing Table

For those of you who don’t already have an old dressing table to upcycle, it’s time to find one! Contact friends and family, search online or try flea markets to find a dressing table that is full of character and has lots of potential. Shop around to find what you’re looking for and you will save so much money in the long run.

Make Any Repairs

Now that you have your dressing table, it’s time to start the upcycle! Pre-loved pieces of furniture are likely to have been around for a little while, so might need some TLC. It’s best to repair any broken or damaged bits before starting the rest of the upcycle. You may need to use wood filler to help get rid of any large scratches or dents that won’t be removed with sanding. Maybe you need to fix a stuck drawer or a broken leg, too. Once you have painted your table, you won’t want to have to be worrying about these things, so making any repairs at the beginning is the best way forward.

Clean With Sugar Soap

Once you’ve repaired any broken bits, it’s time to start cleaning. The first step is to remove any metal handles as they will be cleaned separately, then get out the sugar soap. Sugar soap is a cleaning product that prepares surfaces for repainting, as it gently washes any unwanted chemicals from the top layer of your furniture. With any cloth or sponge, clean the entire dressing table with the sugar soap and wipe afterwards with warm water. It is non-abrasive so won’t damage the dressing table, but it gets furniture in the best possible condition to give you a smooth finish once it is painted.

Bring Handles Back To Life

If the metal handles are dirty, grimey or generally very dirty, you’ll need to give them a good soak in equal parts of tomato ketchup and vinegar. Yes, this sounds really strange, but the acidic content of the two products helps to dissolve any grime. Leave to soak for a few hours before cleaning well (very well) and you’ll have brand new looking handles. For those of you with handles beyond repair, invest in some new ones that will bring the dressing table to life even more!

Sand It Down

Next, get some medium-grit sandpaper and go over the entire piece of furniture. It’s so important not to leave any lumps or bumps as they will be even more obvious when painted. Try to get things looking as even as possible all over, but it definitely won’t look perfect at this stage. Take a wet cloth to wipe away all the dust and leave to dry properly before moving on to the next stage.

Apply Primer

Whilst this stage isn’t essential as some paints have primer built in, applying a separate primer will ensure you have a nice smooth surface before painting, that the paint will stick to really well. Primer also helps to keep the paint intact for longer, meaning you won’t need to do another upcycle for a good few decades!

Firstly, put a sheet or newspaper underneath your dressing table in case things get messy. Take a small brush to get into any fiddly areas and use a larger brush for the open areas. Don’t expect a perfect coat the first time, as this is only a base for when you start applying the top layers of paint. Just take your time and evenly cover the entire dressing table. Once you’ve finished, leave it to dry according to the instructions on the paint and once dry, gently sand down any drip marks or lumpy bits and wipe away all the dust.

Time To Paint!

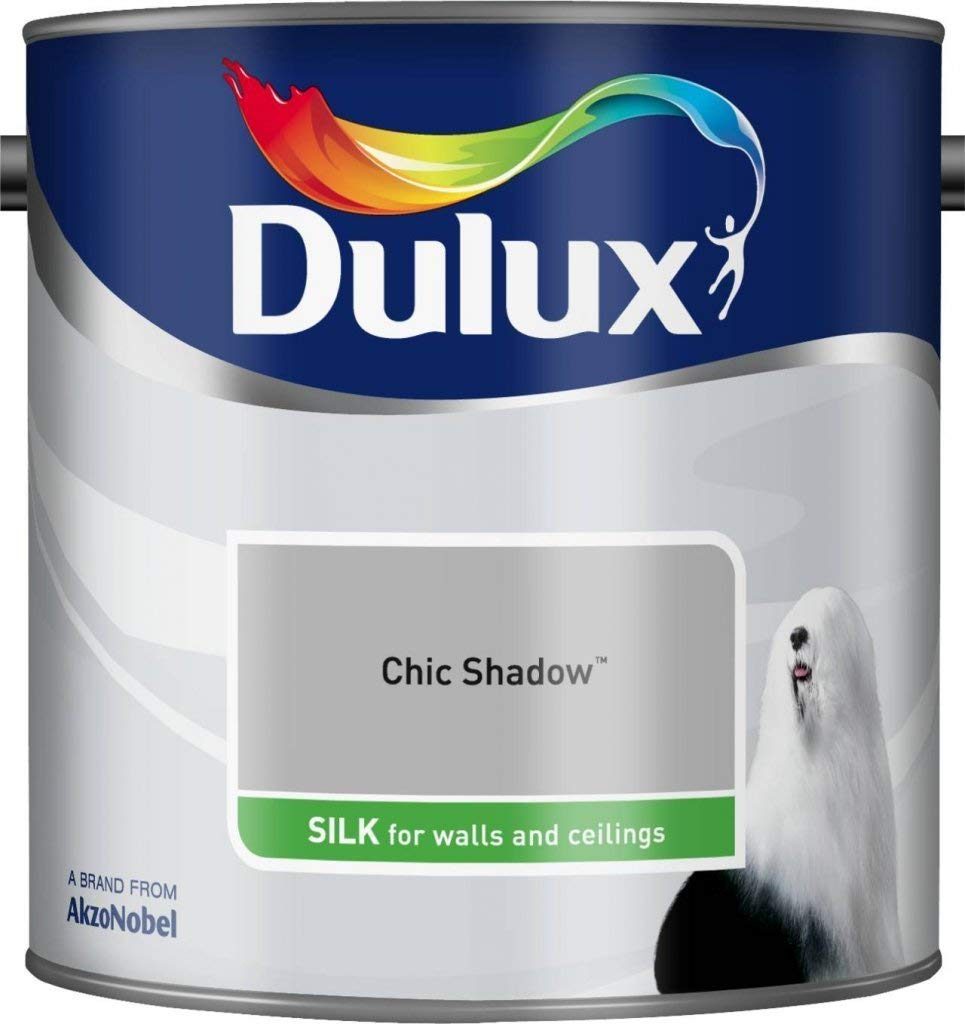
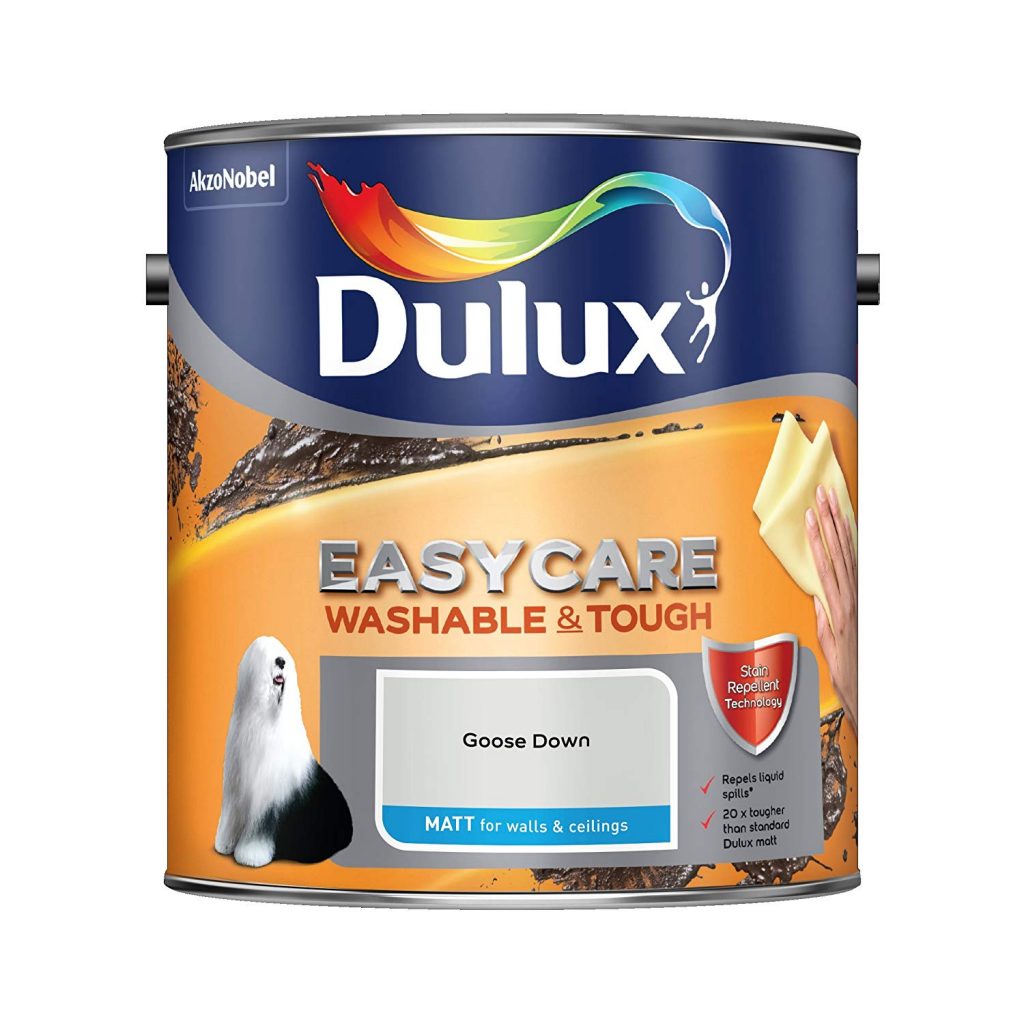
Once your primer has completely dried, it’s time to start painting. Now, when it comes to choosing a colour, your options are endless. In another post we written it included Dulux chic shadow silk & Dulux goose down paint which has been in trend for a couple of years now and still looks great. You could go for a simple white, a sleek black or add a pop of colour with pastel pink, sage green or teal blue. The darker you go, the more coats you might need, but you shouldn’t need any more than 3, especially with the primer.

Follow the same steps as with the primer, using the smaller brush for areas that are intricate and a bigger brush for the larger surfaces. Take your time and gradually work your way around the dressing table. Again, the first coat won’t be perfect, but you will notice such a big difference after the second coat. No matter how many coats it needs, repeat the same process. It is so important that you leave enough time for the paint to dry properly in between coats, or you risk ending up with bobbly and lumpy areas of paint.

Try using a colour that contrasts the rest of the dressing table on the drawers or on the top. If you’re feeling brave, why not try using stencils to create something completely unique? This is your chance to be creative, so find some inspiration and go wild. Reattach your handles or fit your new ones, and you’ve got your brand new dressing table!

Delux chic shadow silk paint in grey

Check Dulux chic shadow paint here

Dulux Goose Down Paint Matt

Check Dulux goose down paint here

Summary

So, there you have it! A brand new piece focal point for your room that everyone will think is from a designer furniture shop. Taking some time and care to renovate an old piece of furniture into exactly what you were looking for is not only cost effective, but extremely environmentally friendly. Prepared to feel proud every time you enter the room when you look at your new dressing table.

6th July 2020 Tips

How to Keep House Smelling Good With Pets

Pets are more than just animals roaming in our homes – they are part of our family. They keep us company and entertain us. Dogs further offer protection, while cats ensure there are no rodents in the house.

Unfortunately, it is not all rosy with pets. This is because they can leave an undesirable odour behind. Although you may get used to pet odour in your house, visitors will notice the uncomfortable smell, which you do not want. Therefore, you must know how to deal with this odour. Below are some helpful tips on how to keep your home odour-free.

Keep everything clean

One effective way to keep pet odours at bay is to clean all your pet’s supplies. Wash their dishes, launder their bending, and clean pet collars. Also, be sure to clean all areas that your pet may come into contact with such pillow beds and couches. To make the cleaning easy, remove the seat cushions and pillows and vacuum your furniture weekly, but when things go bad, high-end hot water extraction is your next best choice.

Use shampoos and deodorants

Another great tactic to help keep pet smells at bay is to bath the pet using shampoo. However, bathing pets can be too much if you have to do it daily. This is because some pets are playful and enjoy playing in the mud and dirt, which may necessitate bathing the pet twice a day. While it is essential to bath your pet, keep in mind that too much bathing can result in skin dryness, which is not suitable for your pet.

shampoo your dog
shampoo your dog

Carpets are a big problem with pets they will cling onto the fibers for months even after the pet has left says John from ACS – an Alex carpet cleaning company. We use a range of stage by stage pet friendly chemicals to treat the carpet to stop it holding a scent as much.

Using a pet deodoriser is a good option as well. However, note that you should only use the deodorant after bathing the pet. This is because spraying fragrance on the pet without bathing will only prevent the odour for a while but not deal with it. But bathing and applying deodorant works better. The plug-in air fresheners by Ambi Pur for pet odor removal have had excellent reviews and can be found readily on Amazon.

Ambi Pur 3Volution Pet Odor Remover

https://amzn.to/2ZGomUu

Absorb and avoid cover-up

While using plug-in candles is a welcome idea when dealing with pet odour, it does not remove bad smells but instead covers it up. The result will be a mixture of odour smells that can be irritating.

air freshener with pets in the house

Therefore, consider using natural neutralisers to eliminate the bad smell when your pets wee or defecate accidentally, but not as a preventive measure.

https://amzn.to/3e19rsZ

Clean the Walls

Pets enjoy lying down against walls, leaving behind their natural oil, and this can be smelly. If you have a whitish wall, you can see these oils and stains. Therefore, you need to clean the wall as these pet oils could result in bad odour. In some cases, you may need to repaint the wall. Consider using sealants if the odour is trapped in bricks, paneling, and any other masonry or woodwork. Applying a seal will trap the smell and keep your home fresh.


https://amzn.to/2VON6ZC

Use air purifier

Air purifiers work by filtering air particles to improve air quality in your indoor space. Through purification, the air purifier lessens dust and sanitises the air by removing bad smells. A HEPA filter is best for people with allergies and will as well make your home smell fresh. The best part is that most purifiers are not expensive, and you can find the right size for your home even if you’re on a budget. With the right purifier, you can keep your pets without worrying about pet odor provided you perform other necessary cleaning procedures.

Pet grooming

Since pet hair and dandruff can result in odour, be sure to brush your pets regularly to minimise shedding. This way, you can take control of where they shed their fur. You can dedicate a few hours weekly to grooming your pets and keep your home clean and odour-free. Besides, grooming your pets will keep then good looking. You will as well bond with your pets as you groom them.

https://amzn.to/2O5X2t7

Keep windows open

While this sounds obvious, many people do not know that it helps keep a house with pets fresh. By opening the windows regularly for as many hours as possible, you will be letting in the fresh air, which will make your home feel fresh. This, combined with pet deodoriser, air purifier, regular pet grooming, general cleaning, etc. will keep your house smelling fresh, and you will never have to worry about pet odour. With all these tips, you will have an easy time dealing with pet odour in your house.

20th November 2019 D.I.Y

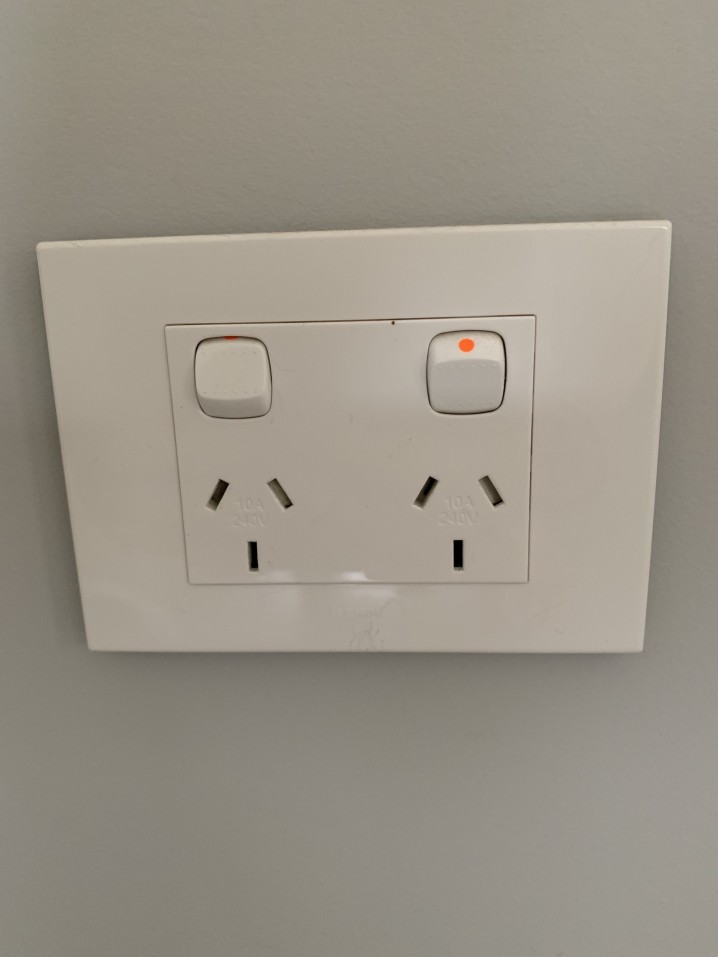
How to Wire a Light Switch?

You may want to know how to wire a light switch? Light switch wiring can be simple or notoriously fiddly, so you have to know what you are doing somewhat and keep in mind the safety aspects and concerns of wire lights. If you are unsure – it may be better to get an electrician to do this task or someone similar that is trained. Electricity is not something to be messed with – it can be incredibly dangerous and fatal if not done right. But do not let this put you off. It is a creative thing to learn and can save a lot of money.

  • lightbulb
    lightbulb

RCD Protection

Adding a new light from scratch or a completely new switch now requires the circuit to have RCD protection. This often requires that the fuse board is upgraded to a modern consumer unit.

How to Wire a Ceiling light

Here are some tips to follow on how to wire a light switch uk. How to wire a one way light switch is sometimes more difficult than it seems. But let’s find out how to do it. Firstly, the most important step on Wiring a lighting circuit:

Safety:

  • Make sure you switch off the mains power at the fuse box. This way you will be ensuring you do not cut through a live mains cable that could cause serious damage. 
  • Use a voltmeter, and/or a socket tester so you can be sure there are no mains running through the wires.
  • When you are finished, also use a socket tester or multimeter before you switch the mains back on. 

How to Wire a light?

Wiring a light switch uk could not be easier. Here we shall run through the steps. For a one-way switch, firstly you must earth the switch. This will make sure if there are any power surges, the power will be directed away and be dispersed in a safe manner. To do this you must open the switch and draw a light wiring diagram. This diagram will help you remember where to place the wires back and if you need a future reference of this light fitting. 

  • Secondly: You must connect the correct cores to the correct terminals of the new switch and tighten the screws. 
  • Third: Make sure you earth the switch and cover with some green/yellow sleeving. 
  • Fourth: Check everything is secure and cover over with the face plate. 

This is basic ceiling light wiring. Wiring a ceiling light can be very rewarding and ultimately save a lot of money if you do it right. The thing is – because it is quite tricky and there is not much margin for error, it can often go wrong. Sometimes you may want to get an electrician so they can check over your work and teach you a little bit more, so you can be confident. Check out our article on covering boiler pipes for more.

How to wire a double 2 way light switch

This is slightly different to 1 way light switches. Multi way switching needs an extra core so the current can run around the circuit in different directions in various ways. Because of the arrangement of the switching, these wires can be live at all times, so they require an extra brown safety flag on the wires to alert people to this fact, because it can be very dangerous. 

How to Wire a Double Light Switch

2 way light switch wiring needs to be done with an air of caution. They should all take power from the same circuit, but if not wired correctly, they may take power from different circuits. There could still be live cables if it is in a neutral position. This does not necessarily mean they are wrong, but may require an expert to take a look at them to make sure nothing is untoward. 2 wire light switches may require bigger wall mounts, so make sure you look out for this. 

Double light switch wiring is useful however, and is worth it. It is mostly used in larger rooms, like a long narrow hallway or a room with two entrances. Two way light switch wiring is useful here because sometimes, one can enter a room and not exit it the same way, so it makes it a better user experience throughout the whole house.

How to wire a light fitting with 3 cables

This is the same. Most all light fittings have 3 cables or more. A live, earth and a neutral. How to wire a light fitting with multiple cables is often asked, but it actually the same for multiple as it is for the two cables. This would also be the same advice for how to wire a light fitting with 4 cables.

Light switch wiring diagram

You probably will have seen a lot of wiring diagrams. But these can be confusing if you do not know what the symbols mean. What do the symbols mean??

Wiring a light switch uk diagram can be different to the EU and the USA, and everywhere else, so which is right? 

Light wiring colours:

We know the black or red means current, white neutral wires, silver or copper are the ground wires which are disconnected last.  The actual light, is represented by a circle sometimes with a cross in it, and the switch itself is represented by a line with a 45 degree line coming out of it (as if the switch is off at the moment). Next time you see a light wiring diagram uk, you may know what you are seeing!

Hopefully you have learned how to do wiring a light fitting uk ! Make sure you read other articles and follow safety precautions when you are doing this because it can be dangerous. Here is an article on tidying the home.

23rd October 2019 DIY Interior

How to Create Additional Storage in Your Bedroom

Have you ever found that your bedroom is just overrun with items that don’t have a place to go? If so, you may want to consider how to best improve or enhance the way storage is installed in your bedroom. Added storage, in small or large amounts, can improve the way your bedroom functions as a whole. For that reason, here are some ideas on how you can work to create additional storage in your bedroom: 

Install Shelving 

There is one surface that massively under performs in your bedroom; the walls. Often these are left bare and empty even though in every other area of your home you would have shelves. That is why, then, installing shelves in your bedroom can be a simple way to increase your bedroom storage. 

Shelving can also be extremely decorative depending on your choices. As you can either use the shelves for practical use or art, decorative features or otherwise as well. Your shelving choices don’t necessarily have to be wooden planks on a wall either. 

shelving
shelving

Try quirky shelving choices that will catch the eye, for example, a selection of hangers linked up can be both interesting and good to store various items (not only clothing), you could also add a storage trunk underneath the shelf in the unused space making even more room. The more creative your shelving choices are, the more interesting it will be and the more storage you can inject into the room. 

Beds with Storage 

A bed is the biggest item of furniture in your room and so can be severely underused. If you don’t have storage under your bed or a storage bed, then you are missing out on a very lucrative storage space. 

This can be done via DIY as you can easily create your own under-bed storage boxes. You can either re-use old boxes, cutting them down to size, or create brand new ones bespoke for the space you have available. Though this fully depends on your level of DIY skills and whether you have the urge to create something yourself. 

Of course, you do run the risk of making under your bed a little bit of a cemetery of unused items or knick-knacks. So, the best practice is to make sure you sort or clear through your under-bed storage at least once a year. This way you don’t waste space in the long-term either! 

Optimise Your Wardrobe 

The wardrobe is a big space and a necessary part of our bedroom storage options. However, it can be very badly used in terms of saving space and optimising storage opportunities. The fact is that your wardrobe is more than just hanging space and one or two shelves. 

First things first: clean out the wardrobe. Get rid of old clothes you haven’t worn in years, clean the accumulated dust and make sure that it is all sorted before attempting to put anything back in. 

Then, you can work on adding more storage. A good first step is to add an extra hanging rod. You may have one already, but don’t be afraid to add a double-decker of hanging rods to optimise that side of your wardrobe. If it’s particularly tall (in the case of an in-built wall wardrobe especially) this can be a simple way to add more hanging space. Next, you can consider adding more shelving as well – though you should be a little more liberal with this. And if you do have shelves, make sure your clothes folding is optimised for the best use of space. 

Another good idea is to have a seasonal shift in clothing. Your winter wardrobe doesn’t need to be hanging up through the warm days of summer, pack it away out of sight instead! And then switch it back in once the chill starts to set in again. 

Also, don’t forget that your wardrobe doors also have plenty of room to have extra storage installed there. You can buy or create a shoe storage hanger, for example, which can be used for a variety of other knickknacks and storage. View more ways to creatively hide the ugly parts of your home!

Storage Boxes/Bench 

When it comes to the bedroom, freestanding pieces of furniture need to be limited; otherwise, you end up with a very cramped space. That is why you may do better with a number of storage boxes instead of a dedicated piece of furniture. As these can often be tucked away or stored in out-of-the-way spots. 

Or, for example, you could invest in a storage bench. These come in many shapes and sizes, as well as in fabrics such as luxury velvet furniture pieces or even leather – it depends on your overall bedroom decor or theme. 

Use A Storage Facility

I have noticed a lot of self storage services pop up around the country where people can store away their things in a secure unit and even hold their own key. Some of these services offer a free pick up service too if you hire storage over a certain period of say 3 months. This is not ideal for things you regularly use but serves a purpose for a few situations.

Install Organisers in Drawers 

Is your sock drawer a little bit of a mess? Socks bulging, underwear falling out whenever it opens or something along those lines? Then your drawers may need a little bit of organisation. A drawer organiser can help to create neat, simple, partitions in your drawers which can actually be very useful. 

chest-of-drawers
chest-of-drawers

A drawer partition can separate your socks from your underwear, but it can also be used in several different drawers as well. You can separate your pyjamas from your day clothes, your t-shirt from your shorts, you can even separate your knicks from your knacks. A drawer partition can also be easily made with a few simple pieces of wood as well. Or there are a few shops which may have a solution that fits as well. 

And there you have it! Lots of different techniques that you can use to add more storage space to your bedroom, either in isolation or collectively, depending on your storage needs. With both DIY and shop-bought options, there’s no reason you should be lacking space in your bedroom. So, start increasing your storage today. For more decluttering info, check out our ultimate decluttering guide!

4th September 2019 Garden

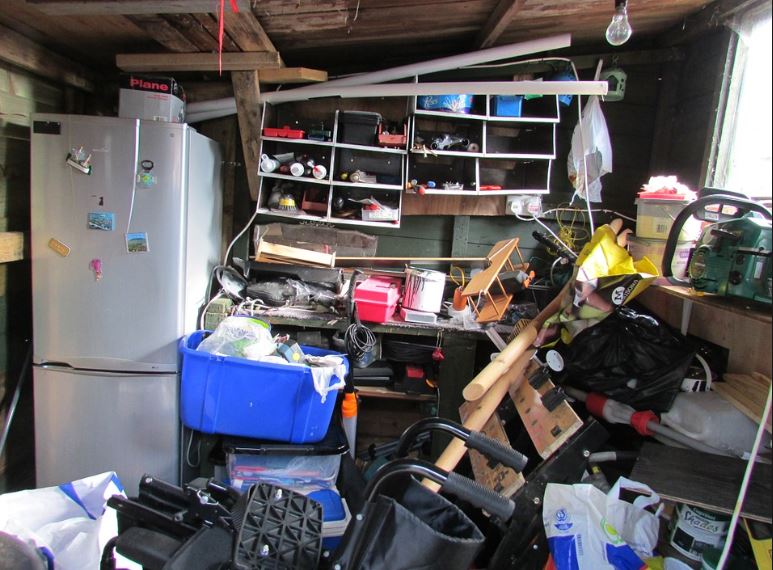
How to Organise Your Garden Shed

Organising your garden shed is often harder than it sounds. Garden sheds sometimes turn into a dumpsite for garden equipment and items we don’t want to store in the house, but don’t want to do away with completely either. However, the accumulated items in our garden shed can be very inconvenient, especially if we’re looking for something important. Freeing up shed space can also help you be a more efficient gardener.

So let’s have a look at the best ways to organise a garden shed.

Start with decluttering

The first step to organising your garden shed is by tackling the clutter. Start by taking everything out of the shed, and be ruthless in weeding out the things you can part with. If you haven’t used the item in over a year, it’s safe to say it’s fine to give or throw away. The English Garden recommends devoting a whole day to cleaning your shed to ensure that the decluttering is done properly. In setting aside a good amount of time to organise your shed, you save yourself the hassle of constantly looking for items in the future. In the long-term you will save yourself a lot of effort.

What not to store in your shed

When you’re deciding what to keep and what to throw away, it is best to know which items shouldn’t be stored in a shed. Country Living explains that temperature and moisture must be considered when storing something in a shed. Insulation, mould and humidity means that there are some household items that won’t store well. Canned food, wine, photographs, paint and glue are all subject to damage due to the temperature and humidity. Clothing and bedding can also be damaged by moths, and electronics run the risk of rusting. When decluttering your shed, make sure that none of these items are left behind. If you are using your shed as a storage space it should be functional and not a dumping ground.

Making the most of storage space

After you’ve decluttered your shed, the next step is to create storage space. There are many DIY upcycling projects that can create more effective storage units for your shed. Instead of placing small wooden crates on the floor, consider hanging some of them on the wall by suspending them on sturdy hooks. You can place anything from small tools to plants in them for easy access. You can also use hooks to hang larger tools on the wall, giving you more floor space. If you have fruit crates, you can also consider mounting them to the wall for extra shelves. With a fresh coat of paint and some woodwork, you can also transform an old ladder into shelves for a storage unit that maximises vertical space.

Storing valuable items

If you are leaving valuable items such as bikes or expensive garden equipment in your shed, it’s best to make sure that they’re properly stored and protected. This may mean upgrading your shed, especially if the current structure needs a lot of repairs. Investing in or building a metal shed is the best way to keep these types of items safe. Screwfix’s collection of metal sheds details how most models come with multiple padlock points for extra security. Aside from keeping your valuables secure, metal sheds are much harder to break into from the sides compared to wooden structures. This is something to keep in mind if you want to keep valuables safe and secure in your garden shed.

Repurposing a garden shed

With a decluttered and properly organised garden shed, you should consider using it for more unique purposes. You can transform freed up garden sheds into a small home bar, a tiny summer house, an indoor garden, or even a hobby room—the possibilities are endless. When it comes to DIY shed building creating or repurposing a shed on your own means that you have complete control over the design. However, it’s still vital to be thorough in order to achieve quality results. Being hands on with organising your garden shed means that you now have free reign on how to make the best use of your space. Just be careful that bad habits don’t creep back in and a year later you are back to square one.

9th April 2019 D.I.Y

Ultimate Decluttering Guide

Decluttering is one of the habits that you should want to have in your life. There are already millions of homes filled with so much clutter that their houses already look like a hoarder’s. For generally clean people, this is not a problem but for the majority of us, clutter is a serious problem.

We all want clean and spacious houses but the truth is our lifestyle and consumer behaviour does not allow us the ideal situation. The idea of decluttering can be quite too much especially when you realize the sheer amount of items that you have.

According to the LA Times, the average households over 300, 000 items. This is an astounding number of items given that the average space of a house is just getting smaller and smaller.

A minimalist lifestyle is ideal especially for young professionals who still have no kids. Most of them need only the bare essentials so it would only be best to start decluttering from now.

Here is a comprehensive decluttering guide that you can follow to ensure that your house does not look like a hoarder’s house.

Start Small

Decluttering can be overwhelming. Items piling up do not get rid of themselves and often, this clutter can hold up to months and months of unnecessary items. Start off with a small space just to get yourself going. Tackle a kitchen counter or a dining table first and then work towards the bigger space afterwards. You need a sense of motivation to keep yourself inspired. Cleaning can be a boring, back-breaking task and keeping yourself motivated will be hard.

Perhaps starting with only your walls can help, since this is the first thing that draws everyones attention, this way you’ll be motivated to do the rest of your home once you start noticnig the benefits of decluttering. Because you’ve now got free wall space, how about expanding your room with wall mirrors and creating a space that feels large, warm and not so claustrophobic anymore.

Work Slowly and in Increments

Work Slowly and in increments so you do not burn yourself out. Instead of using up the entire day just for decluttering, make it a habit instead. You can do an hour or two per day just for cleaning up or you can spend an afternoon on a free day. Don’t rush yourself. It’s better to have steady progress than a rushed success.

Get Organized

After cleaning and organizing each area, decide immediately what you want to do with the items that you’ve deemed unnecessary for your daily life. Create 4 piles: For Self-Storage, to throw away, to donate and to sell. One mistake that often occurs from people deciding to declutter is that after they declutter one area, they just bring the items to another area. Make sure that the items you decide to throw out goes straight to the trash or you’ll just end up with a big pile of stuff that you can’t throw away.

Rent a Storage Facility

     “One of the best actions to do when decluttering is to rent a storage facility” – WhatStorage?

Let’s face it. We all have items inside our homes that we can’t really part with. These items hold too much sentimental value to us or may still be useful in the future. However, keeping them inside our houses can be too troublesome. Renting a cheap storage facility to store them in would be the best solution for you. Self-storage facilities are a cheap and versatile solution to your storage problems. You can find a storage facility almost anywhere.

Enjoy Decluttering

Try to enjoy the little things about decluttering. For example, having a spacious house afterwards. Once you start enjoying, decluttering would very much be easier and faster. Focus on what is important and always remember why you decided to declutter.

It may be hard to let go of your items especially those with special memories associated with them. However, there is an adage, “Keep the memory but let go of the items.” This means that you can still reminisce without having to keep your house filled with unnecessary items. Here are some tips to help you let go of the items that you have.

Whilst decluttering, don’t forget to take into account what else you may need to add to your home now that you’ve freed up plenty of space. One great way is by Re-Designing your Home with Hand Carved Furniture to give it a more complete look now you’ve removed all the useless items from your interior.

Be informed of the 80/20 Rule

The 80/20 rule is the phenomenon that occurs in most people. It states that out of the 100% of items that we own, we only generally use 20 percent of it in our day to day lives. This can hold true for clothing, games, computer parts, books, tapes, toys, etc. Now that you are aware of this, make sure to get rid of the 80 percent that is basically just clutter.

Don’t Think About Their Past Value But Their Present/Future Value

The Wall Street Journal recently published an article that on average, Americans spend over $1.2 trillion annually on unnecessary items — this ranges from decorative items to stuff that they impulsively buy and do not use.

Often, people don’t get rid of their items because they are aware of the item’s past value. However, this should not be the case. Look at your stuff with its present or future value instead. There is no use in thinking of value that has long past.

Is the item still worth anything to you? Does it still have utility? If not, then what is it even doing inside your house?

Check Your Appliances If They All Work

Another factor that adds up to the clutter in our homes is broken appliances that “we swear to fix on our free day.” Let’s be real. Most of these appliances are too broken to fix or would cost less to buy a brand new one. Throw them out and enjoy the extra space.

« Previous Page
Next Page »

Primary Sidebar

Keep up to date with our latest posts

Subscribe to our newsletter for free and be the first to be notified about all our latest content!

Welcome to A2B Crafts

At A2B Crafts we make it our duty to bring you the latest in shabby chic design and Do it yourself furniture. If you’re new to the craft or a long time expert, A2B crafts is perfect for you. With every new post we hope to bring you something new and exciting which gives you the inspiration to try something new with your home
furnishings. If you feel inspired after reading any of our posts or you’ve even tried these tips for yourself, please feel free to let us know through our contact page or our other social channels!

Footer

Stay Connected

  • Facebook
  • Instagram
  • Pinterest
  • Tumblr
  • Twitter
  • YouTube

Contact Information

Tel: Thursday – Saturday 01328 856001

or mobile 07917606039 at other times

Address: Wheelspeed Unit 1, Cattle Market Street, Fakenham, Norfolk, NR21 9AW

Please feel free to contact at anytime, however at present we work part-time so may not get back to you immediately,
but will make contact as soon as possible.

Categories

  • DIY Interior
  • Furniture Upcycle
  • Hobbie Crafts
  • Interior Decor
  • News
  • D.I.Y
  • Garden

Helpful Links

  • Contact Details
  • Conditions of Use
  • Privacy Notice
  • Shipping & Returns

Copyright© 2025 · Cookd Pro Theme by Shay Bocks