• Skip to primary navigation
  • Skip to main content
  • Skip to primary sidebar
  • Skip to footer
  • Home
  • Interior Decor
    • D.I.Y
    • DIY Interior
    • Tips
  • Hobbie Crafts
    • Furniture Upcycle
  • Garden
  • News
  • Write For Us
  • Contact Details

A2B Crafts

DIY Crafts & Upcycling

Interior Decor

5th November 2023 Interior Decor

Master Bedroom Wardrobe Design With Dressing Table

Welcome to the world of exquisite bedroom wardrobes and stylish dressing tables. Are you tired of cluttered and unorganized closets in your master bedroom? Look no further, because in this article, we will guide you through the latest trends and designs for master bedroom wardrobes and dressing tables that can elevate the look and functionality of your space. Get ready to transform your bedroom with these impressive wardrobe and dressing table ideas.

What Is A Master Bedroom Wardrobe?

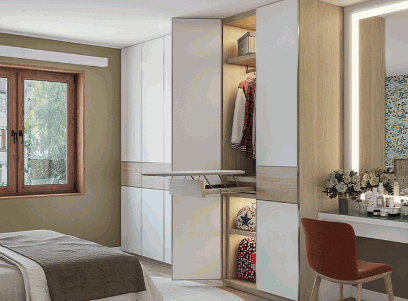
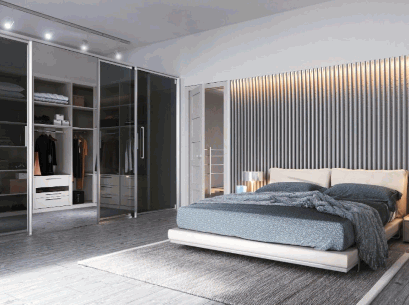
A master bedroom wardrobe is a spacious storage unit specifically designed for the master bedroom. It is intended to be a dedicated space for organizing and keeping clothing, accessories, and personal belongings. The wardrobe usually includes shelves, drawers, hanging rods, and sometimes even a dressing table. It offers abundant storage to keep the bedroom free of clutter and aids in maintaining an organized and functional space.

Pro-tip: When selecting a master bedroom wardrobe, take into consideration the size of your room, your storage requirements, and the overall style and design that complements your bedroom decor.

Why Is A Dressing Table Important In A Master Bedroom Wardrobe Design?

A dressing table is an essential element in a master bedroom wardrobe design for multiple reasons. Firstly, it provides a dedicated space for grooming, allowing for comfortable and efficient preparation. Secondly, it offers storage for personal care items such as cosmetics and jewelry, promoting organization and easy access. Additionally, a dressing table enhances the overall aesthetic of the bedroom, serving as a stylish focal point. Lastly, it adds functionality to the wardrobe design, serving as a versatile piece of furniture.

What Are The Benefits Of Having A Dressing Table In The Master Bedroom Wardrobe?

Having a dressing table in the master bedroom wardrobe offers numerous benefits:

  1. Convenience: It provides a dedicated space for dressing and grooming within the bedroom, eliminating the need to go to a separate area.
  2. Organization: The dressing table offers storage for beauty products, accessories, and grooming tools, keeping them neatly organized and easily accessible.
  3. Efficiency: With a dressing table, you can save time getting ready as everything you need is in one place.
  4. Privacy: Having a dressing table in the wardrobe allows for privacy while getting ready, especially if there are multiple occupants in the bedroom.
  5. Aesthetics: It adds a stylish and functional element to the bedroom, enhancing the overall design and ambiance.

What Are The Factors To Consider When Designing A Master Bedroom Wardrobe With A Dressing Table?

Designing a master bedroom wardrobe with a dressing table requires careful consideration of various factors to create a functional and aesthetically pleasing space. In this section, we will discuss the key elements to keep in mind when designing such a wardrobe. From the available space and personal style preferences to functionality and storage needs, each factor plays a crucial role in creating the perfect wardrobe and dressing area. Additionally, we will also touch upon the importance of setting a budget for this project and how it can impact the overall design.

1. Available Space

When designing a master bedroom wardrobe with a dressing table, it is important to consider the available space. Here are some steps to help you make the most of your space:

  1. Measure the dimensions of the room to determine the available space.
  2. Take into account the layout of the room and any constraints, such as windows or doors.
  3. Plan the placement of the wardrobe and dressing table based on the available space.
  4. Select a wardrobe design that fits within the available space, such as a built-in wardrobe for smaller rooms or an L-shaped wardrobe for larger rooms.
  5. Maximize storage by incorporating shelves, drawers, or hanging rods based on your specific storage needs.
  6. Choose a dressing table that complements the wardrobe design and fits comfortably within the available space.
  7. Enhance functionality by adding features like mirrors, lighting, or additional storage compartments.
  8. Ensure there is enough space to move around comfortably and easily access the wardrobe and dressing table.
  9. Consider the overall aesthetic and style of the room when finalizing the design.

2. Personal Style And Preferences

When creating a master bedroom wardrobe with a dressing table, it is important to consider your style and preferences. These factors should be taken into account to ensure that the design reflects your unique taste:

  1. Choose a wardrobe and dressing table design that aligns with your preferred aesthetic, whether it’s modern and minimalist, glamorous and vintage, or cozy and rustic.
  2. Select materials, finishes, and colors that resonate with your style.
  3. Incorporate storage solutions and organizational features that cater to your specific needs and habits.
  4. Customize the layout and configuration of the wardrobe and dressing table to suit your daily routine and convenience.

By prioritizing your style and preferences, you can create a master bedroom wardrobe that truly reflects your individuality.

3. Functionality And Storage Needs

When designing a master bedroom wardrobe with a dressing table, it is important to consider both functionality and storage needs.

  1. Available Space: Determine the size and layout of the wardrobe to ensure it can accommodate both clothing storage and the dressing table.
  2. Personal Style and Preferences: Choose a design that reflects your taste and complements the overall aesthetic of the bedroom.
  3. Assess the amount of clothing, accessories, and grooming items you have to determine the required storage capacity and organization solutions.
  4. Budget: Set a budget and prioritize features and materials accordingly.

To optimize functionality, incorporate features such as adjustable shelves, hanging rods, drawers, and compartments. Consider installing mirrors and proper lighting for ease of use.

The concept of combining a wardrobe with a dressing table dates back to ancient civilizations such as Egypt and Rome. In these cultures, individuals stored their garments and accessories in elaborately designed furniture pieces that included built-in mirrors and storage compartments. These early wardrobe designs were not only functional but also served as status symbols, displaying one’s wealth and fashion sense. Over time, the wardrobe with a dressing table has evolved to meet the changing needs and preferences of individuals, offering a practical and stylish solution for organizing clothing and completing grooming routines.

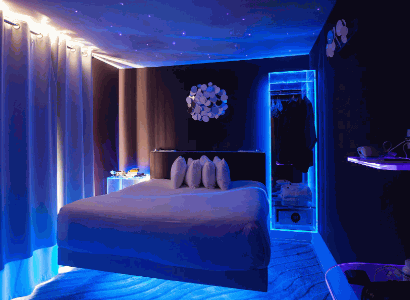
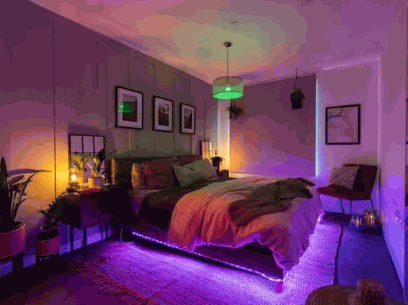
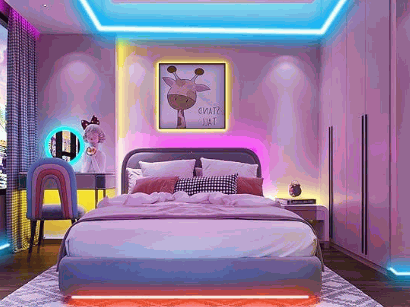
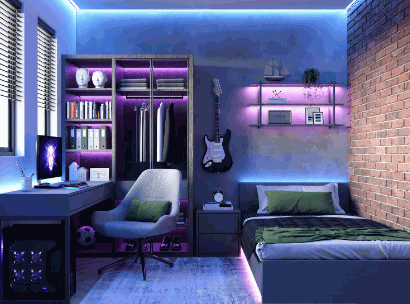
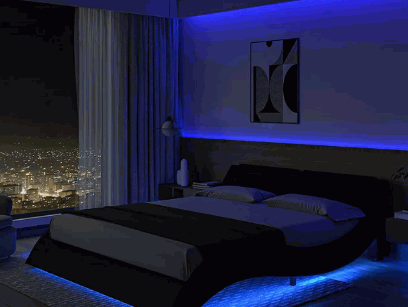
Discover: Best LED Lights For Bedroom

4. Budget

Designing a master bedroom wardrobe with a dressing table requires careful consideration of the budget. Here are some steps to help you stay within your budget while creating a functional and stylish space:

  1. Set a realistic budget for the entire project, including the wardrobe and dressing table.
  2. Prioritize your needs and wants to allocate funds accordingly.
  3. Research different materials and finishes to find cost-effective options that suit your aesthetic.
  4. Compare prices from different suppliers to get the best deal.
  5. Consider DIY options or repurposing existing furniture to save money.
  6. Explore second-hand or vintage stores for affordable and unique pieces.
  7. Optimize storage solutions to maximize space and reduce the need for additional furniture.

Remember, staying within your budget doesn’t mean compromising on style and functionality. With careful planning and smart choices, you can create a beautiful master bedroom wardrobe with a dressing table that fits your budget and personal taste.

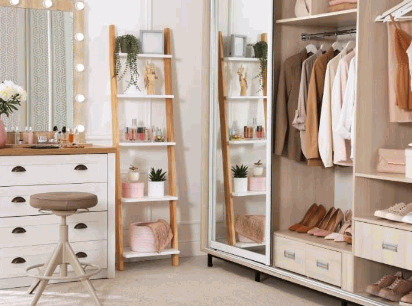
What Are The Different Types Of Master Bedroom Wardrobe Designs With Dressing Tables?

The master bedroom wardrobe and dressing table design can greatly enhance the functionality and aesthetics of a bedroom. However, with various options available, it can be overwhelming to choose the right design. In this section, we will discuss the different types of master bedroom wardrobe designs with dressing tables, including built-in wardrobes with attached dressing tables, walk-in wardrobes with standalone dressing tables, and L-shaped wardrobes with corner dressing tables. Each option offers its unique advantages and we’ll explore them in detail to help you find the perfect fit for your bedroom.

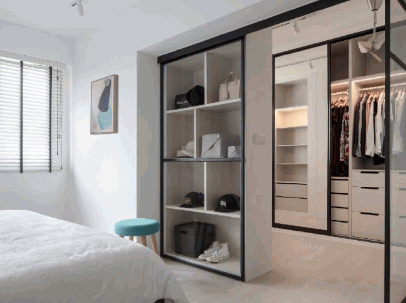
1. Built-in Wardrobe With Attached Dressing Table

A popular choice for master bedroom designs is a built-in wardrobe with an attached dressing table. To incorporate this design, consider the following steps:

  1. Start by measuring the available space to ensure that the wardrobe and dressing table fit seamlessly.
  2. Take into account the style and design of the room to maintain a cohesive look.
  3. Focus on functionality and storage needs, incorporating features such as drawers, shelves, and hanging space.
  4. It is important to set a budget to guide material and customization choices.

Fact: Built-in wardrobes with attached dressing tables are known for maximizing space utilization and creating a streamlined and organized master bedroom.

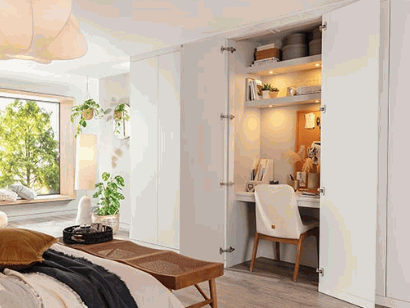
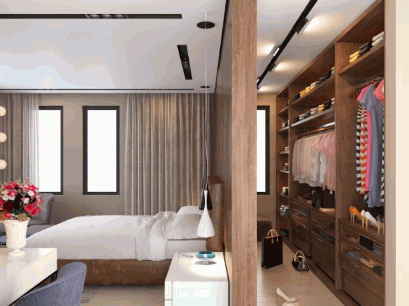
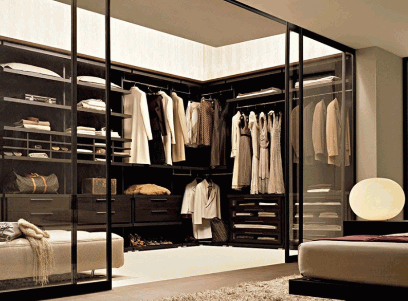
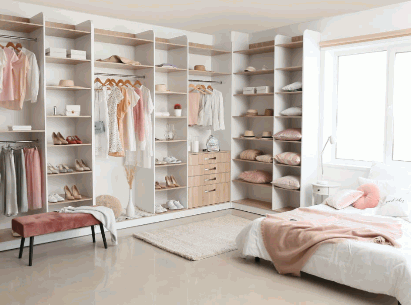
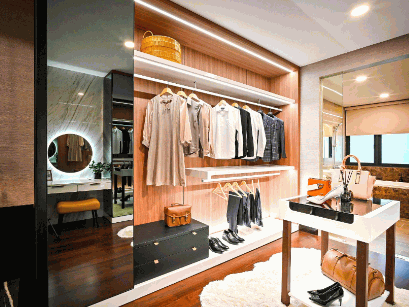
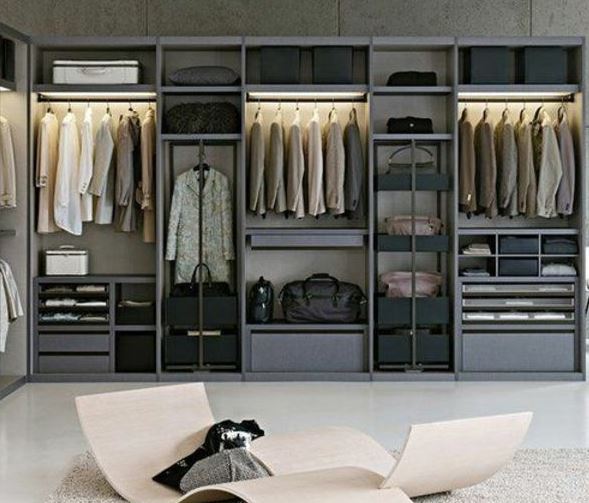
2. Walk-In Wardrobe With Standalone Dressing Table

A walk-in wardrobe with a standalone dressing table is a luxurious and functional addition to any master bedroom. Here are some steps to consider when designing this type of wardrobe:

  1. Assess available space and determine the size and layout for the walk-in wardrobe and dressing table.
  2. Consider your style and preferences. Choose materials, colors, and finishes that align with your aesthetic.
  3. Ensure the walk-in wardrobe provides ample storage for clothing, accessories, and shoes, while the dressing table has enough surface area for cosmetics and grooming essentials.
  4. Set a budget and prioritize features accordingly. Consider the cost of materials, installation, and any additional customization.

Here are some suggestions for a walk-in wardrobe with a standalone dressing table:

  • Opt for a sleek and modern design with clean lines and minimalistic finishes.
  • Add a touch of glamour by incorporating mirrored surfaces and elegant lighting fixtures.
  • Create a cozy and rustic atmosphere with warm wood tones and vintage-inspired accents.

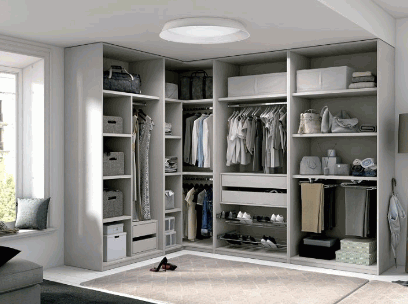
3. L-Shaped Wardrobe With Corner Dressing Table

An L-shaped wardrobe with a corner dressing table is a popular design choice for master bedrooms. This layout maximizes space and creates a dedicated area for getting ready. To create this type of wardrobe and dressing table setup, follow these steps:

  1. Measure the available space and determine the dimensions of the L-shaped wardrobe and corner dressing table.
  2. Select a corner unit for the wardrobe to optimize the use of space.
  3. Choose a dressing table that fits snugly into the corner, providing ample surface area for grooming and storage.
  4. Consider incorporating built-in drawers and shelves to maximize storage space.
  5. Select materials and finishes that complement the overall style of the bedroom.
  6. Ensure proper lighting around the dressing table area for optimal visibility.

Pro-tip: To further optimize the functionality of the L-shaped wardrobe with a corner dressing table, consider adding a full-length mirror and organizing accessories in labeled bins or trays.

What Are Some Tips For Organizing A Master Bedroom Wardrobe With A Dressing Table?

A master bedroom wardrobe with a dressing table can be a stylish and functional addition to any bedroom. However, with all the clothes, accessories, and personal items that may need to be stored, it can quickly become cluttered and disorganized. In this section, we will discuss some helpful tips for organizing a master bedroom wardrobe with a dressing table. These tips will cover how to divide the space according to function, use drawer dividers and organizers, utilize vertical space, and keep frequently used items easily accessible.

1. Divide The Space According To Function

When organizing a master bedroom wardrobe with a dressing table, it is important to divide the space according to function in order to maximize efficiency and convenience.

  1. Create separate sections for different types of clothing, such as a hanging space for dresses and suits, shelves for folded items, and drawers for accessories.
  2. Allocate a dedicated area on the dressing table for makeup and skincare products, with compartments or organizers to keep them tidy and easily accessible.
  3. Designate a space for jewelry storage, whether it’s a built-in drawer or a separate jewelry box.
  4. Set up a mirror and adequate lighting in the dressing table area for optimal grooming and styling.

Pro-tip: Label or color-code each section to maintain organization and make it easier to find and put away items.

2. Use Drawer Dividers And Organizers

When organizing a master bedroom wardrobe with a dressing table, it is important to utilize drawer dividers and organizers to maximize space and maintain organization.

  1. Begin by sorting items into categories such as clothing, accessories, and cosmetics.
  2. Utilize drawer dividers to create separate compartments for different types of clothing, such as socks, underwear, and t-shirts.
  3. Make use of organizers such as small bins or trays to store accessories like jewelry, belts, and scarves.
  4. Label each drawer or compartment to easily identify and locate specific items.

Pro-tip: Utilize vertical space by installing hooks or hanging organizers for items such as bags or hats.

3. Utilize Vertical Space

Utilizing vertical space in a master bedroom wardrobe with a dressing table is crucial for maximizing storage and organization. Here are some steps to effectively utilize vertical space:

  1. Install tall shelves or cabinets to make use of the available vertical height.
  2. Use hanging organizers or hooks on the walls for accessories or belts.
  3. Utilize the back of the wardrobe doors by adding over-the-door shoe racks or storage pockets.
  4. Consider adding a pull-out or adjustable rod for hanging clothes of varying lengths.

Explore: How to Install Shelving in Cabinets

4. Keep Frequently Used Items Easily Accessible

In order to ensure that frequently used items are easily accessible in a master bedroom wardrobe with a dressing table, follow these steps:

  1. Organize items by category, such as jewelry, accessories, or cosmetics.
  2. Assign designated storage spaces for each category, such as drawers, trays, or hooks.
  3. Place frequently used items in the most accessible areas, like the top drawer or a hanging organizer.
  4. Use transparent containers or labels to easily identify and locate items.

Fact: An organized wardrobe can save you time and reduce stress when getting ready in the morning.

What Are Some Design Ideas For Master Bedroom Wardrobes With Dressing Tables?

The master bedroom is a sanctuary for relaxation and rejuvenation, and a well-designed wardrobe with a dressing table can enhance this calming atmosphere. If you’re considering adding this feature to your bedroom, there are several design ideas to explore. From sleek and modern to vintage and glamorous, we’ll cover the top three options for master bedroom wardrobes with dressing tables. Each design offers its own unique charm and functionality to elevate your bedroom space. Let’s take a closer look at these options and find the perfect fit for your style and needs.

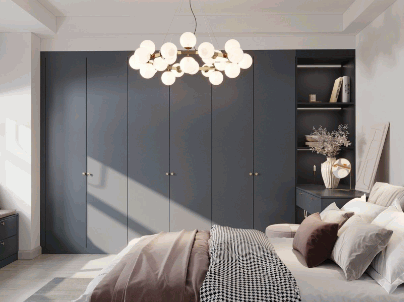
1. Minimalist And Modern

When creating a minimalist and modern master bedroom wardrobe with a dressing table, follow these steps:

  1. Choose a sleek and streamlined wardrobe design with clean lines and minimal ornamentation.
  2. Opt for a dressing table that features a minimalist design, such as a floating or wall-mounted table.
  3. Select a neutral color palette, such as white, gray, or black, for the wardrobe and dressing table to achieve a minimalist aesthetic.
  4. Incorporate hidden or concealed storage solutions to maintain a clutter-free appearance.

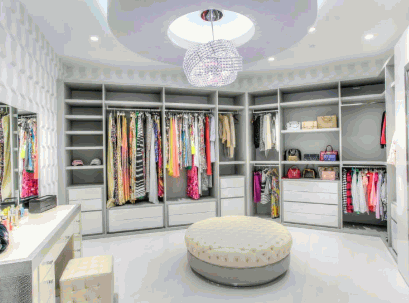
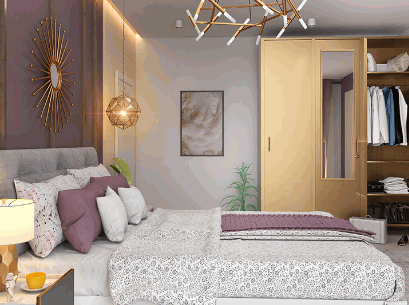
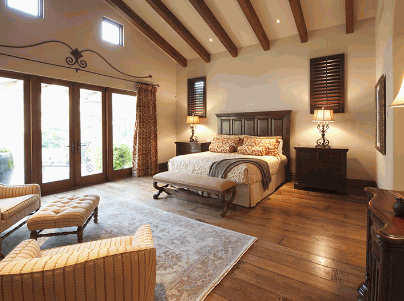
2. Vintage And Glamorous

When creating a master bedroom wardrobe with a vintage and glamorous style, it is important to consider:

  • The available space
  • Personal style
  • Functionality and storage needs
  • Budget

A built-in wardrobe with an attached dressing table can provide a cohesive look. To maximize organization, divide the space according to function and use drawer dividers and organizers. Utilizing vertical space is also helpful, especially for frequently used items.

To achieve a vintage and glamorous design, incorporate:

  • Ornate details
  • Luxurious fabrics
  • Antique-inspired accessories

These types of bedroom wardrobes are reminiscent of the opulence of the Art Deco era, with their elegant lines, rich materials, and intricate detailing.

3. Rustic And Cozy

When designing a rustic and cozy master bedroom wardrobe with a dressing table, consider the following steps:

  1. Choose warm and natural materials like reclaimed wood or distressed finishes.
  2. Incorporate earthy colors like brown, beige, or soft neutrals for a cozy feel.
  3. Add rustic accents like wrought iron handles or vintage-inspired knobs to enhance the rustic and cozy atmosphere.
  4. Create a cozy seating area within the wardrobe, using comfortable chairs or a small bench.
  5. Use soft lighting options like warm-toned bulbs or fairy lights to further enhance the rustic and cozy ambiance.
  6. Add texture with natural fabrics like burlap or linen for curtains or upholstery.
  7. Include storage options that blend with the rustic and cozy theme, such as wooden crates or woven baskets.
  8. Accessorize with vintage or antique decor pieces to add to the rustic and cozy charm.
  9. Ensure the dressing table has a rustic design with distressed finishes or natural wood textures.
  10. Personalize the space with cozy touches like plush rugs or soft cushions to make it even more rustic and cozy.

5th November 2023 Interior Decor

Best LED Lights For Bedrooms

Are you tired of dim lighting in your bedroom? Look no further, as we delve into the world of the best LED lights for your bedroom. Illuminate your sanctuary with these top-rated options that will transform the ambiance and functionality of your space. Say goodbye to inadequate lighting and hello to the perfect bedroom lighting solution.

Why Do You Need LED Lights For Your Bedroom?

LED lights offer a multitude of benefits that make them the perfect choice for bedroom lighting. Here are a few reasons why you should consider switching to LED lights:

  1. Energy efficiency: LED lights consume significantly less energy than traditional incandescent bulbs, resulting in lower electricity bills and cost savings for you.
  2. Long lifespan: LED lights have a longer lifespan compared to other lighting options, reducing the need for frequent bulb replacements and saving you money in the long run.
  3. Versatility: With LED lights, you have the option to choose from various colors and can even dim them, allowing you to create the perfect ambiance for your bedroom.
  4. Safety: LED lights emit less heat, reducing the risk of burns or fire hazards, and making them a safer option for your bedroom.
  5. Environmentally friendly: LED lights are free from harmful substances and can be recycled, making them an eco-friendly choice that promotes a greener environment for your bedroom.

Overall, LED lights provide a cost-effective, durable, customizable, and safe lighting solution for your bedroom.

Learn more: Bedroom With Walk-In Wardrobe

What Factors Should You Consider When Choosing LED Lights For Your Bedroom?

When it comes to choosing LED lights for your bedroom, there are several important factors to consider. These factors will not only impact the functionality and aesthetic of your lights but also your overall experience with them. In this section, we will discuss the key considerations for selecting the best LED lights for your bedroom, including brightness, color temperature, energy efficiency, dimming capabilities, color options, and installation and control options. By the end, you will have a better understanding of what to look for when shopping for LED lights for your bedroom.

1. Brightness

When selecting LED lights for your bedroom, it is important to consider the level of brightness to create the desired ambiance. Here are some steps to help you choose the appropriate level of brightness:

  1. Evaluate the lighting needs of your bedroom, taking into account whether you require bright task lighting or soft ambient lighting.
  2. Take note of the lumens, which indicate the brightness of the LED lights. For a bedroom, a range of 1500-3000 lumens is generally recommended.
  3. Consider the size of your room. Larger rooms may require a higher number of lumens to adequately illuminate the space.
  4. Factor in any specific activities you plan to do in your bedroom, such as reading or getting dressed, which may require brighter lighting.

By following these steps, you can select LED lights with the appropriate level of brightness to enhance the comfort and functionality of your bedroom.

The concept of brightness in lighting can be traced back to ancient civilizations, where people used various methods such as oil lamps and candles to light their living spaces. With the advancements in technology, including the invention of electric lights and the development of LED technology, we now have more precise control over brightness levels, allowing for customizable lighting solutions for our modern bedrooms.

2. Color Temperature

Color temperature is an important factor to consider when choosing LED lights for your bedroom. It refers to the color appearance of the light, ranging from warm to cool tones. Here are the steps to consider:

  1. Identify your preference: Determine whether you prefer a warm, cozy ambiance or a cool, energizing atmosphere in your bedroom.
  2. Select the right color temperature: For a warm, relaxing feel, choose LED lights with a color temperature between 2700K and 3000K. For a cool, crisp ambiance, opt for lights with a color temperature between 4000K and 5000K.
  3. Consider dimming options: Look for LED lights that offer dimming capabilities, allowing you to adjust the brightness and create the desired mood in your bedroom.
  4. Test the lighting: Before committing, purchase a single LED light bulb or a sample strip to test the color temperature in your bedroom and see if it matches your vision.

History shows that the concept of color temperature has been utilized in lighting design for decades. It was first introduced by lighting designers and scientists in the 19th century to create specific atmospheres in different settings.

3. Energy Efficiency

When selecting LED lights for your bedroom, it is crucial to prioritize energy efficiency. LED lights are renowned for their low energy usage and long lifespan. To ensure maximum energy efficiency, follow these guidelines:

  1. Choose lights with a high lumens-to-watts ratio. This indicates the amount of light produced per unit of power consumed.
  2. Opt for lights with energy-saving features, such as dimming capabilities and motion sensors.
  3. Select LED lights with a high Energy Star rating, as they meet strict energy efficiency standards.
  4. Consider the color temperature of the lights. Cooler temperatures consume less energy than warmer ones.
  5. Ensure the lights have a long lifespan, reducing the need for frequent replacements and saving energy in the long run.
  6. Properly install and position the lights to maximize efficiency and minimize energy waste.

By following these steps, you can choose energy-efficient LED lights that not only illuminate your bedroom but also decrease your energy usage and save on electricity costs.

4. Dimming Capabilities

Dimming capabilities are an important factor to consider when selecting LED lights for your bedroom. They provide the convenience of adjusting the brightness according to your mood and needs. Follow these steps to effectively utilize the dimming capabilities:

  1. Choose LED lights that are compatible with dimmer switches.
  2. If you don’t already have one, install a dimmer switch in your bedroom.
  3. Follow the manufacturer’s instructions to connect the LED lights to the dimmer switch.
  4. Test the dimming capabilities by gradually adjusting the brightness using the dimmer switch.

Pro-tip: Take advantage of the dimming capabilities to create a cozy and relaxing ambiance in your bedroom, perfect for winding down before sleep.

5. Color Options

When selecting LED lights for your bedroom, it is important to consider the variety of color options available to achieve your desired ambiance. Here are some key factors to keep in mind:

  • Color Temperature: Choose between warm white (2700K-3000K) for a cozy atmosphere or cool white (5000K-6500K) for a brighter, more energetic feel.
  • Color Changing: Opt for LED lights that offer the ability to change colors, allowing you to switch between different hues and create different moods.
  • Dimming Options: Look for lights that have adjustable brightness levels, giving you the ability to set the perfect lighting for various activities.
  • RGB Control: Select lights that offer RGB control, giving you the freedom to customize and mix different colors to suit your personal preferences.
  • Smart Lighting: Consider smart LED lights that can be controlled through smartphone apps or voice assistants, providing convenience and flexibility for your lighting setup.

6. Installation And Control

  1. Determine the placement of the lights based on your desired lighting effect and functional needs.
  2. Prepare the surface for installation by cleaning it and ensuring it is free from dust or debris.
  3. Connect the lights to a power source, following the manufacturer’s instructions and ensuring proper wiring.
  4. Control the lights with your smartphone or voice assistant by using compatible smart devices or apps.

Pro-tip: Use smart LED light strips with adjustable colors and dimming capabilities to create a personalized and ambient atmosphere in your bedroom. Experiment with different lighting scenes and schedules to enhance relaxation or productivity.

What Are The Best LED Lights For Your Bedroom?

When it comes to lighting up your bedroom, LED lights are a popular choice. But with so many options on the market, it can be overwhelming to find the perfect fit for your space. In this section, we’ll take a look at some of the best LED lights for your bedroom. From color-changing light strips to smart bulbs, we’ll explore the top choices and their unique features. Get ready to transform your bedroom into a cozy and stylish oasis with these top LED lights.

1. Philips Hue White And Color Ambiance Lightstrip Plus

The Philips Hue White and Color Ambiance Lightstrip Plus is a versatile LED light option for your bedroom. Follow these steps to effectively install and use it:

  1. Determine the best placement for the Lightstrip Plus, whether it be along the ceiling, baseboard, or behind furniture.
  2. Prepare the surface by cleaning it thoroughly and ensuring it is dry and free of any dust or debris.
  3. Connect the Lightstrip Plus to a power source, either by plugging it into an outlet or using a compatible power adapter.
  4. Control the lights using the Philips Hue app on your smartphone or through voice commands with a compatible voice assistant such as Amazon Alexa or Google Assistant.

With these simple steps, you can fully enjoy the benefits of the Philips Hue White and Color Ambiance Lightstrip Plus in your bedroom.

2. Nanoleaf Canvas Smarter Kit

The Nanoleaf Canvas Smarter Kit is a popular choice for LED lights in bedrooms. Here are the steps to install and use it:

  1. Plan the layout: Determine where you want to place the lights on your bedroom wall.
  2. Prepare the wall: Clean the surface and ensure it is free from dust or debris.
  3. Mount the panels: Attach the panels to the wall using the included adhesive strips.
  4. Connect the panels: Use the connectors to link the panels together in your desired configuration.
  5. Power up: Connect the power supply to the first panel and plug it into an outlet.
  6. Control the lights: Use the Nanoleaf app or voice assistant to customize and control the lighting effects.

3. LIFX A19 Smart Bulb

The LIFX A19 Smart Bulb is a popular choice for bedroom lighting due to its smart features and versatility. Here are the steps to install and use the LIFX A19 Smart Bulb in your bedroom:

  1. Download the LIFX app on your smartphone and create an account.
  2. Screw the LIFX A19 Smart Bulb into a standard light fixture in your bedroom.
  3. Turn on the power to the light fixture and wait for the bulb to connect to your Wi-Fi network.
  4. Open the LIFX app and follow the instructions to add the LIFX A19 Smart Bulb to your smart home system.
  5. Use the app to control the brightness, color, and effects of the LIFX A19 Smart Bulb in your bedroom.
  6. Integrate the LIFX A19 Smart Bulb with voice assistants like Amazon Alexa or Google Assistant for hands-free control.

With the LIFX A19 Smart Bulb, you can create personalized lighting scenes and schedules to enhance the ambiance and functionality of your bedroom.

4. Govee LED Strip Lights

The Govee LED Strip Lights are a popular choice for bedroom lighting due to their versatility and easy installation. These lights offer customizable colors, brightness levels, and various lighting effects to create the perfect ambiance in any bedroom. With adhesive backing, they can be easily attached to any surface, and their flexible design allows for creative placement options. Additionally, the Govee LED Strip Lights can be controlled through a smartphone app or voice assistant, offering convenience and flexibility. Overall, these lights provide an affordable and stylish solution for enhancing the atmosphere of any bedroom.

5. Yeelight Smart LED Bulb

  • Compatibility: Check if the Yeelight Smart LED Bulb is compatible with your current lighting system or if you need additional components.
  • Installation: Screw the Yeelight bulb into a standard light socket and ensure it is securely in place.
  • Connect to Wi-Fi: Download the Yeelight app, create an account, and connect the bulb to your Wi-Fi network following the app’s instructions.
  • Control: Use the app to control the Yeelight bulb, adjusting brightness, color, and other settings. You can also connect it to voice assistants like Amazon Alexa or Google Assistant for hands-free control.
  • Customization: Take advantage of the Yeelight app’s features to create personalized lighting scenes, schedules, and automation.

The Yeelight Smart LED Bulb is a versatile choice for your bedroom, offering convenient control, energy efficiency, and the ability to create the perfect ambiance for any mood or activity. With the Yeelight Smart LED Bulb, you can easily adjust the lighting to your liking and connect it to voice assistants for a hands-free experience. Plus, the Yeelight app allows for customization with personalized lighting scenes, schedules, and automation. Make the Yeelight Smart LED Bulb a part of your home lighting system today.

6. TP-Link Kasa Smart Wi-Fi Light Bulb

The TP-Link Kasa Smart Wi-Fi Light Bulb is an excellent choice for illuminating your bedroom. Follow these steps for effective installation and use:

  1. Screw the TP-Link Kasa Smart Wi-Fi Light Bulb into a standard light socket.
  2. Download and install the Kasa Smart app on your smartphone.
  3. Connect the light bulb to your Wi-Fi network using the app.
  4. Create schedules or set timers to automate the lighting in your bedroom.
  5. Adjust the brightness and color temperature of the light bulb to your liking.
  6. Use voice commands through a compatible voice assistant to control the light bulb.

In addition to the TP-Link Kasa Smart Wi-Fi Light Bulb, other recommended LED lights for your bedroom include the Philips Hue White and Color Ambiance Lightstrip Plus, Nanoleaf Canvas Smarter Kit, LIFX A19 Smart Bulb, Govee LED Strip Lights, and Yeelight Smart LED Bulb. Enjoy the convenience and ambiance these smart LED lights bring to your bedroom!

How To Install And Use LED Lights In Your Bedroom?

Adding LED lights to your bedroom can not only enhance the ambiance but also provide functional lighting for tasks such as reading or getting ready. In this section, we’ll discuss the steps to install and use LED lights in your bedroom. From determining the best placement for the lights to controlling them with your smartphone, we’ll cover all the necessary aspects for a seamless installation process. Get ready to transform your bedroom with the perfect LED lighting setup.

1. Determine the Placement Of The Lights

Determining the optimal placement of LED lights in your bedroom is crucial for achieving the right lighting and ambiance. Follow these steps to ensure the best results:

  1. Assess the room: Take into consideration the layout, placement of furniture, and any specific areas that require lighting, such as reading nooks or dressing areas.
  2. Highlight focal points: Identify any architectural features, artwork, or decorative elements that you want to accentuate with the lights.
  3. Avoid glare and shadows: Position the lights in a way that minimizes glare and provides even illumination throughout the room.
  4. Consider functionality: Decide if you need task lighting for activities like reading or working, and plan accordingly.
  5. Experiment and adjust: Install the lights temporarily and test different positions to find the most pleasing and practical arrangement.

2. Prepare The Surface For Installation

Preparing the surface before installing LED lights in your bedroom is crucial for a smooth and secure installation process. Follow these steps:

  1. Clean the surface: Remove any dust, dirt, or debris from the area where you plan to install the lights. This will ensure proper adhesion and prevent any bumps or unevenness.
  2. Measure and mark: Use a measuring tape to determine the desired length and position of the LED lights. Mark the spots where you will attach the lights for accurate placement.
  3. Apply adhesive: Depending on the type of LED lights you have, apply the adhesive provided to the back of the lights. Make sure to apply it evenly and cover the entire back surface.
  4. Press and hold: Press the LED lights firmly against the prepared surface. Hold them in place for a few seconds to allow the adhesive to bond properly.
  5. Secure with additional support: For added stability, you can use mounting clips or brackets to secure the LED lights to the surface. This will help prevent any accidental detachment.
  6. Test the installation: Once the lights are secured, turn them on to test the installation. Ensure that they are functioning properly and illuminating the desired area.

Remember, proper surface preparation is essential for a successful LED light installation in your bedroom. By following these steps, you can create a well-lit and aesthetically pleasing space. Happy lighting!

3. Connect The Lights To A Power Source

To successfully connect LED lights to a power source in your bedroom, follow these steps:

  1. Choose a power source: Identify an available electrical outlet or consider using a power strip for multiple lights.
  2. Prepare the power source: Ensure the outlet or power strip is functioning properly and has the appropriate voltage for the LED lights.
  3. Check the LED light’s power requirements: Confirm the voltage and wattage needed for the lights and ensure they match the power source.
  4. Connect the lights: Plug the LED lights into the electrical outlet or power strip, making sure the connections are secure.
  5. Test the lights: Turn on the lights to verify they are receiving power and functioning correctly.

By following these steps, you can complete the process of connecting your LED lights to a power source in your bedroom.

4. Control The Lights With Your Smartphone Or Voice Assistant

Controlling your bedroom LED lights with your smartphone or voice assistant offers a convenient and customizable experience. Follow these steps to get started:

  1. Make sure your LED lights are compatible with a smartphone or voice control.
  2. Download the corresponding app for your LED lights.
  3. Connect your lights to your Wi-Fi network using the app’s instructions.
  4. Pair your LED lights with your smartphone or voice assistant, such as Google Home or Amazon Alexa.
  5. Utilize the app or voice commands to adjust the lights’ brightness, color, and effects.
  6. Create schedules or routines to automate your lighting based on your personal preferences.

For an even more enhanced experience, consider using LED lights like Philips Hue or Nanoleaf Canvas that seamlessly integrate with smartphone and voice control. Enjoy the convenience and ambiance these lights can bring to your bedroom.

5th November 2023 Interior Decor

Bedroom With Walk In Wardrobe

Are you tired of struggling with cramped and cluttered bedroom spaces? Look no further, because we have the perfect solution for you. Introducing the ultimate in-storage and organization – the bedroom with a walk-in wardrobe. In this article, we will explore the importance and benefits of having a walk-in wardrobe, and how it can transform your bedroom into a functional and stylish oasis. Say goodbye to clutter and hello to a well-organized space with a walk-in wardrobe.

What Is A Bedroom With A Walk-in Wardrobe?

A bedroom with a walk-in wardrobe is a lavish and functional addition to any home. It is a bedroom that features an attached space specifically designed for storing clothes, shoes, and accessories. This type of wardrobe typically includes built-in shelves, hanging rods, and drawers for effectively organizing and displaying clothing items. It provides ample storage space and simplifies the process of getting ready in the morning. A bedroom with a walk-in wardrobe offers easy access to clothing and helps keep the bedroom free of clutter. Overall, it is a stylish and efficient solution for organizing and maintaining a well-arranged living space.

Why Choose A Bedroom With A Walk-In Wardrobe?

Are you tired of cluttered closets and overflowing dressers? A bedroom with a walk-in wardrobe may be the perfect solution for you. This section will explore the benefits of choosing a bedroom with a walk-in wardrobe, including how it maximizes space, provides organization, and adds value to your home. Say goodbye to cramped and chaotic closets and hello to a luxurious and functional bedroom with a walk-in wardrobe. Let’s dive in.

Check out: Master Bedroom Wardrobe Design With Dressing Table

1. Maximizes Space

A bedroom with a walk-in wardrobe is a great way to maximize space by utilizing the area efficiently. Here are steps to consider when designing and organizing this type of bedroom:

  1. Assess the available space and take measurements to ensure the best use of the area.
  2. Plan the layout, making sure to provide easy access to clothes and accessories.
  3. Choose storage solutions that optimize vertical space, such as tall shelves or hanging organizers.
  4. Install proper lighting to illuminate both the wardrobe and the bedroom area for added functionality.
  5. Select quality materials and finishes that complement the overall design and ensure durability for long-term use.

2. Provides Organization

A bedroom with a walk-in wardrobe offers excellent organization for your clothing and belongings. Here are some steps to achieve a well-organized space:

  1. Assess your storage needs and determine the types of items you need to organize.
  2. Plan the layout of your walk-in wardrobe, considering the placement of shelves, drawers, and hanging space. This ensures proper organization and utilization of space.
  3. Choose quality materials and finishes that will withstand daily use and enhance the overall aesthetic of the room.
  4. Utilize vertical space by installing tall shelves or cabinets to maximize storage capacity.
  5. Maintain a clutter-free environment by regularly decluttering and organizing your belongings.

By following these steps, you can create a functional and organized bedroom with a walk-in wardrobe that provides excellent organization to meet your storage needs.

3. Adds Value To The Home

Adding a walk-in wardrobe to a bedroom can greatly increase its value, making it an attractive feature for potential homebuyers. Here are the steps to consider when adding value with a walk-in wardrobe:

  1. Evaluate the available space and determine if a walk-in wardrobe is feasible.
  2. Plan the layout and design of the wardrobe, ensuring it complements the overall style of the bedroom.
  3. Choose high-quality materials and finishes that will enhance the aesthetic appeal and durability of the wardrobe, ultimately adding value to the home.
  4. Maximize vertical space by incorporating shelving, hanging rods, and drawers.
  5. Maintain a clutter-free environment by organizing and regularly decluttering the wardrobe.

Fact: According to a survey by the National Association of Home Builders, walk-in wardrobes are among the top features that home buyers desire, adding significant value to the property.

What Are The Design Options For A Bedroom With A Walk-In Wardrobe?

When it comes to designing a bedroom with a walk-in wardrobe, there are several options to consider. Each option offers its unique features and benefits, allowing you to customize your space according to your specific needs and preferences. In this section, we will discuss the various design options available for a bedroom with a walk-in wardrobe, including built-in wardrobes, walk-in closets, open wardrobes, and customized wardrobes. By the end, you will have a better understanding of which design option best suits your lifestyle and storage needs.

1. Built-In Wardrobe

A built-in wardrobe is a permanent storage solution that is integrated into the design of a bedroom with a walk-in wardrobe.

  • Plan the dimensions and layout of the built-in wardrobe to fit your space and storage needs.
  • Select the type of doors for the wardrobe, such as hinged, sliding, or folding doors.
  • Consider the material and finish of the built-in wardrobe, ensuring it complements the overall aesthetic of the bedroom.
  • Incorporate shelves, drawers, and hanging rods in the interior design of the built-in wardrobe to maximize storage and organization.
  • Install proper lighting inside the built-in wardrobe to ensure visibility and ease of use.

2. Walk-In Closet

A walk-in closet is a luxurious addition to a bedroom, providing ample storage space and enhancing organization. Here are the steps to design and organize a walk-in closet:

  1. Determine your storage needs and preferences.
  2. Plan the layout of your walk-in closet, taking into consideration the available space and your storage requirements.
  3. Choose high-quality materials and finishes for both durability and aesthetics.
  4. Maximize the use of vertical space by incorporating shelves, hanging rods, and storage units.
  5. Maintain a clutter-free environment by regularly organizing and decluttering your walk-in closet.

Walk-in closets have a rich history dating back to the 17th century when they were primarily used by the wealthy elites to store their extensive wardrobes. Over time, walk-in closets have become more accessible and popular, offering practical storage solutions for homeowners of all backgrounds.

3. Open Wardrobe

Designing an open wardrobe in a bedroom with a walk-in wardrobe involves a few key steps:

  1. Choose an open wardrobe concept that complements your style and fits within the overall bedroom design.
  2. Select a suitable location within the walk-in wardrobe for the open wardrobe, considering accessibility and visibility.
  3. Decide on the type of open wardrobe, such as a hanging rod, shelves, or a combination of both, based on your storage needs and the number of items you plan to store.
  4. Consider incorporating additional elements like hooks, baskets, or shoe racks to maximize the functionality of the open wardrobe.
  5. Organize and arrange your clothing and accessories in a visually appealing and practical manner within the open wardrobe.

Remember to keep the open wardrobe clutter-free and regularly declutter to maintain an organized and stylish space. By following these steps, you can successfully create a functional and aesthetically pleasing open wardrobe in your bedroom with a walk-in wardrobe.

4. Customized Wardrobe

A customized wardrobe is a personalized and tailored storage solution for a bedroom with a walk-in wardrobe. To create a customized wardrobe, follow these steps:

  1. Assess your storage needs: Determine the types and quantities of items you need to store, such as clothes, shoes, and accessories.
  2. Measure the available space: Take accurate measurements to ensure the customized wardrobe fits perfectly in your bedroom.
  3. Select a design: Choose a design that complements the overall aesthetic of your bedroom and reflects your style.
  4. Consider features: Decide on features such as shelves, drawers, hanging rods, and shoe racks, based on your unique storage requirements.
  5. Choose high-quality materials and finishes: Select durable and visually appealing materials and finishes for your customized wardrobe.
  6. Collaborate with a professional: Work with a professional wardrobe designer or carpenter to bring your customized wardrobe design to life.

For a seamless and functional bedroom with a walk-in wardrobe, invest in a customized wardrobe that meets your unique storage needs and enhances the overall design of your space.

What Are The Essential Elements Of A Bedroom With A Walk-In Wardrobe?

When designing a bedroom with a walk-in wardrobe, several key elements must be considered to create a functional and stylish space. From lighting and storage to ventilation and layout, each aspect plays a crucial role in the overall design. In this section, we will discuss the essential elements of a bedroom with a walk-in wardrobe and how they contribute to the overall functionality and aesthetics of the space.

1. Ample Lighting

Ample lighting is essential when designing a bedroom with a walk-in wardrobe to ensure functionality and a pleasant atmosphere. Here are some steps to achieve ample lighting:

  1. Assess natural lighting: Take advantage of windows and skylights to maximize natural light during the day.
  2. Consider artificial lighting: Install a combination of ambient, task, and accent lighting to provide a well-lit space.
  3. Choose the right fixtures: Opt for fixtures that complement the overall design and provide adequate brightness.
  4. Use mirrors strategically: Place mirrors near light sources to reflect and enhance the lighting in the room.
  5. Add dimmer switches: Install dimmer switches to adjust the lighting levels based on different moods and activities.

2. Efficient Storage Solutions

Efficient storage solutions are crucial for a bedroom with a walk-in wardrobe. Here are steps to achieve this:

  1. Maximize vertical space: Utilize tall shelves, hanging rods, and stackable storage containers to make the most of your vertical space.
  2. Utilize under-bed storage: Invest in bed frames or containers that allow for storing items beneath the bed.
  3. Use adjustable shelving: Install shelves that can be moved or adjusted to fit different items and sizes.
  4. Include built-in drawers and cabinets: These provide convenient storage options for folded clothes, accessories, and other items.
  5. Label and categorize: Use labels or dividers to keep items organized and easily accessible.

By implementing these efficient storage solutions, you can optimize space and keep your bedroom with a walk-in wardrobe neat.

3. Proper Ventilation

Proper ventilation is essential in a bedroom with a walk-in wardrobe to maintain good air quality and prevent musty odors. Follow these steps to ensure adequate ventilation:

  1. Install windows or vents to allow fresh air to circulate.
  2. Consider installing a ceiling fan or exhaust fan to remove stale air.
  3. Use breathable materials for wardrobe doors and shelves.
  4. Keep the wardrobe organized to prevent any blockages in airflow.
  5. Regularly clean and air out the wardrobe to prevent moisture buildup.

Fun fact: Adequate ventilation can also help regulate temperature and reduce the risk of mold and mildew growth.

4. Functional Layout

A functional layout is crucial for a bedroom with a walk-in wardrobe. To design the layout, follow these steps:

  1. Assess the available space and determine the size and shape of the wardrobe area.
  2. Consider the flow of movement and ensure easy access between the bedroom and the wardrobe.
  3. Plan the placement of storage units, such as shelves, drawers, and hanging rods, to maximize functionality and organization.
  4. Allocate space for a dressing area or a full-length mirror if desired.
  5. Ensure that there is enough clearance for opening and closing wardrobe doors.

By following these steps, you can create a functional layout that optimizes the use of space and enhances the overall functionality of your bedroom with a walk-in wardrobe.

5. Aesthetically Pleasing Design

An aesthetically pleasing design is crucial when creating a bedroom with a walk-in wardrobe. Follow these steps to achieve a visually appealing space:

  1. Choose a cohesive color scheme that complements the overall theme of the room.
  2. Select furniture and fixtures that blend well together and create a harmonious atmosphere.
  3. Incorporate stylish lighting fixtures to enhance the ambiance and highlight key areas.
  4. Add decorative elements such as artwork, plants, or rugs to inject personality and visual interest.
  5. Keep the space well-organized and clutter-free to maintain a clean and elegant look.

In the 18th century, the concept of walk-in wardrobes first emerged as a symbol of luxury and opulence. They were initially popularized by the French aristocracy, who sought grand and spacious dressing areas. Over time, walk-in wardrobes have become a coveted feature in modern homes, offering both functionality and style. Today, homeowners can enjoy the benefits of an aesthetically pleasing design combined with practical storage solutions in their bedrooms with a walk-in wardrobe.

How To Design And Organize A Bedroom With A Walk-In Wardrobe?

A bedroom with a walk-in wardrobe is the epitome of luxury and organization. However, designing and organizing this space can be a daunting task. In this section, we will discuss the step-by-step process of creating the perfect bedroom with a walk-in wardrobe. From determining your needs and wants, to planning the layout and design, to utilizing vertical space and keeping it clutter-free, we will cover all the essential elements to help you create a functional and stylish bedroom with a walk-in wardrobe.

1. Determine Your Needs And Wants

When creating a bedroom with a walk-in wardrobe, it’s essential to first assess your needs and desires to design a space that meets your specific requirements. Here are the steps to consider:

  1. Determine your storage needs: Assess the amount of clothing, shoes, accessories, and other items you need to store to ensure you have adequate space.
  2. Evaluate your lifestyle: Consider your daily routine and habits to determine if you need additional features, such as a dressing area or seating area, within the walk-in wardrobe.
  3. Consider your budget: Determine the amount you are willing to spend on the project, including the cost of materials, furniture, and professional assistance if necessary.
  4. Think about aesthetics: Decide on the overall style and design elements you prefer, such as the type of closet doors, color scheme, and lighting.
  5. Plan for future growth: Anticipate any potential changes in your needs, such as a growing wardrobe or lifestyle adjustments, and incorporate them into your design.

2. Plan The Layout And Design

When designing a bedroom with a walk-in wardrobe, it’s important to consider functionality, aesthetics, and personal preferences. Here are some steps to guide you:

  1. Analyze the available space and determine the dimensions for the walk-in wardrobe area.
  2. Plan the layout and design of the wardrobe, taking into consideration your specific needs and preferences, such as a built-in wardrobe, walk-in closet, open wardrobe, or customized wardrobe.
  3. Consider the placement of storage units, hanging rods, shelves, and drawers to optimize organization and accessibility.
  4. Select appropriate lighting fixtures to ensure ample illumination throughout the wardrobe space.
  5. Choose quality materials and finishes that complement the overall bedroom design and ensure durability.

By following these steps, you can create a well-designed and organized bedroom with a functional walk-in wardrobe.

3. Choose Quality Materials And Finishes

Choosing quality materials and finishes is crucial when designing a bedroom with a walk-in wardrobe. Here are the steps to guide you:

  1. Research: Explore different materials and finishes available in the market.
  2. Budget: Determine your budget and find materials and finishes that fit within it.
  3. Durability: Select materials that are long-lasting and can withstand daily wear and tear.
  4. Aesthetic Appeal: Consider the overall design and style of your bedroom and choose materials that complement it.
  5. Maintenance: Opt for materials and finishes that are easy to clean and maintain.
  6. Eco-Friendly: If sustainability is important to you, look for environmentally friendly materials.
  7. Compatibility: Ensure that the materials and finishes you choose are compatible with the existing elements of your bedroom.

4. Utilize Vertical Space

Utilizing vertical space is crucial for maximizing storage in a bedroom with a walk-in wardrobe. Here are some steps to help you make the most out of your vertical space:

  1. Install floor-to-ceiling shelves or cabinets to store folded clothes and accessories.
  2. Utilize hanging organizers or hooks on the walls to hang bags, belts, or scarves.
  3. Opt for tall shoe racks or mounted shoe organizers to save space.
  4. Consider installing a loft or elevated platform for additional storage space underneath.
  5. Make use of the space above wardrobes or closets by installing extra shelves or using storage boxes.

By following these steps, you can effectively utilize vertical space and create a functional and organized bedroom with a walk-in wardrobe.

5. Keep It Clutter-Free

Keeping a bedroom with a walk-in wardrobe free from clutter is crucial for maintaining a clean and organized space. Here are some steps to help you achieve this:

  1. Regularly declutter: Sort through your clothes and belongings regularly to remove items you no longer use or need.
  2. Maximize storage: Utilize storage solutions such as shelves, drawers, and hanging organizers to keep items neatly stored.
  3. Assign a place for everything: Designate specific spots for different items to ensure they are always put back in their proper place.
  4. Implement a cleaning routine: Regularly dust, vacuum, and wipe down surfaces to keep the space clean and free from dust and dirt.
  5. Maintain organization: Stay disciplined in keeping up with organizing and putting things away, preventing clutter from accumulating.

By following these steps, you can maintain a clutter-free bedroom with a walk-in wardrobe, creating a serene and functional space.

18th October 2023 Interior Decor

How To Clean Living Room Carpet

Cleaning the living room carpet is a must. It improves the look and health of your home. A clean carpet boosts the beauty of your living room and keeps your family safe.

For successful cleaning, there are several steps. First, a thorough vacuuming. This removes any loose dirt and stops dirt from going deeper into the fibers during cleaning.

Next, take on any stubborn stains or spills. Pick a cleaning solution appropriate for your carpet type. Test it on a small spot first.

After treating spots, do a deep clean. You can steam clean yourself or hire professionals. Steam cleaning eliminates dirt, allergens, and bacteria, returning the carpet to its fresh, revitalized state.

Regular maintenance is essential. Attend to spills, vacuum, and schedule professional deep cleanings. Doing this makes sure your living room remains clean and inviting.

Gather The Necessary Materials For Carpet Cleaning

Gather the right materials for cleaning your living room carpet.

Here’s a 4-step guide to help you:

  1. Vacuum Cleaner: Get a reliable one for removing loose dirt and debris.
  2. Carpet Cleaner Solution: Pick one that’s good for your specific carpet type. It should lift stains and eliminate odors without causing damage.
  3. Stain Remover: Keep one handy to tackle unexpected spills.
  4. Cleaning Brushes: Include bristle brushes for high-pile carpets and soft brushes for delicate fibers.

Other Details: Ventilate the room during the process. Wear protective clothing such as gloves or face masks if sensitive to chemical cleansers.

Fun Fact: According to The Carpet and Rug Institute (CRI), regular carpet maintenance can improve air quality. It traps allergens and pollutants.

Clear The Room And Remove Any Furniture Or Obstacles

To create an ideal environment for cleaning your living room carpet, it is important to clear the area and remove any furniture or obstacles that may hinder your progress. This initial step will facilitate easy access to the entire carpeted space and enable a thorough cleaning process. Here is a step-by-step guide on how to clear the room and remove any furniture or obstacles:

  1. Begin by moving all furniture, including chairs, tables, and decorations, to another part of the house or a designated area.
  2. Take care to protect your furniture from potential damage by using appropriate covers or moving blankets.
  3. Remove any smaller items, such as lamps, vases, and accessories, from the room to ensure a clutter-free space.
  4. Next, address any obstacles that may impede your cleaning process, such as toys, shoes, or random items on the floor. Place these items in their appropriate storage spaces.
  5. If there are any bulky obstacles that cannot be easily moved, consider using sliders, or furniture glides, or asking for assistance to relocate them temporarily.
  6. Ensure the entire room is clear of furniture and obstacles, providing ample space for efficient and thorough carpet cleaning.

It is worth noting that during this process, it is essential to handle furniture and delicate items with care to avoid any damage. Taking these precautions will help create an optimal setting for cleaning your living room carpet effectively. Furthermore, a pro tip to consider is to take pictures or make a mental note of the furniture’s original placement. This will ease the process of arranging the room back to its desired layout once the carpet cleaning is complete. Cleaning your living room carpet is an essential task that requires careful preparation. By following these steps and removing any furniture or obstacles, you can ensure a successful and hassle-free cleaning experience. Clearing out small furniture and items from your living room is like playing a game of indoor Tetris but with fewer colorful blocks and more risk of stubbing your toe on the coffee table.

Explore: How To Clean Outdoor Carpet On Patio

Move Small Furniture And Items

Moving small furniture and items? Essential! Whether for rearranging or deep cleaning, clear the room and remove obstacles. Create a safe environment and make your task easier with these 5 steps:

  1. Assess size and weight. Can you handle it alone or need assistance?
  2. Empty drawers or remove any detachable parts to lighten the load.
  3. Lift furniture or items by bending your knees and using leg muscles, not your back.
  4. For heavier items, use sliders or furniture moving pads to glide across the floor without causing damage.
  5. Place furniture or items in the desired location. Make sure it’s secure and stable before letting go.

Protection for your floors? Use blankets or cardboard underneath heavy objects to prevent scratches or dents. Ancient civilizations knew this too! Archaeological findings show they used basic techniques like ropes, logs, and ramps to transport heavy objects. Open spaces and clearing obstacles are always essential for efficient living arrangements.

Remove Larger Furniture

Clearing a room? Need to move large furniture? Follow this 4-step guide!

  1. Start by emptying cabinets and shelves, so they’re lighter.
  2. Disassemble if possible.
  3. Clear a path, removing any tripping hazards.
  4. Use proper lifting techniques to avoid injury.

Additionally, consider windows and doorways for a smooth transition.

Vacuum The Carpet To Remove Loose Dirt And Debris

To effectively clean your living room carpet, it is essential to use a vacuum cleaner that can efficiently remove loose dirt and debris embedded in the carpet fibers. Regular vacuuming not only keeps your carpet looking clean but also extends its lifespan.

Here is a six-step guide to properly vacuum your carpet and eliminate loose dirt and debris:

  1. Prepare the vacuum cleaner: Ensure that the vacuum cleaner is in good working condition and that the bag or canister is empty to maximize suction power.
  2. Clear the area: Remove any obstacles such as furniture, toys, or small objects from the carpeted area to facilitate thorough cleaning.
  3. Adjust the settings: Set the vacuum cleaner to the appropriate height for your carpet type. Low-pile carpets may require a lower setting, while high-pile carpets may need a higher setting for optimal cleaning.
  4. Start from the furthest point: Begin vacuuming from the farthest corner of the room, moving backward towards the exit. This method ensures that you cover the entire carpeted area without stepping on already-cleaned sections.
  5. Use overlapping strokes: Slowly push the vacuum cleaner forward in a straight line, overlapping each stroke by a few inches. This technique helps to remove embedded dirt and debris more effectively.
  6. Complete multiple passes: For a thorough clean, make multiple passes over heavily soiled areas or high-traffic zones. This step ensures that deeply embedded dirt and debris are thoroughly removed.

Here are some additional important details to consider while vacuuming your carpet:

  • Pay attention to edges and corners: Use the attachments provided with your vacuum cleaner to clean hard-to-reach areas such as edges, corners, and along baseboards where dirt can accumulate.
  • Regular maintenance: Regularly clean or replace the vacuum cleaner’s filter to maintain its efficiency. Clogged filters can hinder suction power and prevent effective dirt removal.

Pro Tip: To prevent excessive wear and tear on your carpet, vacuum high-traffic areas at least twice a week. Regular vacuuming helps prevent the accumulation of dirt and debris, keeping your carpet cleaner and maintaining its appearance for a longer time.

By following these steps and taking the necessary precautions, you can ensure that your living room carpet stays clean and free from loose dirt and debris, providing a fresh and inviting atmosphere in your home.

Turn your living room carpet into a black hole for dirt with the power of a strong suction vacuum cleaner, but beware, it may try to swallow the remote control along the way.

Learn more: How To Clean Carpet At Home DIY

Use A Strong Suction Vacuum Cleaner

Tired of lugging around a heavy vacuum that doesn’t get the dirt and debris out of your carpets? Worry no more! A strong suction vacuum is the answer. It can easily suck out even the most stubborn dirt particles from the fibers of your carpet.

Here’s a step-by-step guide on how to use it:

  1. Prepare the area. Take away any furniture that may be in the way.
  2. Plug it in and get it ready.
  3. Change the height setting according to the thickness of the carpet.
  4. Turn it on and move it across the carpet in overlapping lines.
  5. Focus on high-traffic areas. You may need to do multiple passes.
  6. Once you’re done, empty the dustbin or change the bag.
  7. Clean any attachments you use.

Using this vacuum not only cleans better but also improves indoor air quality by getting rid of allergens and dust particles.

Pay Extra Attention To High-Traffic Areas

High-traffic areas require special attention!

Here’s how to keep your carpets spotless:

  • Vacuum daily to capture loose dirt and debris.
  • Use attachments to reach those tricky corners and crevices.
  • Implement a shoe-free policy to prevent dirt buildup.

For even better results, use a carpet cleaner specifically designed for high-traffic areas.

Let’s look at one homeowner’s success story. They welcomed guests with slip-on shoe covers to reduce residue. Their dedication paid off—their carpets were always in perfect condition!

To keep carpets looking new, it’s important to vacuum regularly. Make a commitment to caring for your carpets—and enjoy their beauty for years to come.

Spot Treat Any Stains Or Spills

Spot treat any stains or spills in your living room carpet with these easy steps:

  1. Firstly, identify the stained area and determine the type of stain.
  2. Next, mix a cleaning solution suitable for the specific stain, such as vinegar and water solution for general stains, or a specialized carpet cleaner for tougher stains.
  3. Then, gently blot the stained area with a clean cloth or sponge, starting from the outside and moving towards the center to prevent spreading.
  4. Finally, rinse the treated area with clean water and blot dry with a towel.

From wine spills to mystery substances, identifying the stain on your living room carpet is like playing CSI: Carpet Stain Investigation.

Identify The Type Of Stain And Choose The Appropriate Cleaning Solution

Identifying the stain type is key. Look closely to figure out if it’s liquid or solid, organic or inorganic. That’ll help you pick the right cleaning solution. For instance, organic stains like food or coffee need enzymatic cleaners. And, greasy spots require solvent-based solutions.

Then, apply the solution with a clean cloth or sponge. Don’t be too rough. Let it sit for a while to break down the stain particles. If it’s a unique stain, like wine, you can use white wine as a pretreatment, then use a specialized cleaner.

For tricky spots, check online resources or ask experts. With knowledge and creativity, you can beat any stain!

Apply The Cleaning Solution And Let It Sit For A Few Minutes

Cleaning solutions are key to removing stains and spills. Allowing them to sit for a few minutes helps them penetrate and break down the stain. Here’s a guide:

  1. Identify stain – to pick the right cleaning solution, you must first know what kind of stain you have.
  2. Choose a solution – you can buy products or make your own with household items.
  3. Apply it – use a cloth or sponge to work it into the area. Don’t oversaturate or rub too hard.
  4. Let it sit – this helps break down and loosen the stain.
  5. Blot or rinse – excess moisture should be blotted up with a cloth or sponge. Rinse off any residue with water or a damp cloth.

Gently Blot The Stained Area With A Clean Cloth Or Sponge

Treating spills? Blotting is the way! Use a clean cloth or sponge to gently press against the stain. It’ll absorb the liquid, preventing it from spreading further. Here’s how:

  1. Identify the stain, then dampen the cloth/sponge with water (not soaking wet!).
  2. Place it directly on the stain and press gently.
  3. Lift off and check for residue.
  4. Repeat as needed with a fresh portion of the cloth/sponge until the stain’s gone.

Some stains may need specific treatments or cleaning solutions, like oil-based ones that need dish soap. Avoid rubbing or scrubbing vigorously, too. Blotting’s gentler and stops the stain from going deeper. Plus, the clean cloth/sponge won’t introduce extra dirt or contaminants. Being gentle yet thorough will help you address spills and keep them from becoming permanent stains.

Deep Clean The Carpet Using A Carpet Cleaner

Deeply cleansing your living room carpet using a carpet cleaner is an effective way to remove dirt, stains, and allergens, ensuring a fresh and healthy environment. Follow this 5-step guide for optimal results:

  1. Prepare the carpet cleaner: Fill the cleaning solution tank with the recommended amount of water and carpet detergent. Ensure that the machine is in proper working condition.
  2. Vacuum the carpet: Before using the carpet cleaner, thoroughly vacuum the entire carpeted area to remove loose dirt and debris. This step will improve the effectiveness of the cleaning process.
  3. Test a small area: Select an inconspicuous part of the carpet to test the cleaning solution. Apply a small amount of the solution and follow the manufacturer’s instructions to ensure it does not damage or discolor the carpet fibers.
  4. Clean in sections: Divide the carpeted area into manageable sections and start cleaning from one corner, moving in a systematic pattern. Use slow and steady motions to allow the carpet cleaner to extract dirt and stains effectively.
  5. Dry the carpet: After cleaning, ensure proper air circulation in the room to aid in the drying process. Avoid walking on the carpet until it is completely dry to prevent re-soiling.

For added freshness and to maintain the carpet’s appearance, consider using a carpet deodorizer or stain protectant after deep cleaning.

It’s vital to note that different types of carpets may require specific cleaning methods and products, so always refer to the manufacturer’s guidelines. By deep cleaning your living room carpet regularly, you can extend its lifespan and enhance the overall cleanliness of your home.

Want to give your carpet a spa day? Just fill up the carpet cleaner with the recommended cleaning solution and water, and watch those stains check out for some much-needed relaxation.

Fill The Carpet Cleaner With The Recommended Cleaning Solution And Water

Maintaining a clean and fresh carpet is key for a healthy, cozy home. An effective way to deep clean carpets is by using a carpet cleaner with the right cleaning solution and water. To do this, follow these steps:

1.Read the instructions on the cleaning solution bottle. Measure out the right amount in a container.
2.Open the tank of the carpet cleaner. Pour in the solution, evenly distributed.
3.Fill the rest of the tank with warm water. Don’t overfill.
4.Mix the solution and water together in the tank.
5.Securely close the tank.

Now the carpet cleaner is ready to tackle those tough stains and dirt! Different carpets may need different formulas. Check with pros or manufacturers’ recommendations for the right product.

Cleaning tip: Use vinegar and warm water as a DIY carpet cleaner. The Spruce website says it works great!

Start From The Farthest Corner And Work Your Way Towards The Exit

For a professional carpet clean, start from the farthest corner and work your way out! This ensures no spot is left untouched. To do this:

  1. Remove furniture and obstacles from the area.
  2. Pre-treat any stains or heavily soiled areas.
  3. Fill the carpet cleaner with water and cleaning solution.
  4. Slowly move in a back-and-forth motion, while releasing the cleaning solution onto the carpet.
  5. Allow time to dry before replacing furniture.

Remember to adjust the brush settings and choose suitable cleaning solutions, based on your carpet type. Studies show carpets that are regularly deep cleaned this way have improved longevity and maintain their appearance for longer.

Use Slow, Overlapping Strokes To Ensure Thorough Cleaning

For a thorough clean when using a carpet cleaner, slow, overlapping strokes are key. This technique ensures every bit of the carpet is cleaned, leaving it dirt-free and fresh. Here’s how to do it:

  1. Begin at one end of the carpet. Move the cleaner in a straight line, slowly across the surface.
  2. As you reach the end of the stroke, slightly overlap the previous path. This ensures nothing is missed.
  3. Maintain a consistent speed and repeat until the whole carpet is covered.

Slow strokes allow the cleaner to suck up dirt and debris from deep within the carpet fibers. Overlapping each stroke means no spot is left untouched.

Be aware of extra pressure. Excessive pressure can cause the carpet to become saturated with water or cleaning solution. This could lead to long drying times or damage.

Tip: Before using a carpet cleaner on the entire carpet, test it on an area that won’t be seen first. This ensures it won’t discolor or damage the carpet.

Allow The Carpet To Dry Completely

After cleaning the living room carpet, it is essential to ensure it dries completely. This can be achieved by following a simple yet effective process.

Firstly, remove any excess moisture by blotting the carpet with a clean and absorbent cloth. Next, increase air circulation by opening windows or using fans in the room. It is also advisable to avoid walking on the carpet until it is fully dry to prevent any additional moisture from being absorbed. Additionally, using a dehumidifier can expedite the drying process by removing excess humidity from the air. Lastly, it is crucial to allow sufficient time for the carpet to dry completely before returning furniture or allowing foot traffic on it. By following these steps, the carpet will dry thoroughly, preventing any potential damage or complications.

  1. Blot the carpet with a clean, absorbent cloth to remove excess moisture.
  2. Increase air circulation by opening windows or using fans in the room.
  3. Avoid walking on the carpet to prevent additional moisture absorption.
  4. Utilize a dehumidifier to remove excess humidity from the air.
  5. Allow sufficient time for the carpet to dry completely before returning furniture.
  6. Avoid foot traffic on the carpet until it is fully dry to prevent any damage or complications.

It is important to note that directly applying heat sources, such as hairdryers, to the carpet may cause permanent damage. Therefore, it is best to rely on natural air circulation and patience for the carpet to dry thoroughly.

Using these techniques will ensure that your living room carpet is completely dry and free from moisture, protecting it from potential issues such as mold or mildew growth.

Don’t just open your windows, let the fresh air in and the carpet farts out.

Open Windows Or Turn On Fans To Facilitate Air Circulation

Adequate air circulation is key to ensuring your carpet dries completely. This can be achieved by opening windows and turning on fans. Here’s why it’s so important:

  • Open windows let fresh air in, which helps with the evaporation process and prevents moisture buildup.
  • Fans circulate the air, speeding up the drying process.
  • Ventilation prevents mold and mildew growth, which can happen if the carpet stays wet for too long.
  • It also gets rid of bad odors after cleaning.

Airflow helps the carpet dry evenly. Target areas that take longer to dry, like corners or high-traffic spots, to avoid damage from moisture.

For maximum airflow, place fans in different parts of the room and clear any furniture or obstacles. This will make sure your carpet dries thoroughly.

Don’t forget to open the windows and turn on the fans! This is essential for your carpet’s longevity and to prevent any issues from too much moisture.

Avoid Walking On The Carpet Until It Is Fully Dry

Keep everyone away from the wet carpet until it’s dried. Don’t rush the process. Keep pets away from the damp carpet, too. Put signs or barriers up if you need to cross the carpeted area. Increase airflow in the room by opening windows and using fans. Check on the carpet’s condition during the drying period. Different methods of cleaning or moisture exposure may take different amounts of drying time. To be sure, wait an extra day before allowing regular foot traffic. By following these guidelines, you can maintain your carpets’ condition and traverse them with confidence.

Replace Furniture And Enjoy Your Clean Living room carpet!

Replacing furniture and having a spick-and-span living room carpet is the ultimate reward for all your cleaning efforts. Not only does it give your space a new look, but it also contributes to a healthier environment. Here are some useful tips to help you achieve that goal!

  • Shift the furniture: Start by taking out all furniture from your living room. This way you can clean every inch of the carpet and guarantee a thorough clean.
  • Vacuum completely: Before putting the furniture back, vacuum the carpet to remove any dirt and debris. Utilize attachments to reach hidden corners and crevices completely.
  • Treat stains instantly: If you spot any stains or spills during the cleaning process, make sure to treat them right away. Use the proper stain removers or DIY solutions for best results.
  • Add protective measures: To keep your carpet clean in the long term, think about adding protective measures such as area rugs or furniture pads. These can help prevent future stains and harm from heavy items.

Now, let’s discuss some unique details that haven’t been mentioned yet. It’s important to keep in mind that while cleaning is essential, prevention is just as important. Regularly vacuuming your carpet helps reduce dirt buildup and extends its life expectancy. In addition, professional deep cleaning should be done at least once a year for a successful and complete cleanse.

For a more positive clean living room carpet experience, here are some additional tips:

  1. Enforce a ‘no shoes’ policy: Shoes bring dirt from the outside into your home, so setting a no-shoes rule can significantly reduce the amount of dirt on your carpet.
  2. Use door mats: Placing doormats both inside and outside entrances will capture dirt before it reaches your living room carpet.
  3. Rotate furniture regularly: Rotating your furniture regularly will distribute weight more evenly on the carpet surface, preventing excessive wear in certain areas.
  4. Invest in professional cleaning equipment: Consider buying a high-quality vacuum cleaner and carpet cleaner to take care of your living room carpet properly. These tools can provide deeper cleaning, remove stubborn stains, and enhance the overall carpet appearance.

By sticking to these tips, you can not only keep your living room carpet clean but also extend its lifespan. So, say goodbye to grimy carpets and welcome the fresh and inviting atmosphere of your living space.

31st January 2022 Interior Decor

The Psychology of Rearranging Furniture

Whether you subscribe to feng shui or you simply appreciate the difference interior design and furniture placement can make to your life, understanding the psychology behind rearranging furniture can make achieving a truly positive design for your personal space much easier. The impact that our environment can have on our mood, stress levels, energy, joy, and more can be surprisingly large and you can take control of that by proactively and intentionally choosing to rearrange furniture and interior design.

There are two main ways in which rearranging your furniture can affect your mood. The first is that the act itself of altering our environment, in this case through furniture rearranging, can have an impact on our emotions. The second is that the arrangement of the furniture and how it affects the environment in which we live can have its own impact on how we feel.

How rearranging your furniture can boost your mood

You probably have some people in your life who move furniture around in their home on a seemingly constant basis. You might think that the only reason to do so is that they become dissatisfied with the original arrangement but the psychology behind this behaviour is a little more complex than simply getting bored with how the room looks.

Having mastery over our environment can profoundly affect the way we feel. According to Psychology Today, having an impact on our environment “lifts mood, provides concrete satisfaction, and instils a sense of effectiveness”.

When we rearrange furniture and other items in our home, we can feel resourceful, clever, and creative. And this can improve our self-esteem and provide us with a sense of true control. Very often the events in our lives can feel as though they are happening to us so completing a task that gives us that control can reduce anxiety, make us feel less helpless, and soothe frazzled nerves.

Getting rid of clutter, specifically, can provide us with a boost of energy as well as mood elevation. It is a way of providing ourselves with a fresh start and letting go of old attachments and emotions. Removing clutter from our home environment can be a cathartic process that brings with it relief and joy.

You can almost think of rearranging furniture as an act of self-care. It is a feel-good option that gives us mood elevation, a burst of the best energy and creativity, and provides us with concrete satisfaction that we can see all around us once we have completed the task.

If you are clearing clutter as a way to boost your mood, it can help to identify what you truly want or need to keep hold of. As William Morris said, “Keep nothing in your house that you do not know to be useful, or believe to be functional”. Additional objects that don’t make you happy and that you don’t need to use can safely be removed to create more space for you to breathe and to fill with items that do improve your life or how you feel.

How the arrangement of your furniture can change how you feel

Photo by Dan Hadley from Pexels

Psychology Today say that if you rearrange your furniture, it can help you to achieve inner and outer harmony. At first glance, this might seem like a strange claim when you’re talking about moving some pieces of furniture around a room, but actually, the way that your furniture is arranged can have a surprisingly large impact on your wellbeing.

Let’s think about what inner and outer harmony can mean in terms of your home. When your furniture is arranged in a way that makes sense functionally, this can bring peace by streamlining how you can move about and can make outer harmony happen. And when it is arranged that makes sense aesthetically, this can bring peace by aligning your space with your identity and making inner harmony happen.

Feng shui

Feng shui is one theory behind how this inner and outer harmony can be achieved with the arrangement of your house. Feng shui can seem quite “out there” when you first look into but when you scratch beneath the surface, feng shui decorating means common sense ways of rearranging your home environment to become organised in a way that makes our lives that little bit easier and less stressful. And it doesn’t have to be expensive, so you don’t need to worry about buyer’s remorse from obtaining all sorts of pieces that you don’t actually need.

According to Rodika Tichi, “What feng shui decorating means is that you create an environment that has the best energy to support the specific activity, or activities, intended for that space”. With feng shui, the goal is to think about the purpose of that specific room and having the furniture relate to it and fit that purpose through the way it is arranged. Such specificity brings relief because you are no longer fighting against the room’s arrangement to do the activities that you need to, but instead, you are working with it.

Let’s take a look at a few examples of how feng shui can make outer harmony happen for you. Think about the traffic patterns in your home. With feng shui, the idea is that chi energy should flow through your front door and be able to travel unimpeded throughout the home, without getting blocked. People will follow these same patterns, so the layout of your home shouldn’t end at a wall or other impediment.

You also need to find reasons for the chi, or people, to pause. For instance, you wouldn’t expect someone to breeze through your front door, bypass your living room, and leave immediately out of your back door. Your living room should be a place to pause and breathe so it should be arranged in a way that directs people’s attention to the space. You can use an interesting rug or wall decoration to slow down the energy and grab people’s attention.

Natural light is also an important element, as it is for professional interior designers alike. Natural light can make you feel lighter, freer, and more energetic and it allows energy to flow easily throughout the room. And you don’t want your furniture to block any of that light if you can help it.

For example, if a piece of your bedroom furniture such as your bed is in front of the window, your bedroom may feel less like a breath of fresh air and more like a claustrophobic place. A lighting scheme or cleverly placed mirrors can help to increase the amount of light in the room if there isn’t much to work with.

Thinking about symmetry

Human beings find symmetry aesthetically pleasing, it is an innate part of our nervous system. And it comes down to how our brains process the world. They are always trying to make processing as easy as possible and symmetry is pleasing because it creates a pattern that doesn’t need to be focused on in too much depth. We find faces that are more symmetrical attractive and we find rooms that are more symmetrical attractive for the same reasons.

But this doesn’t only apply to rooms, symmetry can also enhance pieces of furniture. Take display cabinets for example. When designing or rearranging a display cabinet take time to step back, think about what to put in a display cabinet. and is it symmetrical and atheistically pleasing? Achieving this takes time, so little adjustments now and then can make the world of difference.

Photo Credit – Adobe Stock

Focusing on symmetry can be one of those easy DIY home projects that don’t require a huge amount of creativity. Not everyone is one of those creative people but we do all have a natural sense of symmetry. To rearrange your room to make it symmetrical, that doesn’t mean that you have to have two pieces of every piece of furniture. But it means that the area should be balanced.

The best way of doing this is to rearrange your room around a natural focal point. A great example of this is your front room. Here, the natural focal point will likely be the sofa. Wherever you place that will be the centre, and then you can rearrange the rest of the pieces so that they balance the sofa. Again, that doesn’t mean that the pieces on each side need to be identical. They can instead be a similar form.

It might take a little while to achieve the balance that you’re looking for with creating the symmetrical new space but you do have an innate sense of symmetry so you will find the perfect balance simply by listening to your gut.

On the other side of the symmetry debate, asymmetry does also have its place. An asymmetrical element to a room can draw the eye and be interesting and pleasing. This is one of those opportunities to hone your aesthetic which can help you to feel creative and accomplished. You can have your furniture relate to your personality and can be a true feel-good option for you every time you walk into the room. And it can help you to hone your aesthetic and identify your personal sense of style.

Reducing clutter

We have already covered the fact that the act of clearing clutter can have a positive impact on how you feel. But reducing clutter in a meaningful way can leave you with a room that makes you feel good whenever you spend time in it.

Additional objects that don’t totally align with the room or improve how you feel can drag the overall feel of the space down and make it feel unwelcome and stressful. This comes back to how we process the spaces around us. When there is too much going on, this can give us sensory overload which can increase our stress levels.

This isn’t to say that everyone should live in a minimalist paradise. Instead, improvement occurs when you have objects and furniture that relate both to the room itself and to how you feel. And you don’t even have to throw everything away. Re-purposing the objects you already own can completely alter the space.

For example, if you have photographs randomly dotted around the room, you can rearrange them by creating gallery walls instead, which can make the space more organised and make the photographs themselves much more pleasing to look at.

Again such specificity brings relief because it means that there is a purpose and deliberate design behind the way that your space is arranged, and this can help you to feel calmer. And by re-purposing the items you already own, you can identify what you truly care about both in terms of sentimentality and in terms of how to hone your aesthetic. You also won’t get buyer’s remorse from getting rid of something that deep down you love and replacing it with something that doesn’t bring you joy.

Decluttering on a regular basis in this mindful manner can be thought of as a form of apartment therapy and it will also slowly bring you the house that is perfect for you and your needs. Improvement occurs over time for so many things and honing the arrangement of your house is exactly one of those things.

The bottom line

If you feel unsettled in your bed or your living room or you easily get stressed in your kitchen, moving things around in your house in a way that makes sense can do wonders for your emotions. We all feel like we have too much “stuff” but that may not always be the case.

By being mindful in the way you rearrange your personal items, you might find that you end up being able to hone your aesthetic and identify the things that are truly meaningful to you (and find the ability to decide to get rid of the other things that aren’t). There is a metaphor there and as cheesy as it may sound, going through this process with your house can truly help you to go through this process with your inner self.

Looking for more interior design inspiration? Looking for that next DIY project? Head on over to our blog and read some of the fantastic pieces we have covering multiple subjects.

10th September 2021 D.I.Y

Exposed Piping: Your Channel for a Chic Home!

Gone are the days where you should be ashamed of your exposed pipes putting off the visitors – these conduits give the finishing touches to any modern home needing that particular spice.

Aside from being a great accent with just minimal improvements, exposed piping offers something more that is valued by the people of today: convenience. Not only are pipes in the open easier to clean, but they can be used in different ways if you’re keen enough. What’s more?

If you have a particular eye for a specific theme, these displayed tubing can provide you with the subtlety and a pop of uniqueness perfect for your standout home.

Get your exposed pipes out because the industrial setting is extremely in!

Make Your Bathroom Bloom

There are certain hotspots in your home that require more ducts than other sections. While you may take the extra mile to cover them, taking the easier route of maximizing their presence can provide you with a lot more design ideas to play with. Here are some of the suggestions for exposed piping that can quickly turn your bathroom from “no” to “whoa!” with a few touches:

Bare your Shower

Photo Credit – Adobe Stock

Why should you be the only bare one out in the shower? Opt for the bare it all option for your latest shower installation and observe the drastic change in your bathroom atmosphere! While most people make their bath lines invisible, stand out from the rest by making the most out of your exposed piping. Either choose a minimalistic look that brings out a subtle highlight, or go all out with a dramatic touch with bold colours.

Don’t Blink in the Sink

Photo Credit – Adobe Stock

You won’t need to let your personality down the drain when you choose to accentuate your exposed piping in the sink. Sink and shower taps can have a life of their own when you choose to show them off! Attaching some lights in the sink pipelines is a great start to pave the way towards being effortlessly chic!

Sink pipe ideas are not even limited to the bathroom, as you can add a quirky element in your kitchen by highlighting the water lines. Not only does it add a personal touch to your kitchen area, but it also doubles up as a rack you can hang items with.

Turn Pipes into an Asset

Photo Credit – Adobe Stock

Sometimes, your water lines are positioned in the most random places. Don’t let it stop you from making a statement, though. With the right colour finish, you can go with any theme of your preference. Into that modern, contemporary look? Highlight your thick tubes above with a matte black hue for a tremendous everyday contrast. How about hand-picking a bright red shade for that eye-catching retro finish?

Your bathroom pipes shouldn’t always end up as dull; you can always add the right spice into the mix.

When in Doubt, Accessorize!

The most random pipelines don’t always have to blend in – showcase your keen eye for details by mixing fashion and functionality in unexpected places. Improve your home design and up your decorating game by hopping in on the exposed piping trend. Throw in some style, and you’re in for a ride!

Light it Out!

Photo Credit – Adobe Stock

You can deliberately have some pipelines exposed in your kitchen (or any area of your choice) to show off your trendy personality! Light fixtures made from exposed piping can do more than light up your chosen spot, it can also convey a lot more things – like your ability to give glamour to everything, even to unnoticed features.

Be Bold with Gold

Midas has the golden touch; why can’t you? Exposed piping can either be thick or thin, but that shouldn’t let you down when you’re going for a minimalistic design with just the right pop of hue! Some units have thick water lines up their ceiling, either for emergencies or there is just no other space available. Either way, bright gold conduits can liven up your living space. You can even choose any other colour; make your home your own.

They can even be seen out of every nook and cranny, including the space allotted for your reading blues. Still, you can never go wrong with the steampunk design, no matter how delicate. Give a kick to your interior decorations by making the displayed electrical and water channels the library’s main focus.

Pipes Don’t Just Hold Water

Photo Credit – Pixabay

Exposed piping designs are not just limited to walls and ceilings. In fact, you can definitely use them to support something. How about a wine holder, but make it a statement?

Styles of Pipes

Exposed piping can give you an infinite list of designs that can create different atmospheres in your own home. Be it retro, industrial, modern, or vintage, choosing the right style of conduits is a vital decision you shouldn’t miss out on.

Here are some pipe styles to consider when making changes around your space:

Copper Pipes: Copper is a popular choice not only because of its versatility, but also because of its durable properties. As the premium choice in plumbing, copper pipes’ main selling point is strong components that won’t contaminate your water source. What’s more? You can definitely leave them as they are because copper pipes are chic enough already.

PVC Pipes: These plastic pipes are usually used for water drainage, but can typically function all around. This type of channel makes a great exposed piping decor because of its longevity and resistance to rust. Color them black or any shade you want and watch as the plumbing lines transform the scene. What’s more? PVC pipes are great for DIY projects – consider this when you want to have a unique home that is one-of-a-kind.

PEX Pipes: Similarly made out of plastic, PEX pipes are known for their flexibility. As they can be adjusted to fit into tight places while still maintaining the durability needed for functionality, these pipes can be an addition you are looking for all along! No matter what style of conduits you use, what’s important is you find the drive to appreciate the potential of exposed piping. Channel your inner designer by giving life to the lines that are a fast-growing trend!

26th August 2021 D.I.Y

How & Why You Should Paint Your Tired Kitchen Cabinets

Painting Kitchen Cabinets - A Guide
Breathing new life into your kitchen doesn’t have to cost a bomb!

There is nothing that spruces a home quite like a new kitchen but, as we all know, a new kitchen can be expensive. The average cost of a new kitchen in the UK is £8,000 and £5,000 of that is the new cabinets. If you don’t want to spend quite that much but still want to update your kitchen’s look, then why not just paint your kitchen cabinets? It costs around £80 per cabinet, so you could end up saving thousands. It is frankly amazing the difference adding a lick of paint can make to your kitchen, and your home. But how do you even get started? What paint should I use? How do I prepare for this home improvement task? Well-read on for our handy, informative guide on how to paint, kitchen cabinets.

Make sure that your cabinets are in good enough condition to be painted

Old Kitchen Cabinets

Unfortunately, some kitchen cabinets just aren’t in a good enough state to be renewed. If your cabinets are fragile, the bottoms are starting to sag, the doors aren’t hanging right, or the veneers are starting to become delaminated, it might be better for you to bite the bullet and shell out for some new ones.

You should also take into account the material that your cabinets are made from, this is important as wood cabinets are perfect for painting. If your cabinets are laminated, don’t worry, you can still paint on this material! Just look out for any peeling, cracked or bulking, as painting over these blemishes isn’t going to make much difference. If your laminate cabinets have these signs, you may need to replace them completely. But you can also opt to use your old cabinets for other upcycling projects!

Decide what type of paint you want

Types Of Paint Oil Paint, Matt Paint, Silk Paint

Let’s get the fun bit out of the way first: choosing the look you will go for. This is actually an important decision because painting kitchen cabinets is a big job and you really don’t want to end up having to do it twice in quick succession. The colour scheme is, of course, a matter of personal preference but choosing the right paint does have some impact on how easy the cabinets are to paint and how durable they will be.

Matt/chalk –

These types of paints can give a great rustic/country kitchen look and they are easy to paint with. This type of paint will stick to most surfaces with little to no sanding. They are less durable, however, and are more prone to chipping and scratching, so you may end up having to redecorate slightly sooner than you would have liked to.

Satin –

With its smooth finish and shiny sheen when it’s dried, satin paint is a fantastic option to pain your cabinets with thanks to its hardy nature and is holds up when washed. But this type of paint does not hide blemishes and imperfection on the surface or when you have to do touch ups.

Gloss –

Gloss paint is incredibly durable and reflects light with excellence, gloss pain also has a high resilience to moisture thanks to its density. If you choose gloss paint preparation is key as gloss will show every imperfection upon application, make sure that the surface is clean and smooth before you apply.

Oil Based Paints –

Also known as solvent based paint, this type of paint is often used by professionals for its hard finish that is durable and resists moisture and water than other paints. This type of paint is perfect for stained cabinets. If you are wanting a finish that will look great for years and years, an oil based paint is your best option. While this type of paint offers great resistance, this comes at the price that oil based paint take a long time to dry, and we mean a long time. So, if you wish to paint cabinets with oil paint, make sure you are prepared to have a large drying area and don’t mind waiting.

Latex Paints –

Latex paints are your friendly easy to use paint that requires little prep beforehand such as priming, this type of paint latches onto wooden surfaces such as your cabinet frames with ease. This style of paint also comes in a range of finishes, giving your cabinets texture. The only drawback with latex paint is its durability, with it being thin also it is easy to leave brush marks.

Deciding whether to strip your kitchen cabinets

The great debate: to strip or not to strip. There is a school of thought that says you should always fully strip off the previous layer of paint before you put a new one on, but doing so is quite time consuming and may not always be necessary. The purpose of stripping is that a painted surface is much less rough than a bare wood surface, which means that a new layer of paint will adhere to it less well. But you can make a painted surface rougher, and easier for the new paint to adhere to, by sanding it down.

Sanding down painted cabinets is the go-to method of stripping a cabinet door but do be careful as to much vigorous sanding can damage the wood lying underneath. So, when sanding wood make sure to sand evenly to avoid making unwanted delves and gouges. You can use either sandpaper or power tools, but the advice remains the same, keep a consistent level of sanding to avoid any accidents.

You can also use a hot air gun, this method removes paint quickly and with ease, but you must be incredibly carful as you can scorch the wood! Also do note that a hot air gun removes paint and cannot be used to remove varnish as it will turn the varnish into an almost glue-like substance that will ruin your cabinets.

Using a chemical stripping agent is another option, this is best for intricately designed cabinets and cabinets that have multiple paint layers present while also providing the best results! When using a chemical method, you must take care. Read the safety instructions thoroughly and make sure you have all the equipment needed.

It is important, however, to make sure that you thoroughly clean and degrease the surface before you start painting on it. Cooking creates so much grease in your kitchen, which sticks to the surface of your cabinets, and this will make it much harder for your new paint to stick.

It’s probably a good idea to take off all the doors

Not everyone takes off their kitchen cabinet doors, and instead use masking tape to cover hinges and other metalwork, but it is usually a good idea to take the doors off berfore painting them. It is going to be much harder for you to do a neat and professional-looking job with the cabinet doors in situ, and the whole process will be more difficult and stressful.

If you’re able to, it can be wise to invest in painter’s pyramid. Painter’s pyramids will suspend the door in the air so that you can paint the front, back, and sides all in one go without having to wait for it to dry before you turn it over. Using painter pyramids in addition to your setup, regardless of how you choose to paint your cabinet doors, Painter’s Pyramids are a simply a must-have.

It’s probably a good idea to take off all the doors

It is also a good idea to clearly label exactly where each door goes. You might think it’ll be obvious to you where each door came from, but when you’re standing over a sea of kitchen cabinet doors it suddenly gets a lot more difficult. We recommend drawing a diagram of the kitchen and labelling not only the doors but the corresponding cabinet where the cabinet door has come from. This makes it far easier when reassembling your kitchen cabinets, as with any D.I.Y paint job the more your prep that better the outcome.

Prep the room before you start

Painting your kitchen cabinets is a big job and it takes a relatively long time, so you need to be prepared before you start. You may well not be able to use your kitchen as you normally would, so think about how you are going to be eating while the job is happening and get everything ready and in place.

If you have the space that doesn’t get used as much as the kitchen and has ample room to dry your cabinet doors, setup in there as the kitchen is usually a heavy traffic area within the home and it can be difficult to complete this job within confined spaces.

You will need to empty all of your cabinets of their food and products and clear all of the kitchen sides of their appliances. Then cover all of the fixed appliances with sheeting, as well as the counters, and use masking tape along the edges of the cabinets to protect your walls. Remove the cabinet doors if you are going to, and take out their hinges and handles.

If you are lacking the appropriate space or cannot remove them cover the hinges with masking tape, but do take the handles off.

Paint the cabinets!

You will usually need to do around one or two coats unless you are going for a much lighter colour than you currently have, in which case you might need more. Before you begin, you should use a primer and wait for it to dry. Then start by filling in the nooks and crannies before moving onto the main part of the cabinet. Always work from top to bottom when painting the cabinets, and make sure that you are painting across the grain rather than with it. Most people use a brush and/or a roller, but if you want a smoother finish, you could opt for a spray gun instead if your local paint store or D.I.Y store sells them. Each has their own pros and cons, which we talk about below.

Paint Brush –

The old faithful paint brush is usually the first port of call when you are deciding to go ahead painting cabinets. Brushes can be a natural bristle brush or can be a synthetic bristle brush, either is fine for painting your cabinets also your standard bush works with nearly all types of paint including oil based paints, latex paints, etc.

Pros –

Come in range of sizes

Cheap & works with nearly all paints

Perfect for small detailing such as to paint edges and getting into nooks

Cons –

Bristles breaking off and mixing with your paintwork

Considerably slower painting large surfaces in comparison to a roller

Roller –

Using a roller for a job like this may seem like overkill for painting doors, but if you have especially large cabinet doors, a roller is a perfect option for speeding up the job while spreading an even coat across the surface. Rollers also can come in a variety of materials such as foam, felt, polyester and multiple others.

Pros –

Speedy application of paint for those larger areas that would usually take up more time using a traditional paintbrush.

Smooth finish, even and consistent paint application, leaving a seamless appearance.

Less labour intensive

Cons –

Some high-quality rollers can be expensive in comparison

Can’t be used to paint smaller areas such as nooks and bevels in the cabinet design.

Paint Sprayer –

If you want to save time while getting a professional finish, then a sprayer might be the answer that you are looking for. As using a spray paint gun can save you loads of time from having to put on multiple coats of paint as you just spray paint!

Pros –

Considerably faster paint time.

Paint dries faster.

Even paint application.

More professional looking result

Cons –

Cleaning the paint sprayer takes longer than brushes or rollers.

Expensive

Any touch ups can only be done with the sprayer

All these items can be found at your local hardware shop or can be easily purchased via online retailers like Amazon.

Now that you have a more information on the ways that you can paint, take your time and see if you have the budget or the time to get started on this paint job.

Wait for the paint to cure

It is tempting to get your kitchen back in order as quickly as possible, but it really is worth your while to wait for your wet paint to cure. If you don’t, you could end up with smudged paint, in which case you will have an even bigger job on your hand. When selecting your paint, take into account on how much time your paint will take to dry. Different paint types take different lengths of time to cure, so make sure that you read the instructions carefully, and use your judgement to make sure that it really is ready!

Painting Cabinets – The bottom line

It is definitely possible to completely update your kitchen on a budget, just by painting your kitchen cabinets. It is a big job, but it can save you a lot of money, so it is often well worth it. Just make sure that you have everything ready before you start and have a good feel for how to paint kitchen cabinets, and you will have a kitchen that feels just like new in no time!

Just remember to take your time as it isn’t a race, flying through this job rushing along every step of the way is a sure-fire way to be left with, yes, a revitalised kitchen but all the tell-tale signs of a rush job, scuffs, sloppy paint application and a blotchy uneven finish. Slow and steady wins the race as you want the best possible result, preparation is key and carful application of paint is vital for this project to go swimmingly.

23rd October 2019 DIY Interior

How to Create Additional Storage in Your Bedroom

Have you ever found that your bedroom is just overrun with items that don’t have a place to go? If so, you may want to consider how to best improve or enhance the way storage is installed in your bedroom. Added storage, in small or large amounts, can improve the way your bedroom functions as a whole. For that reason, here are some ideas on how you can work to create additional storage in your bedroom: 

Install Shelving 

There is one surface that massively under performs in your bedroom; the walls. Often these are left bare and empty even though in every other area of your home you would have shelves. That is why, then, installing shelves in your bedroom can be a simple way to increase your bedroom storage. 

Shelving can also be extremely decorative depending on your choices. As you can either use the shelves for practical use or art, decorative features or otherwise as well. Your shelving choices don’t necessarily have to be wooden planks on a wall either. 

shelving
shelving

Try quirky shelving choices that will catch the eye, for example, a selection of hangers linked up can be both interesting and good to store various items (not only clothing), you could also add a storage trunk underneath the shelf in the unused space making even more room. The more creative your shelving choices are, the more interesting it will be and the more storage you can inject into the room. 

Beds with Storage 

A bed is the biggest item of furniture in your room and so can be severely underused. If you don’t have storage under your bed or a storage bed, then you are missing out on a very lucrative storage space. 

This can be done via DIY as you can easily create your own under-bed storage boxes. You can either re-use old boxes, cutting them down to size, or create brand new ones bespoke for the space you have available. Though this fully depends on your level of DIY skills and whether you have the urge to create something yourself. 

Of course, you do run the risk of making under your bed a little bit of a cemetery of unused items or knick-knacks. So, the best practice is to make sure you sort or clear through your under-bed storage at least once a year. This way you don’t waste space in the long-term either! 

Optimise Your Wardrobe 

The wardrobe is a big space and a necessary part of our bedroom storage options. However, it can be very badly used in terms of saving space and optimising storage opportunities. The fact is that your wardrobe is more than just hanging space and one or two shelves. 

First things first: clean out the wardrobe. Get rid of old clothes you haven’t worn in years, clean the accumulated dust and make sure that it is all sorted before attempting to put anything back in. 

Then, you can work on adding more storage. A good first step is to add an extra hanging rod. You may have one already, but don’t be afraid to add a double-decker of hanging rods to optimise that side of your wardrobe. If it’s particularly tall (in the case of an in-built wall wardrobe especially) this can be a simple way to add more hanging space. Next, you can consider adding more shelving as well – though you should be a little more liberal with this. And if you do have shelves, make sure your clothes folding is optimised for the best use of space. 

Another good idea is to have a seasonal shift in clothing. Your winter wardrobe doesn’t need to be hanging up through the warm days of summer, pack it away out of sight instead! And then switch it back in once the chill starts to set in again. 

Also, don’t forget that your wardrobe doors also have plenty of room to have extra storage installed there. You can buy or create a shoe storage hanger, for example, which can be used for a variety of other knickknacks and storage. View more ways to creatively hide the ugly parts of your home!

Storage Boxes/Bench 

When it comes to the bedroom, freestanding pieces of furniture need to be limited; otherwise, you end up with a very cramped space. That is why you may do better with a number of storage boxes instead of a dedicated piece of furniture. As these can often be tucked away or stored in out-of-the-way spots. 

Or, for example, you could invest in a storage bench. These come in many shapes and sizes, as well as in fabrics such as luxury velvet furniture pieces or even leather – it depends on your overall bedroom decor or theme. 

Use A Storage Facility

I have noticed a lot of self storage services pop up around the country where people can store away their things in a secure unit and even hold their own key. Some of these services offer a free pick up service too if you hire storage over a certain period of say 3 months. This is not ideal for things you regularly use but serves a purpose for a few situations.

Install Organisers in Drawers 

Is your sock drawer a little bit of a mess? Socks bulging, underwear falling out whenever it opens or something along those lines? Then your drawers may need a little bit of organisation. A drawer organiser can help to create neat, simple, partitions in your drawers which can actually be very useful. 

chest-of-drawers
chest-of-drawers

A drawer partition can separate your socks from your underwear, but it can also be used in several different drawers as well. You can separate your pyjamas from your day clothes, your t-shirt from your shorts, you can even separate your knicks from your knacks. A drawer partition can also be easily made with a few simple pieces of wood as well. Or there are a few shops which may have a solution that fits as well. 

And there you have it! Lots of different techniques that you can use to add more storage space to your bedroom, either in isolation or collectively, depending on your storage needs. With both DIY and shop-bought options, there’s no reason you should be lacking space in your bedroom. So, start increasing your storage today. For more decluttering info, check out our ultimate decluttering guide!

9th April 2019 D.I.Y

Ultimate Decluttering Guide

Decluttering is one of the habits that you should want to have in your life. There are already millions of homes filled with so much clutter that their houses already look like a hoarder’s. For generally clean people, this is not a problem but for the majority of us, clutter is a serious problem.

We all want clean and spacious houses but the truth is our lifestyle and consumer behaviour does not allow us the ideal situation. The idea of decluttering can be quite too much especially when you realize the sheer amount of items that you have.

According to the LA Times, the average households over 300, 000 items. This is an astounding number of items given that the average space of a house is just getting smaller and smaller.

A minimalist lifestyle is ideal especially for young professionals who still have no kids. Most of them need only the bare essentials so it would only be best to start decluttering from now.

Here is a comprehensive decluttering guide that you can follow to ensure that your house does not look like a hoarder’s house.

Start Small

Decluttering can be overwhelming. Items piling up do not get rid of themselves and often, this clutter can hold up to months and months of unnecessary items. Start off with a small space just to get yourself going. Tackle a kitchen counter or a dining table first and then work towards the bigger space afterwards. You need a sense of motivation to keep yourself inspired. Cleaning can be a boring, back-breaking task and keeping yourself motivated will be hard.

Perhaps starting with only your walls can help, since this is the first thing that draws everyones attention, this way you’ll be motivated to do the rest of your home once you start noticnig the benefits of decluttering. Because you’ve now got free wall space, how about expanding your room with wall mirrors and creating a space that feels large, warm and not so claustrophobic anymore.

Work Slowly and in Increments

Work Slowly and in increments so you do not burn yourself out. Instead of using up the entire day just for decluttering, make it a habit instead. You can do an hour or two per day just for cleaning up or you can spend an afternoon on a free day. Don’t rush yourself. It’s better to have steady progress than a rushed success.

Get Organized

After cleaning and organizing each area, decide immediately what you want to do with the items that you’ve deemed unnecessary for your daily life. Create 4 piles: For Self-Storage, to throw away, to donate and to sell. One mistake that often occurs from people deciding to declutter is that after they declutter one area, they just bring the items to another area. Make sure that the items you decide to throw out goes straight to the trash or you’ll just end up with a big pile of stuff that you can’t throw away.

Rent a Storage Facility

     “One of the best actions to do when decluttering is to rent a storage facility” – WhatStorage?

Let’s face it. We all have items inside our homes that we can’t really part with. These items hold too much sentimental value to us or may still be useful in the future. However, keeping them inside our houses can be too troublesome. Renting a cheap storage facility to store them in would be the best solution for you. Self-storage facilities are a cheap and versatile solution to your storage problems. You can find a storage facility almost anywhere.

Enjoy Decluttering

Try to enjoy the little things about decluttering. For example, having a spacious house afterwards. Once you start enjoying, decluttering would very much be easier and faster. Focus on what is important and always remember why you decided to declutter.

It may be hard to let go of your items especially those with special memories associated with them. However, there is an adage, “Keep the memory but let go of the items.” This means that you can still reminisce without having to keep your house filled with unnecessary items. Here are some tips to help you let go of the items that you have.

Whilst decluttering, don’t forget to take into account what else you may need to add to your home now that you’ve freed up plenty of space. One great way is by Re-Designing your Home with Hand Carved Furniture to give it a more complete look now you’ve removed all the useless items from your interior.

Be informed of the 80/20 Rule

The 80/20 rule is the phenomenon that occurs in most people. It states that out of the 100% of items that we own, we only generally use 20 percent of it in our day to day lives. This can hold true for clothing, games, computer parts, books, tapes, toys, etc. Now that you are aware of this, make sure to get rid of the 80 percent that is basically just clutter.

Don’t Think About Their Past Value But Their Present/Future Value

The Wall Street Journal recently published an article that on average, Americans spend over $1.2 trillion annually on unnecessary items — this ranges from decorative items to stuff that they impulsively buy and do not use.

Often, people don’t get rid of their items because they are aware of the item’s past value. However, this should not be the case. Look at your stuff with its present or future value instead. There is no use in thinking of value that has long past.

Is the item still worth anything to you? Does it still have utility? If not, then what is it even doing inside your house?

Check Your Appliances If They All Work

Another factor that adds up to the clutter in our homes is broken appliances that “we swear to fix on our free day.” Let’s be real. Most of these appliances are too broken to fix or would cost less to buy a brand new one. Throw them out and enjoy the extra space.

1st April 2019 D.I.Y

Home Improvements: What to do with shells from the beach

When you think of home improvements, you would most probably think about them costing you a dime or two. Well it doesn’t have to be that way, all it takes is getting your hands dirty, some elbow grease and our help to improve your home in a number of ways by using the seashells from your favourite beach.

You’ve most probably collected shells before with your little one, perhaps for one of their own art projects or easy shell crafts they can do at home. But we bet you’ve never collected them to improve your home. There are plenty of ways you can use shells to add attention to detail in a bathroom or dining area, keeping you up to date with the latest home decorating trends 2019.

Here are just some of the things you can do with them.

But before we get into that, you’ll want to know how to properly clean your shells so you can get a spotless look which will match perfectly with the rest of the home…

How to Clean Shells from the Beach

There’s actually quite the debate always going on about how to clean seashells from the beach, do you use baking soda? Regular fresh water? How about the water the shell was found in?

There are many different opinions across the web, here is ours;

MURIATIC ACID, shells will finally have their natural colour back and you’ll see a more beautiful side to them!

But don’t worry, muriatic acid for those of you who don’t know is just another word for hydrochloric acid. Which can be found in many household products such as toilet bowl cleaner and tile cleaner. This exact acid can be used to clean your shells.

Here is a safe solution for you and your shells and how to get them clean;

  • ¼ cup of muriatic acid and ¾ cups of water.
  • Dip for a maximum of 3 seconds and neutralize in fresh water straight after.
  • Avoid contact with skin and stainless steel

If you want to see the process of cleaning shells from the beach and you want to be mesmerized by the dirty to clean to shells, check out the how to bring back color to seashells tutorial.

How to make Seashells shine

It’s one thing cleaning your shells and making them look like they would in the sea, but it’s another thing completely to have them featuring their natural shine. With some mineral oil, you’re going to want to rub over the shell to give it a deep clean, it does 2 things:

  • It restores the natural shine of the shell
  • It preserves the shell

How to keep Seashells shiny

Finally you’ve got that shine back, but how do you go about keeping that beautiful shine so that after you’ve created your masterpiece, you can be happy knowing nothing is going to ruin ti design?

You can spray satin-finish polyurethane or coat with clear nail polish. Although this may be a lengthy process for each shell you have, you’ll be able to reverse the shells organic shiny look and give it an even extra glossy shine.

Decorating with Seashells in a Bathroom

Just like using old storage pallets to create your very own DIY furiture, there are plenty of ways you can use seashells to bring out a natural vibe in your home, especially in the area of your bathroom where these shells will fit the most.

Here are some end results, from the people who are already using this cost efficient way of bringing stylish design to their homes.

Seashell Display Jars

You’ve probably seen plenty of these from the image above, seashell display jars are one of the most common and probably the most stylish way of bringing the beautiful gems of the ocean into your home. Without compromising on the design of your home.

The best part about beach in a jar is that there is no limitation to what you can do and no two jars look the same so this way you can have something unique that only you own.

Jars with sand and shells are not limited to a bathroom, although we think they do look the best in there, these wonderful creations can also work to work with their environment, making them great in kitchens and lounge areas that feature ocean colours.

Now, we bet you’re excited to go ahead with going to your local beach, picking out some decorative shells and making your own sand and shells in glass jars. But we also know you’re probably wondering how the hell you go about gluing your shells to glass? Or how you even managed to get the sand to stick without it looking complete without purpose?

Read on to get some pro tips on how you can achieve your seashell in a jar dreams.

How to Glue Shells to Glass

Less is always more, as they say. Applying glue to shells is no different, there are many different techniques and practices for going about this. You’ll need some form of hot glue, typically that will from one of the craft glue guns from your local craft store.

Once acquired, you’ll want to squeeze a sizeable amount of glue on the outside of the glass, then you’ll want to take your best looking seashell and press down firmly on the glue. Hold for a minimum of 60 seconds to ensure the glue can harden around your shell. Repeat this process till you’re happy with your final design.

How to Glue Sand in a Jar

It’s important you get the consistency right, with to much glue you’re going to look you made this with a blindfold on, alternatively with not enough glue your sand won’t stick to the glass and you won’t get the desired effect.

To get the desired look, you’re going to want to follow our golden rule:

For every 1 cup of sand, you’ll want to have 1 cup of glue.

Doing this, you should get a thick mixture, with a little mixing you’ll be ready to add your gooey sand to the surface of your jar, spread out evenly for a balanced finish.

Other creative uses for seashells in your home

Beyond the basics of using shells and sand to make glass shell jars, there are other creative uses for seashells that you can use within your home, outside of the bathroom area.

As a side note, seashell crafts for adults is fun but it’s even more enjoyable once you get your kids involved. Allowing them to help you create something that is going to be a cherished part of your home for potentially many years.

Seashell Display Case

For collectors out there, this is one of the ways you can proudly put your favourite seashells on display.

These seashells were probably left over from your glass jar projet, you’ve probably thought to yourself ‘these are just too beautiful to use’ and instead just threw them in a draw never to be seen again.

Making something out of them and putting them on display gets you the best of both worlds. You can admire a natural resource whilst adding a personal touch to your home, wherever you choose to feature your brand new display case.

There are many ways you can come up with to add shells to a display case, one of them would be to use a wooden, sort of like a larger display cause would be used from and assigning compartments for your favourite seashells. Maybe in order of size, type, or even colour.

We have yet to cover how you’re going to manage to add shells to the display cabinet, so here’s how to glue shells to wood.

How to Glue Shells to Wood

Just like glueing to glass, you’re going to want to get a hot glue gun from your local craft store, so that the shells you attach will stay attached. However it is advised that you clean your wood before hand as dust and other particles can be visible even after the job has been completed, mostly this goes unnoticed with glass surfaces.

Seashell Shadow box

Similar to display cases, using a shadow box to display your shells will offer you another way of bringing in the natural design. However, these should be used as an alternative if you truly take pride in the design of your home, and you’re looking for a way to add shells that won’t compromise the general design.

This is because, unlike display cabinet, shadow boxes feature a more organized finish making them ideal for people who like to have a modern home looks like each decor piece was placed with purpose.

Shell Shower Curtains

You’ll most probably see some form of shell shower curtains in your home, but I bet they are all printed designs and not the real thing. Well why not use the real thing and create some fabulous curtains from them?

Whether you start off with a blank curtain or you use a shell design that is going to compliment the actual shells which you’re going to feature. However you choose to go about this fun craft, make sure to glue everything down properly and have some fun with it.

Seashell Animal Crafts

With seashell crafts, with usually think about larger designs, whether that’s shell curtains or seashell jars. But what about little dinky ornaments that can fit on any tableside in your home that can bring you some unique style that has been made from seashells?

These little dicnky ornemants are seashell animals, whether you’re a lover of foxes, ladybirds or any other animal in existence, we are sure you can achieve the design with a couple of sea shells, some paint and a great deal of imagination.

How to make Seashell Animals

Now, this would depend on what sort of animal you’re looking to create. Thankfully we live in the age or internet so having resources for this information won’t be too hard to find, however we want to give you a head start, here are some tools you’re going to need if you want to create one of these beautiful pieces for yourself.

  • Hot glue gun
  • Some of your favourite paint and paint brushes.
  • And a creative mind

If you’re unsure what to create, perhaps you don’t have a favourite animal or you’re just looking for a unique idea, here is over 100 seashell animal crafts to inspire you.

Broken Seashell Crafts

When we’re looking for seashells, we usually look for the most pretty and eye catching ones, I mean that’s just the way we are naturally as humans to seek out the most beautiful thing as possible.

But that means we waste materials that could add to our home, such as broken seashells.

Broken seashell crafts are unique in the sense that they take something that seems to be at the end of its life time, soon to be washed away or thrown away and turn it into something that is elegant yet charming and a piece that could become a great addition to a bathroom, lounge or bedroom area in a home.

Next Page »

Primary Sidebar

Keep up to date with our latest posts

Subscribe to our newsletter for free and be the first to be notified about all our latest content!

Welcome to A2B Crafts

At A2B Crafts we make it our duty to bring you the latest in shabby chic design and Do it yourself furniture. If you’re new to the craft or a long time expert, A2B crafts is perfect for you. With every new post we hope to bring you something new and exciting which gives you the inspiration to try something new with your home
furnishings. If you feel inspired after reading any of our posts or you’ve even tried these tips for yourself, please feel free to let us know through our contact page or our other social channels!

Footer

Stay Connected

  • Facebook
  • Instagram
  • Pinterest
  • Tumblr
  • Twitter
  • YouTube

Contact Information

Tel: Thursday – Saturday 01328 856001

or mobile 07917606039 at other times

Address: Wheelspeed Unit 1, Cattle Market Street, Fakenham, Norfolk, NR21 9AW

Please feel free to contact at anytime, however at present we work part-time so may not get back to you immediately,
but will make contact as soon as possible.

Categories

  • DIY Interior
  • Furniture Upcycle
  • Hobbie Crafts
  • Interior Decor
  • News
  • D.I.Y
  • Garden

Helpful Links

  • Contact Details
  • Conditions of Use
  • Privacy Notice
  • Shipping & Returns

Copyright© 2025 · Cookd Pro Theme by Shay Bocks