• Skip to primary navigation
  • Skip to main content
  • Skip to primary sidebar
  • Skip to footer
  • Home
  • Interior Decor
    • D.I.Y
    • DIY Interior
    • Tips
  • Hobbie Crafts
    • Furniture Upcycle
  • Garden
  • News
  • Write For Us
  • Contact Details

A2B Crafts

DIY Crafts & Upcycling

DIY Interior

10th September 2021 D.I.Y

Exposed Piping: Your Channel for a Chic Home!

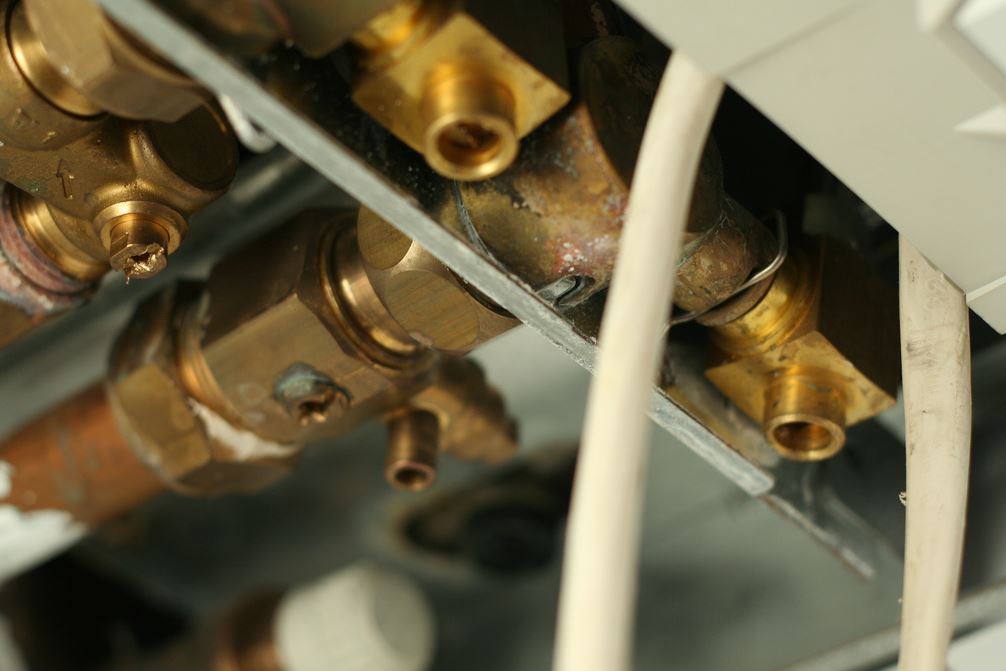
Gone are the days where you should be ashamed of your exposed pipes putting off the visitors – these conduits give the finishing touches to any modern home needing that particular spice.

Aside from being a great accent with just minimal improvements, exposed piping offers something more that is valued by the people of today: convenience. Not only are pipes in the open easier to clean, but they can be used in different ways if you’re keen enough. What’s more?

If you have a particular eye for a specific theme, these displayed tubing can provide you with the subtlety and a pop of uniqueness perfect for your standout home.

Get your exposed pipes out because the industrial setting is extremely in!

Make Your Bathroom Bloom

There are certain hotspots in your home that require more ducts than other sections. While you may take the extra mile to cover them, taking the easier route of maximizing their presence can provide you with a lot more design ideas to play with. Here are some of the suggestions for exposed piping that can quickly turn your bathroom from “no” to “whoa!” with a few touches:

Bare your Shower

Photo Credit – Adobe Stock

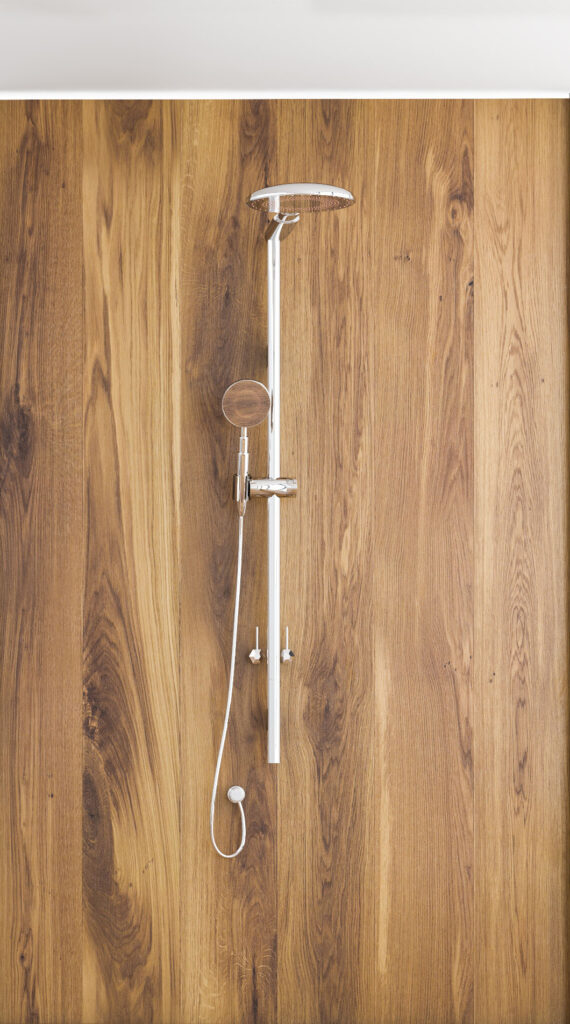
Why should you be the only bare one out in the shower? Opt for the bare it all option for your latest shower installation and observe the drastic change in your bathroom atmosphere! While most people make their bath lines invisible, stand out from the rest by making the most out of your exposed piping. Either choose a minimalistic look that brings out a subtle highlight, or go all out with a dramatic touch with bold colours.

Don’t Blink in the Sink

Photo Credit – Adobe Stock

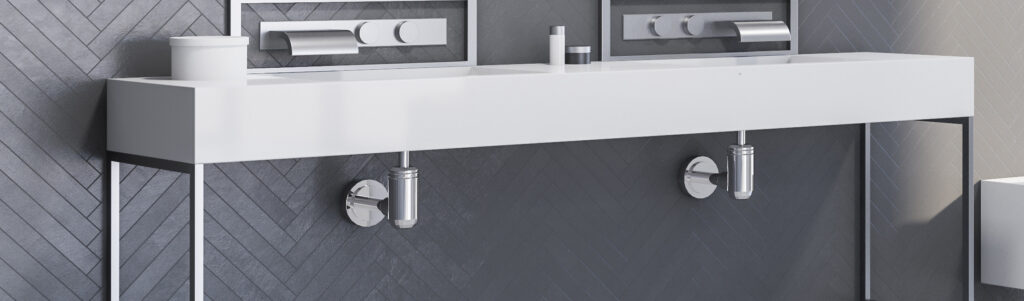
You won’t need to let your personality down the drain when you choose to accentuate your exposed piping in the sink. Sink and shower taps can have a life of their own when you choose to show them off! Attaching some lights in the sink pipelines is a great start to pave the way towards being effortlessly chic!

Sink pipe ideas are not even limited to the bathroom, as you can add a quirky element in your kitchen by highlighting the water lines. Not only does it add a personal touch to your kitchen area, but it also doubles up as a rack you can hang items with.

Turn Pipes into an Asset

Photo Credit – Adobe Stock

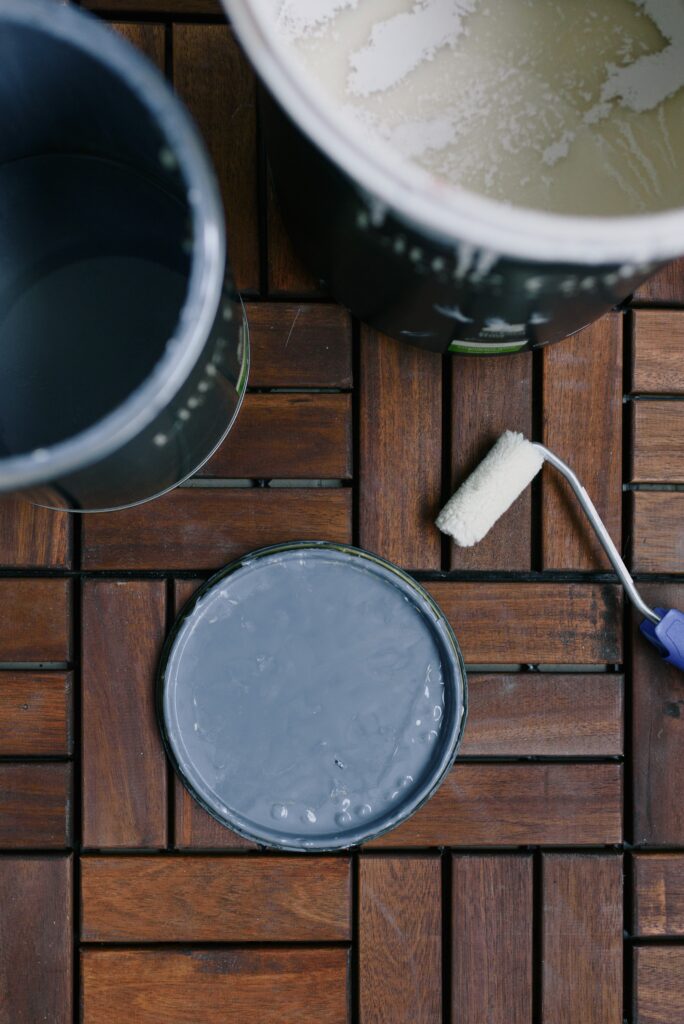
Sometimes, your water lines are positioned in the most random places. Don’t let it stop you from making a statement, though. With the right colour finish, you can go with any theme of your preference. Into that modern, contemporary look? Highlight your thick tubes above with a matte black hue for a tremendous everyday contrast. How about hand-picking a bright red shade for that eye-catching retro finish?

Your bathroom pipes shouldn’t always end up as dull; you can always add the right spice into the mix.

When in Doubt, Accessorize!

The most random pipelines don’t always have to blend in – showcase your keen eye for details by mixing fashion and functionality in unexpected places. Improve your home design and up your decorating game by hopping in on the exposed piping trend. Throw in some style, and you’re in for a ride!

Light it Out!

Photo Credit – Adobe Stock

You can deliberately have some pipelines exposed in your kitchen (or any area of your choice) to show off your trendy personality! Light fixtures made from exposed piping can do more than light up your chosen spot, it can also convey a lot more things – like your ability to give glamour to everything, even to unnoticed features.
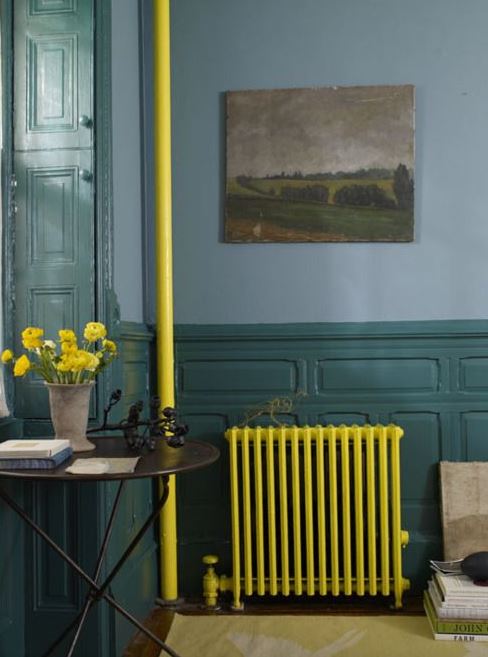
Be Bold with Gold

Midas has the golden touch; why can’t you? Exposed piping can either be thick or thin, but that shouldn’t let you down when you’re going for a minimalistic design with just the right pop of hue! Some units have thick water lines up their ceiling, either for emergencies or there is just no other space available. Either way, bright gold conduits can liven up your living space. You can even choose any other colour; make your home your own.

They can even be seen out of every nook and cranny, including the space allotted for your reading blues. Still, you can never go wrong with the steampunk design, no matter how delicate. Give a kick to your interior decorations by making the displayed electrical and water channels the library’s main focus.

Pipes Don’t Just Hold Water

Photo Credit – Pixabay

Exposed piping designs are not just limited to walls and ceilings. In fact, you can definitely use them to support something. How about a wine holder, but make it a statement?
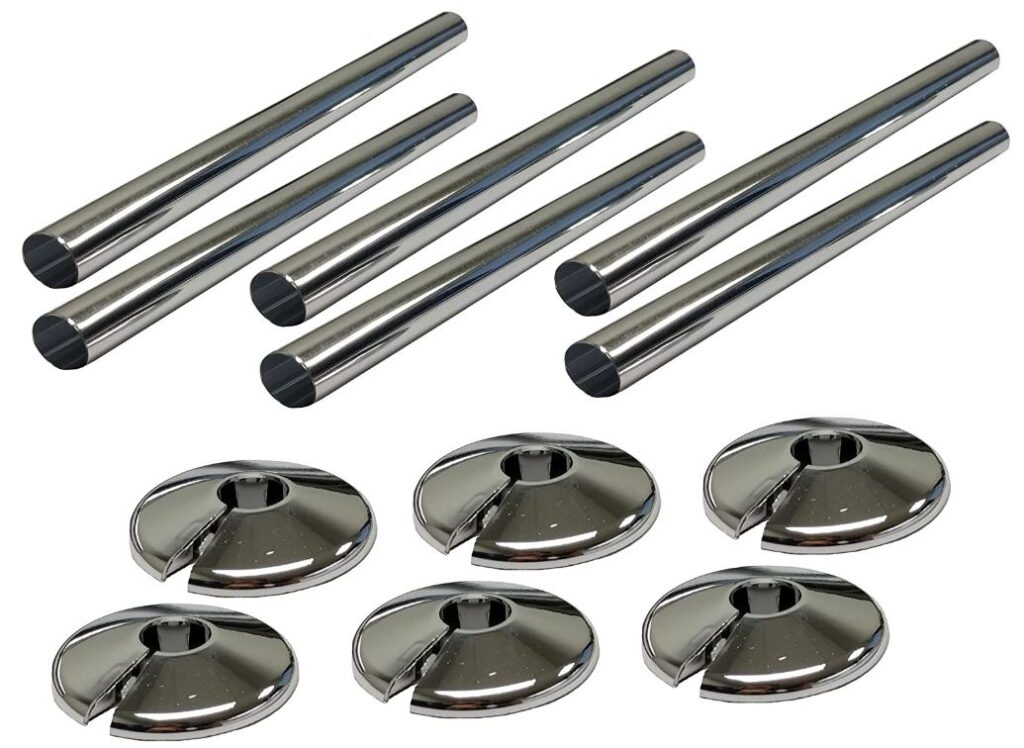
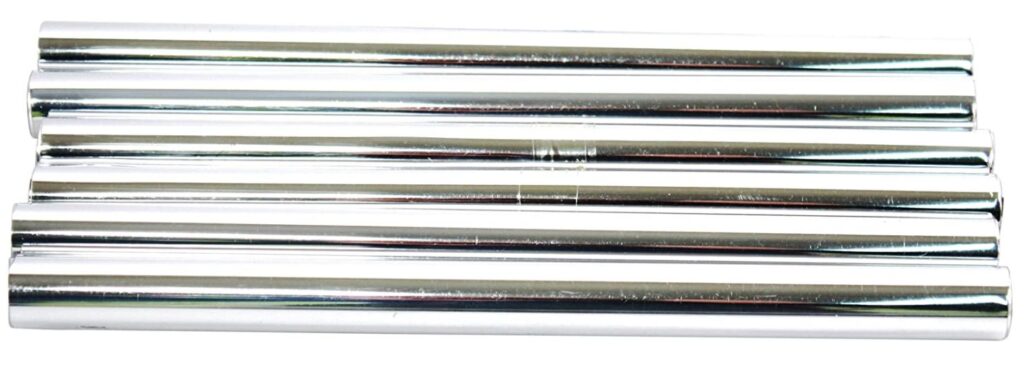
Styles of Pipes

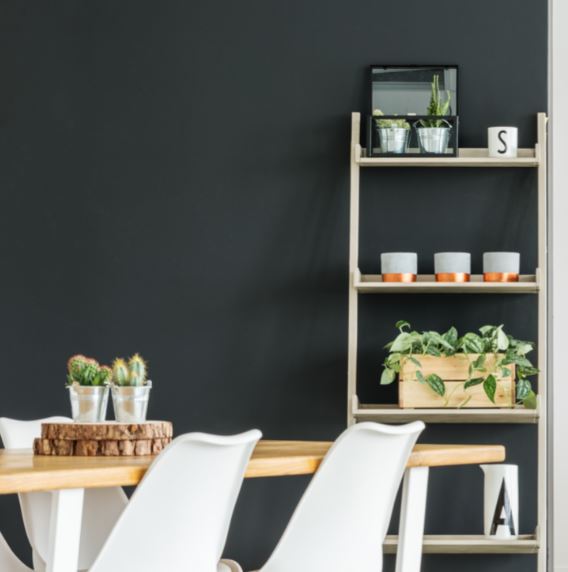
Exposed piping can give you an infinite list of designs that can create different atmospheres in your own home. Be it retro, industrial, modern, or vintage, choosing the right style of conduits is a vital decision you shouldn’t miss out on.

Here are some pipe styles to consider when making changes around your space:

Copper Pipes: Copper is a popular choice not only because of its versatility, but also because of its durable properties. As the premium choice in plumbing, copper pipes’ main selling point is strong components that won’t contaminate your water source. What’s more? You can definitely leave them as they are because copper pipes are chic enough already.

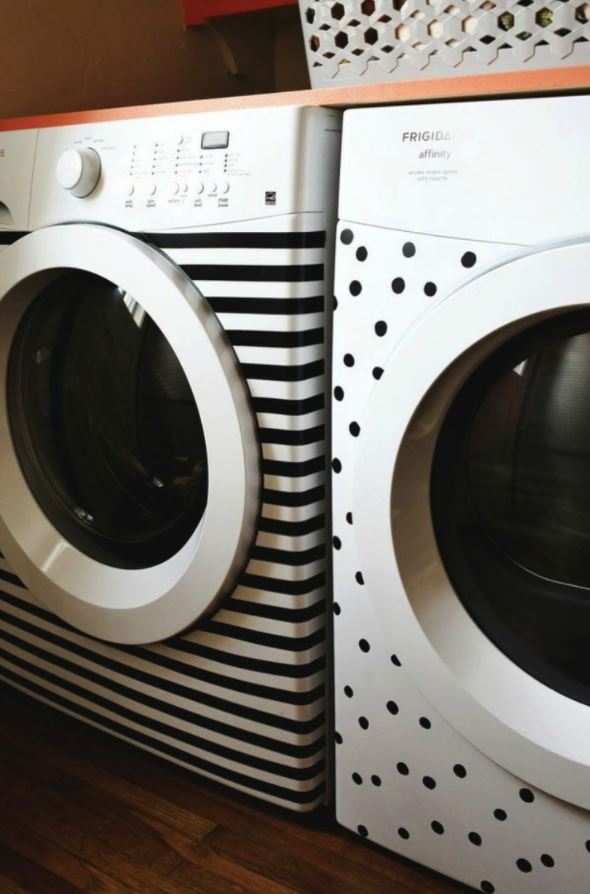
PVC Pipes: These plastic pipes are usually used for water drainage, but can typically function all around. This type of channel makes a great exposed piping decor because of its longevity and resistance to rust. Color them black or any shade you want and watch as the plumbing lines transform the scene. What’s more? PVC pipes are great for DIY projects – consider this when you want to have a unique home that is one-of-a-kind.

PEX Pipes: Similarly made out of plastic, PEX pipes are known for their flexibility. As they can be adjusted to fit into tight places while still maintaining the durability needed for functionality, these pipes can be an addition you are looking for all along! No matter what style of conduits you use, what’s important is you find the drive to appreciate the potential of exposed piping. Channel your inner designer by giving life to the lines that are a fast-growing trend!

26th August 2021 D.I.Y

How & Why You Should Paint Your Tired Kitchen Cabinets

Painting Kitchen Cabinets - A Guide
Breathing new life into your kitchen doesn’t have to cost a bomb!

There is nothing that spruces a home quite like a new kitchen but, as we all know, a new kitchen can be expensive. The average cost of a new kitchen in the UK is £8,000 and £5,000 of that is the new cabinets. If you don’t want to spend quite that much but still want to update your kitchen’s look, then why not just paint your kitchen cabinets? It costs around £80 per cabinet, so you could end up saving thousands. It is frankly amazing the difference adding a lick of paint can make to your kitchen, and your home. But how do you even get started? What paint should I use? How do I prepare for this home improvement task? Well-read on for our handy, informative guide on how to paint, kitchen cabinets.

Make sure that your cabinets are in good enough condition to be painted

Old Kitchen Cabinets

Unfortunately, some kitchen cabinets just aren’t in a good enough state to be renewed. If your cabinets are fragile, the bottoms are starting to sag, the doors aren’t hanging right, or the veneers are starting to become delaminated, it might be better for you to bite the bullet and shell out for some new ones.

You should also take into account the material that your cabinets are made from, this is important as wood cabinets are perfect for painting. If your cabinets are laminated, don’t worry, you can still paint on this material! Just look out for any peeling, cracked or bulking, as painting over these blemishes isn’t going to make much difference. If your laminate cabinets have these signs, you may need to replace them completely. But you can also opt to use your old cabinets for other upcycling projects!

Decide what type of paint you want

Types Of Paint Oil Paint, Matt Paint, Silk Paint

Let’s get the fun bit out of the way first: choosing the look you will go for. This is actually an important decision because painting kitchen cabinets is a big job and you really don’t want to end up having to do it twice in quick succession. The colour scheme is, of course, a matter of personal preference but choosing the right paint does have some impact on how easy the cabinets are to paint and how durable they will be.

Matt/chalk –

These types of paints can give a great rustic/country kitchen look and they are easy to paint with. This type of paint will stick to most surfaces with little to no sanding. They are less durable, however, and are more prone to chipping and scratching, so you may end up having to redecorate slightly sooner than you would have liked to.

Satin –

With its smooth finish and shiny sheen when it’s dried, satin paint is a fantastic option to pain your cabinets with thanks to its hardy nature and is holds up when washed. But this type of paint does not hide blemishes and imperfection on the surface or when you have to do touch ups.

Gloss –

Gloss paint is incredibly durable and reflects light with excellence, gloss pain also has a high resilience to moisture thanks to its density. If you choose gloss paint preparation is key as gloss will show every imperfection upon application, make sure that the surface is clean and smooth before you apply.

Oil Based Paints –

Also known as solvent based paint, this type of paint is often used by professionals for its hard finish that is durable and resists moisture and water than other paints. This type of paint is perfect for stained cabinets. If you are wanting a finish that will look great for years and years, an oil based paint is your best option. While this type of paint offers great resistance, this comes at the price that oil based paint take a long time to dry, and we mean a long time. So, if you wish to paint cabinets with oil paint, make sure you are prepared to have a large drying area and don’t mind waiting.

Latex Paints –

Latex paints are your friendly easy to use paint that requires little prep beforehand such as priming, this type of paint latches onto wooden surfaces such as your cabinet frames with ease. This style of paint also comes in a range of finishes, giving your cabinets texture. The only drawback with latex paint is its durability, with it being thin also it is easy to leave brush marks.

Deciding whether to strip your kitchen cabinets

The great debate: to strip or not to strip. There is a school of thought that says you should always fully strip off the previous layer of paint before you put a new one on, but doing so is quite time consuming and may not always be necessary. The purpose of stripping is that a painted surface is much less rough than a bare wood surface, which means that a new layer of paint will adhere to it less well. But you can make a painted surface rougher, and easier for the new paint to adhere to, by sanding it down.

Sanding down painted cabinets is the go-to method of stripping a cabinet door but do be careful as to much vigorous sanding can damage the wood lying underneath. So, when sanding wood make sure to sand evenly to avoid making unwanted delves and gouges. You can use either sandpaper or power tools, but the advice remains the same, keep a consistent level of sanding to avoid any accidents.

You can also use a hot air gun, this method removes paint quickly and with ease, but you must be incredibly carful as you can scorch the wood! Also do note that a hot air gun removes paint and cannot be used to remove varnish as it will turn the varnish into an almost glue-like substance that will ruin your cabinets.

Using a chemical stripping agent is another option, this is best for intricately designed cabinets and cabinets that have multiple paint layers present while also providing the best results! When using a chemical method, you must take care. Read the safety instructions thoroughly and make sure you have all the equipment needed.

It is important, however, to make sure that you thoroughly clean and degrease the surface before you start painting on it. Cooking creates so much grease in your kitchen, which sticks to the surface of your cabinets, and this will make it much harder for your new paint to stick.

It’s probably a good idea to take off all the doors

Not everyone takes off their kitchen cabinet doors, and instead use masking tape to cover hinges and other metalwork, but it is usually a good idea to take the doors off berfore painting them. It is going to be much harder for you to do a neat and professional-looking job with the cabinet doors in situ, and the whole process will be more difficult and stressful.

If you’re able to, it can be wise to invest in painter’s pyramid. Painter’s pyramids will suspend the door in the air so that you can paint the front, back, and sides all in one go without having to wait for it to dry before you turn it over. Using painter pyramids in addition to your setup, regardless of how you choose to paint your cabinet doors, Painter’s Pyramids are a simply a must-have.

It’s probably a good idea to take off all the doors

It is also a good idea to clearly label exactly where each door goes. You might think it’ll be obvious to you where each door came from, but when you’re standing over a sea of kitchen cabinet doors it suddenly gets a lot more difficult. We recommend drawing a diagram of the kitchen and labelling not only the doors but the corresponding cabinet where the cabinet door has come from. This makes it far easier when reassembling your kitchen cabinets, as with any D.I.Y paint job the more your prep that better the outcome.

Prep the room before you start

Painting your kitchen cabinets is a big job and it takes a relatively long time, so you need to be prepared before you start. You may well not be able to use your kitchen as you normally would, so think about how you are going to be eating while the job is happening and get everything ready and in place.

If you have the space that doesn’t get used as much as the kitchen and has ample room to dry your cabinet doors, setup in there as the kitchen is usually a heavy traffic area within the home and it can be difficult to complete this job within confined spaces.

You will need to empty all of your cabinets of their food and products and clear all of the kitchen sides of their appliances. Then cover all of the fixed appliances with sheeting, as well as the counters, and use masking tape along the edges of the cabinets to protect your walls. Remove the cabinet doors if you are going to, and take out their hinges and handles.

If you are lacking the appropriate space or cannot remove them cover the hinges with masking tape, but do take the handles off.

Paint the cabinets!

You will usually need to do around one or two coats unless you are going for a much lighter colour than you currently have, in which case you might need more. Before you begin, you should use a primer and wait for it to dry. Then start by filling in the nooks and crannies before moving onto the main part of the cabinet. Always work from top to bottom when painting the cabinets, and make sure that you are painting across the grain rather than with it. Most people use a brush and/or a roller, but if you want a smoother finish, you could opt for a spray gun instead if your local paint store or D.I.Y store sells them. Each has their own pros and cons, which we talk about below.

Paint Brush –

The old faithful paint brush is usually the first port of call when you are deciding to go ahead painting cabinets. Brushes can be a natural bristle brush or can be a synthetic bristle brush, either is fine for painting your cabinets also your standard bush works with nearly all types of paint including oil based paints, latex paints, etc.

Pros –

Come in range of sizes

Cheap & works with nearly all paints

Perfect for small detailing such as to paint edges and getting into nooks

Cons –

Bristles breaking off and mixing with your paintwork

Considerably slower painting large surfaces in comparison to a roller

Roller –

Using a roller for a job like this may seem like overkill for painting doors, but if you have especially large cabinet doors, a roller is a perfect option for speeding up the job while spreading an even coat across the surface. Rollers also can come in a variety of materials such as foam, felt, polyester and multiple others.

Pros –

Speedy application of paint for those larger areas that would usually take up more time using a traditional paintbrush.

Smooth finish, even and consistent paint application, leaving a seamless appearance.

Less labour intensive

Cons –

Some high-quality rollers can be expensive in comparison

Can’t be used to paint smaller areas such as nooks and bevels in the cabinet design.

Paint Sprayer –

If you want to save time while getting a professional finish, then a sprayer might be the answer that you are looking for. As using a spray paint gun can save you loads of time from having to put on multiple coats of paint as you just spray paint!

Pros –

Considerably faster paint time.

Paint dries faster.

Even paint application.

More professional looking result

Cons –

Cleaning the paint sprayer takes longer than brushes or rollers.

Expensive

Any touch ups can only be done with the sprayer

All these items can be found at your local hardware shop or can be easily purchased via online retailers like Amazon.

Now that you have a more information on the ways that you can paint, take your time and see if you have the budget or the time to get started on this paint job.

Wait for the paint to cure

It is tempting to get your kitchen back in order as quickly as possible, but it really is worth your while to wait for your wet paint to cure. If you don’t, you could end up with smudged paint, in which case you will have an even bigger job on your hand. When selecting your paint, take into account on how much time your paint will take to dry. Different paint types take different lengths of time to cure, so make sure that you read the instructions carefully, and use your judgement to make sure that it really is ready!

Painting Cabinets – The bottom line

It is definitely possible to completely update your kitchen on a budget, just by painting your kitchen cabinets. It is a big job, but it can save you a lot of money, so it is often well worth it. Just make sure that you have everything ready before you start and have a good feel for how to paint kitchen cabinets, and you will have a kitchen that feels just like new in no time!

Just remember to take your time as it isn’t a race, flying through this job rushing along every step of the way is a sure-fire way to be left with, yes, a revitalised kitchen but all the tell-tale signs of a rush job, scuffs, sloppy paint application and a blotchy uneven finish. Slow and steady wins the race as you want the best possible result, preparation is key and carful application of paint is vital for this project to go swimmingly.

23rd October 2019 DIY Interior

How to Create Additional Storage in Your Bedroom

Have you ever found that your bedroom is just overrun with items that don’t have a place to go? If so, you may want to consider how to best improve or enhance the way storage is installed in your bedroom. Added storage, in small or large amounts, can improve the way your bedroom functions as a whole. For that reason, here are some ideas on how you can work to create additional storage in your bedroom: 

Install Shelving 

There is one surface that massively under performs in your bedroom; the walls. Often these are left bare and empty even though in every other area of your home you would have shelves. That is why, then, installing shelves in your bedroom can be a simple way to increase your bedroom storage. 

Shelving can also be extremely decorative depending on your choices. As you can either use the shelves for practical use or art, decorative features or otherwise as well. Your shelving choices don’t necessarily have to be wooden planks on a wall either. 

shelving
shelving

Try quirky shelving choices that will catch the eye, for example, a selection of hangers linked up can be both interesting and good to store various items (not only clothing), you could also add a storage trunk underneath the shelf in the unused space making even more room. The more creative your shelving choices are, the more interesting it will be and the more storage you can inject into the room. 

Beds with Storage 

A bed is the biggest item of furniture in your room and so can be severely underused. If you don’t have storage under your bed or a storage bed, then you are missing out on a very lucrative storage space. 

This can be done via DIY as you can easily create your own under-bed storage boxes. You can either re-use old boxes, cutting them down to size, or create brand new ones bespoke for the space you have available. Though this fully depends on your level of DIY skills and whether you have the urge to create something yourself. 

Of course, you do run the risk of making under your bed a little bit of a cemetery of unused items or knick-knacks. So, the best practice is to make sure you sort or clear through your under-bed storage at least once a year. This way you don’t waste space in the long-term either! 

Optimise Your Wardrobe 

The wardrobe is a big space and a necessary part of our bedroom storage options. However, it can be very badly used in terms of saving space and optimising storage opportunities. The fact is that your wardrobe is more than just hanging space and one or two shelves. 

First things first: clean out the wardrobe. Get rid of old clothes you haven’t worn in years, clean the accumulated dust and make sure that it is all sorted before attempting to put anything back in. 

Then, you can work on adding more storage. A good first step is to add an extra hanging rod. You may have one already, but don’t be afraid to add a double-decker of hanging rods to optimise that side of your wardrobe. If it’s particularly tall (in the case of an in-built wall wardrobe especially) this can be a simple way to add more hanging space. Next, you can consider adding more shelving as well – though you should be a little more liberal with this. And if you do have shelves, make sure your clothes folding is optimised for the best use of space. 

Another good idea is to have a seasonal shift in clothing. Your winter wardrobe doesn’t need to be hanging up through the warm days of summer, pack it away out of sight instead! And then switch it back in once the chill starts to set in again. 

Also, don’t forget that your wardrobe doors also have plenty of room to have extra storage installed there. You can buy or create a shoe storage hanger, for example, which can be used for a variety of other knickknacks and storage. View more ways to creatively hide the ugly parts of your home!

Storage Boxes/Bench 

When it comes to the bedroom, freestanding pieces of furniture need to be limited; otherwise, you end up with a very cramped space. That is why you may do better with a number of storage boxes instead of a dedicated piece of furniture. As these can often be tucked away or stored in out-of-the-way spots. 

Or, for example, you could invest in a storage bench. These come in many shapes and sizes, as well as in fabrics such as luxury velvet furniture pieces or even leather – it depends on your overall bedroom decor or theme. 

Use A Storage Facility

I have noticed a lot of self storage services pop up around the country where people can store away their things in a secure unit and even hold their own key. Some of these services offer a free pick up service too if you hire storage over a certain period of say 3 months. This is not ideal for things you regularly use but serves a purpose for a few situations.

Install Organisers in Drawers 

Is your sock drawer a little bit of a mess? Socks bulging, underwear falling out whenever it opens or something along those lines? Then your drawers may need a little bit of organisation. A drawer organiser can help to create neat, simple, partitions in your drawers which can actually be very useful. 

chest-of-drawers
chest-of-drawers

A drawer partition can separate your socks from your underwear, but it can also be used in several different drawers as well. You can separate your pyjamas from your day clothes, your t-shirt from your shorts, you can even separate your knicks from your knacks. A drawer partition can also be easily made with a few simple pieces of wood as well. Or there are a few shops which may have a solution that fits as well. 

And there you have it! Lots of different techniques that you can use to add more storage space to your bedroom, either in isolation or collectively, depending on your storage needs. With both DIY and shop-bought options, there’s no reason you should be lacking space in your bedroom. So, start increasing your storage today. For more decluttering info, check out our ultimate decluttering guide!

18th March 2019 D.I.Y

How to Cover Unsightly Boiler Pipes

Check latest price of radsnaps here

Although we are deeply grateful for the warmth that boilers provide, they’re certainly not the most alluring item you will have in your house. They don’t add much to a room’s décor. The pipes mess up the interiors and make rooms look lousy. Actually, they are an eyesore and can neutralize the elegance in any captivating décor – unless of course your home is of the rustic style, then move along because boiler pipes can add to the design of the home.

Otherwise, to counter this effect most homeowners often find themselves investing in false ceilings, new cabinet designs and even reconstructing and breaking down walls just to ensure that the boiler pipes are not exposed. Though very effective, these approaches are very expensive and need a lot of time to implement.

What’s more, you will need to hire qualified professionals who charge exorbitant amounts for these sort of ‘home improvements’. This essentially means that if don’t have deep pockets or know the right people, you will have to put up with unsightly bathrooms and rooms that look like dreary for a very long time! Very depressing right?

Fortunately, there are some things you can do to salvage the situation affordably. Read on to find out about interesting but cheap ways on how to cover unsightly boiler pipes:

Conceal with design tapes or radiator pipe sleeves

Design tapes can transform unsightly pipes from an eyesore to beautiful and attractive pieces. You can find decorative tapes at local stores for a price tag that won’t break your budget. Try them today and watch as your space changes from drab to fab!

You can use radiator pipe covers that come in various decorative colours, like these chrome radsnap radiator pipe sleeves/covers below delivered fast from places like Amazon.

chrome radsnap radiator pipe sleeves and covers
Chrome radiator pipe sleeves

Check the latest prices on radsnap radiator pipe sleeves here

Radiator pipe collars also known as rad rings or pipe roses are a nice finish for the base.

Check the latest price on these pipe collars

Box in the pipes

Consider boiler casings if you want to spruce up the pipes underneath the boiler. They are specially designed cases that cover the pipes completely concealing them safely and giving the house a tidy appearance. Just ensure that pipework, as well as the boiler, have enough ventilation and that the casings you use meet the standard requirements.

Check latest prices on this thermopanel boxing

Use DIY chalkboard covers

If you have time, why don’t you create your chalkboard cover (You will need to be an expert DIYer)? Create an MDF frame that goes around the boiler and the pipes then box the entire unit. For a practical cover that keeps the pipes discreet, use a lick of chalkboard paint.

Cover them with fake foliage

This is an amazing boiler pipe cover that will definitely give your home a tropical feel. Fake foliage offers a seamless solution to ugly pipes blemishing your home décor. For those who can afford real foliage, go for creepers and climbers. Though they require some effort and time in conditioning, watering and pruning them, they look excellent!

Check the latest prices on fake foliage here

Paint the pipes in lively colours

Don’t just paint them like everybody else, do it with a twist! You can get ideas from your kids or spouse. Help each other with ideas and skills and you will be surprised at how creative you are. The results will definitely be spectacular. Not to mention you will spend time with your family and have memories to treasure forever whilst adding a unique touch to your home that the entire family can be proud of, since they were a part of it.

Check the latest styles & prices of radiator paint here

Conceal with a Curtain

One convenient way to hide your unattractive boiler pipes is to hang some fabric or a small curtain in front of them. This way the pipes will not only be easily accessible in case of a malfunction, but you will also not see them whenever you visit this particular room. Don’t forget design matter, so don’t just use a random curtain to hide the pipes, ensure it will complement the space in its own right too, as to not draw unnecessary attention towards it.

Check out these ranges of curtains here

Factors to consider

Now, before you choose any concealing method, it is important to consider a few factors:

  • Which approach is the best for me?
  • Where is the boiler located?
  • What happens there and how exposed are the pipes?
  • Should you camouflage, detract or integrate them into the room’s décor design?

These should be answered before you start buying what you need to cover your boiler pipes, simply because even if you like the idea of let say…painting over them, they may not look right in your home. You’ll want to have a great balance of doing something you like and that you’re going to enjoy creating whilst making sure whatever it is your doing works for the home, since this is the purpose of the project after all.

Your Budget

Finally It is very important to consider these factors beforehand so as to help you pick the most stylish and appropriate solution for both you and your house. Also, when doing this, keep in mind that ventilation is very important. Be careful with what you cover and it should not interfere with the boiler’s functioning as well as your ability to access its internal parts.

Final Thoughts

Every apartment or house whether small or large has something that is plainly ugly, oddly placed or just weird. While these small problems may drive you nuts, stay they must because they are valuable as they are a part of the character of your home, which could offer a unique look when decorated properly using the tips we have just discussed.

Ultimately, the only viable solution is to be creative and make it your own. Luckily for you covering boiler piles is not that difficult, especially if you follow these handy tips. Good luck!

11th April 2018 DIY Interior

3 steps to planning the perfect kitchen

Here are some great ideas for creating the perfect kitchen, in collaboration with Ideas for Living.

Designing a new kitchen is an exciting process as well as one that can swamp homeowners with choice. Understandably, many homeowners often get carried away with the desired look and finish, creating look-books and colour schemes and experimenting with different styles. Whilst this is an exciting part of the process, it is important to plan carefully and look beyond the aesthetic in order to achieve a space that truly works for you. Planning a new kitchen should always start with three key considerations:

#1 THINK ABOUT WHAT GOES ON IN YOUR KITCHEN – HOW CAN YOUR KITCHEN WORK FOR YOUR LIFESTYLE?

Firstly, think about what goes on in your kitchen and how you want to use the space. Consider factors such as whether you need to include a dining area for entertaining or a space that can double up as a home office or study. Are you a gadget geek like Dean Signori or a serious foody? Will the kitchen be the focal hub for the family? Designs and solutions exist to meet any of these needs and more.

Whilst a kitchen must meet the needs of your lifestyle today, it is also important to project what your lifestyle will look like in the future and make sure your kitchen fits this brief too. Will you have teenagers in the home who will benefit from open plan living? Will you require solutions that are adaptable to different levels of mobility.

#2 THINK ABOUT YOUR IDEAL LAYOUT – CREATING AN EFFICIENT WORKSPACE

Once you have defined the function of your kitchen, the next step to think about is layout. The path between your oven or hob, fridge and sink is the one you will tread most frequently. This is known as the working triangle and it should be given careful thought to achieve optimum kitchen efficiency. There is no limit to the functionality of today’s kitchens, the challenge is to make the space work perfectly for you.

#3 MAXIMISE EVERY INCH OF SPACE– CLEVER STORAGE SOLUTIONS


Step 3 is to maximise every inch of available space. Think about the different dimensions of your kitchen – not just width and length, but height and depth too. The key is to make the most of what’s available. Clever functionality such as vertical storage units, tables that fold into drawers or pull-out shelves that provide access to tricky corner space can transform kitchen storage.

The choice of styles and solutions can be overwhelming so consider partnering with experts in the field like Häfele. They don’t sell directly to the consumer, they choose to partner with the finest kitchen studios across the country in order to make homes smart, well organised, flexible and future proof. Their Ideas For Living website not only inspires homeowners with ideas and solutions to create their ideal kitchen, but also provides a direct link to their UK-wide network of Studio Partners, who have the knowledge and expertise to transform wishes into a beautiful and functional reality.

Discussing your kitchen ideas with a hand-picked experts can really help you to define your needs, and to create a space that incorporates your chosen style into a design that works for your lifestyle, now and in the future.


This post was first seen at lovechicliving

4th April 2018 D.I.Y

The DIY Mistakes Interior Designers Wish You You’d Stop Making

Deep down, we all fancy ourselves as a bit of an interior design/DIY guru. After all, pretty cushions are pretty cushions, and when it comes to painting a wall, how hard can it be? Right?

RIGHT?

But if you take the time to watch pretty much any renovation reality show, you’ll quickly realise even the most capable (or not-so-capable) DIY decorators aren’t immune to making some pretty epic stuff-ups.

So we spoke to three Aussie interior designers at the top of their game to find out the most common DIY mistakes they see on a day-to-day basis… in other words, what NOT to try at home.

Darren Palmer
Interior Designer, judge on ‘The Block’ and author of HomeSPACE.


“I truly believe the biggest mistake DIY’ers make is not setting a brief. By working out exactly what they need to achieve, what their family requires and what they need to add or subtract from the home to make it work properly as well as considering things like style, mood and budget, people are able to create a plan and plot a path.

“Without the briefing process and having a document to adhere to along the way you can end up with a completely different, or at worst a completely disparate, result than you intended.”Don’t just dive in head first without a plan.
Don’t spend more than you have or more than you should
Don’t worry about what your friends think if you love it
Don’t please only yourself if you plan to sell your property within the next 2 years.
Don’t fall in love with one solution. there are always myriad options and plan b is often better than your first intention.
Don’t be timid. Use your character and personality to inform decisions and commit to them wholeheartedly. It’s not the risks you take that you regret, it’s the chances you missed that keep you awake at night so just have faith, plan and commit to a bold solution that you are passionate about.

Vivian Panagos
Interior Designer and Blogger

“The most common DIY decorating mistake that I see is not taking the time to space plan and draft a furniture floor plan before buying ‘big ticket items’ like a sofa. Furniture needs space to “breathe” and often I see a too-big-for-the-room sofa pushed up against a wall because that’s the only way it will fit in the space or coffee tables that are difficult to navigate around.

“Pushing furniture away from walls and allowing the right amount of space to move freely makes a big difference to how a room feels.

“What you don’t have in a room is just as important as what you do have and a floor plan can help you work through any space planning issues by experimenting on paper before committing to the real deal.”

Jen Bishop
Publisher of Interiors Addict and Reno Addict.

“I think something many people get wrong is being in rush! When you move house or decide to make over a room, it is so tempting to want it all done in a week. We have all become too used to have things immediately!

“The worst thing you can do is go out shopping one Saturday (or worse, online) with the mission to get everything you need for your new kid’s bedroom or living room. It will end in disaster! Even worse if you try and get everything from the same shop.

“Great, authentic, unique interiors which you’ll love coming home to, take time. The best decisions are the ones you sit on for a couple of weeks or even months and keep going back to. This also gives you the time to save up for the couch you really want rather than making do with the cheaper one just because it’s on sale. So my top decorating tip is always to take your time and buy things you really love.

Never paint a room without first trying out some decent sized sample pot patches on the wall, or a few walls, and looking at the effects at different times of day.
“Another mistake we all make is buying things because they’re on trend. Yes, copper, Mongolian sheepskins, fiddle leaf figs, knot cushions and Scandi coffee tables may be all the rage now, but what happens when the magazines have different things next year? By all means buy on trend items but make sure your investment pieces are classics.

“Something you must never do is paint a room without first trying out some decent sized sample pot patches on the wall, or a few walls, and looking at the effects at different times of day, in daylight and artificial light.

“Another mistake to avoid is buying furniture without measuring your space first. The best plan is to mark out your new lounge or rug with masking tape on the floor so you can see how big or small it will feel in the space and if you can walk around pieces comfortably.”


If you’re interested in continuing reading this post, please go to the original article which can be found here at HuffingtonPost!

20th November 2017 D.I.Y

Creative ways to hide ugly parts of the home

Here is something about living spaces though unfortunate, that is a proven fact-99 % of all of them probably have something that is either oddly placed, weird, or merely plain ugly! Whether it is that luxurious apartment across the street, or the secluded bungalow adjacent to the park, every living space possesses some common persistent minor concerns (pipes cords, vents, accessories) that do not necessarily add to the beauty aspect. And while these little ugly problems’ might be annoying and somewhat embarrassing, most are a must stay, especially for you the one paying the rent or mortgage. The best and only solution, however, is getting creative.

If you are in search of some creative ways to help you conceal your home’s eyesores, here are several tricks to get you going.

Fake Rocks

Are your outdoor pipes ruining your otherwise well-manicured lawn? Do away with these necessary eyesores with the help of fake rocks! Easily purchasable online such as on Amazon, these accessories will ideally blend well into your lawn or garden effortlessly.

Fake rock to hide water outlet


Air Vent Cover

Although they may appear messy or even ugly, some fixtures and accessories simply cannot be eradicated from home, and one such fixture is an air vent. In most cases, these immovable accessories are not any pleasing to look at. Nonetheless, one easy way to conceal this eye sore is nailing a standard decorative rug on the house wall like these from ZARA, just above the vent. Although this will not ensure it is out of sight, it will nonetheless dress it up pretty well. Be sure to leave it fairly loose or use one that can let air pass so that you dont fully cover the vents air flow.

A doormat being used to cover ugly air vent


AC Unit Curtain

If it is yet to come, it is of course just around the corner. With summer comes several annoying and embarrassing concerns around the house, and few can match the unsightly and obnoxious AC Units. Other than the difficulty they pose during installations, they look horrendous in your house windows. A simple fix, however, is to cover it with an appealing yet functional half-window curtain to create a refined cover-up.

Net curtain covering air conditioning unit


Decorated Dryer and Washer

As we would all agree, trying to make an item as large as a dryer or washer disappear entirely from sight is difficult. What then do you do? Bring them to the front instead! As crazy as it sounds, you can use simple decorations such as classic colored tape to add polka dots or fun stripes patterns to jazz these accessories up.

Poker dot & striped decals on washer/dryer


Hidden PEX Manifold

While a PEX Manifold is an integral fixture for the overall functionality of a homes heated floor plumbing, this is not to say that they are appealing or something that you want visible. For a quick fix, you may need to incorporate a bit if your DIY flair. You can hide this necessary evil directly behind a characteristic shabby chic radiator style cover or encased wooden unit, and only you have to know about it. However, in a statement from  someone more experienced in these systems…

Brett from https://consumerhomedecor.com says that although these parts may be very ugly and are often hidden during the house build, they should be somewhat accessible in case of a leak or need for extension. The last thing you want if you are unlucky enough to have a leak of some kind is to have to break down other parts of the home/walls to get to the pex manifold so try and make a removable cover or access point.

PEX manifold shabby chic cover cabinet

Radiator cover adapted to cover pex manifold plumbing


Copper Boiler Vent Cover

While your hose cannot function without them, boilers need vent covers and may at times seem very ugly particularly when they are spoiling the beautiful garden appearance being in line of sight looking out down the garden from the side of the house. However, by placing a simple copper boiler vent cover round these eyesores, like this one from Luxury Metals you can ensure they blend in very well in fact become quite an attractive piece.

Copper boiler vent cover for outdoors

Boiler Pipes

On top of boiler vents, we also have boilers pipes. If you’re unfortunate enough to have this eyesore in your home you will be already to familar with how they give you an unfinished look in a space that would otherwise look beautiful. Thankfully for you, we’ve already have a great article on how to cover unsightly boiler pipes that will really serve as a godsend if you’ve had exposed pipes like this in the home for a while and you haven’t quite yet decided whats the best way of ‘removing’ them from your interior.

29th June 2017 DIY Interior

Flower Chandeliers & Hanging Flower Arrangements

A fabulous trend going from coast-to-coast is hanging flowers.  From the ceremony to the reception, these hanging blooms, are making a statement.

  1. One of the trends is called the upside-down garden.  It’s where you take hundreds of flowers, and hang them from the ceiling, making a sea of  of flowers, transforming your ceremony or dance floor into a lush garden above them.  Almost like your floating above the ground.
  2. Another flora trend is flower chandeliers.   Imagine gorgeous blooms, overflowing and draping down off of a chandeliers, or circle hoops over your heads, or dance floor.  They are sure to set the mood, to your nuptials and will have your guests staring in awe!
  3. Inverted Centerpieces.  Does your venue have tall ceilings? A great idea is to have inverted centerpieces, which where you suspend your table center pieces above your guest, drawing their eyes upward.  These look great with long tables, and can really take your wedding to the next level!
  4. Curtain of flowers.  Have a curtain of flowers draped as your backdrop for your ceremony looks stunning.  You can even have it as your back drop of your sweetheart table.  Flowers draping from top to bottom, add a bit of modern flair.  A great idea is to have them monochromatic, and start lighter at the top, and grow dark, as it goes to the bottom.  Another idea is to hang them in picture frames.  They will look like framed works of art.
  5. Hanging glass globes look very modern, and look absolutely amazing.  You can have them as your backdrop of your ceremony, or suspend them across guest tables.  In each globe your can put a single flower for bright glam look, or add more lush greens and succulent for a more of a garden look.


The article Hanging Flower Arrangements was first posted by  http://leighflorist.net

28th February 2017 DIY Interior

Do It Yourself Furniture Using Old Storage Pallets

What a wonderful experience it is to design your furniture using your own hands. This is all possible to do using the DIY ideas of pallet furniture wherein you can reshape the wooden pallet and turn them into useful furniture in your home. Designing furniture with the wooden pallet is becoming popular today. The ideas about the DIY pallet furniture are a good way on how to make your own furniture in your homes. The wood used in pallets is often oak or southern yellow pine as they are both known for their strength and density which of course is ideal for stacking weight.

Some of the popular ideas for pallet furniture are the pallet chairs, pallet sofa, pallet bed, and the pallet tables. You can design, reshape and remodel the furniture in your homes or in your workshops. You can make all of these in your own with the pallet DIY ideas. These DIY ideas can be very useful in a lot of things. The wooden pallet is usually used in shopping but this is actually a material that can be very useful in order for you to make perfect and fit furniture in your homes.

The wooden pallet became very popular due to the amazing and creative designs that you can make out of this. It can be disassembled into wooden planks and use it in any size of projects that you want. You can turn it into something you need for your children. It can also be turned into clever furniture and other things for your house.

For decades, the wooden pallets are a mechanism for storing bigger items. These are also useful when shipping. Nevertheless, the wooden pallets are a useful resource in the designs and decors in your homes.


Wood Pallet Tables

You can create your original tables just by using four pieces of wood pallets. Pallet tables are also considered to be functional for indoors or outdoors use. With the rustic look and a simple look of this pallet table, its size can also be customized. You may as well change its design that depends on kind of designs you want. Make sure that you choose those wood pallets that are not chemically treated. You can wax it with oil or use polyurethane for its durability and for weather proofing purposes.

You can also make an easy rolling table from the wood pallet. This can be used as a table in your outdoor activities. This can also be used when you want to relax outside your house with your friends or with your family.

In addition to that, you can make this kind of table through the use of two wood pallets and one beam which are cut into four pieces, L – brackets, caster wheels, gray strain and screws. Through the use of these things, you can have a fabulous rolling table as your coffee table outside the house. This is also great to use while you eat your snacks with your friends.


Pallet Swing Chairs

You can make a pallet swing chair using wood pallets. You will just craft the wooden pallet and make a quality swing chairs from a wood pallet. You can also make a unique and cozy swing chair in your home. This can also be made useful for you and for your family. This is especially true if you have kids. You can enjoy it during the summer sitting outside your homes with your family and your friends. Here is a great tutorial on how to make a pallet swing chair. Of course this is one of the more challenging pieces of furniture to make at least compared to floor-standing boxy types so if you are flush with cash then there are some fairly cheap yet quality patio swings here at The Patio Depot.

22nd December 2016 DIY Interior

How To Create The Shabby Chic Look In Your Home

Shabby Header
One of the easiest, cheapest and most charming interior design ideas, shabby chic is definitely in style. What is more, by making use of old furniture and other items, this look helps us to move towards a more eco-friendly existence. Anyone can achieve a ‘shabby chic’ look in their home, it just takes a little bit of imagination, a magpie tendency and a lick of paint – of course Annie Sloan Chalk Paint rises perfectly to the occasion when you decide to give those old pieces of furniture a new lease of life.

What is Shabby Chic Anyway?
Shabby chic is the name given to a style of interior decoration that values age and wear-and-tear. If something does not look as though it has been loved by generations, it is made to look as though it were. This is a soft, opulent and yet down-to earth, cottagey style that can really make a house feel like a home. While it does incorporate genuinely old items, this style is more about imaginative re-creation than it is about genuine antiques. Shabby chic styling gives an interior that you will really love and that is really aesthetically pleasing but not one that you have to be precious about. So shabby chic can be great for messy, chaotic, loving homes with kids and/or pets. It is a styling that can work in real life, not just on the pages of a glossy magazine.


Shabby Room
Elements of Shabby Chic and How To Integrate Them:

Paintwork:
If you have an old piece of wooden furniture that you have fallen out of love with then why not give it a new lease of life by simply painting it? Painting old pieces of furniture is the best way to rejuvenate them. In the shabby chic style, paintwork is often in off-white or pastel shades. Annie Sloan chalk paint in Original, Old White or Cream all make a great colour for wooden furniture.

Distressing:
In the shabby chic look, paintwork is often distressed, rustic or worn. After painting, sanding off sections in areas that would naturally have suffered the most wear over time can allow you to achieve this effect. You can sand down to bare wood or, if you would rather, paint different layers of coloured chalk paint and distress so that you can see all the different layers of paint coming through.

Painted Motifs:
If you are artistic you may like to try your hand at painting delicate motifs on your shabby chic furniture. Roses and other floral emblems, hearts, doves, leaves and other vintage inspired designs are often painted onto items to personalise the look. Stencils can help to create a stunning effect if you are less than expert with a paint brush.

Soft Furnishings:
In a shabby chic home there is usually an abundance of soft-furnishings in faded, vintage-style fabrics. Home made items fit into the style especially well. Crochet, appliqué, hand sewn natural fabrics – all these are often found in a home decorated in this way. Hand sewn cushions are placed on painted chairs, for example, and a unique tablecloth may be placed on a worn old table.


Shabby Collage

A Little Vintage and Unique Clutter:
Putting the finishing touches on a shabby chic home is all about collecting items with a quirky vintage charm or homespun, hand-made appeal. These little touches are what make your shabby chic home really come alive. Put your own personality into your collection and it cannot fail to delight those who see it.


This post ” How to create the shabby chic look in your home ” was first seen on http://www.loverestored.co.uk

Primary Sidebar

Keep up to date with our latest posts

Subscribe to our newsletter for free and be the first to be notified about all our latest content!

Welcome to A2B Crafts

At A2B Crafts we make it our duty to bring you the latest in shabby chic design and Do it yourself furniture. If you’re new to the craft or a long time expert, A2B crafts is perfect for you. With every new post we hope to bring you something new and exciting which gives you the inspiration to try something new with your home
furnishings. If you feel inspired after reading any of our posts or you’ve even tried these tips for yourself, please feel free to let us know through our contact page or our other social channels!

Footer

Stay Connected

  • Facebook
  • Instagram
  • Pinterest
  • Tumblr
  • Twitter
  • YouTube

Contact Information

Tel: Thursday – Saturday 01328 856001

or mobile 07917606039 at other times

Address: Wheelspeed Unit 1, Cattle Market Street, Fakenham, Norfolk, NR21 9AW

Please feel free to contact at anytime, however at present we work part-time so may not get back to you immediately,
but will make contact as soon as possible.

Categories

  • DIY Interior
  • Furniture Upcycle
  • Hobbie Crafts
  • Interior Decor
  • News
  • D.I.Y
  • Garden

Helpful Links

  • Contact Details
  • Conditions of Use
  • Privacy Notice
  • Shipping & Returns

Copyright© 2025 · Cookd Pro Theme by Shay Bocks