• Skip to primary navigation
  • Skip to main content
  • Skip to primary sidebar
  • Skip to footer
  • Home
  • Interior Decor
    • D.I.Y
    • DIY Interior
    • Tips
  • Hobbie Crafts
    • Furniture Upcycle
  • Garden
  • News
  • Write For Us
  • Contact Details

A2B Crafts

DIY Crafts & Upcycling

D.I.Y

18th April 2024 D.I.Y

How To Plaster DIY

Ready to tackle a DIY plastering project but unsure of where to start?

In this comprehensive guide, we will walk you through everything you need to know about plastering walls and ceilings.

From the tools and materials required to step-by-step instructions on how to plaster like a pro, we’ve got you covered.

Learn about common mistakes to avoid, helpful tips for success, and how to finish and paint over your newly plastered surfaces.

Get ready to enjoy your newly transformed walls and ceilings!

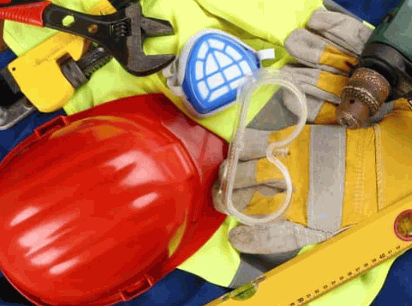
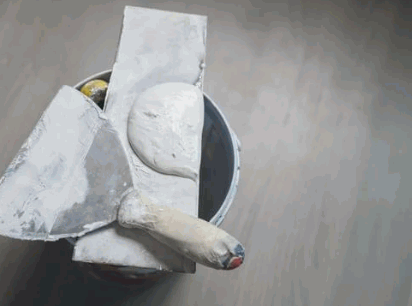
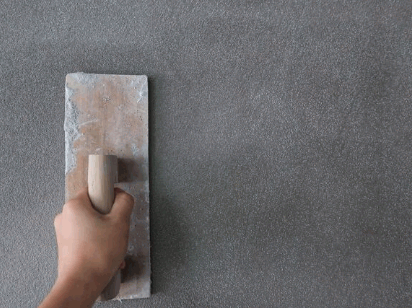
What Tools And Materials Do You Need For Plastering?

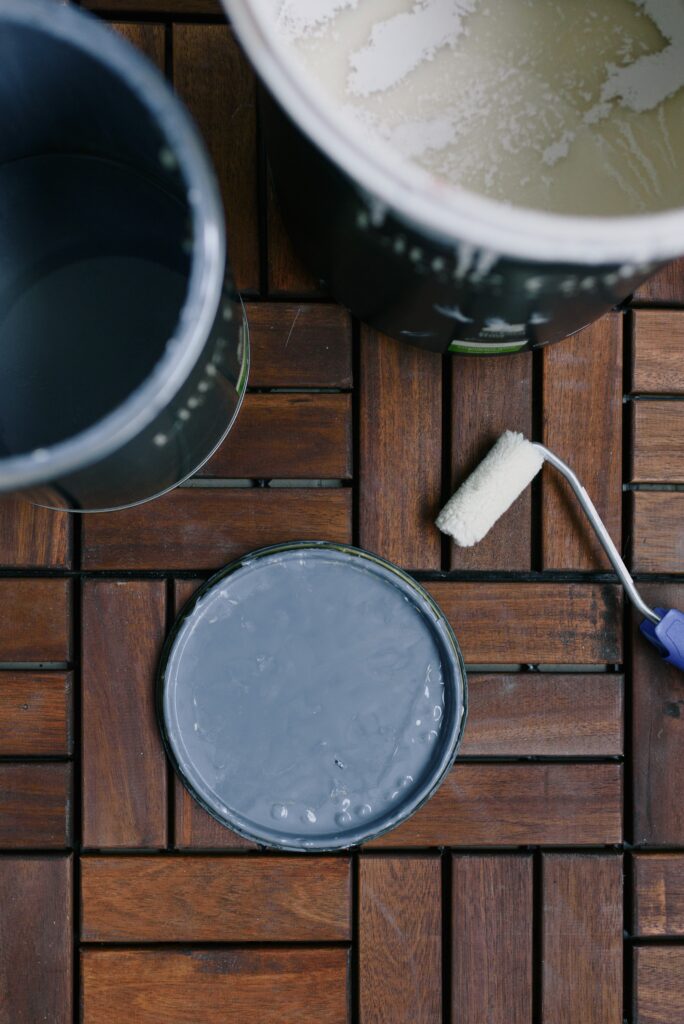
For a successful plastering project, you need a variety of tools and materials. These include a trowel, hawk, brushes, buckets, water, PVA, and the appropriate plaster mix to achieve a smooth and flawless finish on your walls or ceilings.

Each of these items plays a crucial role in the plastering process. The trowel, for example, is used to apply and smooth out the plaster mixture, ensuring even coverage. A hawk functions as a portable platform to hold the plaster, making it easier to transfer onto the trowel. Brushes are essential for detailing and cleaning up excess plaster, while buckets are necessary for mixing the plaster to the right consistency.

Water is a key component in adjusting the texture of the mixture, and PVA serves as a bonding agent between the plaster and the surface.

Choosing the correct plaster mix is vital for achieving the desired finish, with variations available for different surfaces and applications. When these tools and materials are used skillfully and combined appropriately, they result in a professional and durable plastering job.

Tools Needed For Plastering

Regarding plastering, the essential tools you need include a float for applying the plaster mix, a plasterer’s board to hold the plaster, and various brushes for smoothing and detailing the coat.

A float is a versatile tool available in different sizes, with the larger ones used for applying the first coats of plaster and the smaller ones for intricate details.

A plasterer’s board serves as a portable surface for holding the plaster, allowing you to easily access the material as you work on various sections.

Different types of brushes are utilised based on the texture and finish required, such as soft-bristled brushes for creating smooth surfaces and wire brushes for roughening up areas for better adhesion.

Materials Needed For Plastering

Plus tools, the materials crucial for plastering include the plaster mix itself, water for consistency, PVA for adhesion, and the final finish to achieve the desired look and texture.

Regarding plastering, the choice of materials plays a vital role in determining the quality and longevity of the finished surface.

Plaster mix forms the foundation of the plastering process, serving as the primary substance that covers and smoothens the wall or ceiling.

Water is essential for adjusting the consistency of the plaster mix, ensuring it spreads evenly and adheres well to the surface.

Adding PVA adhesive helps improve the bond between the plaster and the substrate, enhancing durability and preventing cracks over time.

Selecting the right finish, whether it’s textured, smooth, or decorative, is crucial for achieving the desired visual appeal of the plastered area.

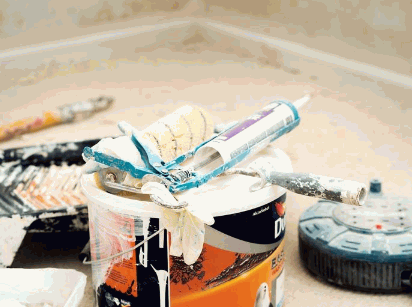
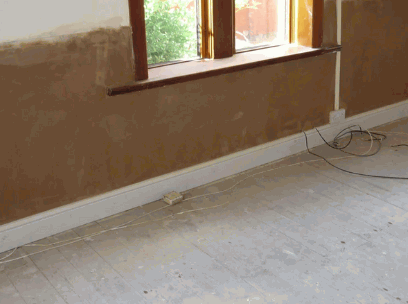
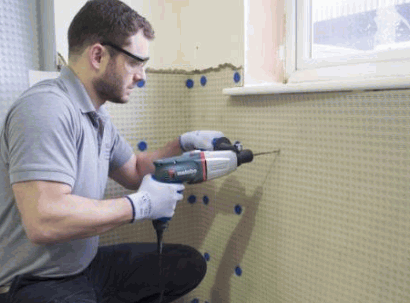
Preparation For Plastering

Before starting the plastering process, thorough preparation is key to ensuring a successful DIY project. Proper preparation steps can make the application of plaster smoother and more effective.

One important step in preparing for plastering is to thoroughly clean the surface to be plastered. This helps in removing any dust, debris, or grease that can affect the adhesion of the plaster. Next, applying a primer such as PVA is crucial to seal the surface and provide a good base for the plaster to adhere to.

  • Masking off areas that you don’t want to plaster, such as windows and trim, is essential to ensure clean edges and a professional finish.

Each of these preparation steps plays a significant role in creating a smooth and durable plastered surface that looks polished and well done.

Preparation Steps For Plastering

The preparation steps for plastering involve cleaning the wall or ceiling surface, applying a PVA primer for better adhesion, and ensuring that the area is ready for the plaster application.

Before starting the cleaning process, it is crucial to remove any dust, dirt, or debris from the surface to prevent contamination and ensure a smooth plaster finish.

  1. Applying a PVA primer serves as a bonding agent between the surface and the plaster, promoting better adhesion and reducing the chances of cracks or peeling over time.

Ensuring that the area is adequately prepared before plaster application is essential for achieving a professional-quality finish that will stand the test of time.

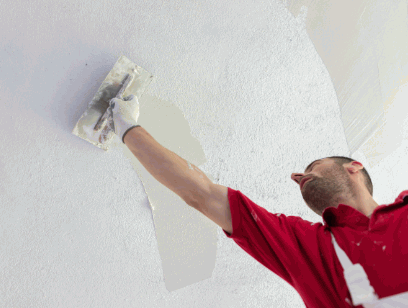
How To Plaster A Wall

Plastering a wall involves applying layers of plaster in a specific technique to achieve a smooth finish. Paying attention to details like brushing and edging ensures a seamless look across the entire surface.

  1. Begin by preparing the wall surface, ensuring it is clean and free of any dust or debris. Apply a primer if needed to promote better adhesion of the plaster.
  2. Next, mix the plaster according to the manufacturer’s instructions, aiming for a creamy consistency.
  3. Start applying the plaster using a hawk and trowel, spreading it evenly in upward strokes. Focus on maintaining a consistent thickness throughout to avoid uneven drying and cracking. Smooth out the surface with a plasterer’s float, using circular motions to achieve a polished look.
  4. When dealing with edges, take your time to carefully blend the plaster with the rest of the wall, ensuring a seamless transition. Finishing touches like feathering the edges will create a professional finish that enhances the overall appearance of the wall.

Step-By-Step Guide To Plastering A Wall

To plaster a wall effectively, start by preparing the surface, applying the plaster in thin coats, and using a brush to smooth out any imperfections. Pay special attention to the edges for a seamless finish.

  1. After the initial surface preparation, mix the plaster according to the manufacturer’s instructions, ensuring a smooth and lump-free consistency.
  2. Begin by applying the first thin layer of plaster evenly across the wall surface, using a plastering trowel for a uniform distribution. Working in small sections, continue adding subsequent layers, allowing each coat to dry before applying the next to avoid cracking.

Once the plaster is set but not fully dried, use a damp sponge to gently smooth out any bumps or ridges, maintaining a consistent texture. Feather the edges of each layer to blend them seamlessly with the existing surface, creating a cohesive and polished look. Don’t forget to keep the tools clean and wipe off excess plaster for a neat final result that enhances the aesthetic appeal of the room.

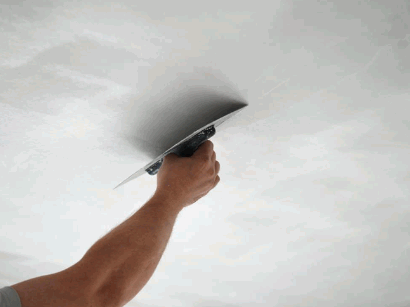
How To Plaster A Ceiling

Plastering a ceiling requires specific techniques and tools to ensure a flawless finish. Applying the plaster coat evenly and smoothly is crucial for achieving professional results on ceilings.

When working on ceilings, it’s essential to start by preparing the surface thoroughly. Check for any cracks, holes, or imperfections that need to be filled before applying the plaster. Repairing these issues beforehand will prevent them from showing through the plaster layer later on.

Another challenge when plastering ceilings is managing the material overhead. Gravity can make it trickier to control and spread the plaster evenly, so using the right tools like a specialised ceiling plastering tool can help maintain consistency.

Discover more: Is Plaster And Stucco The Same

Step-By-Step Guide To Plastering A Ceiling

Plastering a ceiling involves using the right tools to apply the plaster evenly and smoothly, ensuring a uniform finish. Mastering the technique is essential for achieving a professional result on ceilings.

  1. One key consideration when plastering a ceiling is the overhead nature of the surface, which can pose challenges in terms of accessibility and arm fatigue. To tackle this, it is important to have sturdy scaffolding or a reliable platform that provides a stable working surface.

Proper preparation of the ceiling is crucial before applying the plaster. This involves cleaning the surface thoroughly, repairing any cracks or imperfections, and ensuring it is completely dry to promote adhesion. Using the correct type of plaster is also vital, as different formulations are suited to varying conditions.

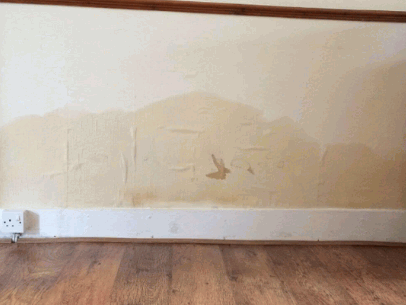
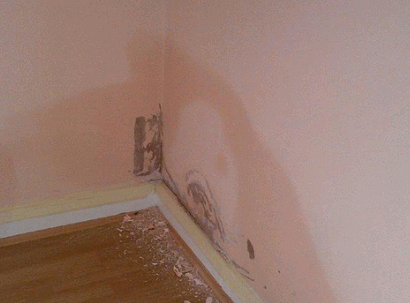
Common Mistakes To Avoid When Plastering

In the plastering process, it is crucial to be aware of common mistakes that can compromise the quality of the finish. By avoiding these errors, you can ensure a successful DIY plastering project.

  • One frequent mistake is improper surface preparation, which can lead to adhesion issues, causing the plaster to crack or peel off. Flat surfaces are essential for a smooth finish. Make sure to clean the wall thoroughly and repair any cracks or damage before applying the plaster.
  • Another common error is improper mixing of the plaster. It is crucial to follow the manufacturer’s instructions regarding the correct water-to-plaster ratio. Consistency is key for a strong and lasting finish. Failure to mix properly can result in weak, crumbly plaster that will not adhere well.

Tips For A Successful DIY Plastering Project

To achieve success in a DIY plastering project, consider incorporating key tips and strategies that can enhance the quality of your finish. These tips can streamline the process and help you avoid common pitfalls.

One crucial aspect to begin with is proper surface preparation. Ensure that the walls are clean, dry, and free of any debris before starting the plastering process.

Preparing the surface adequately will lay a strong foundation for a smooth and durable finish.

You can use a primer or bonding agent to improve the adhesion and longevity of the plaster. Investing in high-quality plastering tools, such as trowels and floats, can significantly impact the final result.

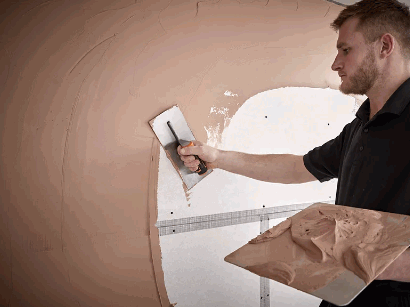
How To Finish And Smooth Plaster

The final step in the plastering process involves finishing and smoothing the plaster to achieve a flawless surface. Using the right techniques and processes is essential for creating a polished and professional look.

  1. One important method for achieving a smooth finish is to apply a thin coat of plaster using a trowel. This helps fill in any remaining imperfections and levels out the surface.
  2. Careful sanding with fine-grit sandpaper is then crucial to further refine the texture and ensure a seamless appearance.
  3. Employing a sponge to gently wet and smooth the surface can help address any minor flaws before the final drying process.

Taking these meticulous steps guarantees a high-quality finish that is both visually appealing and durable.

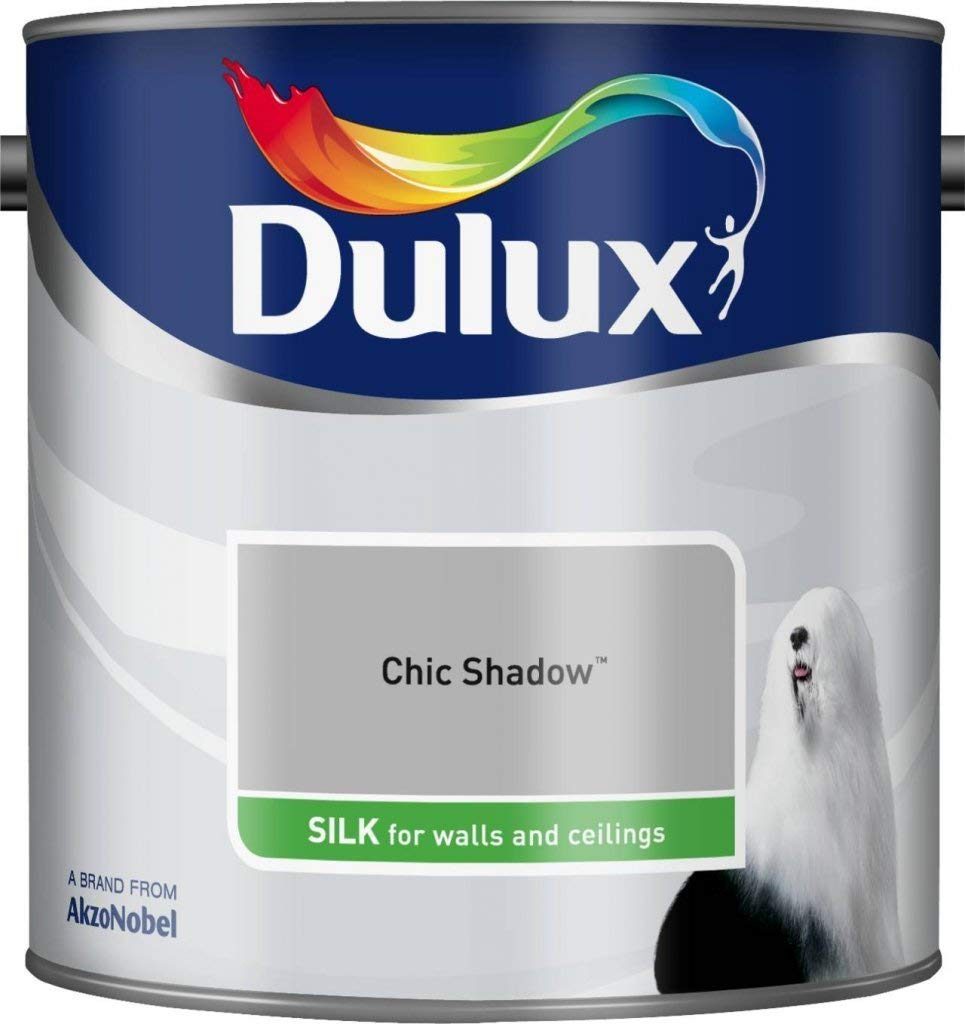
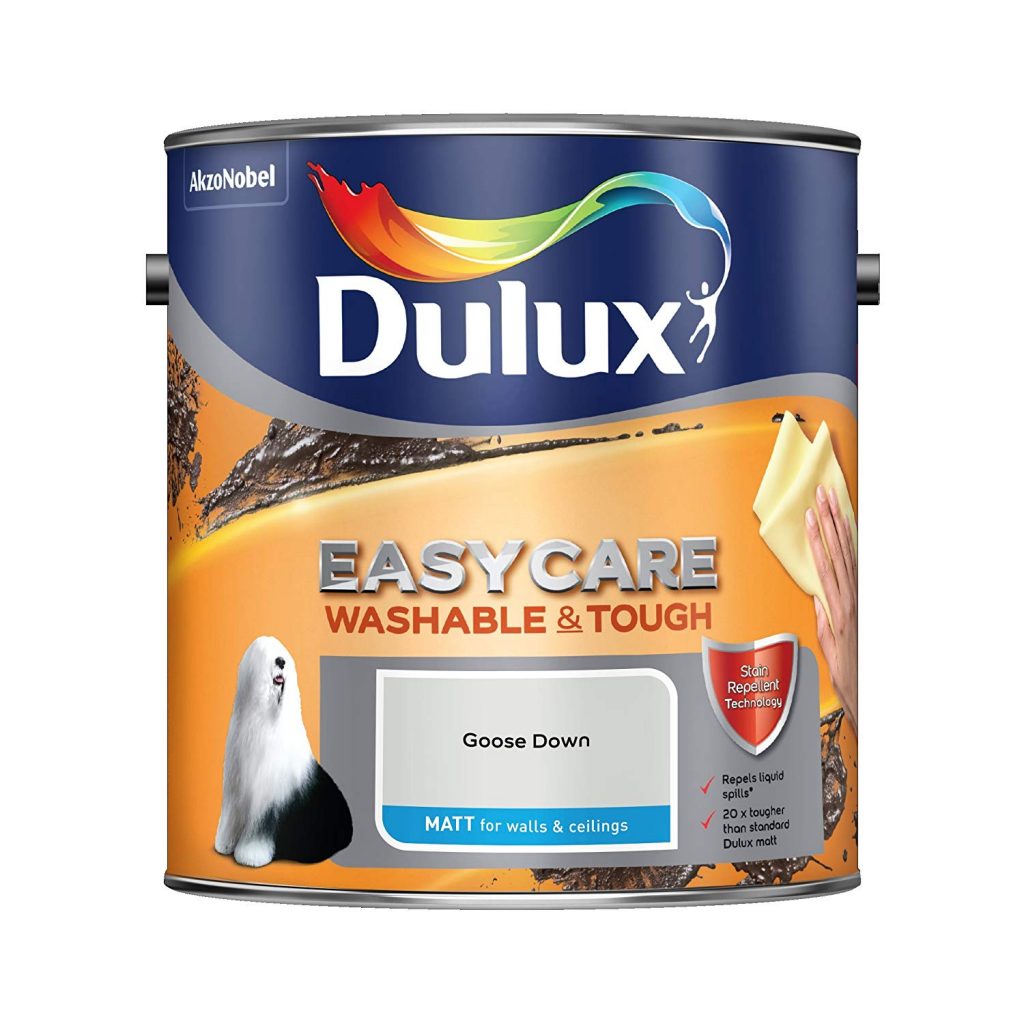
How To Paint Over Plaster

Once the plaster has dried and cured, the next step is to paint over it to enhance the aesthetics of your walls or ceilings.

Applying paint after plastering requires attention to detail and a systematic approach for a professional finish. Before you start painting, it is crucial to ensure that the surface is clean and free of any dust, debris, or imperfections. Use a damp cloth to wipe down the plastered area and let it dry completely. Prime the surface with a high-quality primer suitable for the plaster to promote better adhesion and durability of the paint. Choose a top-quality paint that is recommended for plaster surfaces, and mix it well before applying.

How To Clean Up After Plastering

After completing the plastering process, proper clean-up is essential to maintain a tidy workspace and ensure the longevity of your tools. Cleaning up after plastering involves disposing of waste materials, washing tools, and restoring the area to its original condition.

  1. One key aspect of post-plastering clean-up is the efficient handling of waste materials. It is crucial to gather all debris, including leftover plaster, dust, and worn-out protective materials. Utilising a sturdy bin bag or container can help contain the mess effectively.
  2. Once the waste is collected, it’s important to dispose of it properly. Environmentally-friendly options such as recycling or using designated disposal sites are recommended to minimise the impact on the environment.
  3. After waste disposal, focus on cleaning your tools. Remove any dried plaster from tools using a brush or scraper, then wash them with warm, soapy water. Properly drying and lubricating your tools will help prevent corrosion and maintain their functionality.

Conclusion: Enjoy Your Newly Plastered Walls And Ceilings

The process of plastering can transform your walls and ceilings, adding a fresh and polished look to your living space. By following the right techniques and using quality materials, you can achieve professional results and enjoy the beauty of newly plastered surfaces.

When you take on a plastering project, not only do you elevate the aesthetics of your home, but you also create a sense of accomplishment. The smooth and flawless finish achieved through plastering can completely rejuvenate the atmosphere of a room, making it more inviting and sophisticated.

The durability of plaster ensures that your walls and ceilings remain stylish and resistant to wear over time. As you step back and admire your handiwork, you’ll feel a sense of pride knowing that you’ve transformed a humble wall into a stunning centrepiece of your home.

18th October 2023 D.I.Y

How To Clean Carpet At Home DIY

Tired of looking at those dirty, stained carpets in your home? Fear not! We’ve got the solution. Here, we’ll show you how to clean your carpets with simple, cost-effective DIY methods.

Cleaning your carpet may seem intimidating, but with some effort and the right techniques, it’s easy to get great results. First, you’ll need some tools and supplies: a vacuum cleaner, a bucket, warm water, mild detergent, a scrub brush or sponge, and clean towels.

Start by removing any loose dirt or debris from the carpet surface. Vacuum the area thoroughly. This will loosen up the trapped dirt or dust particles.

Next, tackle those stubborn stains. Mix a small amount of mild detergent with warm water in a bucket. Dip your scrub brush or sponge into the soapy water and gently scrub the stained areas in a circular motion. Be gentle – rubbing too hard can damage the carpet fibers.

Once you’ve scrubbed the stains, rinse the areas with clean water using a sponge or towel. Make sure to remove all soap residue; this can attract more dirt in the future. Blot the cleaned areas with a dry towel to absorb extra moisture.

Now that you’ve successfully cleaned your carpet, maintain its cleanliness for longer-lasting results. Vacuum regularly to prevent dirt buildup. Put rugs or mats in high-traffic areas to reduce wear and tear.

Don’t let dirty carpets ruin the look of your home. Take action today and give your carpets a fresh, clean appearance. By following these simple DIY methods, you can save money on professional cleaning services and get great results. So, roll up your sleeves and transform your carpets into a spotless masterpiece!

Uncover more: How To Clean Living Room Carpet

Gathering The Necessary Materials

Gather these materials to successfully clean your carpet at home:

  1. Vacuum cleaner to remove loose dirt and debris.
  2. Carpet stain remover for tough stains.
  3. Scrub brush or sponge to agitate the stain remover into the fibers.
  4. Cloths or paper towels to absorb moisture.

Start by vacuuming the entire surface. Then, apply the stain remover onto specific stains and let it sit for a few minutes. Use a brush/sponge to gently agitate the stain remover into the carpet fibers.

A clean towel is useful to soak up any excess moisture. Act quickly to prevent stains from setting permanently. Regular vacuuming can increase the carpet’s lifespan by 5 years, according to The Carpet and Rug Institute. Their study shows that daily vacuuming reduces dust mite infestations and improves air quality.

Preparing The Carpet For Cleaning

Before cleaning, take note of any loose threads or snags on your carpet and trim them carefully. Then clear the area of furniture and objects to clean every inch of your carpet. Vacuuming will remove dirt and debris, then pre-treat any stubborn stains using a suitable solution. Test any cleaning solution in a small area, follow instructions for using a carpet cleaner, and use eco-friendly solutions if you have pets or children. Finally, allow enough time for the carpet to dry completely before putting furniture back on it. These steps will help your carpet be restored to its former beauty!

Choosing The Appropriate Cleaning Method

Deciding on the right carpet cleaning method is super important for keeping your carpets looking and lasting great. Different solutions work best for different kinds of stains and fabrics. Look at these carpet cleaning methods:

MethodBest forHow it Works
Steam CleaningTough stainsHot water mixed with detergent was injected into the carpet. Then, the water and dirt are extracted.
Dry CleaningDelicate fabricsAbsorbent compounds spread on the carpet to attract dirt. Vacuumed away after.
Foam CleaningLightly soiled carpetsA foam solution was applied to the carpet using a machine. Dirt is vacuumed away.
Bonnet CleaningSurface cleaningA rotary machine and absorbent pad are used to agitate carpet fibers and remove surface dirt.

For further info, consider this:

  • Enzymatic cleaners are best for specific stains like pet pee or red wine.
  • Eco-friendly cleaners are great for households with allergies.

For excellent carpet cleaning outcomes, remember:

  1. Test a small area to make sure colors won’t fade.
  2. Vacuum before applying any cleaning solution.
  3. Blot stains instead of rubbing them.
  4. Read instructions for dosages and applications of commercial products.

By picking the perfect cleaning method for your carpets and following these tips, you can keep your carpets looking great for years!

Cleaning The Carpet

Identify the type of stain or spill on your carpet. Different stains require different solutions – like an enzymatic cleaner for pet urine or a mild detergent for food stains.

Now, take action! Blot the stain with a clean cloth or sponge. Don’t scrub hard, it can damage the fibers. For tough stains, repeat blotting or use a specialized cleaner.

Drying The Carpet

Here are the steps to ensure your carpet dries fully, reducing mold risk and keeping it cleaner longer:

  1. Blot up extra moisture with absorbent towels or paper towels. Pressure gently and repeat until no wetness is taken in.
  2. Let fresh air in by opening windows and doors by using fans or turning on the HVAC system. This will help dry the carpet quickly.
  3. Use a dehumidifier if it’s humid or raining outside. It takes away additional moisture from the air and stops it from going back into the carpet fibers.
  4. Don’t walk on the carpet when wet. This leaves footprints and slows down the drying process.
  5. Be patient when waiting for the carpet to dry, especially if you have cleaned it deeply or if it’s thicker.
  6. For quicker drying time, use a steam cleaner with a built-in heater. Fans should be placed around the wet areas of the carpet for better airflow. Elevate furniture legs with wooden blocks or aluminum foil, to make sure they don’t touch wet carpet.

These steps ensure your carpet dries fully, reducing mold risk and keeping it cleaner longer.

Post-Cleaning Maintenance Tips

Ensure your carpet’s longevity and cleanliness with post-cleaning maintenance tips!

  • Vacuum regularly
  • Treat stains immediately
  • Avoid walking on damp carpets
  • Use carpet protectors
  • Rotate furniture periodically
  • Hire professional cleaning services

These tips will keep your carpet looking fresh for years.

Conclusion

We have been looking at ways to clean carpets at home. Let’s review the key points and add extra information.

Vacuuming is essential for a healthy carpet. Regular vacuuming removes dirt, dust, and more to increase the lifespan of carpets.

Spot cleaning is also important for tackling stains and spills. Acting quickly with a cloth or paper towel can help.

Steam cleaning is done by professional cleaners. Hot water and pressure remove dirt and grime.

Did you know? Ancient Persians and Greeks used soapwort plants to clean their carpets. The saponins acted as natural detergents when mixed with water. Interesting how people cleaned carpets before modern advances!

4th October 2023 D.I.Y

How To Damp Proof Wood Walls DIY

Damp-proofing wood walls is key to preventing moisture damage and keeping your space intact. It means taking steps to stop water from entering the walls and causing structural issues. Here, we look at DIY methods to damp-proof your wood walls.

Why is damp proofing so important? Wood is porous and easily absorbs moisture. This can lead to rot, mold growth, and other problems. By taking preventive action, you keep your wood walls safe.

A good way is to apply a waterproof sealant or paint. This makes a protective barrier on the wood, blocking water from entering. Choose a quality sealant or paint made of wood.

Also, install a vapor barrier behind the wood paneling or drywall. It serves as a physical barrier against moisture and stops it from reaching the wooden structure. Be sure to install the vapor barrier correctly.

Proper ventilation in the space helps prevent condensation and lower humidity levels. Install vents or fans in places like kitchens and bathrooms for better air circulation and drier wood walls.

Inspect your wood walls regularly for signs of dampness or water damage. Look out for discoloration, peeling paint, soft spots, or musty odors. If you find any, address them quickly to avoid more damage.

Understanding The Importance Of Damp Proofing Wood Walls

Wood walls are a beautiful design choice. But, they can be prone to dampness. To safeguard their structural integrity and prevent moisture-related issues like rot, mold, and mildew, damp proofing is essential. Wood absorbs and releases moisture depending on the humidity levels around it, which can cause warping, swelling, or decay.

To protect wood walls, specialized sealants or coatings can create an impermeable layer, keeping water out. Make sure to use high-quality products made for wood surfaces. Inspecting for signs of moisture penetration is also important.

Ventilation is vital too. Good airflow helps regulate humidity levels, reducing the risk of condensation. Fans or vents in bathrooms or kitchens can be beneficial.

Consult professionals for the right sealant and application techniques. Damp-proofing your wood walls will keep them looking beautiful and functioning well for years.

Preparing The Materials And Tools Needed For Damp Proofing

DIY projects are unique, so extra materials or tools might be needed. Consider a moisture meter to measure the wood wall’s moisture levels. Invest in high-quality waterproofing paint or sealant for wood surfaces that have great moisture resistance. Get brushes or rollers for an even application. Wear protective equipment like gloves, goggles, and a dust mask when working with chemicals. Proper preparation makes all the difference in successful DIY results!

Inspecting The Wood Walls For Existing Damp Issues

Look out for any signs of water damage, like discoloration, mold, and peeling paint.

Also, feel the walls to see if they’re damp.

Check the baseboards and corners for water stains or soft spots.

Use a moisture meter to see if there’s hidden moisture in the wood.

Examine the exterior walls for any cracks that could let water in.

Besides these steps, pay attention to smaller signs of dampness. Condensation and lack of insulation can become bigger issues if left unchecked. It’s important to inspect your wood walls regularly to prevent costly repairs and health hazards. Act now to keep your house safe and sound!

Treating Any Existing Damp Problems

In order to address any existing damp issues, it is important to follow the necessary steps for effective treatment. Firstly, identifying the source of moisture is crucial, as it could be due to condensation, rising dampness, or penetrating dampness. Once the source is determined, appropriate measures can be taken to mitigate the problem. This may involve improving ventilation, sealing cracks and gaps, or applying damp-proof membranes. Additionally, it is important to ensure that any damaged or decayed wood is repaired or replaced to prevent further moisture infiltration. By taking these necessary steps, the underlying damp problems can be effectively treated, ensuring the durability and longevity of the wood walls.

Furthermore, it is essential to regularly monitor the moisture levels to prevent future recurrence of dampness. This can be done by using moisture meters or hygrometers to assess the moisture content in the walls. Maintaining proper ventilation and implementing preventive measures such as waterproofing treatments can also contribute to long-term damp prevention. By addressing the existing damp problems promptly and taking preventive measures, the wood walls can be safeguarded against moisture-related issues in the future.

Notably, in addition to the technical aspects of damp treatment, it is important to consider the potential impact on individuals residing in the affected area. Damp problems can lead to the growth of mold and mildew, which can be detrimental to respiratory health. Therefore, it is crucial to address these issues promptly to ensure the well-being of inhabitants.

Finding moisture or water damage on your wood walls is like discovering your ex’s number in your phone: it’s a sure sign of trouble.

Identifying Signs Of Moisture Or Water Damage

Moisture or water damage can be destructive. To stop it from getting worse, it’s important to recognize signs of damage quickly. Here are some key warnings:

  • Water stains or discoloration on walls, ceilings, or floors
  • Musty or damp smells in closed rooms
  • Peeling or bubbling paint or wallpaper
  • Visible mold growth
  • Warped or swollen wood
  • Deterioration of building materials like plaster, drywall, or cement

Neglecting moisture issues can lead to bigger problems and weaken the structure of your property. So it’s essential to tackle these signs fast.

It’s not only homes that are affected by wetness. Commercial properties and buildings are also at risk, like when a burst pipe causes lots of damage in a commercial building. It spread water through many floors, wrecking furniture and equipment. This serves as an important reminder of the importance of spotting and treating moisture or water damage without delay.

So keep an eye out for anything unusual that could show moisture issues and act quickly. Early detection is the key to avoiding expensive repairs and keeping your property in good condition.

Applying Appropriate Treatments Or Sealants

Locate the source of the dampness first. It could be a pipe leak, faulty guttering, or wall cracks. Solve these underlying problems to stop recurring dampness. Then, select an ideal treatment or sealant for the particular kind of dampness, such as condensation or rising dampness. Get expert advice or research thoroughly to make sure you use the most effective product. When applying the chosen treatment or sealant, follow the manufacturer’s instructions and clean the affected area first. For even coverage, use the correct tools and techniques.

Also, ample airflow is essential for preventing dampness in the long run. Open windows regularly or install ventilation systems. To further improve the outcome of the treatment, follow these steps: maintain areas prone to dampness (like bathrooms and basements); properly install insulation materials; and monitor humidity levels with dehumidifiers. Taking timely action and doing regular maintenance will keep your property in good condition and your living environment healthy.

Applying A Damp Proofing Solution To The Wood Walls

Wood walls can be prone to dampness, which can lead to damage and decay. To protect the wood and prevent moisture from seeping in, it is important to apply a damp-proofing solution. Here is a step-by-step guide to help you apply the solution effectively:

  1. Prepare the surface: Ensure that the wood walls are clean and dry before applying the damp-proofing solution. Remove any existing paint or sealant to allow the solution to penetrate the wood properly.
  2. Choose the right solution: There are different types of damp-proofing solutions available, including liquid membranes, epoxy resin, and silane/siloxane-based products. Select a solution that is specifically designed for treating wood surfaces.
  3. Apply the solution: Using a brush or roller, apply the damp-proofing solution evenly across the wood walls. Make sure to cover the entire surface, paying extra attention to any cracks, crevices, or joints where moisture can seep in.
  4. Allow for proper drying time: Give the solution enough time to dry and cure. Follow the manufacturer’s instructions for the specific product you are using, as drying times may vary.
  5. Apply a second coat (optional): Depending on the product you choose, it may be recommended to apply a second coat for added protection. This will enhance the effectiveness of the damp-proofing solution and provide an extra barrier against moisture.
  6. Monitor and maintain: Regularly monitor the wood walls to ensure that the damp-proofing solution is working effectively. If you notice any signs of dampness or moisture, reapply the solution as needed.

It is important to note that each wood wall may have unique characteristics and requirements, so it is always a good idea to consult with a professional or follow the manufacturer’s instructions for the best results.

Pro Tip: Before applying the damp proofing solution, consider testing a small inconspicuous area first to ensure compatibility and to determine the desired effect on the wood.

When it comes to choosing the right damp-proofing product, remember that moisture and walls are like exes at a wedding – they just don’t mix.

Choosing The Right Damp-Proofing Product

Compatibility: Check that the damp-proofing product you get is compatible with the type of wood used in your walls. Different woods have distinctive qualities, and using an unsuitable product can cause ineffectiveness or even damage the wood.

Application method: Think about how easy it is to apply when you pick a damp-proofing solution. Some products may need special gear or help from a professional. Others can be done by homeowners. Pick a way that works with your abilities and resources.

Effectiveness: Look for a product that gives good defense against dampness damage. Investigate the effectiveness of different damp-proofing solutions. Read customer reviews. And think of consulting with experts to figure out which option will protect your wood walls best.

Longevity: Think about how long the damp-proofing product will last. You want a solution that will work for a long time, so you don’t have to apply it or do maintenance too often.

Remember, you have to look over and maintain damp proofing regularly to make sure it stays good. By taking care of troubles quickly and having a proactive attitude, you can avoid issues down the line.

Preparing The Wood Walls For Application

Assess the condition- Inspect the wood walls for any damage or decay. Look for cracks, rot, or moisture. This will help you decide what needs to be done.

Clean and dry- Remove any dirt, dust, or debris using a vacuum or brush. Make sure the walls are completely dry.

Repair and seal- If there are any visible damages, fix them with a filler or sealant before applying the damp-proofing solution. Follow the manufacturer’s instructions on ventilation and safety.

A cautionary tale- A homeowner didn’t prepare their wood walls properly and moisture seeped through untreated areas. It caused damage and cost money to fix. Preparing the walls beforehand would have avoided all this.

Applying The Damp Proofing Solution According To The Manufacturer’s Instructions

  1. Clean the wood walls thoroughly to prepare the surface – removing any dirt, dust, or debris. To bond properly, it’s essential.
  2. Mix the damp proofing solution carefully, following the manufacturer’s instructions. This balances the chemical composition, maximizing effectiveness.
  3. Use a brush or roller to apply the solution evenly, paying attention to corners and edges.
  4. Allow sufficient time for it to dry completely before adding any finishes or exposing it to moisture.
  5. Manufacturer instructions regarding temperature conditions or protective measures should also be taken note of.

Ancient civilizations used natural substances, such as oils and resins from plants, to preserve wooden structures from humidity and water damage. This knowledge has evolved into modern-day solutions with advanced chemical formulas for increased protection. Such solutions ensure the longevity of our valuable wooden surfaces.

Explore: How To DIY Chemical Injection Damp Proofing

Allowing The Damp Proofing Solution To Dry And Cure

Ensure optimal results with the damp proofing solution by drying and curing it thoroughly. Follow these 5 steps for proper drying and curing:

  1. Using a brush or roller, evenly apply a thin layer of the solution to the wood surface.
  2. Let the solution air dry for 24 hours, and make sure the area is properly ventilated.
  3. Once dry, inspect the wood to be sure it’s evenly absorbed in the solution.
  4. If needed, apply a second coat with the same process.
  5. Give the second coat enough time to dry and cure before applying other treatments or finishes.

To ensure optimal drying and curing of the damp proofing solution:

  • Keep temperature and humidity levels in the area during drying and curing.
  • Avoid direct exposure to sunlight, which could cause uneven drying.
  • Make sure the area has adequate ventilation; this helps speed up drying and prevent trapped moisture.
  • Regularly check the drying progress by lightly touching the wood surface. If any area still feels wet or sticky, give it more time to dry.

With proper drying and curing time, your wood walls will be effectively protected against moisture, improving their longevity and durability.

Finishing Touches And Maintenance Tips

Dust & wipe wood walls regularly to get rid of dirt & grime. Use a soft cloth or microfiber duster to avoid scratches. Inspect walls for cracks & gaps. Seal them with wood filler or caulk to stop moisture from seeping in. Apply a protective finish like wax or varnish to make walls resistant to moisture, UV rays, & scratches.

Balance humidity levels. Use a dehumidifier in humid climates or rainy seasons. Hang curtains or blinds to protect walls from direct sunlight. Sunlight can fade color & cause warping. Check for mold & mildew. Remove with a mild bleach solution if present.

Follow these tips to keep wood walls in great condition!

Conclusion

We have discussed it – damp-proofing wood walls is essential. Follow the steps outlined in this article to protect them:

  1. Identify signs of dampness and use a damp-proof membrane on the external wall. This will prevent moisture from seeping in.
  2. Apply waterproof paint or sealant too. Choose a high-quality product designed for wood surfaces.
  3. Maintain proper ventilation to reduce condensation and humidity. Utilize dehumidifiers and open windows regularly.
  4. Inspect and repair any cracks or gaps in your wood walls. Seal them with filler or caulking materials. This will further enhance damp-proofing effectiveness.

Investing in these techniques will safeguard your wood walls. Preserve their aesthetic appeal and structural integrity. Minimize potential damage caused by moisture infiltration. Ensure a longer lifespan for your wooden surfaces.

4th October 2023 D.I.Y

How To DIY Chemical Injection Damp Proofing

DIY chemical injection dampproofing is a method to stop moisture from entering dwellings. It involves injecting a special chemical blend into walls, forming a barrier against water. Homeowners can do this themselves, thus avoiding the cost of hiring professionals.

  1. Step one is locating spots that are prone to moisture. Signs are damp patches, peeling wallpaper, and musty smells. Then, clean and remove any loose material from these areas.
  2. Next, drill holes in the affected walls at regular intervals. This allows the chemical solution to reach deep into the masonry. The mix is usually water with a damp-proofing agent.
  3. Using an injection gun, inject the blend into each hole until it starts to overflow slightly. This ensures that all empty spaces within the wall are filled with the solution. Wipe away the extra.
  4. Be safe during this process, as some damp-proofing agents can be hazardous if not handled correctly. Wear protective gear such as gloves and goggles, and make sure the work area is well-ventilated.

Explore further: How To Damp Proof A Retaining Garden Wall

Understanding The Need For Damp Proofing

Damproofing is essential to protect buildings from moisture damage. It halts water infiltration, mold growth, and structural breakdown. Knowing about damp proofing assures long-term, sustainable structures.

Moisture can cause severe issues such as decay, fracturing, and even weakening of the structure. Dampproofing is the first defense against these problems. It establishes a barrier that stops water from infiltrating the building, protecting the structure and its occupants.

Before doing damp proofing, you must contemplate climate conditions, building materials, and the source of moisture entry. This helps determine the most suitable damp-proofing method.

One common chemical injection dampproofing technique is injecting a liquid or gel material into the affected areas of the structure. This forms a waterproof barrier that hinders further moisture entry. The injected chemicals block water and make the structure stronger and more durable.

Pro Tip: Before attempting any DIY chemical injection damp proofing, study and comprehend the process for best results. Ask professionals for help if needed.

Preparing For Damp Proofing

To prepare for damp proofing with DIY chemical injection, gather the necessary tools and materials. Assess the affected areas and determine the required quantity of chemicals. This section equips you with the essential steps for a successful damp-proofing project.

Gather The Necessary Tools And Materials

Gathering the right tools & materials is key for damp proofing. Here’s a step-by-step guide to help you out:

  1. Assess the requirements. Understand what damp proofing needs.
  2. Research & seek advice. Get tips from pros or experts.
  3. Make a list. Keep track of all needed tools & materials.
  4. Shop smartly. Compare prices & prioritize quality.
  5. Double-check before starting. Avoid any hassle.

It’s essential to know that there may be specific items required, depending on the damp proofing method & severity of the problem. A study by The NIBS found dampness & moisture-related issues can affect buildings’ air quality.

Assess The Affected Areas And Determine The Required Quantity Of Chemicals

Assessing affected areas and determining the quantity of required chemicals is vital for damp proofing prep. This approach allows a thorough evaluation of the damage and helps figure out the right amount of chemicals for the areas. Here are 5 steps to do it:

  1. Inspect: Carefully check areas with signs of dampness, like discolored walls or peeling paint. Look for cracks or leaks that may be causing the issue.
  2. Measure: Use a measuring tape for each affected area. It’ll help calculate the surface area needing treatment and estimate the quantity of chemicals.
  3. Identify dampness type: Different types of dampness require different chemicals. Figure out if it’s rising, condensation, or penetrating dampness to select the right chemical solution.
  4. Consult an expert: Seek advice from a damp proofing specialist who can assess the situation and give recommendations on the best course of action and chemicals.
  5. Calculate quantity: Based on measurements and consultation, calculate the exact quantity of chemicals needed for treatment. Follow manufacturer guidelines for dilution ratios for effective use.

Also, proper ventilation in affected areas can prevent further damage from moisture build-up. Regular inspection and maintenance can spot early signs of water damage before it’s too late.

Safety Precautions

To ensure safety while undertaking a DIY chemical injection damp-proofing project, it is crucial to take certain precautions. Understanding the potential hazards of chemicals and using personal protective equipment (PPE) play vital roles in safeguarding yourself.

Understanding The Potential Hazards Of Chemicals

Chemicals can be risky – so let’s break down the different hazards they pose.

Check out this table for an overview:

Chemical HazardDescriptionExamples
FlammableIgnites and burns easilyAcetone, gasoline
ToxicCan be harmful or even deadly if inhaled or ingestedLead, cyanide
CorrosiveDamages materials it touchesSulfuric acid, strong alkalis
IrritantCauses inflammation when in contact with skin or mucous membranesBleach, ammonia

It’s also important to think about reactivity and environmental impact. Reactivity is how chemicals can react and cause danger when combined with other substances. Environmental impact considers the consequences of chemical release on ecosystems and nearby areas.

When you deal with chemicals, always wear PPE like gloves, goggles, and lab coats. Make sure your workspace has proper ventilation, too.

Pro Tip: Read Material Safety Data Sheets (MSDS) for each chemical. These sheets have info on handling, first aid, and emergency contacts in case of accidents or spills.

By being aware of the risks and taking proper precautions, we can keep ourselves and those around us safe. Stay informed and stay safe!

Using Personal Protective Equipment (PPE)

Using Personal Protective Equipment (PPE) is essential for individual safety in many settings. This article will explore the importance of PPE and its effectiveness.

Masks help protect against airborne particles and pathogens. Wear clothing that is not loose-fitting to avoid getting caught in machinery. Gloves provide a barrier between hazardous substances and skin. Safety goggles protect eyes from chemicals or debris. Harnesses and safety belts are essential for fall protection when working at heights.

There are other aspects to consider with PPE. Fit it properly and inspect it for damage or defects. Provide training on how to use and maintain it.

To ensure effectiveness:

  1. Select appropriate PPE for the task or environment.
  2. Clean and sanitize PPE regularly.
  3. Store PPE in a clean and dry area.
  4. Replace damaged or worn-out PPE.
  5. Educate workers on using PPE correctly.

Following these suggestions helps to reduce the risk of injury or illness in work environments. PPE is a vital defense and promotes safety and well-being.

Step-By-Step Instructions For DIY Chemical Injection Damp Proofing

To achieve successful DIY chemical injection damp proofing, follow these step-by-step instructions. Prepare the injection ports, mix the damp-proofing chemical solution, and inject the chemical into the affected areas. This systematic approach ensures a thorough and effective treatment, preventing moisture from seeping into your walls and causing potential damage.

Preparing The Injection Ports

For successful DIY chemical injection damp proofing, preparation of injection ports is key. Here’s a step-by-step guide to help you out:

  1. Assess the wall. Check inside and outside for cracks or cavities. Use a flashlight.
  2. Clean the area. Remove paint, dirt, and debris with a wire brush or scraper. Make sure it’s dry.
  3. Mark injection points. Use a pencil or marker to identify points.
  4. Install injection ports. Adhere them to marked points. Follow manufacturer instructions.

Note: Different walls may require specific methods. Consult experts or read product manuals.

DIY chemical injection damp proofing can be rewarding. It saves money and protects your home. So take precautions and follow proper procedures.

Mixing The Damp Proofing Chemical Solution

Gather all items needed to mix the damp-proofing chemical, such as the chemical, a clean bucket, measuring cups, and a stir stick. Measure the chemical according to the instructions. Put the measured chemical into the bucket. Then, gradually add water while stirring. Stir until all components are mixed and have a uniform consistency. Let it sit for a few minutes before application.

Always use protective gear like gloves and goggles. Mix only as much as you need to avoid waste. Different products may have different mixing instructions, so read and follow the manufacturer’s guidelines.

Mixing the damp-proofing chemical solution correctly is important for its effectiveness and longevity. Follow these steps and take precautions to reduce dampness and create a healthier environment.

Injecting The Chemical Into The Affected Areas

Before injecting the chemical, clean and dry the affected area. Get rid of any debris or loose materials that could disrupt the injection process. Follow the manufacturer’s guidelines to mix the right proportions of the chemical solution.

Drill holes into the areas where moisture is present. Insert the nozzle and inject the chemical solution with light pressure. Then, seal off the drilled holes with epoxy or mortar.

Be sure to read all the safety instructions provided by the product and relevant authorities. Proper ventilation is also important to secure safety and maintain air quality. A homeowner was able to use this chemical injection damp proofing and solved their basement issue. With the right tools and knowledge, you can do it too!

Aftercare And Maintenance

To ensure the long-lasting effectiveness of your DIY chemical injection damp proofing, aftercare and maintenance play vital roles. Cleaning and sealing the injection ports, as well as monitoring for any signs of moisture or dampness, are essential steps to guarantee the continued success of your damp-proofing solution.

Cleaning And Sealing The Injection Ports

  1. Gather the necessary items for cleaning: a mild detergent, warm water, a soft-bristle brush, and a clean cloth.
  2. Mix a mild detergent and warm water in a bucket or basin.
  3. Dip the brush into the soapy water. Gently scrub the injection ports to remove dirt and debris.
  4. Rinse the injection ports with clean water. Remove remaining soap residue.
  5. Dry the injection ports with a clean cloth. Make sure they are dry before sealing them.

Regularly clean and seal injection ports. Check for signs of damage or wear.

Neglecting proper cleaning has caused issues such as leaks and decreased performance.

But advancements have taught us the importance of this step.

Cleaning and sealing injection ports will protect them and improve system efficiency. So take the time to care for them regularly. You’ll gain performance and reliability.

Monitoring For Any Signs Of Moisture Or Dampness

  1. Inspect all moist areas, like bathrooms, basements, and kitchens.
  2. Spot visible water stains on walls/ceilings.
  3. Smell for musty odors which might hide moisture.
  4. Hygrometers can track humidity levels.
  5. Use moisture meters to detect moist spots behind walls/under flooring.

Address any signs of moisture quickly. This may include fixing leaks, better ventilation, or dehumidifiers in humid places. Maintenance prevents costly repairs and guards your home.

Conclusion

This article has explored DIY chemical injection damp proofing. Prep and diagnosis are necessary, as well as the chemicals and equipment. Safety precautions and risks are incredibly significant.

Manufacturers’ instructions must be followed and professional guidance may be necessary. DIY projects can be fulfilling, however, tackling chemical injection damp proofing without knowledge and experience can lead to costly errors. Seeking help from a professional specializing in damp-proofing solutions may be beneficial.

Now’s the time to create a safe and comfortable living environment! Take measures to address existing or potential damp issues. Prevention is better than cure when protecting your property from dampness. Act now and enjoy a healthier living space tomorrow!

3rd May 2023 D.I.Y

Preserving Your Leather: How To Apply A Dye Sealer

Leather is a popular material used for various products, from clothing to furniture, and is prized for its durability, style, and comfort. However, leather is also vulnerable to damage from sunlight, moisture, and other environmental factors, which can cause it to fade, crack, and deteriorate over time. To protect your leather items and extend their lifespan, it’s essential to preserve them properly. One effective method of maintaining leather is by using a dye sealer. A dye sealer is a protective coating that penetrates the leather fibres, adding colour and sealing the surface to protect it from damage.

Understanding Leather And Its Properties

Leather is a material that is widely used for clothing, footwear, and furniture and is valued for its durability, style, and comfort. To effectively preserve leather, it’s essential to understand its properties and how it behaves over time. In this section, we will go over the different types of leather, their characteristics, and the factors that can affect the longevity of your leather items.

Check out: The Psychology Of Rearranging Furniture

How To Apply A Dye Sealer

Types Of Leather

There are several types of leather, each with unique properties and characteristics. Some of the most common types include:

  • Full-Grain Leather: This type of leather is made from the top layer of the hide and is considered the highest quality leather. Full-grain leather has a natural texture and patina and is known for its durability and resistance to damage.
  • Top-Grain Leather: This type of leather is made from the second layer of the hide and has had the top layer sanded and buffed to remove any blemishes. Top-grain leather is still durable but is less resistant to damage than full-grain leather.
  • Corrected-Grain Leather: This type of leather is made from the third layer of the hide and has had an artificial grain applied to it to hide any imperfections. Corrected-grain leather is less durable and resistant to damage than full-grain or top-grain leather.

Characteristics Of Leather

Leather has several unique properties and characteristics, including:

  • Durability: Leather is known for its durability and can last many years with proper care and maintenance.
  • Breathability: Leather allows air to circulate, which helps keep the material from becoming too hot or humid.
  • Softness: Leather can be soft and flexible, making it comfortable to wear or sit on.
  • Water Resistance: Leather is naturally water-resistant, but its resistance can be diminished over time by exposure to moisture and other environmental factors.

Factors That Affect Leather’s Durability

Several factors can affect the longevity of your leather items, including:

  • Exposure to Sunlight: Direct sunlight can cause the leather to fade and crack over time.
  • Moisture: Exposure to water can cause the leather to become discoloured, brittle, and weakened.
  • Temperature: Extreme temperatures can cause the leather to dry out and become brittle, making it more susceptible to damage.
  • Use: Regular use can cause the leather to become worn and scratched, weakening its fibres and reducing its lifespan.

By understanding the different types of leather, their characteristics, and the factors that affect their durability, you can make informed decisions about preserving your leather items best and extending their lifespan.

What Is A Dye Sealer, And How Does It Work?

A dye sealer is a protective coating applied to the leather to protect it from damage and extend its lifespan. Dye sealers come in various colours and formulas and can be used to both add colour to leather and seal its surface to protect it from the elements.

Check out: How & Why You Should Paint Your Tired Kitchen Cabinets

How A Dye Sealer Protects Leather

A dye sealer penetrates into the leather fibres, creating a barrier that helps protect the leather from damage. The dye in the sealer adds colour to the leather, helping to hide any existing damage or blemishes, while the sealer protects the leather from further damage. The sealer forms a barrier that repels moisture and prevents the leather from becoming brittle and dry, which can cause it to crack and deteriorate over time.

Different Types Of Dye Sealers

Several types of dye sealers are available, each with unique properties and characteristics. Some of the most common types of dye sealers include:

  • Water-Based Dye Sealers: These sealers are made from water and a type of resin and are known for their easy application and quick drying time. Water-based dye sealers are also environmentally friendly, as they do not emit fumes or harmful chemicals.
  • Solvent-Based Dye Sealers: These sealers are made from solvents, such as alcohol or petroleum, and are known for their robust and long-lasting protection. Solvent-based dye sealers can be more challenging to apply than water-based sealers and may emit fumes harmful to the environment.
  • Oil-Based Dye Sealers: These sealers are made from oil and are known for their deep, long-lasting protection. Oil-based dye sealers can be difficult to apply and require multiple coats for maximum protection.

Choosing the correct type of dye sealer for your leather will depend on your specific needs and preferences and the style of leather you are working with. It’s important to carefully read the instructions and follow the recommended application process for the dye sealer you choose to ensure the best results and protection for your leather.

Preparing The Leather For Application

Before applying a dye sealer to your leather, it’s essential to prepare it to ensure the best results properly. This will not only help the dye sealer to adhere correctly but also help to extend the life of your leather. Here are the steps to properly prepare your leather for a dye sealer application:

  • Clean the Leather: The first step in preparing the leather is to clean it thoroughly. This will remove any dirt, oil, or other contaminants that may interfere with the adhesion of the dye sealer. A gentle leather cleaner, such as a soap and water solution, can clean the leather. Remove all soap residue with a clean cloth and allow the leather to dry completely before applying the dye sealer.
  • Condition the Leather: Leather can dry out and crack over time, so it’s important to condition it before applying a dye sealer. Leather conditioner helps to moisturise the leather, making it more pliable and less likely to crack. Apply a thin layer of leather conditioner to the leather, using a clean cloth, and allow it to soak in for 10-15 minutes. Then, remove any excess conditioner with a clean cloth.
  • Repair Any Damage: Before applying a dye sealer, it’s a good idea to repair any damage to the leather, such as cracks or tears. This will help prevent the damage from worsening and ensure that the dye sealer adheres properly to the leather. A leather patch or filler can be used to repair any damage.
  • Test the Dye Sealer: Before applying the dye sealer to the entire piece of leather, it’s a good idea to test it on a small, inconspicuous area first. This will allow you to see how the dye sealer will affect the leather and make any necessary adjustments before applying it to the entire piece.

By adequately preparing the leather, you can ensure that your dye sealer application goes smoothly and that your leather will be protected for years.

 Applying The Dye Sealer

Once your leather is prepared correctly, you’re ready to apply the dye sealer. The specific instructions for applying a dye sealer will vary depending on the type of sealer you’re using, but here are some general guidelines to follow:

  • Please read the Instructions: Before you start, read the instructions for your specific dye sealer to ensure that you’re using it correctly. Some sealers may require multiple coats or have specific drying times that need to be followed.
  • Apply the Dye Sealer: Start by applying a thin, even layer of dye sealer to the leather using a clean cloth or brush. Be sure to cover the entire leather surface, including the seams and any exposed edges.
  • Allow to Dry: Allow the dye sealer to dry completely, following the instructions on the product label. Depending on the sealer you’re using, this can take anywhere from a few minutes to several hours.
  • Apply Additional Coats: If necessary, apply additional coats of dye sealer to the leather, following the instructions on the product label. Be sure to allow each coat to dry completely before applying the next.
  • Buff the Leather: Once the final coat of dye sealer has dried, use a clean cloth to buff the leather to a high shine gently. This will help to spread the dye evenly and ensure that the leather has a smooth, uniform appearance.

You can successfully apply a dye sealer to your leather and protect it from damage for years to come. It’s essential to take your time and be patient, as using a dye sealer can be a time-consuming process. But the result of beautifully protected leather is well worth the effort!

Maintaining Your Leather After Application

Once you’ve successfully applied a dye sealer to your leather, it’s essential to maintain it properly to ensure that it stays protected and looks great for years to come. Here are some tips for keeping your leather after a dye sealer application:

  • Clean Regularly: Leather can become dirty and stained over time, so it’s essential to clean it regularly to keep it looking its best. Use a gentle leather cleaner, such as a soap and water solution, to clean the leather, and remove all soap residue with a clean cloth.
  • Condition Regularly: Leather can dry out and crack over time, so it’s important to condition it regularly to keep it moisturised and pliable. Use a leather conditioner to keep your leather soft and supple, and follow the instructions on the product label.
  • Avoid Exposure to Direct Sunlight and Heat: Direct sunlight and heat can cause the leather to fade and dry out, so it’s essential to keep your leather out of direct sunlight and away from heat sources.
  • Protect from Scratches and Tears: Leather can become scratched and torn over time, so it’s essential to protect it from damage. Use a protective cover or place a soft cloth between your leather and hard surfaces to prevent scratches and tears.
  • Store Properly: When not in use, store your leather in a cool, dry place away from direct sunlight and heat sources. This will help extend your leather’s life and keep it looking its best.

With these simple tips, you can maintain your leather after a dye sealer application and enjoy its beauty and durability for years to come.

Preserving your leather is an essential step in ensuring that it lasts for years to come. A dye sealer is a great way to protect your leather from damage, and by following the proper steps for preparing, applying, and maintaining it, you can ensure that it stays looking great for a long time. Whether you’re a leathercraft enthusiast or want to keep your leather furniture and accessories looking their best, applying a dye sealer is a simple and effective way to ensure that your leather stays protected and beautiful. So don’t hesitate to try it out today and enjoy the benefits of beautifully preserved leather for years to come!

10th September 2021 D.I.Y

Exposed Piping: Your Channel for a Chic Home!

Gone are the days where you should be ashamed of your exposed pipes putting off the visitors – these conduits give the finishing touches to any modern home needing that particular spice.

Aside from being a great accent with just minimal improvements, exposed piping offers something more that is valued by the people of today: convenience. Not only are pipes in the open easier to clean, but they can be used in different ways if you’re keen enough. What’s more?

If you have a particular eye for a specific theme, these displayed tubing can provide you with the subtlety and a pop of uniqueness perfect for your standout home.

Get your exposed pipes out because the industrial setting is extremely in!

Make Your Bathroom Bloom

There are certain hotspots in your home that require more ducts than other sections. While you may take the extra mile to cover them, taking the easier route of maximizing their presence can provide you with a lot more design ideas to play with. Here are some of the suggestions for exposed piping that can quickly turn your bathroom from “no” to “whoa!” with a few touches:

Bare your Shower

Photo Credit – Adobe Stock

Why should you be the only bare one out in the shower? Opt for the bare it all option for your latest shower installation and observe the drastic change in your bathroom atmosphere! While most people make their bath lines invisible, stand out from the rest by making the most out of your exposed piping. Either choose a minimalistic look that brings out a subtle highlight, or go all out with a dramatic touch with bold colours.

Don’t Blink in the Sink

Photo Credit – Adobe Stock

You won’t need to let your personality down the drain when you choose to accentuate your exposed piping in the sink. Sink and shower taps can have a life of their own when you choose to show them off! Attaching some lights in the sink pipelines is a great start to pave the way towards being effortlessly chic!

Sink pipe ideas are not even limited to the bathroom, as you can add a quirky element in your kitchen by highlighting the water lines. Not only does it add a personal touch to your kitchen area, but it also doubles up as a rack you can hang items with.

Turn Pipes into an Asset

Photo Credit – Adobe Stock

Sometimes, your water lines are positioned in the most random places. Don’t let it stop you from making a statement, though. With the right colour finish, you can go with any theme of your preference. Into that modern, contemporary look? Highlight your thick tubes above with a matte black hue for a tremendous everyday contrast. How about hand-picking a bright red shade for that eye-catching retro finish?

Your bathroom pipes shouldn’t always end up as dull; you can always add the right spice into the mix.

When in Doubt, Accessorize!

The most random pipelines don’t always have to blend in – showcase your keen eye for details by mixing fashion and functionality in unexpected places. Improve your home design and up your decorating game by hopping in on the exposed piping trend. Throw in some style, and you’re in for a ride!

Light it Out!

Photo Credit – Adobe Stock

You can deliberately have some pipelines exposed in your kitchen (or any area of your choice) to show off your trendy personality! Light fixtures made from exposed piping can do more than light up your chosen spot, it can also convey a lot more things – like your ability to give glamour to everything, even to unnoticed features.

Be Bold with Gold

Midas has the golden touch; why can’t you? Exposed piping can either be thick or thin, but that shouldn’t let you down when you’re going for a minimalistic design with just the right pop of hue! Some units have thick water lines up their ceiling, either for emergencies or there is just no other space available. Either way, bright gold conduits can liven up your living space. You can even choose any other colour; make your home your own.

They can even be seen out of every nook and cranny, including the space allotted for your reading blues. Still, you can never go wrong with the steampunk design, no matter how delicate. Give a kick to your interior decorations by making the displayed electrical and water channels the library’s main focus.

Pipes Don’t Just Hold Water

Photo Credit – Pixabay

Exposed piping designs are not just limited to walls and ceilings. In fact, you can definitely use them to support something. How about a wine holder, but make it a statement?

Styles of Pipes

Exposed piping can give you an infinite list of designs that can create different atmospheres in your own home. Be it retro, industrial, modern, or vintage, choosing the right style of conduits is a vital decision you shouldn’t miss out on.

Here are some pipe styles to consider when making changes around your space:

Copper Pipes: Copper is a popular choice not only because of its versatility, but also because of its durable properties. As the premium choice in plumbing, copper pipes’ main selling point is strong components that won’t contaminate your water source. What’s more? You can definitely leave them as they are because copper pipes are chic enough already.

PVC Pipes: These plastic pipes are usually used for water drainage, but can typically function all around. This type of channel makes a great exposed piping decor because of its longevity and resistance to rust. Color them black or any shade you want and watch as the plumbing lines transform the scene. What’s more? PVC pipes are great for DIY projects – consider this when you want to have a unique home that is one-of-a-kind.

PEX Pipes: Similarly made out of plastic, PEX pipes are known for their flexibility. As they can be adjusted to fit into tight places while still maintaining the durability needed for functionality, these pipes can be an addition you are looking for all along! No matter what style of conduits you use, what’s important is you find the drive to appreciate the potential of exposed piping. Channel your inner designer by giving life to the lines that are a fast-growing trend!

26th August 2021 D.I.Y

How & Why You Should Paint Your Tired Kitchen Cabinets

Painting Kitchen Cabinets - A Guide
Breathing new life into your kitchen doesn’t have to cost a bomb!

There is nothing that spruces a home quite like a new kitchen but, as we all know, a new kitchen can be expensive. The average cost of a new kitchen in the UK is £8,000 and £5,000 of that is the new cabinets. If you don’t want to spend quite that much but still want to update your kitchen’s look, then why not just paint your kitchen cabinets? It costs around £80 per cabinet, so you could end up saving thousands. It is frankly amazing the difference adding a lick of paint can make to your kitchen, and your home. But how do you even get started? What paint should I use? How do I prepare for this home improvement task? Well-read on for our handy, informative guide on how to paint, kitchen cabinets.

Make sure that your cabinets are in good enough condition to be painted

Old Kitchen Cabinets

Unfortunately, some kitchen cabinets just aren’t in a good enough state to be renewed. If your cabinets are fragile, the bottoms are starting to sag, the doors aren’t hanging right, or the veneers are starting to become delaminated, it might be better for you to bite the bullet and shell out for some new ones.

You should also take into account the material that your cabinets are made from, this is important as wood cabinets are perfect for painting. If your cabinets are laminated, don’t worry, you can still paint on this material! Just look out for any peeling, cracked or bulking, as painting over these blemishes isn’t going to make much difference. If your laminate cabinets have these signs, you may need to replace them completely. But you can also opt to use your old cabinets for other upcycling projects!

Decide what type of paint you want

Types Of Paint Oil Paint, Matt Paint, Silk Paint

Let’s get the fun bit out of the way first: choosing the look you will go for. This is actually an important decision because painting kitchen cabinets is a big job and you really don’t want to end up having to do it twice in quick succession. The colour scheme is, of course, a matter of personal preference but choosing the right paint does have some impact on how easy the cabinets are to paint and how durable they will be.

Matt/chalk –

These types of paints can give a great rustic/country kitchen look and they are easy to paint with. This type of paint will stick to most surfaces with little to no sanding. They are less durable, however, and are more prone to chipping and scratching, so you may end up having to redecorate slightly sooner than you would have liked to.

Satin –

With its smooth finish and shiny sheen when it’s dried, satin paint is a fantastic option to pain your cabinets with thanks to its hardy nature and is holds up when washed. But this type of paint does not hide blemishes and imperfection on the surface or when you have to do touch ups.

Gloss –

Gloss paint is incredibly durable and reflects light with excellence, gloss pain also has a high resilience to moisture thanks to its density. If you choose gloss paint preparation is key as gloss will show every imperfection upon application, make sure that the surface is clean and smooth before you apply.

Oil Based Paints –

Also known as solvent based paint, this type of paint is often used by professionals for its hard finish that is durable and resists moisture and water than other paints. This type of paint is perfect for stained cabinets. If you are wanting a finish that will look great for years and years, an oil based paint is your best option. While this type of paint offers great resistance, this comes at the price that oil based paint take a long time to dry, and we mean a long time. So, if you wish to paint cabinets with oil paint, make sure you are prepared to have a large drying area and don’t mind waiting.

Latex Paints –

Latex paints are your friendly easy to use paint that requires little prep beforehand such as priming, this type of paint latches onto wooden surfaces such as your cabinet frames with ease. This style of paint also comes in a range of finishes, giving your cabinets texture. The only drawback with latex paint is its durability, with it being thin also it is easy to leave brush marks.

Deciding whether to strip your kitchen cabinets

The great debate: to strip or not to strip. There is a school of thought that says you should always fully strip off the previous layer of paint before you put a new one on, but doing so is quite time consuming and may not always be necessary. The purpose of stripping is that a painted surface is much less rough than a bare wood surface, which means that a new layer of paint will adhere to it less well. But you can make a painted surface rougher, and easier for the new paint to adhere to, by sanding it down.

Sanding down painted cabinets is the go-to method of stripping a cabinet door but do be careful as to much vigorous sanding can damage the wood lying underneath. So, when sanding wood make sure to sand evenly to avoid making unwanted delves and gouges. You can use either sandpaper or power tools, but the advice remains the same, keep a consistent level of sanding to avoid any accidents.

You can also use a hot air gun, this method removes paint quickly and with ease, but you must be incredibly carful as you can scorch the wood! Also do note that a hot air gun removes paint and cannot be used to remove varnish as it will turn the varnish into an almost glue-like substance that will ruin your cabinets.

Using a chemical stripping agent is another option, this is best for intricately designed cabinets and cabinets that have multiple paint layers present while also providing the best results! When using a chemical method, you must take care. Read the safety instructions thoroughly and make sure you have all the equipment needed.

It is important, however, to make sure that you thoroughly clean and degrease the surface before you start painting on it. Cooking creates so much grease in your kitchen, which sticks to the surface of your cabinets, and this will make it much harder for your new paint to stick.

It’s probably a good idea to take off all the doors

Not everyone takes off their kitchen cabinet doors, and instead use masking tape to cover hinges and other metalwork, but it is usually a good idea to take the doors off berfore painting them. It is going to be much harder for you to do a neat and professional-looking job with the cabinet doors in situ, and the whole process will be more difficult and stressful.

If you’re able to, it can be wise to invest in painter’s pyramid. Painter’s pyramids will suspend the door in the air so that you can paint the front, back, and sides all in one go without having to wait for it to dry before you turn it over. Using painter pyramids in addition to your setup, regardless of how you choose to paint your cabinet doors, Painter’s Pyramids are a simply a must-have.

It’s probably a good idea to take off all the doors

It is also a good idea to clearly label exactly where each door goes. You might think it’ll be obvious to you where each door came from, but when you’re standing over a sea of kitchen cabinet doors it suddenly gets a lot more difficult. We recommend drawing a diagram of the kitchen and labelling not only the doors but the corresponding cabinet where the cabinet door has come from. This makes it far easier when reassembling your kitchen cabinets, as with any D.I.Y paint job the more your prep that better the outcome.

Prep the room before you start

Painting your kitchen cabinets is a big job and it takes a relatively long time, so you need to be prepared before you start. You may well not be able to use your kitchen as you normally would, so think about how you are going to be eating while the job is happening and get everything ready and in place.

If you have the space that doesn’t get used as much as the kitchen and has ample room to dry your cabinet doors, setup in there as the kitchen is usually a heavy traffic area within the home and it can be difficult to complete this job within confined spaces.

You will need to empty all of your cabinets of their food and products and clear all of the kitchen sides of their appliances. Then cover all of the fixed appliances with sheeting, as well as the counters, and use masking tape along the edges of the cabinets to protect your walls. Remove the cabinet doors if you are going to, and take out their hinges and handles.

If you are lacking the appropriate space or cannot remove them cover the hinges with masking tape, but do take the handles off.

Paint the cabinets!

You will usually need to do around one or two coats unless you are going for a much lighter colour than you currently have, in which case you might need more. Before you begin, you should use a primer and wait for it to dry. Then start by filling in the nooks and crannies before moving onto the main part of the cabinet. Always work from top to bottom when painting the cabinets, and make sure that you are painting across the grain rather than with it. Most people use a brush and/or a roller, but if you want a smoother finish, you could opt for a spray gun instead if your local paint store or D.I.Y store sells them. Each has their own pros and cons, which we talk about below.

Paint Brush –

The old faithful paint brush is usually the first port of call when you are deciding to go ahead painting cabinets. Brushes can be a natural bristle brush or can be a synthetic bristle brush, either is fine for painting your cabinets also your standard bush works with nearly all types of paint including oil based paints, latex paints, etc.

Pros –

Come in range of sizes

Cheap & works with nearly all paints

Perfect for small detailing such as to paint edges and getting into nooks

Cons –

Bristles breaking off and mixing with your paintwork

Considerably slower painting large surfaces in comparison to a roller

Roller –

Using a roller for a job like this may seem like overkill for painting doors, but if you have especially large cabinet doors, a roller is a perfect option for speeding up the job while spreading an even coat across the surface. Rollers also can come in a variety of materials such as foam, felt, polyester and multiple others.

Pros –

Speedy application of paint for those larger areas that would usually take up more time using a traditional paintbrush.

Smooth finish, even and consistent paint application, leaving a seamless appearance.

Less labour intensive

Cons –

Some high-quality rollers can be expensive in comparison

Can’t be used to paint smaller areas such as nooks and bevels in the cabinet design.

Paint Sprayer –

If you want to save time while getting a professional finish, then a sprayer might be the answer that you are looking for. As using a spray paint gun can save you loads of time from having to put on multiple coats of paint as you just spray paint!

Pros –

Considerably faster paint time.

Paint dries faster.

Even paint application.

More professional looking result

Cons –

Cleaning the paint sprayer takes longer than brushes or rollers.

Expensive

Any touch ups can only be done with the sprayer

All these items can be found at your local hardware shop or can be easily purchased via online retailers like Amazon.

Now that you have a more information on the ways that you can paint, take your time and see if you have the budget or the time to get started on this paint job.

Wait for the paint to cure

It is tempting to get your kitchen back in order as quickly as possible, but it really is worth your while to wait for your wet paint to cure. If you don’t, you could end up with smudged paint, in which case you will have an even bigger job on your hand. When selecting your paint, take into account on how much time your paint will take to dry. Different paint types take different lengths of time to cure, so make sure that you read the instructions carefully, and use your judgement to make sure that it really is ready!

Painting Cabinets – The bottom line

It is definitely possible to completely update your kitchen on a budget, just by painting your kitchen cabinets. It is a big job, but it can save you a lot of money, so it is often well worth it. Just make sure that you have everything ready before you start and have a good feel for how to paint kitchen cabinets, and you will have a kitchen that feels just like new in no time!

Just remember to take your time as it isn’t a race, flying through this job rushing along every step of the way is a sure-fire way to be left with, yes, a revitalised kitchen but all the tell-tale signs of a rush job, scuffs, sloppy paint application and a blotchy uneven finish. Slow and steady wins the race as you want the best possible result, preparation is key and carful application of paint is vital for this project to go swimmingly.

22nd December 2020 D.I.Y

How To Upcycle Your Old Dressing Table

If you’re struggling to find exactly what you’re looking for, you want to save a bit of money or you’re desperate for a new project, then upcycling an old dressing table could be for you. You will save lots of money and have plenty of fun in the process. So, before buying something new, look for an old piece of furniture that will have more character than anything you can buy in the shops and get started!

Find A Dressing Table

For those of you who don’t already have an old dressing table to upcycle, it’s time to find one! Contact friends and family, search online or try flea markets to find a dressing table that is full of character and has lots of potential. Shop around to find what you’re looking for and you will save so much money in the long run.

Make Any Repairs

Now that you have your dressing table, it’s time to start the upcycle! Pre-loved pieces of furniture are likely to have been around for a little while, so might need some TLC. It’s best to repair any broken or damaged bits before starting the rest of the upcycle. You may need to use wood filler to help get rid of any large scratches or dents that won’t be removed with sanding. Maybe you need to fix a stuck drawer or a broken leg, too. Once you have painted your table, you won’t want to have to be worrying about these things, so making any repairs at the beginning is the best way forward.

Clean With Sugar Soap

Once you’ve repaired any broken bits, it’s time to start cleaning. The first step is to remove any metal handles as they will be cleaned separately, then get out the sugar soap. Sugar soap is a cleaning product that prepares surfaces for repainting, as it gently washes any unwanted chemicals from the top layer of your furniture. With any cloth or sponge, clean the entire dressing table with the sugar soap and wipe afterwards with warm water. It is non-abrasive so won’t damage the dressing table, but it gets furniture in the best possible condition to give you a smooth finish once it is painted.

Bring Handles Back To Life

If the metal handles are dirty, grimey or generally very dirty, you’ll need to give them a good soak in equal parts of tomato ketchup and vinegar. Yes, this sounds really strange, but the acidic content of the two products helps to dissolve any grime. Leave to soak for a few hours before cleaning well (very well) and you’ll have brand new looking handles. For those of you with handles beyond repair, invest in some new ones that will bring the dressing table to life even more!

Sand It Down

Next, get some medium-grit sandpaper and go over the entire piece of furniture. It’s so important not to leave any lumps or bumps as they will be even more obvious when painted. Try to get things looking as even as possible all over, but it definitely won’t look perfect at this stage. Take a wet cloth to wipe away all the dust and leave to dry properly before moving on to the next stage.

Apply Primer

Whilst this stage isn’t essential as some paints have primer built in, applying a separate primer will ensure you have a nice smooth surface before painting, that the paint will stick to really well. Primer also helps to keep the paint intact for longer, meaning you won’t need to do another upcycle for a good few decades!

Firstly, put a sheet or newspaper underneath your dressing table in case things get messy. Take a small brush to get into any fiddly areas and use a larger brush for the open areas. Don’t expect a perfect coat the first time, as this is only a base for when you start applying the top layers of paint. Just take your time and evenly cover the entire dressing table. Once you’ve finished, leave it to dry according to the instructions on the paint and once dry, gently sand down any drip marks or lumpy bits and wipe away all the dust.

Time To Paint!

Once your primer has completely dried, it’s time to start painting. Now, when it comes to choosing a colour, your options are endless. In another post we written it included Dulux chic shadow silk & Dulux goose down paint which has been in trend for a couple of years now and still looks great. You could go for a simple white, a sleek black or add a pop of colour with pastel pink, sage green or teal blue. The darker you go, the more coats you might need, but you shouldn’t need any more than 3, especially with the primer.

Follow the same steps as with the primer, using the smaller brush for areas that are intricate and a bigger brush for the larger surfaces. Take your time and gradually work your way around the dressing table. Again, the first coat won’t be perfect, but you will notice such a big difference after the second coat. No matter how many coats it needs, repeat the same process. It is so important that you leave enough time for the paint to dry properly in between coats, or you risk ending up with bobbly and lumpy areas of paint.

Try using a colour that contrasts the rest of the dressing table on the drawers or on the top. If you’re feeling brave, why not try using stencils to create something completely unique? This is your chance to be creative, so find some inspiration and go wild. Reattach your handles or fit your new ones, and you’ve got your brand new dressing table!

Delux chic shadow silk paint in grey

Check Dulux chic shadow paint here

Dulux Goose Down Paint Matt

Check Dulux goose down paint here

Summary

So, there you have it! A brand new piece focal point for your room that everyone will think is from a designer furniture shop. Taking some time and care to renovate an old piece of furniture into exactly what you were looking for is not only cost effective, but extremely environmentally friendly. Prepared to feel proud every time you enter the room when you look at your new dressing table.

20th November 2019 D.I.Y

How to Wire a Light Switch?

You may want to know how to wire a light switch? Light switch wiring can be simple or notoriously fiddly, so you have to know what you are doing somewhat and keep in mind the safety aspects and concerns of wire lights. If you are unsure – it may be better to get an electrician to do this task or someone similar that is trained. Electricity is not something to be messed with – it can be incredibly dangerous and fatal if not done right. But do not let this put you off. It is a creative thing to learn and can save a lot of money.

  • lightbulb
    lightbulb

RCD Protection

Adding a new light from scratch or a completely new switch now requires the circuit to have RCD protection. This often requires that the fuse board is upgraded to a modern consumer unit.

How to Wire a Ceiling light

Here are some tips to follow on how to wire a light switch uk. How to wire a one way light switch is sometimes more difficult than it seems. But let’s find out how to do it. Firstly, the most important step on Wiring a lighting circuit:

Safety:

  • Make sure you switch off the mains power at the fuse box. This way you will be ensuring you do not cut through a live mains cable that could cause serious damage. 
  • Use a voltmeter, and/or a socket tester so you can be sure there are no mains running through the wires.
  • When you are finished, also use a socket tester or multimeter before you switch the mains back on. 

How to Wire a light?

Wiring a light switch uk could not be easier. Here we shall run through the steps. For a one-way switch, firstly you must earth the switch. This will make sure if there are any power surges, the power will be directed away and be dispersed in a safe manner. To do this you must open the switch and draw a light wiring diagram. This diagram will help you remember where to place the wires back and if you need a future reference of this light fitting. 

  • Secondly: You must connect the correct cores to the correct terminals of the new switch and tighten the screws. 
  • Third: Make sure you earth the switch and cover with some green/yellow sleeving. 
  • Fourth: Check everything is secure and cover over with the face plate. 

This is basic ceiling light wiring. Wiring a ceiling light can be very rewarding and ultimately save a lot of money if you do it right. The thing is – because it is quite tricky and there is not much margin for error, it can often go wrong. Sometimes you may want to get an electrician so they can check over your work and teach you a little bit more, so you can be confident. Check out our article on covering boiler pipes for more.

How to wire a double 2 way light switch

This is slightly different to 1 way light switches. Multi way switching needs an extra core so the current can run around the circuit in different directions in various ways. Because of the arrangement of the switching, these wires can be live at all times, so they require an extra brown safety flag on the wires to alert people to this fact, because it can be very dangerous. 

How to Wire a Double Light Switch

2 way light switch wiring needs to be done with an air of caution. They should all take power from the same circuit, but if not wired correctly, they may take power from different circuits. There could still be live cables if it is in a neutral position. This does not necessarily mean they are wrong, but may require an expert to take a look at them to make sure nothing is untoward. 2 wire light switches may require bigger wall mounts, so make sure you look out for this. 

Double light switch wiring is useful however, and is worth it. It is mostly used in larger rooms, like a long narrow hallway or a room with two entrances. Two way light switch wiring is useful here because sometimes, one can enter a room and not exit it the same way, so it makes it a better user experience throughout the whole house.

How to wire a light fitting with 3 cables

This is the same. Most all light fittings have 3 cables or more. A live, earth and a neutral. How to wire a light fitting with multiple cables is often asked, but it actually the same for multiple as it is for the two cables. This would also be the same advice for how to wire a light fitting with 4 cables.

Light switch wiring diagram

You probably will have seen a lot of wiring diagrams. But these can be confusing if you do not know what the symbols mean. What do the symbols mean??

Wiring a light switch uk diagram can be different to the EU and the USA, and everywhere else, so which is right? 

Light wiring colours:

We know the black or red means current, white neutral wires, silver or copper are the ground wires which are disconnected last.  The actual light, is represented by a circle sometimes with a cross in it, and the switch itself is represented by a line with a 45 degree line coming out of it (as if the switch is off at the moment). Next time you see a light wiring diagram uk, you may know what you are seeing!

Hopefully you have learned how to do wiring a light fitting uk ! Make sure you read other articles and follow safety precautions when you are doing this because it can be dangerous. Here is an article on tidying the home.

9th April 2019 D.I.Y

Ultimate Decluttering Guide

Decluttering is one of the habits that you should want to have in your life. There are already millions of homes filled with so much clutter that their houses already look like a hoarder’s. For generally clean people, this is not a problem but for the majority of us, clutter is a serious problem.

We all want clean and spacious houses but the truth is our lifestyle and consumer behaviour does not allow us the ideal situation. The idea of decluttering can be quite too much especially when you realize the sheer amount of items that you have.

According to the LA Times, the average households over 300, 000 items. This is an astounding number of items given that the average space of a house is just getting smaller and smaller.

A minimalist lifestyle is ideal especially for young professionals who still have no kids. Most of them need only the bare essentials so it would only be best to start decluttering from now.

Here is a comprehensive decluttering guide that you can follow to ensure that your house does not look like a hoarder’s house.

Start Small

Decluttering can be overwhelming. Items piling up do not get rid of themselves and often, this clutter can hold up to months and months of unnecessary items. Start off with a small space just to get yourself going. Tackle a kitchen counter or a dining table first and then work towards the bigger space afterwards. You need a sense of motivation to keep yourself inspired. Cleaning can be a boring, back-breaking task and keeping yourself motivated will be hard.

Perhaps starting with only your walls can help, since this is the first thing that draws everyones attention, this way you’ll be motivated to do the rest of your home once you start noticnig the benefits of decluttering. Because you’ve now got free wall space, how about expanding your room with wall mirrors and creating a space that feels large, warm and not so claustrophobic anymore.

Work Slowly and in Increments

Work Slowly and in increments so you do not burn yourself out. Instead of using up the entire day just for decluttering, make it a habit instead. You can do an hour or two per day just for cleaning up or you can spend an afternoon on a free day. Don’t rush yourself. It’s better to have steady progress than a rushed success.

Get Organized

After cleaning and organizing each area, decide immediately what you want to do with the items that you’ve deemed unnecessary for your daily life. Create 4 piles: For Self-Storage, to throw away, to donate and to sell. One mistake that often occurs from people deciding to declutter is that after they declutter one area, they just bring the items to another area. Make sure that the items you decide to throw out goes straight to the trash or you’ll just end up with a big pile of stuff that you can’t throw away.

Rent a Storage Facility

     “One of the best actions to do when decluttering is to rent a storage facility” – WhatStorage?

Let’s face it. We all have items inside our homes that we can’t really part with. These items hold too much sentimental value to us or may still be useful in the future. However, keeping them inside our houses can be too troublesome. Renting a cheap storage facility to store them in would be the best solution for you. Self-storage facilities are a cheap and versatile solution to your storage problems. You can find a storage facility almost anywhere.

Enjoy Decluttering

Try to enjoy the little things about decluttering. For example, having a spacious house afterwards. Once you start enjoying, decluttering would very much be easier and faster. Focus on what is important and always remember why you decided to declutter.

It may be hard to let go of your items especially those with special memories associated with them. However, there is an adage, “Keep the memory but let go of the items.” This means that you can still reminisce without having to keep your house filled with unnecessary items. Here are some tips to help you let go of the items that you have.

Whilst decluttering, don’t forget to take into account what else you may need to add to your home now that you’ve freed up plenty of space. One great way is by Re-Designing your Home with Hand Carved Furniture to give it a more complete look now you’ve removed all the useless items from your interior.

Be informed of the 80/20 Rule

The 80/20 rule is the phenomenon that occurs in most people. It states that out of the 100% of items that we own, we only generally use 20 percent of it in our day to day lives. This can hold true for clothing, games, computer parts, books, tapes, toys, etc. Now that you are aware of this, make sure to get rid of the 80 percent that is basically just clutter.

Don’t Think About Their Past Value But Their Present/Future Value

The Wall Street Journal recently published an article that on average, Americans spend over $1.2 trillion annually on unnecessary items — this ranges from decorative items to stuff that they impulsively buy and do not use.

Often, people don’t get rid of their items because they are aware of the item’s past value. However, this should not be the case. Look at your stuff with its present or future value instead. There is no use in thinking of value that has long past.

Is the item still worth anything to you? Does it still have utility? If not, then what is it even doing inside your house?

Check Your Appliances If They All Work

Another factor that adds up to the clutter in our homes is broken appliances that “we swear to fix on our free day.” Let’s be real. Most of these appliances are too broken to fix or would cost less to buy a brand new one. Throw them out and enjoy the extra space.

Next Page »

Primary Sidebar

Keep up to date with our latest posts

Subscribe to our newsletter for free and be the first to be notified about all our latest content!

Welcome to A2B Crafts

At A2B Crafts we make it our duty to bring you the latest in shabby chic design and Do it yourself furniture. If you’re new to the craft or a long time expert, A2B crafts is perfect for you. With every new post we hope to bring you something new and exciting which gives you the inspiration to try something new with your home
furnishings. If you feel inspired after reading any of our posts or you’ve even tried these tips for yourself, please feel free to let us know through our contact page or our other social channels!

Footer

Stay Connected

  • Facebook
  • Instagram
  • Pinterest
  • Tumblr
  • Twitter
  • YouTube

Contact Information

Tel: Thursday – Saturday 01328 856001

or mobile 07917606039 at other times

Address: Wheelspeed Unit 1, Cattle Market Street, Fakenham, Norfolk, NR21 9AW

Please feel free to contact at anytime, however at present we work part-time so may not get back to you immediately,
but will make contact as soon as possible.

Categories

  • DIY Interior
  • Furniture Upcycle
  • Hobbie Crafts
  • Interior Decor
  • News
  • D.I.Y
  • Garden

Helpful Links

  • Contact Details
  • Conditions of Use
  • Privacy Notice
  • Shipping & Returns

Copyright© 2025 · Cookd Pro Theme by Shay Bocks