• Skip to primary navigation
  • Skip to main content
  • Skip to primary sidebar
  • Skip to footer
  • Home
  • Interior Decor
    • D.I.Y
    • DIY Interior
    • Tips
  • Hobbie Crafts
    • Furniture Upcycle
  • Garden
  • News
  • Write For Us
  • Contact Details

A2B Crafts

DIY Crafts & Upcycling

A2Bcrafts

5th November 2023 Interior Decor

Bedroom With Walk In Wardrobe

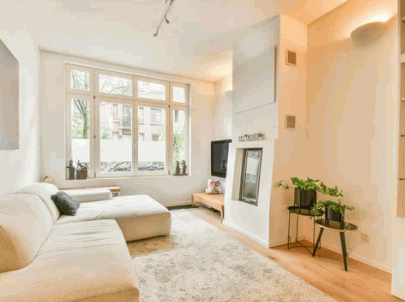
Are you tired of struggling with cramped and cluttered bedroom spaces? Look no further, because we have the perfect solution for you. Introducing the ultimate in-storage and organization – the bedroom with a walk-in wardrobe. In this article, we will explore the importance and benefits of having a walk-in wardrobe, and how it can transform your bedroom into a functional and stylish oasis. Say goodbye to clutter and hello to a well-organized space with a walk-in wardrobe.

What Is A Bedroom With A Walk-in Wardrobe?

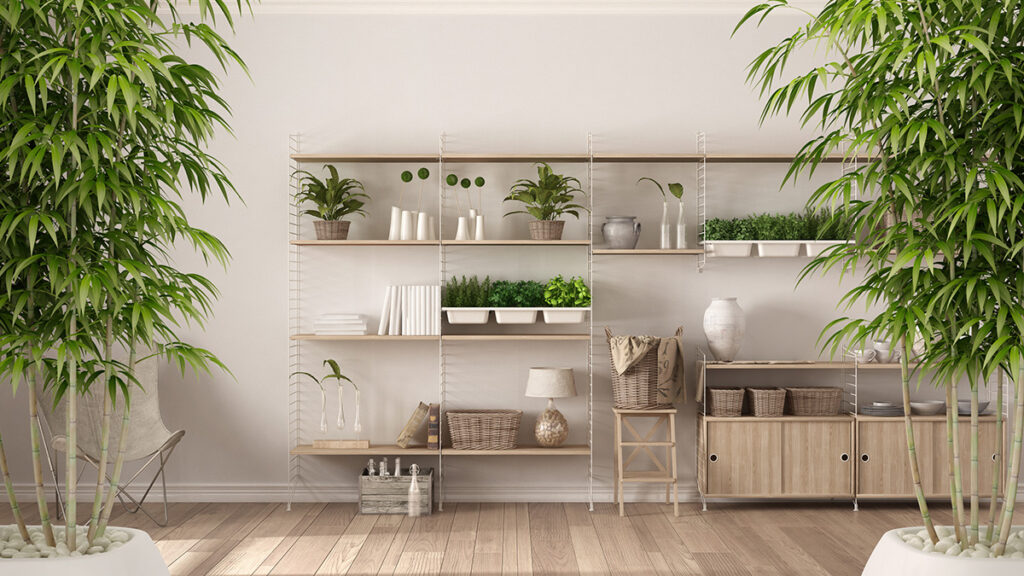
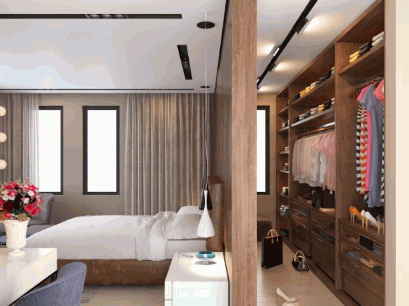
A bedroom with a walk-in wardrobe is a lavish and functional addition to any home. It is a bedroom that features an attached space specifically designed for storing clothes, shoes, and accessories. This type of wardrobe typically includes built-in shelves, hanging rods, and drawers for effectively organizing and displaying clothing items. It provides ample storage space and simplifies the process of getting ready in the morning. A bedroom with a walk-in wardrobe offers easy access to clothing and helps keep the bedroom free of clutter. Overall, it is a stylish and efficient solution for organizing and maintaining a well-arranged living space.

Why Choose A Bedroom With A Walk-In Wardrobe?

Are you tired of cluttered closets and overflowing dressers? A bedroom with a walk-in wardrobe may be the perfect solution for you. This section will explore the benefits of choosing a bedroom with a walk-in wardrobe, including how it maximizes space, provides organization, and adds value to your home. Say goodbye to cramped and chaotic closets and hello to a luxurious and functional bedroom with a walk-in wardrobe. Let’s dive in.

Check out: Master Bedroom Wardrobe Design With Dressing Table

1. Maximizes Space

A bedroom with a walk-in wardrobe is a great way to maximize space by utilizing the area efficiently. Here are steps to consider when designing and organizing this type of bedroom:

  1. Assess the available space and take measurements to ensure the best use of the area.
  2. Plan the layout, making sure to provide easy access to clothes and accessories.
  3. Choose storage solutions that optimize vertical space, such as tall shelves or hanging organizers.
  4. Install proper lighting to illuminate both the wardrobe and the bedroom area for added functionality.
  5. Select quality materials and finishes that complement the overall design and ensure durability for long-term use.

2. Provides Organization

A bedroom with a walk-in wardrobe offers excellent organization for your clothing and belongings. Here are some steps to achieve a well-organized space:

  1. Assess your storage needs and determine the types of items you need to organize.
  2. Plan the layout of your walk-in wardrobe, considering the placement of shelves, drawers, and hanging space. This ensures proper organization and utilization of space.
  3. Choose quality materials and finishes that will withstand daily use and enhance the overall aesthetic of the room.
  4. Utilize vertical space by installing tall shelves or cabinets to maximize storage capacity.
  5. Maintain a clutter-free environment by regularly decluttering and organizing your belongings.

By following these steps, you can create a functional and organized bedroom with a walk-in wardrobe that provides excellent organization to meet your storage needs.

3. Adds Value To The Home

Adding a walk-in wardrobe to a bedroom can greatly increase its value, making it an attractive feature for potential homebuyers. Here are the steps to consider when adding value with a walk-in wardrobe:

  1. Evaluate the available space and determine if a walk-in wardrobe is feasible.
  2. Plan the layout and design of the wardrobe, ensuring it complements the overall style of the bedroom.
  3. Choose high-quality materials and finishes that will enhance the aesthetic appeal and durability of the wardrobe, ultimately adding value to the home.
  4. Maximize vertical space by incorporating shelving, hanging rods, and drawers.
  5. Maintain a clutter-free environment by organizing and regularly decluttering the wardrobe.

Fact: According to a survey by the National Association of Home Builders, walk-in wardrobes are among the top features that home buyers desire, adding significant value to the property.

What Are The Design Options For A Bedroom With A Walk-In Wardrobe?

When it comes to designing a bedroom with a walk-in wardrobe, there are several options to consider. Each option offers its unique features and benefits, allowing you to customize your space according to your specific needs and preferences. In this section, we will discuss the various design options available for a bedroom with a walk-in wardrobe, including built-in wardrobes, walk-in closets, open wardrobes, and customized wardrobes. By the end, you will have a better understanding of which design option best suits your lifestyle and storage needs.

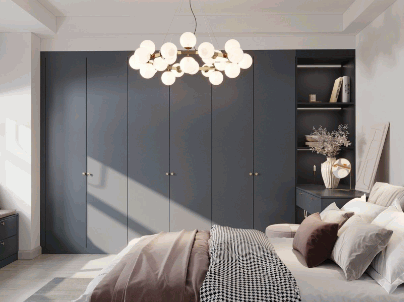
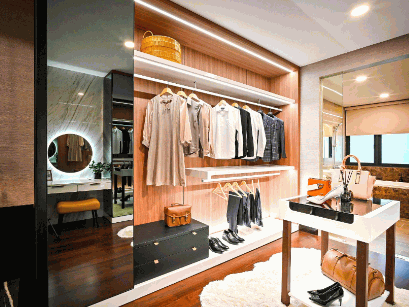
1. Built-In Wardrobe

A built-in wardrobe is a permanent storage solution that is integrated into the design of a bedroom with a walk-in wardrobe.

  • Plan the dimensions and layout of the built-in wardrobe to fit your space and storage needs.
  • Select the type of doors for the wardrobe, such as hinged, sliding, or folding doors.
  • Consider the material and finish of the built-in wardrobe, ensuring it complements the overall aesthetic of the bedroom.
  • Incorporate shelves, drawers, and hanging rods in the interior design of the built-in wardrobe to maximize storage and organization.
  • Install proper lighting inside the built-in wardrobe to ensure visibility and ease of use.
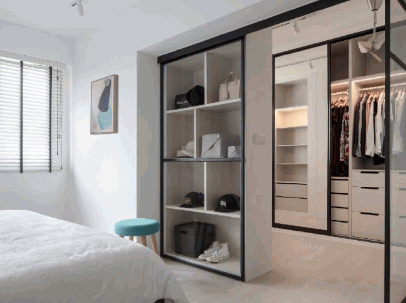
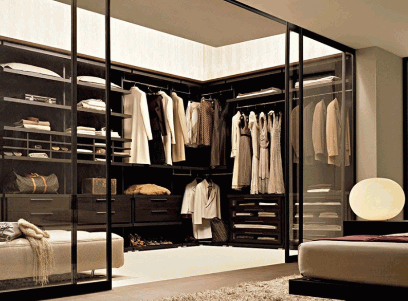
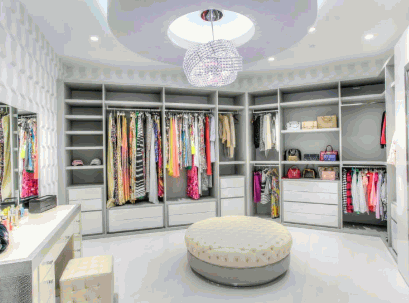
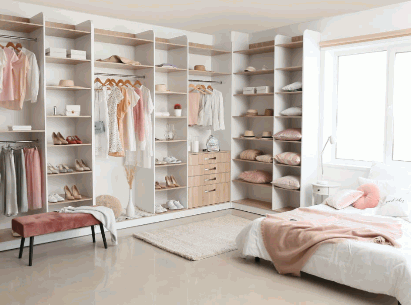
2. Walk-In Closet

A walk-in closet is a luxurious addition to a bedroom, providing ample storage space and enhancing organization. Here are the steps to design and organize a walk-in closet:

  1. Determine your storage needs and preferences.
  2. Plan the layout of your walk-in closet, taking into consideration the available space and your storage requirements.
  3. Choose high-quality materials and finishes for both durability and aesthetics.
  4. Maximize the use of vertical space by incorporating shelves, hanging rods, and storage units.
  5. Maintain a clutter-free environment by regularly organizing and decluttering your walk-in closet.

Walk-in closets have a rich history dating back to the 17th century when they were primarily used by the wealthy elites to store their extensive wardrobes. Over time, walk-in closets have become more accessible and popular, offering practical storage solutions for homeowners of all backgrounds.

3. Open Wardrobe

Designing an open wardrobe in a bedroom with a walk-in wardrobe involves a few key steps:

  1. Choose an open wardrobe concept that complements your style and fits within the overall bedroom design.
  2. Select a suitable location within the walk-in wardrobe for the open wardrobe, considering accessibility and visibility.
  3. Decide on the type of open wardrobe, such as a hanging rod, shelves, or a combination of both, based on your storage needs and the number of items you plan to store.
  4. Consider incorporating additional elements like hooks, baskets, or shoe racks to maximize the functionality of the open wardrobe.
  5. Organize and arrange your clothing and accessories in a visually appealing and practical manner within the open wardrobe.

Remember to keep the open wardrobe clutter-free and regularly declutter to maintain an organized and stylish space. By following these steps, you can successfully create a functional and aesthetically pleasing open wardrobe in your bedroom with a walk-in wardrobe.

4. Customized Wardrobe

A customized wardrobe is a personalized and tailored storage solution for a bedroom with a walk-in wardrobe. To create a customized wardrobe, follow these steps:

  1. Assess your storage needs: Determine the types and quantities of items you need to store, such as clothes, shoes, and accessories.
  2. Measure the available space: Take accurate measurements to ensure the customized wardrobe fits perfectly in your bedroom.
  3. Select a design: Choose a design that complements the overall aesthetic of your bedroom and reflects your style.
  4. Consider features: Decide on features such as shelves, drawers, hanging rods, and shoe racks, based on your unique storage requirements.
  5. Choose high-quality materials and finishes: Select durable and visually appealing materials and finishes for your customized wardrobe.
  6. Collaborate with a professional: Work with a professional wardrobe designer or carpenter to bring your customized wardrobe design to life.

For a seamless and functional bedroom with a walk-in wardrobe, invest in a customized wardrobe that meets your unique storage needs and enhances the overall design of your space.

What Are The Essential Elements Of A Bedroom With A Walk-In Wardrobe?

When designing a bedroom with a walk-in wardrobe, several key elements must be considered to create a functional and stylish space. From lighting and storage to ventilation and layout, each aspect plays a crucial role in the overall design. In this section, we will discuss the essential elements of a bedroom with a walk-in wardrobe and how they contribute to the overall functionality and aesthetics of the space.

1. Ample Lighting

Ample lighting is essential when designing a bedroom with a walk-in wardrobe to ensure functionality and a pleasant atmosphere. Here are some steps to achieve ample lighting:

  1. Assess natural lighting: Take advantage of windows and skylights to maximize natural light during the day.
  2. Consider artificial lighting: Install a combination of ambient, task, and accent lighting to provide a well-lit space.
  3. Choose the right fixtures: Opt for fixtures that complement the overall design and provide adequate brightness.
  4. Use mirrors strategically: Place mirrors near light sources to reflect and enhance the lighting in the room.
  5. Add dimmer switches: Install dimmer switches to adjust the lighting levels based on different moods and activities.

2. Efficient Storage Solutions

Efficient storage solutions are crucial for a bedroom with a walk-in wardrobe. Here are steps to achieve this:

  1. Maximize vertical space: Utilize tall shelves, hanging rods, and stackable storage containers to make the most of your vertical space.
  2. Utilize under-bed storage: Invest in bed frames or containers that allow for storing items beneath the bed.
  3. Use adjustable shelving: Install shelves that can be moved or adjusted to fit different items and sizes.
  4. Include built-in drawers and cabinets: These provide convenient storage options for folded clothes, accessories, and other items.
  5. Label and categorize: Use labels or dividers to keep items organized and easily accessible.

By implementing these efficient storage solutions, you can optimize space and keep your bedroom with a walk-in wardrobe neat.

3. Proper Ventilation

Proper ventilation is essential in a bedroom with a walk-in wardrobe to maintain good air quality and prevent musty odors. Follow these steps to ensure adequate ventilation:

  1. Install windows or vents to allow fresh air to circulate.
  2. Consider installing a ceiling fan or exhaust fan to remove stale air.
  3. Use breathable materials for wardrobe doors and shelves.
  4. Keep the wardrobe organized to prevent any blockages in airflow.
  5. Regularly clean and air out the wardrobe to prevent moisture buildup.

Fun fact: Adequate ventilation can also help regulate temperature and reduce the risk of mold and mildew growth.

4. Functional Layout

A functional layout is crucial for a bedroom with a walk-in wardrobe. To design the layout, follow these steps:

  1. Assess the available space and determine the size and shape of the wardrobe area.
  2. Consider the flow of movement and ensure easy access between the bedroom and the wardrobe.
  3. Plan the placement of storage units, such as shelves, drawers, and hanging rods, to maximize functionality and organization.
  4. Allocate space for a dressing area or a full-length mirror if desired.
  5. Ensure that there is enough clearance for opening and closing wardrobe doors.

By following these steps, you can create a functional layout that optimizes the use of space and enhances the overall functionality of your bedroom with a walk-in wardrobe.

5. Aesthetically Pleasing Design

An aesthetically pleasing design is crucial when creating a bedroom with a walk-in wardrobe. Follow these steps to achieve a visually appealing space:

  1. Choose a cohesive color scheme that complements the overall theme of the room.
  2. Select furniture and fixtures that blend well together and create a harmonious atmosphere.
  3. Incorporate stylish lighting fixtures to enhance the ambiance and highlight key areas.
  4. Add decorative elements such as artwork, plants, or rugs to inject personality and visual interest.
  5. Keep the space well-organized and clutter-free to maintain a clean and elegant look.

In the 18th century, the concept of walk-in wardrobes first emerged as a symbol of luxury and opulence. They were initially popularized by the French aristocracy, who sought grand and spacious dressing areas. Over time, walk-in wardrobes have become a coveted feature in modern homes, offering both functionality and style. Today, homeowners can enjoy the benefits of an aesthetically pleasing design combined with practical storage solutions in their bedrooms with a walk-in wardrobe.

How To Design And Organize A Bedroom With A Walk-In Wardrobe?

A bedroom with a walk-in wardrobe is the epitome of luxury and organization. However, designing and organizing this space can be a daunting task. In this section, we will discuss the step-by-step process of creating the perfect bedroom with a walk-in wardrobe. From determining your needs and wants, to planning the layout and design, to utilizing vertical space and keeping it clutter-free, we will cover all the essential elements to help you create a functional and stylish bedroom with a walk-in wardrobe.

1. Determine Your Needs And Wants

When creating a bedroom with a walk-in wardrobe, it’s essential to first assess your needs and desires to design a space that meets your specific requirements. Here are the steps to consider:

  1. Determine your storage needs: Assess the amount of clothing, shoes, accessories, and other items you need to store to ensure you have adequate space.
  2. Evaluate your lifestyle: Consider your daily routine and habits to determine if you need additional features, such as a dressing area or seating area, within the walk-in wardrobe.
  3. Consider your budget: Determine the amount you are willing to spend on the project, including the cost of materials, furniture, and professional assistance if necessary.
  4. Think about aesthetics: Decide on the overall style and design elements you prefer, such as the type of closet doors, color scheme, and lighting.
  5. Plan for future growth: Anticipate any potential changes in your needs, such as a growing wardrobe or lifestyle adjustments, and incorporate them into your design.

2. Plan The Layout And Design

When designing a bedroom with a walk-in wardrobe, it’s important to consider functionality, aesthetics, and personal preferences. Here are some steps to guide you:

  1. Analyze the available space and determine the dimensions for the walk-in wardrobe area.
  2. Plan the layout and design of the wardrobe, taking into consideration your specific needs and preferences, such as a built-in wardrobe, walk-in closet, open wardrobe, or customized wardrobe.
  3. Consider the placement of storage units, hanging rods, shelves, and drawers to optimize organization and accessibility.
  4. Select appropriate lighting fixtures to ensure ample illumination throughout the wardrobe space.
  5. Choose quality materials and finishes that complement the overall bedroom design and ensure durability.

By following these steps, you can create a well-designed and organized bedroom with a functional walk-in wardrobe.

3. Choose Quality Materials And Finishes

Choosing quality materials and finishes is crucial when designing a bedroom with a walk-in wardrobe. Here are the steps to guide you:

  1. Research: Explore different materials and finishes available in the market.
  2. Budget: Determine your budget and find materials and finishes that fit within it.
  3. Durability: Select materials that are long-lasting and can withstand daily wear and tear.
  4. Aesthetic Appeal: Consider the overall design and style of your bedroom and choose materials that complement it.
  5. Maintenance: Opt for materials and finishes that are easy to clean and maintain.
  6. Eco-Friendly: If sustainability is important to you, look for environmentally friendly materials.
  7. Compatibility: Ensure that the materials and finishes you choose are compatible with the existing elements of your bedroom.

4. Utilize Vertical Space

Utilizing vertical space is crucial for maximizing storage in a bedroom with a walk-in wardrobe. Here are some steps to help you make the most out of your vertical space:

  1. Install floor-to-ceiling shelves or cabinets to store folded clothes and accessories.
  2. Utilize hanging organizers or hooks on the walls to hang bags, belts, or scarves.
  3. Opt for tall shoe racks or mounted shoe organizers to save space.
  4. Consider installing a loft or elevated platform for additional storage space underneath.
  5. Make use of the space above wardrobes or closets by installing extra shelves or using storage boxes.

By following these steps, you can effectively utilize vertical space and create a functional and organized bedroom with a walk-in wardrobe.

5. Keep It Clutter-Free

Keeping a bedroom with a walk-in wardrobe free from clutter is crucial for maintaining a clean and organized space. Here are some steps to help you achieve this:

  1. Regularly declutter: Sort through your clothes and belongings regularly to remove items you no longer use or need.
  2. Maximize storage: Utilize storage solutions such as shelves, drawers, and hanging organizers to keep items neatly stored.
  3. Assign a place for everything: Designate specific spots for different items to ensure they are always put back in their proper place.
  4. Implement a cleaning routine: Regularly dust, vacuum, and wipe down surfaces to keep the space clean and free from dust and dirt.
  5. Maintain organization: Stay disciplined in keeping up with organizing and putting things away, preventing clutter from accumulating.

By following these steps, you can maintain a clutter-free bedroom with a walk-in wardrobe, creating a serene and functional space.

18th October 2023 D.I.Y

How To Clean Carpet At Home DIY

Tired of looking at those dirty, stained carpets in your home? Fear not! We’ve got the solution. Here, we’ll show you how to clean your carpets with simple, cost-effective DIY methods.

Cleaning your carpet may seem intimidating, but with some effort and the right techniques, it’s easy to get great results. First, you’ll need some tools and supplies: a vacuum cleaner, a bucket, warm water, mild detergent, a scrub brush or sponge, and clean towels.

Start by removing any loose dirt or debris from the carpet surface. Vacuum the area thoroughly. This will loosen up the trapped dirt or dust particles.

Next, tackle those stubborn stains. Mix a small amount of mild detergent with warm water in a bucket. Dip your scrub brush or sponge into the soapy water and gently scrub the stained areas in a circular motion. Be gentle – rubbing too hard can damage the carpet fibers.

Once you’ve scrubbed the stains, rinse the areas with clean water using a sponge or towel. Make sure to remove all soap residue; this can attract more dirt in the future. Blot the cleaned areas with a dry towel to absorb extra moisture.

Now that you’ve successfully cleaned your carpet, maintain its cleanliness for longer-lasting results. Vacuum regularly to prevent dirt buildup. Put rugs or mats in high-traffic areas to reduce wear and tear.

Don’t let dirty carpets ruin the look of your home. Take action today and give your carpets a fresh, clean appearance. By following these simple DIY methods, you can save money on professional cleaning services and get great results. So, roll up your sleeves and transform your carpets into a spotless masterpiece!

Uncover more: How To Clean Living Room Carpet

Gathering The Necessary Materials

Gather these materials to successfully clean your carpet at home:

  1. Vacuum cleaner to remove loose dirt and debris.
  2. Carpet stain remover for tough stains.
  3. Scrub brush or sponge to agitate the stain remover into the fibers.
  4. Cloths or paper towels to absorb moisture.

Start by vacuuming the entire surface. Then, apply the stain remover onto specific stains and let it sit for a few minutes. Use a brush/sponge to gently agitate the stain remover into the carpet fibers.

A clean towel is useful to soak up any excess moisture. Act quickly to prevent stains from setting permanently. Regular vacuuming can increase the carpet’s lifespan by 5 years, according to The Carpet and Rug Institute. Their study shows that daily vacuuming reduces dust mite infestations and improves air quality.

Preparing The Carpet For Cleaning

Before cleaning, take note of any loose threads or snags on your carpet and trim them carefully. Then clear the area of furniture and objects to clean every inch of your carpet. Vacuuming will remove dirt and debris, then pre-treat any stubborn stains using a suitable solution. Test any cleaning solution in a small area, follow instructions for using a carpet cleaner, and use eco-friendly solutions if you have pets or children. Finally, allow enough time for the carpet to dry completely before putting furniture back on it. These steps will help your carpet be restored to its former beauty!

Choosing The Appropriate Cleaning Method

Deciding on the right carpet cleaning method is super important for keeping your carpets looking and lasting great. Different solutions work best for different kinds of stains and fabrics. Look at these carpet cleaning methods:

MethodBest forHow it Works
Steam CleaningTough stainsHot water mixed with detergent was injected into the carpet. Then, the water and dirt are extracted.
Dry CleaningDelicate fabricsAbsorbent compounds spread on the carpet to attract dirt. Vacuumed away after.
Foam CleaningLightly soiled carpetsA foam solution was applied to the carpet using a machine. Dirt is vacuumed away.
Bonnet CleaningSurface cleaningA rotary machine and absorbent pad are used to agitate carpet fibers and remove surface dirt.

For further info, consider this:

  • Enzymatic cleaners are best for specific stains like pet pee or red wine.
  • Eco-friendly cleaners are great for households with allergies.

For excellent carpet cleaning outcomes, remember:

  1. Test a small area to make sure colors won’t fade.
  2. Vacuum before applying any cleaning solution.
  3. Blot stains instead of rubbing them.
  4. Read instructions for dosages and applications of commercial products.

By picking the perfect cleaning method for your carpets and following these tips, you can keep your carpets looking great for years!

Cleaning The Carpet

Identify the type of stain or spill on your carpet. Different stains require different solutions – like an enzymatic cleaner for pet urine or a mild detergent for food stains.

Now, take action! Blot the stain with a clean cloth or sponge. Don’t scrub hard, it can damage the fibers. For tough stains, repeat blotting or use a specialized cleaner.

Drying The Carpet

Here are the steps to ensure your carpet dries fully, reducing mold risk and keeping it cleaner longer:

  1. Blot up extra moisture with absorbent towels or paper towels. Pressure gently and repeat until no wetness is taken in.
  2. Let fresh air in by opening windows and doors by using fans or turning on the HVAC system. This will help dry the carpet quickly.
  3. Use a dehumidifier if it’s humid or raining outside. It takes away additional moisture from the air and stops it from going back into the carpet fibers.
  4. Don’t walk on the carpet when wet. This leaves footprints and slows down the drying process.
  5. Be patient when waiting for the carpet to dry, especially if you have cleaned it deeply or if it’s thicker.
  6. For quicker drying time, use a steam cleaner with a built-in heater. Fans should be placed around the wet areas of the carpet for better airflow. Elevate furniture legs with wooden blocks or aluminum foil, to make sure they don’t touch wet carpet.

These steps ensure your carpet dries fully, reducing mold risk and keeping it cleaner longer.

Post-Cleaning Maintenance Tips

Ensure your carpet’s longevity and cleanliness with post-cleaning maintenance tips!

  • Vacuum regularly
  • Treat stains immediately
  • Avoid walking on damp carpets
  • Use carpet protectors
  • Rotate furniture periodically
  • Hire professional cleaning services

These tips will keep your carpet looking fresh for years.

Conclusion

We have been looking at ways to clean carpets at home. Let’s review the key points and add extra information.

Vacuuming is essential for a healthy carpet. Regular vacuuming removes dirt, dust, and more to increase the lifespan of carpets.

Spot cleaning is also important for tackling stains and spills. Acting quickly with a cloth or paper towel can help.

Steam cleaning is done by professional cleaners. Hot water and pressure remove dirt and grime.

Did you know? Ancient Persians and Greeks used soapwort plants to clean their carpets. The saponins acted as natural detergents when mixed with water. Interesting how people cleaned carpets before modern advances!

18th October 2023 Exterior Decor

How To Clean Outdoor Carpet On Patio

Outdoor carpets on patios can quickly become dirty and stained. Keeping them clean is a must. Here, we’ll look at how to do that.

  1. First, use a vacuum to remove any debris or loose dirt. This will stop it from getting stuck in the carpet fibers.
  2. Then, make a solution of warm water and mild detergent. Avoid harsh chemicals – these may damage or discolor the carpet. Apply the solution with a scrub brush or sponge, working in small sections. Be gentle – don’t damage the fibers.
  3. After applying the soapy solution, rinse the carpet properly with clean water. Use a garden hose or pressure washer and make sure all the soap is gone.
  4. Finally, let the carpet air dry before placing furniture or walking on it. This will stop moisture from getting trapped, which could cause mold or mildew.

Gather The Necessary Tools And Materials

Clean your outdoor carpet on the patio. No problem! First, gather your tools and materials. You’ll need a broom, a vacuum cleaner, a bucket with warm water, mild detergent or carpet cleaner for outside use, a scrub brush/sponge, and a garden hose.

Step 1: Use the broom to get rid of loose dirt and debris.

Step 2: Vacuum for deeper cleaning. Get all areas, corners, and edges.

Step 3: Refer to manufacturer guidelines or ask a professional for special carpets.

Pro Tip: Test any cleaning product on a small, unseen spot on the carpet. Make sure it won’t discolor or damage.

Clear The Area

For a clean patio carpet, it’s a must to clear the area. This not only improves its look but also prevents dirt and debris from clumping. Here is a 3-step tutorial:

  1. Get rid of furniture and objects: Start by taking out furniture, plants, and other items from the patio. This will give you an uninterrupted space for cleaning. Store these things in a secure spot until the cleaning is done.
  2. Sweep or use a vacuum: Use a broom or vacuum cleaner to take out loose dirt, leaves, and debris from the patio. Focus on corners and difficult-to-reach spots where dirt usually piles up. Doing so will make the cleaning more effective.
  3. Clear out obstacles: Check the patio and spot any obstacles that may stop proper cleaning, like toys or scattered items. Remove these obstacles carefully so you can get to all parts of the outdoor carpet without any interference.

Also, specialized tools such as leaf blowers can speed up the clearing process by removing lighter debris rapidly.

Now that you have cleared the area, it’s time to focus on other steps to keep your outdoor carpet clean.

Throughout history, people have tried different ways to efficiently clear outdoor areas. From manual labor using brooms and rakes to innovative inventions like leaf blowers and power vacuums, we are continuously looking for cleaner surroundings. This shows our never-ending quest for spotless outdoor spaces.

Remove Loose Debris

For effective cleaning of outdoor carpeting on your patio, it’s essential to begin by getting rid of any loose debris. This helps make a tidier, more attractive patio for you and your guests.

  • Use a broom or a stiff brush to sweep away leaves, dirt, and other bits.
  • Gently shake or tap the edges of the carpet to dislodge embedded debris.
  • If there are stains, gently scrub them with a soft brush and the right cleaning solution.
  • Don’t use too much force while sweeping or scrubbing, to avoid damaging the carpet fibers.
  • Think about using a leaf blower if there’s too much debris to be removed quickly.

Moreover, be aware that different types of carpets need special cleaning methods. It’s wise to check the manufacturer’s recommendations for the best cleaning technique.

Also, regular maintenance of your outdoor carpet can prolong its lifespan. According to Outdoor Living Brands, the right cleaning and care can enhance the life and beauty of your outdoor carpeting.

Vacuum The Carpet

It’s essential to vacuum your outdoor carpet regularly to keep it clean and prolong its life. Here’s a guide to help you do it right!

Prepare the area: Take out furniture and large objects from the carpeted area.

Choose the right vacuum: Pick one with strong suction and attachments suitable for outdoors. It should have a brush attachment too.

Start at one end: Vacuum one end and work your way to the other. Use overlapping strokes for thorough cleaning.

Take care of corners and edges: Use a crevice tool or attachment to reach those hard-to-reach spots.

Empty/vacuum out filters and canisters: Do this often during the cleaning process to avoid clogging.

Also, check with the manufacturer for specific care instructions. Now go grab your vacuum and get started! Enjoy your clean and fresh patio haven!

Spot Clean Any Stains

Spot clean stains on your outdoor carpet with ease! Try these 6 steps:

  1. Identify the stain first.
  2. Blot it with a cloth or paper towel.
  3. Make a cleaning solution with mild detergent and warm water.
  4. Apply it with a brush or sponge.
  5. Rinse off the solution.
  6. Air dry the carpet.

Don’t let the stain sit and do regular maintenance like sweeping and vacuuming.

Pro Tip: Test any cleaner on an unseen area of the carpet before applying it to avoid discoloration or damage.

Deep Clean The Carpet

  1. Preparation: Begin by removing any furniture or objects from the carpeted area. This will ensure that you have access to the entire carpeted surface and allow for a thorough cleaning.
  2. Vacuuming: Use a vacuum cleaner with a hose attachment to remove loose dirt, debris, and pet hair from the carpet. Make sure to go over the entire carpeted area multiple times to capture all the dirt particles.
  3. Spot cleaning: If there are any visible stains or spots on the carpet, treat them with a suitable carpet cleaner or stain remover. Follow the instructions on the product for best results and ensure that you thoroughly rinse and blot the area after cleaning.
  4. Shampooing: Depending on the type of outdoor carpet, you can use a carpet shampoo or a mixture of mild detergent and water. Use a scrub brush or a sponge to apply the cleaning solution to the carpet, working in small sections at a time. Scrub the carpet gently to remove dirt and grime.
  5. Rinsing: After shampooing the entire carpet, rinse it thoroughly with clean water. This can be done using a hose or a pressure washer, making sure to remove all traces of the cleaning solution. It is essential to rinse properly to avoid any residue that may attract more dirt and stains.
  6. Drying: Allow the carpet to dry completely before placing any furniture back on it or using the patio. This can take a few hours to overnight, depending on the weather conditions. Avoid stepping on the carpet until it is completely dry to prevent new dirt from getting tracked in.

In addition to these steps, it is crucial to regularly maintain the cleanliness of your outdoor carpet by sweeping away debris and spot-cleaning any spills or stains as soon as they occur. By following these suggestions, you can keep your patio carpet looking clean and fresh, ensuring its longevity and enjoyment throughout the year.

Save money on renting or purchasing a carpet cleaner by simply inviting your dirt-loving friends over for a barbecue – their footprints will do the cleaning for you!

Rent Or Purchase A Carpet Cleaner

Deciding whether to rent or buy a carpet cleaner is a big deal. Here are 5 things to think about:

  1. Cost: Renting may be cheaper if you only need it sometimes. Buying could be a better long-term investment if you use it often.
  2. Convenience: Renting is convenient because you don’t have to keep it. Buying means you have it whenever you need it.
  3. Quality: Rental cleaners are for commercial use, so they’re high quality. Buying lets you pick what meets your standards.
  4. Maintenance: If you rent, the company takes care of maintenance and repair. Buying means you take care of it.
  5. Flexibility: Renting lets you try different models. Buying lets you clean when you want.

Plus, regular maintenance and proper use are important no matter what. Remember, before machines, people scrubbed carpets with soap or detergents by hand! But now there are electric machines, steam cleaners, and dry foam extractors—all thanks to research and development.

Choose carefully to get the best carpet cleaner for you, and your carpets will stay clean for years.

Prepare The Carpet Cleaner And Cleaning Solution

To get a great carpet clean, it’s important to be ready. Here are the steps:

  1. Gather the needed supplies: Get your carpet cleaner machine, cleaning solution, hot water, and gloves ready. Having them all near makes it easier.
  2. Dilute the solution: Read the instructions on the bottle and mix the solution and hot water in a container or in the machine’s reservoir. Following the directions will give you good results.
  3. Prepare the machine: Fill the tank with the diluted cleaning solution. Most machines have clear markings for different room sizes. Don’t overfill it.
  4. Check for accessories: Your model may have attachments for stains or tight corners. Attach them well.

By following these four steps, you can get your carpet cleaner and clean solution ready. Plus, clean up clutter before starting to make sure you don’t miss any spots. Revitalize your carpets today! They’ll feel fresh and look great.

Clean The Carpet In Sections

Cleaning carpets in sections is an effective approach to a deep clean. Split the job into segments, and give each area your full attention for the best results. Follow this simple 3-step guide to clean your carpet in sections:

  1. Prepare the area: Move any furniture or objects. This ensures you can reach all parts of the carpet without any obstacles.
  2. Vacuum thoroughly: Use a high-quality vacuum to remove dirt, dust, and debris. Focus on busy spots and stains.
  3. Clean with precision: Find a product suitable for your specific type of carpet. Apply it evenly and scrub gently with a brush or sponge, focusing on any stains. Rinse with clean water and dry with a towel or wet/dry vacuum.

Keep in mind special details. Consider using a steam cleaner for sanitization. Test any product on a small, hidden area before using it elsewhere. To avoid future dirt, apply a protective spray or treatment after cleaning. This makes future cleanings easier.

By following these steps and paying attention to details, your carpet will receive a professional-level deep clean.

Uncover more: How To Clean Carpet At Home DIY

Allow The Carpet To Dry

Post carpet cleaning, it’s vital to let your carpets dry completely. This step is essential for keeping carpets clean and in good condition. To make sure your carpets dry properly, follow these steps:

  1. Ventilate: Open windows and doors to circulate air.
  2. Fans: Place fans around the room to help dry.
  3. No walking: Don’t walk on the wet carpet as this could leave footprints.
  4. Elevate: Put aluminum foil or blocks under furniture legs to stop moisture from going back into the carpet.
  5. Prioritize natural light: Move any items that block sunlight from reaching the carpet area.
  6. Patience! Allow time for the carpet to dry before reintroducing foot traffic.

Be patient with this step, as it affects the cleanliness of the carpet. Also, don’t use electric heaters or too much heat close to wet carpets, as it can harm the fibers or cause discoloration. Safety first!

Oh, and did you know? CRI says that carpets that are well looked after last twice as long as those that aren’t.

Treat Any Remaining Stubborn Stains

Stubborn stains? Don’t worry! You can make those patio carpets spotless again. Here’s how:

StepInstructions
1Blot the stain with a cloth or paper towel, avoiding rubbing.
2Mix mild detergent/carpet cleaner with warm water to create a soapy solution.
3Use a soft-bristled brush/sponge to scrub the stained area in circular motions. Rinse brush/sponge often.

For tough stains like oil/grease, sprinkle baking soda first. This will help absorb moisture and lift the stain.

Try these steps and your patio carpets will be as good as new!

Protect The Carpet

To keep your outdoor carpet in tip-top shape, follow these tips!

  1. Cover it with a protective tarp when not in use. This shields it from dirt, moisture, and debris.
  2. Clean and vacuum regularly with a brush attachment designed for outdoor carpets.
  3. Spritz it with stain-resistant spray to make messes easier to clean up.
  4. Lastly, don’t leave heavy furniture on it for a long time. Use furniture pads or rugs to evenly distribute the weight.

If you do all this, your outdoor carpet will stay looking fresh for years to come!

Regular Maintenance Tips

Regular maintenance is key to keeping your outdoor carpet looking beautiful. Follow these 3 easy steps to keep it clean and vibrant.

  1. Step 1: Vacuuming. Use a vacuum with a brush attachment to remove dirt and debris. Move straight along the carpet to clean it well. Pay attention to high-traffic areas.
  2. Step 2: Spot cleaning. For spills and stains, act fast. Blot with a cloth or paper towel, but don’t rub. Mix mild detergent and warm water, and lightly scrub the stained area. Rinse and dry.
  3. Step 3: Deep clean. Do it once or twice a year with a carpet cleaner, or hire professional services. Follow their instructions for the best results. This will help remove dirt and make your carpet look like new.

Prevent mold and mildew by drying the carpet after cleaning or exposure to moisture. Avoid harsh chemicals or abrasive cleaners.

So, give your outdoor flooring some TLC! Clean and maintain it regularly, and create a welcoming space for relaxation and entertainment.

Conclusion

On your journey to clean your outdoor carpet on the patio, we’ve shared many effective strategies. Now you can make your carpet look great and last longer. Cleaning and maintaining your outdoor carpet is crucial for it to perform optimally.

Using a doormat can decrease dirt and debris buildup and reduce the need for deep cleaning sessions. Plus, purchasing a high-quality carpet material that is resistant to stains, water, and UV rays can extend its lifespan.

Spot-testing any cleaning solutions or detergents on the carpet before use is important too. This makes sure there are no bad results or color fading.

Let your patio sparkle with a clean outdoor carpet – a sign of your commitment to keeping a perfect living area.

18th October 2023 Interior Decor

How To Clean Living Room Carpet

Cleaning the living room carpet is a must. It improves the look and health of your home. A clean carpet boosts the beauty of your living room and keeps your family safe.

For successful cleaning, there are several steps. First, a thorough vacuuming. This removes any loose dirt and stops dirt from going deeper into the fibers during cleaning.

Next, take on any stubborn stains or spills. Pick a cleaning solution appropriate for your carpet type. Test it on a small spot first.

After treating spots, do a deep clean. You can steam clean yourself or hire professionals. Steam cleaning eliminates dirt, allergens, and bacteria, returning the carpet to its fresh, revitalized state.

Regular maintenance is essential. Attend to spills, vacuum, and schedule professional deep cleanings. Doing this makes sure your living room remains clean and inviting.

Gather The Necessary Materials For Carpet Cleaning

Gather the right materials for cleaning your living room carpet.

Here’s a 4-step guide to help you:

  1. Vacuum Cleaner: Get a reliable one for removing loose dirt and debris.
  2. Carpet Cleaner Solution: Pick one that’s good for your specific carpet type. It should lift stains and eliminate odors without causing damage.
  3. Stain Remover: Keep one handy to tackle unexpected spills.
  4. Cleaning Brushes: Include bristle brushes for high-pile carpets and soft brushes for delicate fibers.

Other Details: Ventilate the room during the process. Wear protective clothing such as gloves or face masks if sensitive to chemical cleansers.

Fun Fact: According to The Carpet and Rug Institute (CRI), regular carpet maintenance can improve air quality. It traps allergens and pollutants.

Clear The Room And Remove Any Furniture Or Obstacles

To create an ideal environment for cleaning your living room carpet, it is important to clear the area and remove any furniture or obstacles that may hinder your progress. This initial step will facilitate easy access to the entire carpeted space and enable a thorough cleaning process. Here is a step-by-step guide on how to clear the room and remove any furniture or obstacles:

  1. Begin by moving all furniture, including chairs, tables, and decorations, to another part of the house or a designated area.
  2. Take care to protect your furniture from potential damage by using appropriate covers or moving blankets.
  3. Remove any smaller items, such as lamps, vases, and accessories, from the room to ensure a clutter-free space.
  4. Next, address any obstacles that may impede your cleaning process, such as toys, shoes, or random items on the floor. Place these items in their appropriate storage spaces.
  5. If there are any bulky obstacles that cannot be easily moved, consider using sliders, or furniture glides, or asking for assistance to relocate them temporarily.
  6. Ensure the entire room is clear of furniture and obstacles, providing ample space for efficient and thorough carpet cleaning.

It is worth noting that during this process, it is essential to handle furniture and delicate items with care to avoid any damage. Taking these precautions will help create an optimal setting for cleaning your living room carpet effectively. Furthermore, a pro tip to consider is to take pictures or make a mental note of the furniture’s original placement. This will ease the process of arranging the room back to its desired layout once the carpet cleaning is complete. Cleaning your living room carpet is an essential task that requires careful preparation. By following these steps and removing any furniture or obstacles, you can ensure a successful and hassle-free cleaning experience. Clearing out small furniture and items from your living room is like playing a game of indoor Tetris but with fewer colorful blocks and more risk of stubbing your toe on the coffee table.

Explore: How To Clean Outdoor Carpet On Patio

Move Small Furniture And Items

Moving small furniture and items? Essential! Whether for rearranging or deep cleaning, clear the room and remove obstacles. Create a safe environment and make your task easier with these 5 steps:

  1. Assess size and weight. Can you handle it alone or need assistance?
  2. Empty drawers or remove any detachable parts to lighten the load.
  3. Lift furniture or items by bending your knees and using leg muscles, not your back.
  4. For heavier items, use sliders or furniture moving pads to glide across the floor without causing damage.
  5. Place furniture or items in the desired location. Make sure it’s secure and stable before letting go.

Protection for your floors? Use blankets or cardboard underneath heavy objects to prevent scratches or dents. Ancient civilizations knew this too! Archaeological findings show they used basic techniques like ropes, logs, and ramps to transport heavy objects. Open spaces and clearing obstacles are always essential for efficient living arrangements.

Remove Larger Furniture

Clearing a room? Need to move large furniture? Follow this 4-step guide!

  1. Start by emptying cabinets and shelves, so they’re lighter.
  2. Disassemble if possible.
  3. Clear a path, removing any tripping hazards.
  4. Use proper lifting techniques to avoid injury.

Additionally, consider windows and doorways for a smooth transition.

Vacuum The Carpet To Remove Loose Dirt And Debris

To effectively clean your living room carpet, it is essential to use a vacuum cleaner that can efficiently remove loose dirt and debris embedded in the carpet fibers. Regular vacuuming not only keeps your carpet looking clean but also extends its lifespan.

Here is a six-step guide to properly vacuum your carpet and eliminate loose dirt and debris:

  1. Prepare the vacuum cleaner: Ensure that the vacuum cleaner is in good working condition and that the bag or canister is empty to maximize suction power.
  2. Clear the area: Remove any obstacles such as furniture, toys, or small objects from the carpeted area to facilitate thorough cleaning.
  3. Adjust the settings: Set the vacuum cleaner to the appropriate height for your carpet type. Low-pile carpets may require a lower setting, while high-pile carpets may need a higher setting for optimal cleaning.
  4. Start from the furthest point: Begin vacuuming from the farthest corner of the room, moving backward towards the exit. This method ensures that you cover the entire carpeted area without stepping on already-cleaned sections.
  5. Use overlapping strokes: Slowly push the vacuum cleaner forward in a straight line, overlapping each stroke by a few inches. This technique helps to remove embedded dirt and debris more effectively.
  6. Complete multiple passes: For a thorough clean, make multiple passes over heavily soiled areas or high-traffic zones. This step ensures that deeply embedded dirt and debris are thoroughly removed.

Here are some additional important details to consider while vacuuming your carpet:

  • Pay attention to edges and corners: Use the attachments provided with your vacuum cleaner to clean hard-to-reach areas such as edges, corners, and along baseboards where dirt can accumulate.
  • Regular maintenance: Regularly clean or replace the vacuum cleaner’s filter to maintain its efficiency. Clogged filters can hinder suction power and prevent effective dirt removal.

Pro Tip: To prevent excessive wear and tear on your carpet, vacuum high-traffic areas at least twice a week. Regular vacuuming helps prevent the accumulation of dirt and debris, keeping your carpet cleaner and maintaining its appearance for a longer time.

By following these steps and taking the necessary precautions, you can ensure that your living room carpet stays clean and free from loose dirt and debris, providing a fresh and inviting atmosphere in your home.

Turn your living room carpet into a black hole for dirt with the power of a strong suction vacuum cleaner, but beware, it may try to swallow the remote control along the way.

Learn more: How To Clean Carpet At Home DIY

Use A Strong Suction Vacuum Cleaner

Tired of lugging around a heavy vacuum that doesn’t get the dirt and debris out of your carpets? Worry no more! A strong suction vacuum is the answer. It can easily suck out even the most stubborn dirt particles from the fibers of your carpet.

Here’s a step-by-step guide on how to use it:

  1. Prepare the area. Take away any furniture that may be in the way.
  2. Plug it in and get it ready.
  3. Change the height setting according to the thickness of the carpet.
  4. Turn it on and move it across the carpet in overlapping lines.
  5. Focus on high-traffic areas. You may need to do multiple passes.
  6. Once you’re done, empty the dustbin or change the bag.
  7. Clean any attachments you use.

Using this vacuum not only cleans better but also improves indoor air quality by getting rid of allergens and dust particles.

Pay Extra Attention To High-Traffic Areas

High-traffic areas require special attention!

Here’s how to keep your carpets spotless:

  • Vacuum daily to capture loose dirt and debris.
  • Use attachments to reach those tricky corners and crevices.
  • Implement a shoe-free policy to prevent dirt buildup.

For even better results, use a carpet cleaner specifically designed for high-traffic areas.

Let’s look at one homeowner’s success story. They welcomed guests with slip-on shoe covers to reduce residue. Their dedication paid off—their carpets were always in perfect condition!

To keep carpets looking new, it’s important to vacuum regularly. Make a commitment to caring for your carpets—and enjoy their beauty for years to come.

Spot Treat Any Stains Or Spills

Spot treat any stains or spills in your living room carpet with these easy steps:

  1. Firstly, identify the stained area and determine the type of stain.
  2. Next, mix a cleaning solution suitable for the specific stain, such as vinegar and water solution for general stains, or a specialized carpet cleaner for tougher stains.
  3. Then, gently blot the stained area with a clean cloth or sponge, starting from the outside and moving towards the center to prevent spreading.
  4. Finally, rinse the treated area with clean water and blot dry with a towel.

From wine spills to mystery substances, identifying the stain on your living room carpet is like playing CSI: Carpet Stain Investigation.

Identify The Type Of Stain And Choose The Appropriate Cleaning Solution

Identifying the stain type is key. Look closely to figure out if it’s liquid or solid, organic or inorganic. That’ll help you pick the right cleaning solution. For instance, organic stains like food or coffee need enzymatic cleaners. And, greasy spots require solvent-based solutions.

Then, apply the solution with a clean cloth or sponge. Don’t be too rough. Let it sit for a while to break down the stain particles. If it’s a unique stain, like wine, you can use white wine as a pretreatment, then use a specialized cleaner.

For tricky spots, check online resources or ask experts. With knowledge and creativity, you can beat any stain!

Apply The Cleaning Solution And Let It Sit For A Few Minutes

Cleaning solutions are key to removing stains and spills. Allowing them to sit for a few minutes helps them penetrate and break down the stain. Here’s a guide:

  1. Identify stain – to pick the right cleaning solution, you must first know what kind of stain you have.
  2. Choose a solution – you can buy products or make your own with household items.
  3. Apply it – use a cloth or sponge to work it into the area. Don’t oversaturate or rub too hard.
  4. Let it sit – this helps break down and loosen the stain.
  5. Blot or rinse – excess moisture should be blotted up with a cloth or sponge. Rinse off any residue with water or a damp cloth.

Gently Blot The Stained Area With A Clean Cloth Or Sponge

Treating spills? Blotting is the way! Use a clean cloth or sponge to gently press against the stain. It’ll absorb the liquid, preventing it from spreading further. Here’s how:

  1. Identify the stain, then dampen the cloth/sponge with water (not soaking wet!).
  2. Place it directly on the stain and press gently.
  3. Lift off and check for residue.
  4. Repeat as needed with a fresh portion of the cloth/sponge until the stain’s gone.

Some stains may need specific treatments or cleaning solutions, like oil-based ones that need dish soap. Avoid rubbing or scrubbing vigorously, too. Blotting’s gentler and stops the stain from going deeper. Plus, the clean cloth/sponge won’t introduce extra dirt or contaminants. Being gentle yet thorough will help you address spills and keep them from becoming permanent stains.

Deep Clean The Carpet Using A Carpet Cleaner

Deeply cleansing your living room carpet using a carpet cleaner is an effective way to remove dirt, stains, and allergens, ensuring a fresh and healthy environment. Follow this 5-step guide for optimal results:

  1. Prepare the carpet cleaner: Fill the cleaning solution tank with the recommended amount of water and carpet detergent. Ensure that the machine is in proper working condition.
  2. Vacuum the carpet: Before using the carpet cleaner, thoroughly vacuum the entire carpeted area to remove loose dirt and debris. This step will improve the effectiveness of the cleaning process.
  3. Test a small area: Select an inconspicuous part of the carpet to test the cleaning solution. Apply a small amount of the solution and follow the manufacturer’s instructions to ensure it does not damage or discolor the carpet fibers.
  4. Clean in sections: Divide the carpeted area into manageable sections and start cleaning from one corner, moving in a systematic pattern. Use slow and steady motions to allow the carpet cleaner to extract dirt and stains effectively.
  5. Dry the carpet: After cleaning, ensure proper air circulation in the room to aid in the drying process. Avoid walking on the carpet until it is completely dry to prevent re-soiling.

For added freshness and to maintain the carpet’s appearance, consider using a carpet deodorizer or stain protectant after deep cleaning.

It’s vital to note that different types of carpets may require specific cleaning methods and products, so always refer to the manufacturer’s guidelines. By deep cleaning your living room carpet regularly, you can extend its lifespan and enhance the overall cleanliness of your home.

Want to give your carpet a spa day? Just fill up the carpet cleaner with the recommended cleaning solution and water, and watch those stains check out for some much-needed relaxation.

Fill The Carpet Cleaner With The Recommended Cleaning Solution And Water

Maintaining a clean and fresh carpet is key for a healthy, cozy home. An effective way to deep clean carpets is by using a carpet cleaner with the right cleaning solution and water. To do this, follow these steps:

1.Read the instructions on the cleaning solution bottle. Measure out the right amount in a container.
2.Open the tank of the carpet cleaner. Pour in the solution, evenly distributed.
3.Fill the rest of the tank with warm water. Don’t overfill.
4.Mix the solution and water together in the tank.
5.Securely close the tank.

Now the carpet cleaner is ready to tackle those tough stains and dirt! Different carpets may need different formulas. Check with pros or manufacturers’ recommendations for the right product.

Cleaning tip: Use vinegar and warm water as a DIY carpet cleaner. The Spruce website says it works great!

Start From The Farthest Corner And Work Your Way Towards The Exit

For a professional carpet clean, start from the farthest corner and work your way out! This ensures no spot is left untouched. To do this:

  1. Remove furniture and obstacles from the area.
  2. Pre-treat any stains or heavily soiled areas.
  3. Fill the carpet cleaner with water and cleaning solution.
  4. Slowly move in a back-and-forth motion, while releasing the cleaning solution onto the carpet.
  5. Allow time to dry before replacing furniture.

Remember to adjust the brush settings and choose suitable cleaning solutions, based on your carpet type. Studies show carpets that are regularly deep cleaned this way have improved longevity and maintain their appearance for longer.

Use Slow, Overlapping Strokes To Ensure Thorough Cleaning

For a thorough clean when using a carpet cleaner, slow, overlapping strokes are key. This technique ensures every bit of the carpet is cleaned, leaving it dirt-free and fresh. Here’s how to do it:

  1. Begin at one end of the carpet. Move the cleaner in a straight line, slowly across the surface.
  2. As you reach the end of the stroke, slightly overlap the previous path. This ensures nothing is missed.
  3. Maintain a consistent speed and repeat until the whole carpet is covered.

Slow strokes allow the cleaner to suck up dirt and debris from deep within the carpet fibers. Overlapping each stroke means no spot is left untouched.

Be aware of extra pressure. Excessive pressure can cause the carpet to become saturated with water or cleaning solution. This could lead to long drying times or damage.

Tip: Before using a carpet cleaner on the entire carpet, test it on an area that won’t be seen first. This ensures it won’t discolor or damage the carpet.

Allow The Carpet To Dry Completely

After cleaning the living room carpet, it is essential to ensure it dries completely. This can be achieved by following a simple yet effective process.

Firstly, remove any excess moisture by blotting the carpet with a clean and absorbent cloth. Next, increase air circulation by opening windows or using fans in the room. It is also advisable to avoid walking on the carpet until it is fully dry to prevent any additional moisture from being absorbed. Additionally, using a dehumidifier can expedite the drying process by removing excess humidity from the air. Lastly, it is crucial to allow sufficient time for the carpet to dry completely before returning furniture or allowing foot traffic on it. By following these steps, the carpet will dry thoroughly, preventing any potential damage or complications.

  1. Blot the carpet with a clean, absorbent cloth to remove excess moisture.
  2. Increase air circulation by opening windows or using fans in the room.
  3. Avoid walking on the carpet to prevent additional moisture absorption.
  4. Utilize a dehumidifier to remove excess humidity from the air.
  5. Allow sufficient time for the carpet to dry completely before returning furniture.
  6. Avoid foot traffic on the carpet until it is fully dry to prevent any damage or complications.

It is important to note that directly applying heat sources, such as hairdryers, to the carpet may cause permanent damage. Therefore, it is best to rely on natural air circulation and patience for the carpet to dry thoroughly.

Using these techniques will ensure that your living room carpet is completely dry and free from moisture, protecting it from potential issues such as mold or mildew growth.

Don’t just open your windows, let the fresh air in and the carpet farts out.

Open Windows Or Turn On Fans To Facilitate Air Circulation

Adequate air circulation is key to ensuring your carpet dries completely. This can be achieved by opening windows and turning on fans. Here’s why it’s so important:

  • Open windows let fresh air in, which helps with the evaporation process and prevents moisture buildup.
  • Fans circulate the air, speeding up the drying process.
  • Ventilation prevents mold and mildew growth, which can happen if the carpet stays wet for too long.
  • It also gets rid of bad odors after cleaning.

Airflow helps the carpet dry evenly. Target areas that take longer to dry, like corners or high-traffic spots, to avoid damage from moisture.

For maximum airflow, place fans in different parts of the room and clear any furniture or obstacles. This will make sure your carpet dries thoroughly.

Don’t forget to open the windows and turn on the fans! This is essential for your carpet’s longevity and to prevent any issues from too much moisture.

Avoid Walking On The Carpet Until It Is Fully Dry

Keep everyone away from the wet carpet until it’s dried. Don’t rush the process. Keep pets away from the damp carpet, too. Put signs or barriers up if you need to cross the carpeted area. Increase airflow in the room by opening windows and using fans. Check on the carpet’s condition during the drying period. Different methods of cleaning or moisture exposure may take different amounts of drying time. To be sure, wait an extra day before allowing regular foot traffic. By following these guidelines, you can maintain your carpets’ condition and traverse them with confidence.

Replace Furniture And Enjoy Your Clean Living room carpet!

Replacing furniture and having a spick-and-span living room carpet is the ultimate reward for all your cleaning efforts. Not only does it give your space a new look, but it also contributes to a healthier environment. Here are some useful tips to help you achieve that goal!

  • Shift the furniture: Start by taking out all furniture from your living room. This way you can clean every inch of the carpet and guarantee a thorough clean.
  • Vacuum completely: Before putting the furniture back, vacuum the carpet to remove any dirt and debris. Utilize attachments to reach hidden corners and crevices completely.
  • Treat stains instantly: If you spot any stains or spills during the cleaning process, make sure to treat them right away. Use the proper stain removers or DIY solutions for best results.
  • Add protective measures: To keep your carpet clean in the long term, think about adding protective measures such as area rugs or furniture pads. These can help prevent future stains and harm from heavy items.

Now, let’s discuss some unique details that haven’t been mentioned yet. It’s important to keep in mind that while cleaning is essential, prevention is just as important. Regularly vacuuming your carpet helps reduce dirt buildup and extends its life expectancy. In addition, professional deep cleaning should be done at least once a year for a successful and complete cleanse.

For a more positive clean living room carpet experience, here are some additional tips:

  1. Enforce a ‘no shoes’ policy: Shoes bring dirt from the outside into your home, so setting a no-shoes rule can significantly reduce the amount of dirt on your carpet.
  2. Use door mats: Placing doormats both inside and outside entrances will capture dirt before it reaches your living room carpet.
  3. Rotate furniture regularly: Rotating your furniture regularly will distribute weight more evenly on the carpet surface, preventing excessive wear in certain areas.
  4. Invest in professional cleaning equipment: Consider buying a high-quality vacuum cleaner and carpet cleaner to take care of your living room carpet properly. These tools can provide deeper cleaning, remove stubborn stains, and enhance the overall carpet appearance.

By sticking to these tips, you can not only keep your living room carpet clean but also extend its lifespan. So, say goodbye to grimy carpets and welcome the fresh and inviting atmosphere of your living space.

4th October 2023 D.I.Y

How To Damp Proof Wood Walls DIY

Damp-proofing wood walls is key to preventing moisture damage and keeping your space intact. It means taking steps to stop water from entering the walls and causing structural issues. Here, we look at DIY methods to damp-proof your wood walls.

Why is damp proofing so important? Wood is porous and easily absorbs moisture. This can lead to rot, mold growth, and other problems. By taking preventive action, you keep your wood walls safe.

A good way is to apply a waterproof sealant or paint. This makes a protective barrier on the wood, blocking water from entering. Choose a quality sealant or paint made of wood.

Also, install a vapor barrier behind the wood paneling or drywall. It serves as a physical barrier against moisture and stops it from reaching the wooden structure. Be sure to install the vapor barrier correctly.

Proper ventilation in the space helps prevent condensation and lower humidity levels. Install vents or fans in places like kitchens and bathrooms for better air circulation and drier wood walls.

Inspect your wood walls regularly for signs of dampness or water damage. Look out for discoloration, peeling paint, soft spots, or musty odors. If you find any, address them quickly to avoid more damage.

Understanding The Importance Of Damp Proofing Wood Walls

Wood walls are a beautiful design choice. But, they can be prone to dampness. To safeguard their structural integrity and prevent moisture-related issues like rot, mold, and mildew, damp proofing is essential. Wood absorbs and releases moisture depending on the humidity levels around it, which can cause warping, swelling, or decay.

To protect wood walls, specialized sealants or coatings can create an impermeable layer, keeping water out. Make sure to use high-quality products made for wood surfaces. Inspecting for signs of moisture penetration is also important.

Ventilation is vital too. Good airflow helps regulate humidity levels, reducing the risk of condensation. Fans or vents in bathrooms or kitchens can be beneficial.

Consult professionals for the right sealant and application techniques. Damp-proofing your wood walls will keep them looking beautiful and functioning well for years.

Preparing The Materials And Tools Needed For Damp Proofing

DIY projects are unique, so extra materials or tools might be needed. Consider a moisture meter to measure the wood wall’s moisture levels. Invest in high-quality waterproofing paint or sealant for wood surfaces that have great moisture resistance. Get brushes or rollers for an even application. Wear protective equipment like gloves, goggles, and a dust mask when working with chemicals. Proper preparation makes all the difference in successful DIY results!

Inspecting The Wood Walls For Existing Damp Issues

Look out for any signs of water damage, like discoloration, mold, and peeling paint.

Also, feel the walls to see if they’re damp.

Check the baseboards and corners for water stains or soft spots.

Use a moisture meter to see if there’s hidden moisture in the wood.

Examine the exterior walls for any cracks that could let water in.

Besides these steps, pay attention to smaller signs of dampness. Condensation and lack of insulation can become bigger issues if left unchecked. It’s important to inspect your wood walls regularly to prevent costly repairs and health hazards. Act now to keep your house safe and sound!

Treating Any Existing Damp Problems

In order to address any existing damp issues, it is important to follow the necessary steps for effective treatment. Firstly, identifying the source of moisture is crucial, as it could be due to condensation, rising dampness, or penetrating dampness. Once the source is determined, appropriate measures can be taken to mitigate the problem. This may involve improving ventilation, sealing cracks and gaps, or applying damp-proof membranes. Additionally, it is important to ensure that any damaged or decayed wood is repaired or replaced to prevent further moisture infiltration. By taking these necessary steps, the underlying damp problems can be effectively treated, ensuring the durability and longevity of the wood walls.

Furthermore, it is essential to regularly monitor the moisture levels to prevent future recurrence of dampness. This can be done by using moisture meters or hygrometers to assess the moisture content in the walls. Maintaining proper ventilation and implementing preventive measures such as waterproofing treatments can also contribute to long-term damp prevention. By addressing the existing damp problems promptly and taking preventive measures, the wood walls can be safeguarded against moisture-related issues in the future.

Notably, in addition to the technical aspects of damp treatment, it is important to consider the potential impact on individuals residing in the affected area. Damp problems can lead to the growth of mold and mildew, which can be detrimental to respiratory health. Therefore, it is crucial to address these issues promptly to ensure the well-being of inhabitants.

Finding moisture or water damage on your wood walls is like discovering your ex’s number in your phone: it’s a sure sign of trouble.

Identifying Signs Of Moisture Or Water Damage

Moisture or water damage can be destructive. To stop it from getting worse, it’s important to recognize signs of damage quickly. Here are some key warnings:

  • Water stains or discoloration on walls, ceilings, or floors
  • Musty or damp smells in closed rooms
  • Peeling or bubbling paint or wallpaper
  • Visible mold growth
  • Warped or swollen wood
  • Deterioration of building materials like plaster, drywall, or cement

Neglecting moisture issues can lead to bigger problems and weaken the structure of your property. So it’s essential to tackle these signs fast.

It’s not only homes that are affected by wetness. Commercial properties and buildings are also at risk, like when a burst pipe causes lots of damage in a commercial building. It spread water through many floors, wrecking furniture and equipment. This serves as an important reminder of the importance of spotting and treating moisture or water damage without delay.

So keep an eye out for anything unusual that could show moisture issues and act quickly. Early detection is the key to avoiding expensive repairs and keeping your property in good condition.

Applying Appropriate Treatments Or Sealants

Locate the source of the dampness first. It could be a pipe leak, faulty guttering, or wall cracks. Solve these underlying problems to stop recurring dampness. Then, select an ideal treatment or sealant for the particular kind of dampness, such as condensation or rising dampness. Get expert advice or research thoroughly to make sure you use the most effective product. When applying the chosen treatment or sealant, follow the manufacturer’s instructions and clean the affected area first. For even coverage, use the correct tools and techniques.

Also, ample airflow is essential for preventing dampness in the long run. Open windows regularly or install ventilation systems. To further improve the outcome of the treatment, follow these steps: maintain areas prone to dampness (like bathrooms and basements); properly install insulation materials; and monitor humidity levels with dehumidifiers. Taking timely action and doing regular maintenance will keep your property in good condition and your living environment healthy.

Applying A Damp Proofing Solution To The Wood Walls

Wood walls can be prone to dampness, which can lead to damage and decay. To protect the wood and prevent moisture from seeping in, it is important to apply a damp-proofing solution. Here is a step-by-step guide to help you apply the solution effectively:

  1. Prepare the surface: Ensure that the wood walls are clean and dry before applying the damp-proofing solution. Remove any existing paint or sealant to allow the solution to penetrate the wood properly.
  2. Choose the right solution: There are different types of damp-proofing solutions available, including liquid membranes, epoxy resin, and silane/siloxane-based products. Select a solution that is specifically designed for treating wood surfaces.
  3. Apply the solution: Using a brush or roller, apply the damp-proofing solution evenly across the wood walls. Make sure to cover the entire surface, paying extra attention to any cracks, crevices, or joints where moisture can seep in.
  4. Allow for proper drying time: Give the solution enough time to dry and cure. Follow the manufacturer’s instructions for the specific product you are using, as drying times may vary.
  5. Apply a second coat (optional): Depending on the product you choose, it may be recommended to apply a second coat for added protection. This will enhance the effectiveness of the damp-proofing solution and provide an extra barrier against moisture.
  6. Monitor and maintain: Regularly monitor the wood walls to ensure that the damp-proofing solution is working effectively. If you notice any signs of dampness or moisture, reapply the solution as needed.

It is important to note that each wood wall may have unique characteristics and requirements, so it is always a good idea to consult with a professional or follow the manufacturer’s instructions for the best results.

Pro Tip: Before applying the damp proofing solution, consider testing a small inconspicuous area first to ensure compatibility and to determine the desired effect on the wood.

When it comes to choosing the right damp-proofing product, remember that moisture and walls are like exes at a wedding – they just don’t mix.

Choosing The Right Damp-Proofing Product

Compatibility: Check that the damp-proofing product you get is compatible with the type of wood used in your walls. Different woods have distinctive qualities, and using an unsuitable product can cause ineffectiveness or even damage the wood.

Application method: Think about how easy it is to apply when you pick a damp-proofing solution. Some products may need special gear or help from a professional. Others can be done by homeowners. Pick a way that works with your abilities and resources.

Effectiveness: Look for a product that gives good defense against dampness damage. Investigate the effectiveness of different damp-proofing solutions. Read customer reviews. And think of consulting with experts to figure out which option will protect your wood walls best.

Longevity: Think about how long the damp-proofing product will last. You want a solution that will work for a long time, so you don’t have to apply it or do maintenance too often.

Remember, you have to look over and maintain damp proofing regularly to make sure it stays good. By taking care of troubles quickly and having a proactive attitude, you can avoid issues down the line.

Preparing The Wood Walls For Application

Assess the condition- Inspect the wood walls for any damage or decay. Look for cracks, rot, or moisture. This will help you decide what needs to be done.

Clean and dry- Remove any dirt, dust, or debris using a vacuum or brush. Make sure the walls are completely dry.

Repair and seal- If there are any visible damages, fix them with a filler or sealant before applying the damp-proofing solution. Follow the manufacturer’s instructions on ventilation and safety.

A cautionary tale- A homeowner didn’t prepare their wood walls properly and moisture seeped through untreated areas. It caused damage and cost money to fix. Preparing the walls beforehand would have avoided all this.

Applying The Damp Proofing Solution According To The Manufacturer’s Instructions

  1. Clean the wood walls thoroughly to prepare the surface – removing any dirt, dust, or debris. To bond properly, it’s essential.
  2. Mix the damp proofing solution carefully, following the manufacturer’s instructions. This balances the chemical composition, maximizing effectiveness.
  3. Use a brush or roller to apply the solution evenly, paying attention to corners and edges.
  4. Allow sufficient time for it to dry completely before adding any finishes or exposing it to moisture.
  5. Manufacturer instructions regarding temperature conditions or protective measures should also be taken note of.

Ancient civilizations used natural substances, such as oils and resins from plants, to preserve wooden structures from humidity and water damage. This knowledge has evolved into modern-day solutions with advanced chemical formulas for increased protection. Such solutions ensure the longevity of our valuable wooden surfaces.

Explore: How To DIY Chemical Injection Damp Proofing

Allowing The Damp Proofing Solution To Dry And Cure

Ensure optimal results with the damp proofing solution by drying and curing it thoroughly. Follow these 5 steps for proper drying and curing:

  1. Using a brush or roller, evenly apply a thin layer of the solution to the wood surface.
  2. Let the solution air dry for 24 hours, and make sure the area is properly ventilated.
  3. Once dry, inspect the wood to be sure it’s evenly absorbed in the solution.
  4. If needed, apply a second coat with the same process.
  5. Give the second coat enough time to dry and cure before applying other treatments or finishes.

To ensure optimal drying and curing of the damp proofing solution:

  • Keep temperature and humidity levels in the area during drying and curing.
  • Avoid direct exposure to sunlight, which could cause uneven drying.
  • Make sure the area has adequate ventilation; this helps speed up drying and prevent trapped moisture.
  • Regularly check the drying progress by lightly touching the wood surface. If any area still feels wet or sticky, give it more time to dry.

With proper drying and curing time, your wood walls will be effectively protected against moisture, improving their longevity and durability.

Finishing Touches And Maintenance Tips

Dust & wipe wood walls regularly to get rid of dirt & grime. Use a soft cloth or microfiber duster to avoid scratches. Inspect walls for cracks & gaps. Seal them with wood filler or caulk to stop moisture from seeping in. Apply a protective finish like wax or varnish to make walls resistant to moisture, UV rays, & scratches.

Balance humidity levels. Use a dehumidifier in humid climates or rainy seasons. Hang curtains or blinds to protect walls from direct sunlight. Sunlight can fade color & cause warping. Check for mold & mildew. Remove with a mild bleach solution if present.

Follow these tips to keep wood walls in great condition!

Conclusion

We have discussed it – damp-proofing wood walls is essential. Follow the steps outlined in this article to protect them:

  1. Identify signs of dampness and use a damp-proof membrane on the external wall. This will prevent moisture from seeping in.
  2. Apply waterproof paint or sealant too. Choose a high-quality product designed for wood surfaces.
  3. Maintain proper ventilation to reduce condensation and humidity. Utilize dehumidifiers and open windows regularly.
  4. Inspect and repair any cracks or gaps in your wood walls. Seal them with filler or caulking materials. This will further enhance damp-proofing effectiveness.

Investing in these techniques will safeguard your wood walls. Preserve their aesthetic appeal and structural integrity. Minimize potential damage caused by moisture infiltration. Ensure a longer lifespan for your wooden surfaces.

4th October 2023 D.I.Y

How To DIY Chemical Injection Damp Proofing

DIY chemical injection dampproofing is a method to stop moisture from entering dwellings. It involves injecting a special chemical blend into walls, forming a barrier against water. Homeowners can do this themselves, thus avoiding the cost of hiring professionals.

  1. Step one is locating spots that are prone to moisture. Signs are damp patches, peeling wallpaper, and musty smells. Then, clean and remove any loose material from these areas.
  2. Next, drill holes in the affected walls at regular intervals. This allows the chemical solution to reach deep into the masonry. The mix is usually water with a damp-proofing agent.
  3. Using an injection gun, inject the blend into each hole until it starts to overflow slightly. This ensures that all empty spaces within the wall are filled with the solution. Wipe away the extra.
  4. Be safe during this process, as some damp-proofing agents can be hazardous if not handled correctly. Wear protective gear such as gloves and goggles, and make sure the work area is well-ventilated.

Explore further: How To Damp Proof A Retaining Garden Wall

Understanding The Need For Damp Proofing

Damproofing is essential to protect buildings from moisture damage. It halts water infiltration, mold growth, and structural breakdown. Knowing about damp proofing assures long-term, sustainable structures.

Moisture can cause severe issues such as decay, fracturing, and even weakening of the structure. Dampproofing is the first defense against these problems. It establishes a barrier that stops water from infiltrating the building, protecting the structure and its occupants.

Before doing damp proofing, you must contemplate climate conditions, building materials, and the source of moisture entry. This helps determine the most suitable damp-proofing method.

One common chemical injection dampproofing technique is injecting a liquid or gel material into the affected areas of the structure. This forms a waterproof barrier that hinders further moisture entry. The injected chemicals block water and make the structure stronger and more durable.

Pro Tip: Before attempting any DIY chemical injection damp proofing, study and comprehend the process for best results. Ask professionals for help if needed.

Preparing For Damp Proofing

To prepare for damp proofing with DIY chemical injection, gather the necessary tools and materials. Assess the affected areas and determine the required quantity of chemicals. This section equips you with the essential steps for a successful damp-proofing project.

Gather The Necessary Tools And Materials

Gathering the right tools & materials is key for damp proofing. Here’s a step-by-step guide to help you out:

  1. Assess the requirements. Understand what damp proofing needs.
  2. Research & seek advice. Get tips from pros or experts.
  3. Make a list. Keep track of all needed tools & materials.
  4. Shop smartly. Compare prices & prioritize quality.
  5. Double-check before starting. Avoid any hassle.

It’s essential to know that there may be specific items required, depending on the damp proofing method & severity of the problem. A study by The NIBS found dampness & moisture-related issues can affect buildings’ air quality.

Assess The Affected Areas And Determine The Required Quantity Of Chemicals

Assessing affected areas and determining the quantity of required chemicals is vital for damp proofing prep. This approach allows a thorough evaluation of the damage and helps figure out the right amount of chemicals for the areas. Here are 5 steps to do it:

  1. Inspect: Carefully check areas with signs of dampness, like discolored walls or peeling paint. Look for cracks or leaks that may be causing the issue.
  2. Measure: Use a measuring tape for each affected area. It’ll help calculate the surface area needing treatment and estimate the quantity of chemicals.
  3. Identify dampness type: Different types of dampness require different chemicals. Figure out if it’s rising, condensation, or penetrating dampness to select the right chemical solution.
  4. Consult an expert: Seek advice from a damp proofing specialist who can assess the situation and give recommendations on the best course of action and chemicals.
  5. Calculate quantity: Based on measurements and consultation, calculate the exact quantity of chemicals needed for treatment. Follow manufacturer guidelines for dilution ratios for effective use.

Also, proper ventilation in affected areas can prevent further damage from moisture build-up. Regular inspection and maintenance can spot early signs of water damage before it’s too late.

Safety Precautions

To ensure safety while undertaking a DIY chemical injection damp-proofing project, it is crucial to take certain precautions. Understanding the potential hazards of chemicals and using personal protective equipment (PPE) play vital roles in safeguarding yourself.

Understanding The Potential Hazards Of Chemicals

Chemicals can be risky – so let’s break down the different hazards they pose.

Check out this table for an overview:

Chemical HazardDescriptionExamples
FlammableIgnites and burns easilyAcetone, gasoline
ToxicCan be harmful or even deadly if inhaled or ingestedLead, cyanide
CorrosiveDamages materials it touchesSulfuric acid, strong alkalis
IrritantCauses inflammation when in contact with skin or mucous membranesBleach, ammonia

It’s also important to think about reactivity and environmental impact. Reactivity is how chemicals can react and cause danger when combined with other substances. Environmental impact considers the consequences of chemical release on ecosystems and nearby areas.

When you deal with chemicals, always wear PPE like gloves, goggles, and lab coats. Make sure your workspace has proper ventilation, too.

Pro Tip: Read Material Safety Data Sheets (MSDS) for each chemical. These sheets have info on handling, first aid, and emergency contacts in case of accidents or spills.

By being aware of the risks and taking proper precautions, we can keep ourselves and those around us safe. Stay informed and stay safe!

Using Personal Protective Equipment (PPE)

Using Personal Protective Equipment (PPE) is essential for individual safety in many settings. This article will explore the importance of PPE and its effectiveness.

Masks help protect against airborne particles and pathogens. Wear clothing that is not loose-fitting to avoid getting caught in machinery. Gloves provide a barrier between hazardous substances and skin. Safety goggles protect eyes from chemicals or debris. Harnesses and safety belts are essential for fall protection when working at heights.

There are other aspects to consider with PPE. Fit it properly and inspect it for damage or defects. Provide training on how to use and maintain it.

To ensure effectiveness:

  1. Select appropriate PPE for the task or environment.
  2. Clean and sanitize PPE regularly.
  3. Store PPE in a clean and dry area.
  4. Replace damaged or worn-out PPE.
  5. Educate workers on using PPE correctly.

Following these suggestions helps to reduce the risk of injury or illness in work environments. PPE is a vital defense and promotes safety and well-being.

Step-By-Step Instructions For DIY Chemical Injection Damp Proofing

To achieve successful DIY chemical injection damp proofing, follow these step-by-step instructions. Prepare the injection ports, mix the damp-proofing chemical solution, and inject the chemical into the affected areas. This systematic approach ensures a thorough and effective treatment, preventing moisture from seeping into your walls and causing potential damage.

Preparing The Injection Ports

For successful DIY chemical injection damp proofing, preparation of injection ports is key. Here’s a step-by-step guide to help you out:

  1. Assess the wall. Check inside and outside for cracks or cavities. Use a flashlight.
  2. Clean the area. Remove paint, dirt, and debris with a wire brush or scraper. Make sure it’s dry.
  3. Mark injection points. Use a pencil or marker to identify points.
  4. Install injection ports. Adhere them to marked points. Follow manufacturer instructions.

Note: Different walls may require specific methods. Consult experts or read product manuals.

DIY chemical injection damp proofing can be rewarding. It saves money and protects your home. So take precautions and follow proper procedures.

Mixing The Damp Proofing Chemical Solution

Gather all items needed to mix the damp-proofing chemical, such as the chemical, a clean bucket, measuring cups, and a stir stick. Measure the chemical according to the instructions. Put the measured chemical into the bucket. Then, gradually add water while stirring. Stir until all components are mixed and have a uniform consistency. Let it sit for a few minutes before application.

Always use protective gear like gloves and goggles. Mix only as much as you need to avoid waste. Different products may have different mixing instructions, so read and follow the manufacturer’s guidelines.

Mixing the damp-proofing chemical solution correctly is important for its effectiveness and longevity. Follow these steps and take precautions to reduce dampness and create a healthier environment.

Injecting The Chemical Into The Affected Areas

Before injecting the chemical, clean and dry the affected area. Get rid of any debris or loose materials that could disrupt the injection process. Follow the manufacturer’s guidelines to mix the right proportions of the chemical solution.

Drill holes into the areas where moisture is present. Insert the nozzle and inject the chemical solution with light pressure. Then, seal off the drilled holes with epoxy or mortar.

Be sure to read all the safety instructions provided by the product and relevant authorities. Proper ventilation is also important to secure safety and maintain air quality. A homeowner was able to use this chemical injection damp proofing and solved their basement issue. With the right tools and knowledge, you can do it too!

Aftercare And Maintenance

To ensure the long-lasting effectiveness of your DIY chemical injection damp proofing, aftercare and maintenance play vital roles. Cleaning and sealing the injection ports, as well as monitoring for any signs of moisture or dampness, are essential steps to guarantee the continued success of your damp-proofing solution.

Cleaning And Sealing The Injection Ports

  1. Gather the necessary items for cleaning: a mild detergent, warm water, a soft-bristle brush, and a clean cloth.
  2. Mix a mild detergent and warm water in a bucket or basin.
  3. Dip the brush into the soapy water. Gently scrub the injection ports to remove dirt and debris.
  4. Rinse the injection ports with clean water. Remove remaining soap residue.
  5. Dry the injection ports with a clean cloth. Make sure they are dry before sealing them.

Regularly clean and seal injection ports. Check for signs of damage or wear.

Neglecting proper cleaning has caused issues such as leaks and decreased performance.

But advancements have taught us the importance of this step.

Cleaning and sealing injection ports will protect them and improve system efficiency. So take the time to care for them regularly. You’ll gain performance and reliability.

Monitoring For Any Signs Of Moisture Or Dampness

  1. Inspect all moist areas, like bathrooms, basements, and kitchens.
  2. Spot visible water stains on walls/ceilings.
  3. Smell for musty odors which might hide moisture.
  4. Hygrometers can track humidity levels.
  5. Use moisture meters to detect moist spots behind walls/under flooring.

Address any signs of moisture quickly. This may include fixing leaks, better ventilation, or dehumidifiers in humid places. Maintenance prevents costly repairs and guards your home.

Conclusion

This article has explored DIY chemical injection damp proofing. Prep and diagnosis are necessary, as well as the chemicals and equipment. Safety precautions and risks are incredibly significant.

Manufacturers’ instructions must be followed and professional guidance may be necessary. DIY projects can be fulfilling, however, tackling chemical injection damp proofing without knowledge and experience can lead to costly errors. Seeking help from a professional specializing in damp-proofing solutions may be beneficial.

Now’s the time to create a safe and comfortable living environment! Take measures to address existing or potential damp issues. Prevention is better than cure when protecting your property from dampness. Act now and enjoy a healthier living space tomorrow!

4th October 2023 Garden

How To Damp Proof A Retaining Garden Wall

Damp-proofing a retaining garden wall is key to preserving both its structural integrity and the surrounding landscape. Taking preventative measures can guarantee your garden wall stands firm against moisture damage.

Retaining garden walls are useful and attractive additions to any outdoor space. They stop soil erosion, create differing levels in the landscape, and add visual appeal. However, these walls are exposed to different weather conditions, such as rainwater and humidity, which can lead to dampness issues over time.

To properly damp-proof a retaining garden wall, starting with correct construction methods is essential. Utilizing quality materials like waterproof mortar or cement mixtures can raise the wall’s resistance to moisture penetration. Additionally, including a damp-proof membrane during construction or applying an outside tanking system after construction provides extra protection.

Regular maintenance is also an important element in avoiding dampness issues in garden walls. Keeping the wall clean of dirt and debris allows for better water runoff and reduces the odds of moisture accumulation. Inspecting the wall for cracks or gaps periodically and fixing them swiftly helps preserve its durability.

Damp-proofing a retaining garden wall needs careful consideration and proactive measures. By utilizing proper construction techniques, conducting regular maintenance checks, and seeking professional guidance when needed, you can guarantee your garden wall remains strong and attractive for years to come. Let’s now explore the various methods and techniques that can help damp-proof your retaining garden wall efficiently.

Understanding The Importance Of Damp Proofing For A Retaining Garden Wall

A damp-proof barrier is a must for any retaining garden wall. Without it, moisture can seep in, weakening the wall and causing structural issues. Plus, mold, mildew, and other bad microorganisms can grow and cause health issues.

The right materials must be used depending on the soil composition and water table levels in your area. For maximum protection, consult a professional who specializes in waterproofing systems. They will identify problem areas and provide tailored solutions.

Assessing The Condition Of The Retaining Garden Wall

Assessing a garden wall’s condition is essential to deciding the amount of damp-proofing needed. Here’s a 4-part guide to assess your wall:

  1. Look for cracks or damage: Check the entire area for chips, crumbling mortar, or any cracks. These can show weaknesses that may let in moisture.
  2. Check for water stains or white powdery residue: Spot water seepage discoloration on the wall or white powdery residue – ‘efflorescence’. This implies that water has been evaporating from within the masonry.
  3. Observe soil movement near the wall: See if there are signs of soil shifting or bulging close to the wall. Unstable soils can cause lateral pressure, leading to structural instability and possible dampness.
  4. Monitor drainage conditions: Check gutters, downspouts, and surface runoff paths to see how well the drainage system works. Poor drainage can cause too much moisture around the retaining wall.

Plus, note any damp issues that occurred before and make sure they have been taken care of before doing anything else.

Pro Tip: Get professional assistance when assessing the wall’s condition to make sure damp problems and proper measures are identified and taken immediately.

Gathering The Necessary Materials And Tools

To damp-proof your retaining garden wall, gather the following materials and tools:

  1. Waterproof membrane: Purchase a high-quality, outdoor-resistant version.
  2. Damp-proofing paint or sealant: Choose one that creates a barrier against water infiltration.
  3. Paint roller or brush: To apply the paint or sealant evenly.
  4. Cleaner/brush: To clean the wall’s surface.
  5. Protective gear: Wear goggles, gloves, and a mask.

Research and select the best materials and tools according to the wall’s material and condition. Consult with experts for tailored recommendations. Opt for high-quality products with good adhesion, long-lasting protection, and UV resistance. Use an appropriate painting tool for optimal coverage. With these materials and tools, you can provide your wall with effective damp-proofing and long-lasting protection.

Preparing The Retaining Garden Wall For Damp Proofing

For any home improvement project, proper preparation is vital. This is especially true for protecting your garden wall from dampness. By following these steps and investing in suitable products, your structure will stay dry and you can enjoy your outdoor space for years.

Steps to take:

  1. Clean the wall surface with a stiff brush or pressure washer, to remove dirt, debris, and loose materials.
  2. Look for cracks or damage that can let in moisture and repair them with filler or mortar.
  3. Apply a waterproofing primer using a brush or roller, to create a barrier against water penetration.
  4. Install a damp-proof membrane on the entire wall.
  5. Finish off with a weather-resistant render or coating.

Plus, take into account drainage and landscaping around the wall, to prevent water accumulation and damage.

Applying A Damp Roofing Solution

  1. Clean the wall properly, using a wire brush or scraper for tough debris.
  2. Find a damp-proofing product suitable for the wall material. Ask a professional if you’re not sure.
  3. Follow the manufacturer’s instructions to mix the solution.
  4. Apply an even layer of the product with a brush or roller.
  5. Let the solution dry fully before applying more layers.
  6. Check the wall for coverage.
  7. Inspect regularly for moisture and damage.
  8. Don’t neglect damp-proofing – it can cause mold and instability.
  9. Take action to protect your retaining garden wall and have a durable structure!

Uncover more: How To Damp Proof Wood Walls DIY

Adding Additional Protective Measures

To protect your retaining garden wall, extra steps are needed. These can ensure its durability and structural integrity for years. Here’s a 6-step guide:

  1. Evaluate the wall’s condition and check for any damage or weaknesses.
  2. Clean the surface with a water and detergent mix. This is for proper adhesion of protective materials.
  3. Apply a waterproof coating for masonry surfaces. Use a brush or roller.
  4. Add drainage systems, such as weep holes or French drains, at regular intervals along the base of the wall. These help redirect excess water away.
  5. Consider adding a waterproof membrane for extra protection. Put this on the entire wall before backfilling with soil.
  6. Implement proper landscaping techniques. Grade and slope away from the wall to prevent water accumulation. Place plants and shrubs near the wall for water absorption and erosion prevention.

These measures help make the wall stronger against dampness and deterioration. They also reduce maintenance requirements and prolong their lifespan.

Maintaining The Damp Proofed Retaining Garden Wall

  1. Regularly inspect the wall for cracks & fill them.
  2. Monitor drainage nearby. Clear any blockages.
  3. Clean the wall surface from time to time.
  4. Maintain landscaping: avoid planting trees too close.
  5. Redirect water flow away from the wall.
  6. Schedule professional inspections.
  7. Be attentive to details and design.
  8. For persistent dampness, consult a specialist.

Conclusion

Ensuring the durability and strength of a retaining garden wall is essential and can be done with proper damp-proofing. Here are some steps to follow:

  1. Pick a high-quality waterproof material, such as damp-proof bricks or concrete blocks.
  2. Moreover, coat the external surface with a waterproof coating to provide an extra layer of protection.
  3. Additionally, install drainage systems and weep holes to enable water drainage.
  4. Furthermore, slope or grade the area around the wall to divert rainfall away from it.
  5. Lastly, inspect and maintain the wall regularly. Fix any cracks or damages and clear any debris or vegetation near it.

Doing so will ensure your wall remains damp-proofed and intact.

3rd May 2023 D.I.Y

Preserving Your Leather: How To Apply A Dye Sealer

Leather is a popular material used for various products, from clothing to furniture, and is prized for its durability, style, and comfort. However, leather is also vulnerable to damage from sunlight, moisture, and other environmental factors, which can cause it to fade, crack, and deteriorate over time. To protect your leather items and extend their lifespan, it’s essential to preserve them properly. One effective method of maintaining leather is by using a dye sealer. A dye sealer is a protective coating that penetrates the leather fibres, adding colour and sealing the surface to protect it from damage.

Understanding Leather And Its Properties

Leather is a material that is widely used for clothing, footwear, and furniture and is valued for its durability, style, and comfort. To effectively preserve leather, it’s essential to understand its properties and how it behaves over time. In this section, we will go over the different types of leather, their characteristics, and the factors that can affect the longevity of your leather items.

Check out: The Psychology Of Rearranging Furniture

How To Apply A Dye Sealer

Types Of Leather

There are several types of leather, each with unique properties and characteristics. Some of the most common types include:

  • Full-Grain Leather: This type of leather is made from the top layer of the hide and is considered the highest quality leather. Full-grain leather has a natural texture and patina and is known for its durability and resistance to damage.
  • Top-Grain Leather: This type of leather is made from the second layer of the hide and has had the top layer sanded and buffed to remove any blemishes. Top-grain leather is still durable but is less resistant to damage than full-grain leather.
  • Corrected-Grain Leather: This type of leather is made from the third layer of the hide and has had an artificial grain applied to it to hide any imperfections. Corrected-grain leather is less durable and resistant to damage than full-grain or top-grain leather.

Characteristics Of Leather

Leather has several unique properties and characteristics, including:

  • Durability: Leather is known for its durability and can last many years with proper care and maintenance.
  • Breathability: Leather allows air to circulate, which helps keep the material from becoming too hot or humid.
  • Softness: Leather can be soft and flexible, making it comfortable to wear or sit on.
  • Water Resistance: Leather is naturally water-resistant, but its resistance can be diminished over time by exposure to moisture and other environmental factors.

Factors That Affect Leather’s Durability

Several factors can affect the longevity of your leather items, including:

  • Exposure to Sunlight: Direct sunlight can cause the leather to fade and crack over time.
  • Moisture: Exposure to water can cause the leather to become discoloured, brittle, and weakened.
  • Temperature: Extreme temperatures can cause the leather to dry out and become brittle, making it more susceptible to damage.
  • Use: Regular use can cause the leather to become worn and scratched, weakening its fibres and reducing its lifespan.

By understanding the different types of leather, their characteristics, and the factors that affect their durability, you can make informed decisions about preserving your leather items best and extending their lifespan.

What Is A Dye Sealer, And How Does It Work?

A dye sealer is a protective coating applied to the leather to protect it from damage and extend its lifespan. Dye sealers come in various colours and formulas and can be used to both add colour to leather and seal its surface to protect it from the elements.

Check out: How & Why You Should Paint Your Tired Kitchen Cabinets

How A Dye Sealer Protects Leather

A dye sealer penetrates into the leather fibres, creating a barrier that helps protect the leather from damage. The dye in the sealer adds colour to the leather, helping to hide any existing damage or blemishes, while the sealer protects the leather from further damage. The sealer forms a barrier that repels moisture and prevents the leather from becoming brittle and dry, which can cause it to crack and deteriorate over time.

Different Types Of Dye Sealers

Several types of dye sealers are available, each with unique properties and characteristics. Some of the most common types of dye sealers include:

  • Water-Based Dye Sealers: These sealers are made from water and a type of resin and are known for their easy application and quick drying time. Water-based dye sealers are also environmentally friendly, as they do not emit fumes or harmful chemicals.
  • Solvent-Based Dye Sealers: These sealers are made from solvents, such as alcohol or petroleum, and are known for their robust and long-lasting protection. Solvent-based dye sealers can be more challenging to apply than water-based sealers and may emit fumes harmful to the environment.
  • Oil-Based Dye Sealers: These sealers are made from oil and are known for their deep, long-lasting protection. Oil-based dye sealers can be difficult to apply and require multiple coats for maximum protection.

Choosing the correct type of dye sealer for your leather will depend on your specific needs and preferences and the style of leather you are working with. It’s important to carefully read the instructions and follow the recommended application process for the dye sealer you choose to ensure the best results and protection for your leather.

Preparing The Leather For Application

Before applying a dye sealer to your leather, it’s essential to prepare it to ensure the best results properly. This will not only help the dye sealer to adhere correctly but also help to extend the life of your leather. Here are the steps to properly prepare your leather for a dye sealer application:

  • Clean the Leather: The first step in preparing the leather is to clean it thoroughly. This will remove any dirt, oil, or other contaminants that may interfere with the adhesion of the dye sealer. A gentle leather cleaner, such as a soap and water solution, can clean the leather. Remove all soap residue with a clean cloth and allow the leather to dry completely before applying the dye sealer.
  • Condition the Leather: Leather can dry out and crack over time, so it’s important to condition it before applying a dye sealer. Leather conditioner helps to moisturise the leather, making it more pliable and less likely to crack. Apply a thin layer of leather conditioner to the leather, using a clean cloth, and allow it to soak in for 10-15 minutes. Then, remove any excess conditioner with a clean cloth.
  • Repair Any Damage: Before applying a dye sealer, it’s a good idea to repair any damage to the leather, such as cracks or tears. This will help prevent the damage from worsening and ensure that the dye sealer adheres properly to the leather. A leather patch or filler can be used to repair any damage.
  • Test the Dye Sealer: Before applying the dye sealer to the entire piece of leather, it’s a good idea to test it on a small, inconspicuous area first. This will allow you to see how the dye sealer will affect the leather and make any necessary adjustments before applying it to the entire piece.

By adequately preparing the leather, you can ensure that your dye sealer application goes smoothly and that your leather will be protected for years.

 Applying The Dye Sealer

Once your leather is prepared correctly, you’re ready to apply the dye sealer. The specific instructions for applying a dye sealer will vary depending on the type of sealer you’re using, but here are some general guidelines to follow:

  • Please read the Instructions: Before you start, read the instructions for your specific dye sealer to ensure that you’re using it correctly. Some sealers may require multiple coats or have specific drying times that need to be followed.
  • Apply the Dye Sealer: Start by applying a thin, even layer of dye sealer to the leather using a clean cloth or brush. Be sure to cover the entire leather surface, including the seams and any exposed edges.
  • Allow to Dry: Allow the dye sealer to dry completely, following the instructions on the product label. Depending on the sealer you’re using, this can take anywhere from a few minutes to several hours.
  • Apply Additional Coats: If necessary, apply additional coats of dye sealer to the leather, following the instructions on the product label. Be sure to allow each coat to dry completely before applying the next.
  • Buff the Leather: Once the final coat of dye sealer has dried, use a clean cloth to buff the leather to a high shine gently. This will help to spread the dye evenly and ensure that the leather has a smooth, uniform appearance.

You can successfully apply a dye sealer to your leather and protect it from damage for years to come. It’s essential to take your time and be patient, as using a dye sealer can be a time-consuming process. But the result of beautifully protected leather is well worth the effort!

Maintaining Your Leather After Application

Once you’ve successfully applied a dye sealer to your leather, it’s essential to maintain it properly to ensure that it stays protected and looks great for years to come. Here are some tips for keeping your leather after a dye sealer application:

  • Clean Regularly: Leather can become dirty and stained over time, so it’s essential to clean it regularly to keep it looking its best. Use a gentle leather cleaner, such as a soap and water solution, to clean the leather, and remove all soap residue with a clean cloth.
  • Condition Regularly: Leather can dry out and crack over time, so it’s important to condition it regularly to keep it moisturised and pliable. Use a leather conditioner to keep your leather soft and supple, and follow the instructions on the product label.
  • Avoid Exposure to Direct Sunlight and Heat: Direct sunlight and heat can cause the leather to fade and dry out, so it’s essential to keep your leather out of direct sunlight and away from heat sources.
  • Protect from Scratches and Tears: Leather can become scratched and torn over time, so it’s essential to protect it from damage. Use a protective cover or place a soft cloth between your leather and hard surfaces to prevent scratches and tears.
  • Store Properly: When not in use, store your leather in a cool, dry place away from direct sunlight and heat sources. This will help extend your leather’s life and keep it looking its best.

With these simple tips, you can maintain your leather after a dye sealer application and enjoy its beauty and durability for years to come.

Preserving your leather is an essential step in ensuring that it lasts for years to come. A dye sealer is a great way to protect your leather from damage, and by following the proper steps for preparing, applying, and maintaining it, you can ensure that it stays looking great for a long time. Whether you’re a leathercraft enthusiast or want to keep your leather furniture and accessories looking their best, applying a dye sealer is a simple and effective way to ensure that your leather stays protected and beautiful. So don’t hesitate to try it out today and enjoy the benefits of beautifully preserved leather for years to come!

31st January 2022 Interior Decor

The Psychology of Rearranging Furniture

Whether you subscribe to feng shui or you simply appreciate the difference interior design and furniture placement can make to your life, understanding the psychology behind rearranging furniture can make achieving a truly positive design for your personal space much easier. The impact that our environment can have on our mood, stress levels, energy, joy, and more can be surprisingly large and you can take control of that by proactively and intentionally choosing to rearrange furniture and interior design.

There are two main ways in which rearranging your furniture can affect your mood. The first is that the act itself of altering our environment, in this case through furniture rearranging, can have an impact on our emotions. The second is that the arrangement of the furniture and how it affects the environment in which we live can have its own impact on how we feel.

How rearranging your furniture can boost your mood

You probably have some people in your life who move furniture around in their home on a seemingly constant basis. You might think that the only reason to do so is that they become dissatisfied with the original arrangement but the psychology behind this behaviour is a little more complex than simply getting bored with how the room looks.

Having mastery over our environment can profoundly affect the way we feel. According to Psychology Today, having an impact on our environment “lifts mood, provides concrete satisfaction, and instils a sense of effectiveness”.

When we rearrange furniture and other items in our home, we can feel resourceful, clever, and creative. And this can improve our self-esteem and provide us with a sense of true control. Very often the events in our lives can feel as though they are happening to us so completing a task that gives us that control can reduce anxiety, make us feel less helpless, and soothe frazzled nerves.

Getting rid of clutter, specifically, can provide us with a boost of energy as well as mood elevation. It is a way of providing ourselves with a fresh start and letting go of old attachments and emotions. Removing clutter from our home environment can be a cathartic process that brings with it relief and joy.

You can almost think of rearranging furniture as an act of self-care. It is a feel-good option that gives us mood elevation, a burst of the best energy and creativity, and provides us with concrete satisfaction that we can see all around us once we have completed the task.

If you are clearing clutter as a way to boost your mood, it can help to identify what you truly want or need to keep hold of. As William Morris said, “Keep nothing in your house that you do not know to be useful, or believe to be functional”. Additional objects that don’t make you happy and that you don’t need to use can safely be removed to create more space for you to breathe and to fill with items that do improve your life or how you feel.

How the arrangement of your furniture can change how you feel

Photo by Dan Hadley from Pexels

Psychology Today say that if you rearrange your furniture, it can help you to achieve inner and outer harmony. At first glance, this might seem like a strange claim when you’re talking about moving some pieces of furniture around a room, but actually, the way that your furniture is arranged can have a surprisingly large impact on your wellbeing.

Let’s think about what inner and outer harmony can mean in terms of your home. When your furniture is arranged in a way that makes sense functionally, this can bring peace by streamlining how you can move about and can make outer harmony happen. And when it is arranged that makes sense aesthetically, this can bring peace by aligning your space with your identity and making inner harmony happen.

Feng shui

Feng shui is one theory behind how this inner and outer harmony can be achieved with the arrangement of your house. Feng shui can seem quite “out there” when you first look into but when you scratch beneath the surface, feng shui decorating means common sense ways of rearranging your home environment to become organised in a way that makes our lives that little bit easier and less stressful. And it doesn’t have to be expensive, so you don’t need to worry about buyer’s remorse from obtaining all sorts of pieces that you don’t actually need.

According to Rodika Tichi, “What feng shui decorating means is that you create an environment that has the best energy to support the specific activity, or activities, intended for that space”. With feng shui, the goal is to think about the purpose of that specific room and having the furniture relate to it and fit that purpose through the way it is arranged. Such specificity brings relief because you are no longer fighting against the room’s arrangement to do the activities that you need to, but instead, you are working with it.

Let’s take a look at a few examples of how feng shui can make outer harmony happen for you. Think about the traffic patterns in your home. With feng shui, the idea is that chi energy should flow through your front door and be able to travel unimpeded throughout the home, without getting blocked. People will follow these same patterns, so the layout of your home shouldn’t end at a wall or other impediment.

You also need to find reasons for the chi, or people, to pause. For instance, you wouldn’t expect someone to breeze through your front door, bypass your living room, and leave immediately out of your back door. Your living room should be a place to pause and breathe so it should be arranged in a way that directs people’s attention to the space. You can use an interesting rug or wall decoration to slow down the energy and grab people’s attention.

Natural light is also an important element, as it is for professional interior designers alike. Natural light can make you feel lighter, freer, and more energetic and it allows energy to flow easily throughout the room. And you don’t want your furniture to block any of that light if you can help it.

For example, if a piece of your bedroom furniture such as your bed is in front of the window, your bedroom may feel less like a breath of fresh air and more like a claustrophobic place. A lighting scheme or cleverly placed mirrors can help to increase the amount of light in the room if there isn’t much to work with.

Thinking about symmetry

Human beings find symmetry aesthetically pleasing, it is an innate part of our nervous system. And it comes down to how our brains process the world. They are always trying to make processing as easy as possible and symmetry is pleasing because it creates a pattern that doesn’t need to be focused on in too much depth. We find faces that are more symmetrical attractive and we find rooms that are more symmetrical attractive for the same reasons.

But this doesn’t only apply to rooms, symmetry can also enhance pieces of furniture. Take display cabinets for example. When designing or rearranging a display cabinet take time to step back, think about what to put in a display cabinet. and is it symmetrical and atheistically pleasing? Achieving this takes time, so little adjustments now and then can make the world of difference.

Photo Credit – Adobe Stock

Focusing on symmetry can be one of those easy DIY home projects that don’t require a huge amount of creativity. Not everyone is one of those creative people but we do all have a natural sense of symmetry. To rearrange your room to make it symmetrical, that doesn’t mean that you have to have two pieces of every piece of furniture. But it means that the area should be balanced.

The best way of doing this is to rearrange your room around a natural focal point. A great example of this is your front room. Here, the natural focal point will likely be the sofa. Wherever you place that will be the centre, and then you can rearrange the rest of the pieces so that they balance the sofa. Again, that doesn’t mean that the pieces on each side need to be identical. They can instead be a similar form.

It might take a little while to achieve the balance that you’re looking for with creating the symmetrical new space but you do have an innate sense of symmetry so you will find the perfect balance simply by listening to your gut.

On the other side of the symmetry debate, asymmetry does also have its place. An asymmetrical element to a room can draw the eye and be interesting and pleasing. This is one of those opportunities to hone your aesthetic which can help you to feel creative and accomplished. You can have your furniture relate to your personality and can be a true feel-good option for you every time you walk into the room. And it can help you to hone your aesthetic and identify your personal sense of style.

Reducing clutter

We have already covered the fact that the act of clearing clutter can have a positive impact on how you feel. But reducing clutter in a meaningful way can leave you with a room that makes you feel good whenever you spend time in it.

Additional objects that don’t totally align with the room or improve how you feel can drag the overall feel of the space down and make it feel unwelcome and stressful. This comes back to how we process the spaces around us. When there is too much going on, this can give us sensory overload which can increase our stress levels.

This isn’t to say that everyone should live in a minimalist paradise. Instead, improvement occurs when you have objects and furniture that relate both to the room itself and to how you feel. And you don’t even have to throw everything away. Re-purposing the objects you already own can completely alter the space.

For example, if you have photographs randomly dotted around the room, you can rearrange them by creating gallery walls instead, which can make the space more organised and make the photographs themselves much more pleasing to look at.

Again such specificity brings relief because it means that there is a purpose and deliberate design behind the way that your space is arranged, and this can help you to feel calmer. And by re-purposing the items you already own, you can identify what you truly care about both in terms of sentimentality and in terms of how to hone your aesthetic. You also won’t get buyer’s remorse from getting rid of something that deep down you love and replacing it with something that doesn’t bring you joy.

Decluttering on a regular basis in this mindful manner can be thought of as a form of apartment therapy and it will also slowly bring you the house that is perfect for you and your needs. Improvement occurs over time for so many things and honing the arrangement of your house is exactly one of those things.

The bottom line

If you feel unsettled in your bed or your living room or you easily get stressed in your kitchen, moving things around in your house in a way that makes sense can do wonders for your emotions. We all feel like we have too much “stuff” but that may not always be the case.

By being mindful in the way you rearrange your personal items, you might find that you end up being able to hone your aesthetic and identify the things that are truly meaningful to you (and find the ability to decide to get rid of the other things that aren’t). There is a metaphor there and as cheesy as it may sound, going through this process with your house can truly help you to go through this process with your inner self.

Looking for more interior design inspiration? Looking for that next DIY project? Head on over to our blog and read some of the fantastic pieces we have covering multiple subjects.

10th September 2021 D.I.Y

Exposed Piping: Your Channel for a Chic Home!

Gone are the days where you should be ashamed of your exposed pipes putting off the visitors – these conduits give the finishing touches to any modern home needing that particular spice.

Aside from being a great accent with just minimal improvements, exposed piping offers something more that is valued by the people of today: convenience. Not only are pipes in the open easier to clean, but they can be used in different ways if you’re keen enough. What’s more?

If you have a particular eye for a specific theme, these displayed tubing can provide you with the subtlety and a pop of uniqueness perfect for your standout home.

Get your exposed pipes out because the industrial setting is extremely in!

Make Your Bathroom Bloom

There are certain hotspots in your home that require more ducts than other sections. While you may take the extra mile to cover them, taking the easier route of maximizing their presence can provide you with a lot more design ideas to play with. Here are some of the suggestions for exposed piping that can quickly turn your bathroom from “no” to “whoa!” with a few touches:

Bare your Shower

Photo Credit – Adobe Stock

Why should you be the only bare one out in the shower? Opt for the bare it all option for your latest shower installation and observe the drastic change in your bathroom atmosphere! While most people make their bath lines invisible, stand out from the rest by making the most out of your exposed piping. Either choose a minimalistic look that brings out a subtle highlight, or go all out with a dramatic touch with bold colours.

Don’t Blink in the Sink

Photo Credit – Adobe Stock

You won’t need to let your personality down the drain when you choose to accentuate your exposed piping in the sink. Sink and shower taps can have a life of their own when you choose to show them off! Attaching some lights in the sink pipelines is a great start to pave the way towards being effortlessly chic!

Sink pipe ideas are not even limited to the bathroom, as you can add a quirky element in your kitchen by highlighting the water lines. Not only does it add a personal touch to your kitchen area, but it also doubles up as a rack you can hang items with.

Turn Pipes into an Asset

Photo Credit – Adobe Stock

Sometimes, your water lines are positioned in the most random places. Don’t let it stop you from making a statement, though. With the right colour finish, you can go with any theme of your preference. Into that modern, contemporary look? Highlight your thick tubes above with a matte black hue for a tremendous everyday contrast. How about hand-picking a bright red shade for that eye-catching retro finish?

Your bathroom pipes shouldn’t always end up as dull; you can always add the right spice into the mix.

When in Doubt, Accessorize!

The most random pipelines don’t always have to blend in – showcase your keen eye for details by mixing fashion and functionality in unexpected places. Improve your home design and up your decorating game by hopping in on the exposed piping trend. Throw in some style, and you’re in for a ride!

Light it Out!

Photo Credit – Adobe Stock

You can deliberately have some pipelines exposed in your kitchen (or any area of your choice) to show off your trendy personality! Light fixtures made from exposed piping can do more than light up your chosen spot, it can also convey a lot more things – like your ability to give glamour to everything, even to unnoticed features.

Be Bold with Gold

Midas has the golden touch; why can’t you? Exposed piping can either be thick or thin, but that shouldn’t let you down when you’re going for a minimalistic design with just the right pop of hue! Some units have thick water lines up their ceiling, either for emergencies or there is just no other space available. Either way, bright gold conduits can liven up your living space. You can even choose any other colour; make your home your own.

They can even be seen out of every nook and cranny, including the space allotted for your reading blues. Still, you can never go wrong with the steampunk design, no matter how delicate. Give a kick to your interior decorations by making the displayed electrical and water channels the library’s main focus.

Pipes Don’t Just Hold Water

Photo Credit – Pixabay

Exposed piping designs are not just limited to walls and ceilings. In fact, you can definitely use them to support something. How about a wine holder, but make it a statement?

Styles of Pipes

Exposed piping can give you an infinite list of designs that can create different atmospheres in your own home. Be it retro, industrial, modern, or vintage, choosing the right style of conduits is a vital decision you shouldn’t miss out on.

Here are some pipe styles to consider when making changes around your space:

Copper Pipes: Copper is a popular choice not only because of its versatility, but also because of its durable properties. As the premium choice in plumbing, copper pipes’ main selling point is strong components that won’t contaminate your water source. What’s more? You can definitely leave them as they are because copper pipes are chic enough already.

PVC Pipes: These plastic pipes are usually used for water drainage, but can typically function all around. This type of channel makes a great exposed piping decor because of its longevity and resistance to rust. Color them black or any shade you want and watch as the plumbing lines transform the scene. What’s more? PVC pipes are great for DIY projects – consider this when you want to have a unique home that is one-of-a-kind.

PEX Pipes: Similarly made out of plastic, PEX pipes are known for their flexibility. As they can be adjusted to fit into tight places while still maintaining the durability needed for functionality, these pipes can be an addition you are looking for all along! No matter what style of conduits you use, what’s important is you find the drive to appreciate the potential of exposed piping. Channel your inner designer by giving life to the lines that are a fast-growing trend!

« Previous Page
Next Page »

Primary Sidebar

Keep up to date with our latest posts

Subscribe to our newsletter for free and be the first to be notified about all our latest content!

Welcome to A2B Crafts

At A2B Crafts we make it our duty to bring you the latest in shabby chic design and Do it yourself furniture. If you’re new to the craft or a long time expert, A2B crafts is perfect for you. With every new post we hope to bring you something new and exciting which gives you the inspiration to try something new with your home
furnishings. If you feel inspired after reading any of our posts or you’ve even tried these tips for yourself, please feel free to let us know through our contact page or our other social channels!

Footer

Stay Connected

  • Facebook
  • Instagram
  • Pinterest
  • Tumblr
  • Twitter
  • YouTube

Contact Information

Tel: Thursday – Saturday 01328 856001

or mobile 07917606039 at other times

Address: Wheelspeed Unit 1, Cattle Market Street, Fakenham, Norfolk, NR21 9AW

Please feel free to contact at anytime, however at present we work part-time so may not get back to you immediately,
but will make contact as soon as possible.

Categories

  • DIY Interior
  • Furniture Upcycle
  • Hobbie Crafts
  • Interior Decor
  • News
  • D.I.Y
  • Garden

Helpful Links

  • Contact Details
  • Conditions of Use
  • Privacy Notice
  • Shipping & Returns

Copyright© 2025 · Cookd Pro Theme by Shay Bocks