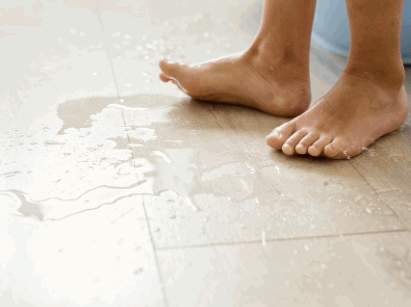
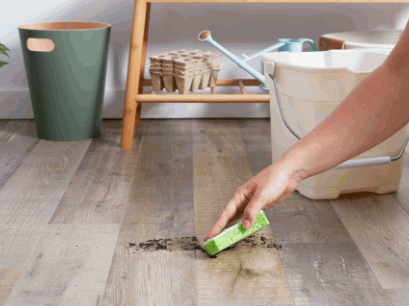
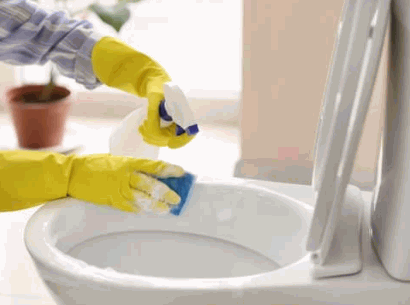
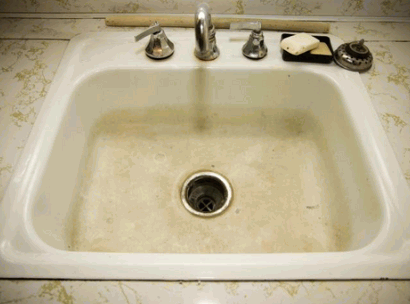
Are you tired of dealing with clogged drains in your sink? From hair buildup to soap scum, various factors can lead to this common household issue.
In this article, we will explore the causes of clogged drains and provide you with essential tools and methods to effectively clean them. Whether you need to plunge the drain, use a drain snake, or try baking soda and vinegar, we’ve got you covered.
Stay tuned to learn how to prevent clogged drains and keep your sink running smoothly.
What Causes Clogged Drains?
Blocked drains can result from various factors, including hair build-up, soap scum, food particles, and grease and oil accumulation.
Hair build-up is a common culprit in bathroom drains, as loose hairs often combine with soap residue to create blockages. Similarly, in kitchen sinks, food particles, and grease can solidify over time, restricting water flow. Neglecting regular maintenance can lead to slow drainage, foul odors, and even potential flooding. It’s essential to address these issues promptly to prevent costly repairs and damage to your plumbing system. By practicing good habits like using drain guards and periodically cleaning your drains, you can ensure smooth water flow and avoid the headaches of blocked pipes.
Gain insights: How To Clean Drain On Whirlpool Dishwasher
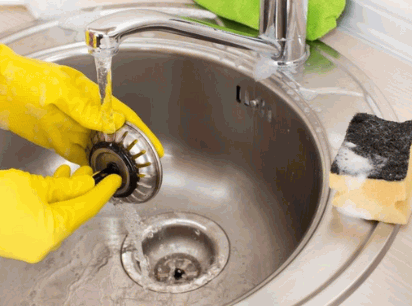
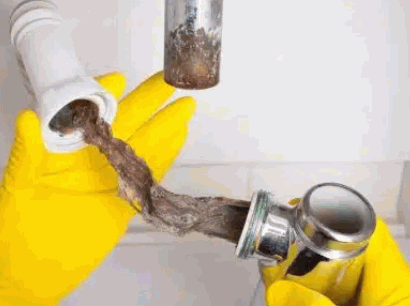
Hair Buildup
Hair build-up is a common culprit behind blocked drains, particularly in bathroom basins and showers, where loose strands can accumulate over time.
These accumulated strands, along with soap scum and other debris, can form a dense mass that restricts water flow in the pipes.
To effectively address these blockages, it’s essential to use appropriate tools such as drain snakes, plungers, or enzymatic cleaners to break down the hair and clear the obstructions.
Regular maintenance is crucial to prevent severe blockages, as proactive cleaning can help remove build-up before it becomes a major issue, saving you from potential plumbing emergencies and costly repairs.
Soap Scum
Soap scum, a residue left behind by soap, can contribute to drain blockages, especially in bathroom basins and showers, where it combines with other debris to form blockages.
This build-up occurs over time as soap residue mixes with minerals in the water, creating a sticky film that adheres to the walls of pipes. To effectively remove soap scum from drains, a simple and eco-friendly solution involves using a mixture of bicarbonate of soda and vinegar. These common household items work together to break down the scum, allowing for easier cleaning. Regular maintenance is key to preventing soap scum build-up, emphasizing the importance of regular cleaning to ensure your drains flow smoothly and are free from blockages.
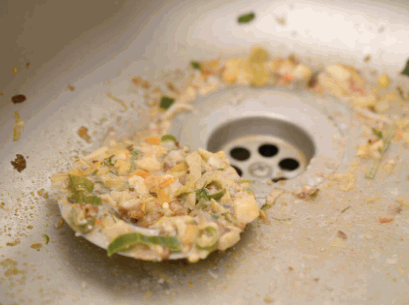
Food Particles
Accumulated food particles can lead to drain blockages, primarily in kitchen sinks, where debris from cooking and washing dishes can obstruct the wastewater flow.
These obstructions can result in slow-draining sinks and even complete backups, causing inconvenience and potential damage to the plumbing system. There are simple and eco-friendly solutions to address this problem.
One effective method is using a mixture of bicarbonate of soda and vinegar to break down the accumulation and eliminate odors. Regularly pouring boiling water down the plughole can also help prevent blockages by flushing away smaller food particles. Along with cleaning methods, appropriate waste disposal, such as using a sink sieve to trap food scraps, is vital in keeping drains clear and avoiding expensive repairs.
Grease And Oil
Grease and oil residues from cooking can solidify in drains, causing blockages in kitchen sinks and utility sinks, where the build-up restricts water flow.
Over time, as these substances accumulate along the pipe walls, they create a thick layer that traps food particles and other debris, leading to a complete blockage. To tackle this issue, one effective method is pouring hot water down the drain to help break down the grease and oil. Using eco-friendly solutions such as a mixture of vinegar and bicarbonate of soda can help dissolve the residues.
It’s crucial to avoid pouring grease and oil down the drain in the first place to prevent blockages from forming and to protect the environment.

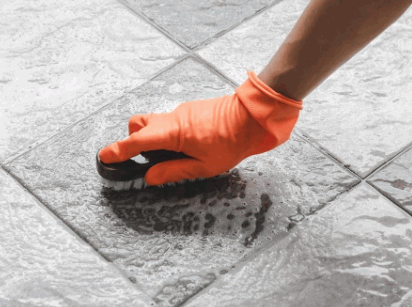
What Tools Do You Need To Clean A Drain In A Sink?
Cleaning a drain in a sink requires specific tools such as a plunger, drain snake, bicarbonate of soda, vinegar, and boiling water to effectively unblock blockages.
The plunger is a versatile tool that uses suction force to dislodge minor blockages by creating a vacuum. A drain snake, also known as an auger, is effective in reaching deeper blockages by physically breaking them apart. Bicarbonate of soda mixed with vinegar generates a chemical reaction that can dissolve organic matter causing the blockage, while boiling water helps to flush out loosened debris.
To begin, start by using the plunger in a back-and-forth motion to create pressure and release the blockage.
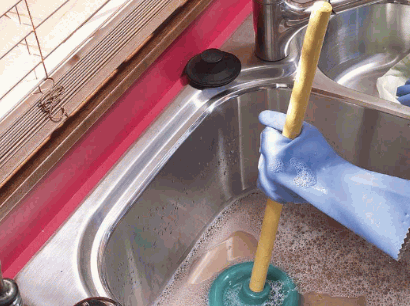
Plunger
A plunger is a versatile tool for unclogging drains, creating suction to dislodge blockages in sinks and toilets effectively.
There are different types of plungers available, each designed for specific purposes. The standard cup plunger, also known as a sink plunger, is suitable for use on flat surfaces such as sinks and baths. On the other hand, the flange plunger, with an additional rubber piece that extends from the cup, is ideal for toilets as it can form a better seal. Shower drain plungers, often with accordion-like designs, are useful for clearing blockages in narrow pipes. Remember, always wear gloves when using a plunger to prevent exposure to bacteria and ensure proper sanitation.
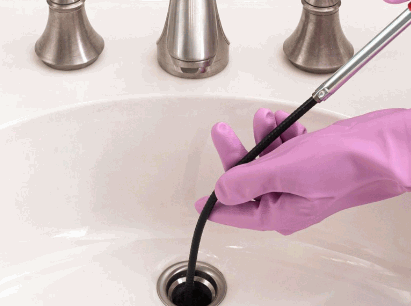
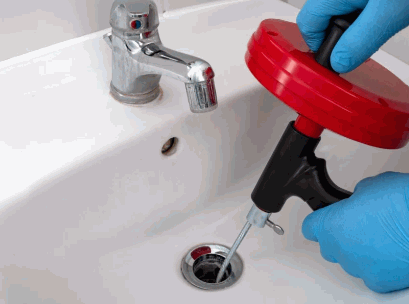
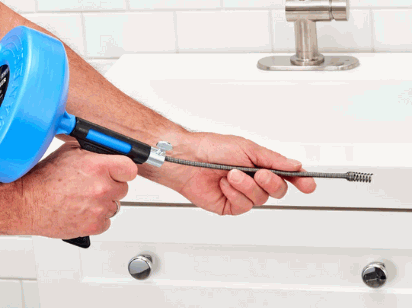
Drain Snake
A drain snake, also known as a plumbing auger, is a flexible tool used to reach deep clogs in drains, offering a mechanical solution for blockage removal.
This tool is designed with a long, coiled wire that can navigate through twists and turns in pipes, dislodging debris that causes blockages. To effectively use a drain snake, start by inserting the end into the drain until you encounter the blockage. Then, rotate the handle to maneuver the snake and break up the obstruction. The benefit of a drain snake is its ability to tackle stubborn blockages that may not respond to liquid solutions or plungers, making it a valuable tool for maintaining clean and free-flowing sink drains.
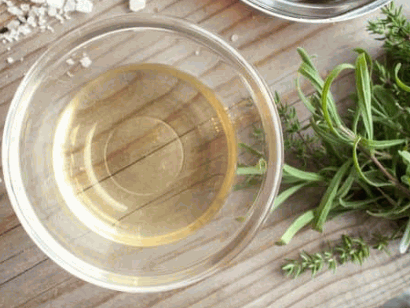
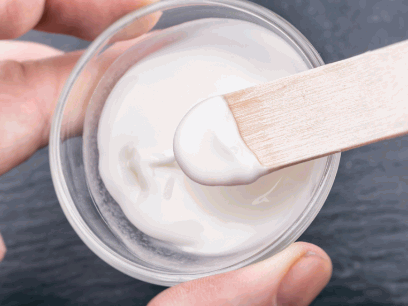
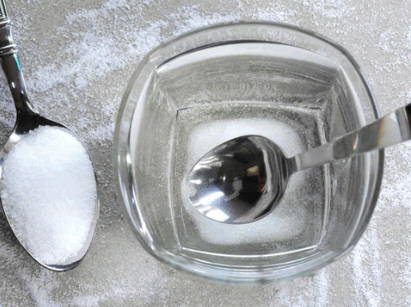
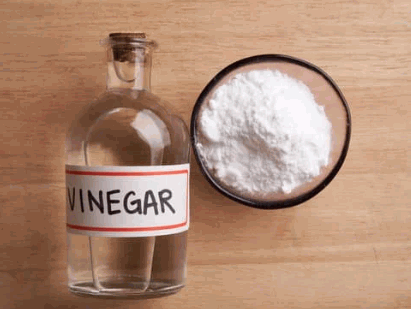
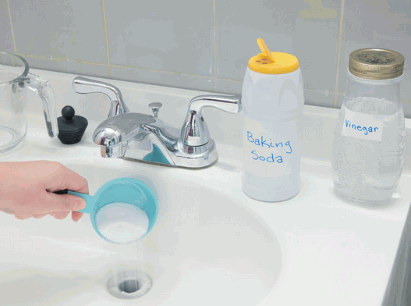
Baking Soda And Vinegar
Combining the bicarbonate of soda and vinegar creates a natural and eco-friendly solution for breaking down organic matter and clearing minor blockages in sink drains.
- When these two common household items are mixed together, a chemical reaction occurs that results in the production of carbon dioxide gas. This bubbling action helps to dislodge debris and grime from the drain, making it an effective yet gentle method for unblocking.
- To create the mixture, simply pour half a cup of bicarbonate of soda down the drain, followed by a cup of vinegar. Allow the solution to work its magic for about 30 minutes before flushing with hot water. Not only does this method avoid harmful chemicals found in commercial cleaners, but it is also gentle on your pipes and safe for the environment.
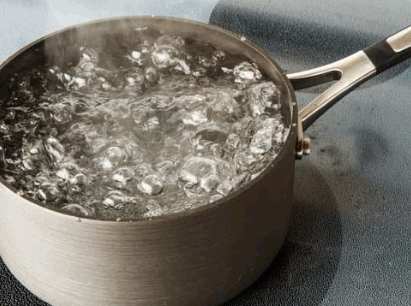
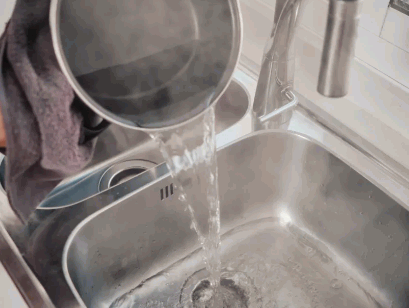
Boiling Water
Boiling water is a simple yet effective method to clear minor blockages in drain pipes, particularly in sink drains where hot water can dissolve grease and soap residues.
By pouring a pot of boiling water down the drain, you can break down the gunk that accumulates over time, helping to restore proper water flow. Using boiling water is a safer and more environmentally friendly alternative to harsh chemical drain cleaners that can be harmful to both your pipes and the environment.
To safely handle boiling water, always wear protective gloves and ensure a steady hand while pouring. Make it a habit to use this method periodically to maintain your drains and prevent any build-up that could lead to more serious clogs down the line.
How To Clean A Drain In A Sink?
- Cleaning a drain in a sink involves several methods, including plunging the drain, using a drain snake, applying bicarbonate of soda and vinegar, and finishing with boiling water to remove blockages.
- To start, when plunging the drain, make sure to create a tight seal around the plunger and push and pull with force to dislodge any blockages.
- Next, when using a drain snake, insert it into the drain and rotate it while pushing forward to grab onto any debris.
- When applying bicarbonate of soda and vinegar, mix equal parts and pour it down the drain, allowing it to sit for 30 minutes before rinsing with hot water.
- Finish off with boiling water to flush out any remaining residue.
- Always wear rubber gloves, and goggles, and avoid mixing chemicals for safety.
Plunge The Drain
Plunging the plug hole is an initial step in clearing blockages, creating pressure to dislodge debris and restore proper water flow in sink drains.
- To effectively plunge a plug hole, start by inserting the plunger’s cup over the plug hole, ensuring a tight seal is formed.
- Firmly push down on the plunger to create pressure, then pull up quickly to create suction.
- Repeat this plunging motion several times to break up the blockage.
To enhance the seal around the plug hole, apply petroleum jelly to the rim of the plunger cup. Common issues during plunging include air escaping through improper seals or water not draining due to an underlying blockage further down the pipe.
Use A Drain Snake
Using a drain snake allows you to reach deep blockages in drains, navigating through the pipes to break down and remove blockages effectively.
To effectively maneuver a drain snake through the pipe system, start by inserting the tip into the drain opening and slowly feeding it further while turning the handle clockwise. As you encounter resistance, gently rotate the snake to break through the blockage. For stubborn blockages, apply steady pressure while twisting the snake back and forth. Remember to retract the snake carefully to avoid damaging the pipes. With practice and patience, handling tough blockages with a drain snake can become a simple and efficient task for maintaining a smoothly flowing drainage system.
Try Baking Soda And Vinegar
Applying a mixture of bicarbonate of soda and vinegar provides a non-toxic and natural remedy for dissolving organic matter and clearing mild blockages in sink drains.
The combination of bicarbonate of soda and vinegar creates a chemical reaction that helps break down debris, grime, and buildup in the pipes. When these two substances mix, they fizz and produce carbon dioxide gas, which creates pressure and pushes the blockage out. This method is not only effective but also safe for your pipes and the environment, as it does not involve harsh chemicals that could harm the plumbing system or the ecosystem.
Plus, using household items like bicarbonate of soda and vinegar is budget-friendly and readily available for anyone looking to tackle drain cleaning tasks with ease.
Pour Boiling Water
Pouring boiling water down the plughole helps dissolve grease and soap residues, providing a quick and simple solution to minor blockages in sink drains.
The high temperature of the hot water is effective in breaking down the fatty substances that may have accumulated in the pipes, helping to clear the passage and prevent blockages. This method is environmentally friendly and does not involve the use of harsh chemicals, making it a safe and cost-effective way to maintain your drain system.
To prevent blockages in the future, it’s advisable to regularly pour hot water down the plughole to keep the pipes clear and prevent build-up. Incorporating a strainer in your sink can help trap debris before it goes down the plughole, reducing the chances of blockages.
How To Prevent Clogged Drains?
Preventing blocked drains involves using a drain cover, avoiding pouring fat and oil down the sink, regular cleaning, and proper use of a waste disposal unit to maintain a clear and functional drainage system.
Being mindful of what you put down the sink can significantly contribute to the prevention of blockages. Avoid flushing large quantities of food waste, coffee grounds, or hair down the sink, as these can easily accumulate and obstruct water flow.
Implementing regular sink maintenance practices, such as periodically flushing sinks with hot water or using natural solutions like bicarbonate of soda and vinegar to break down debris, can help keep your sinks free-flowing. Remember, taking small proactive steps can prevent major plumbing issues in the future.
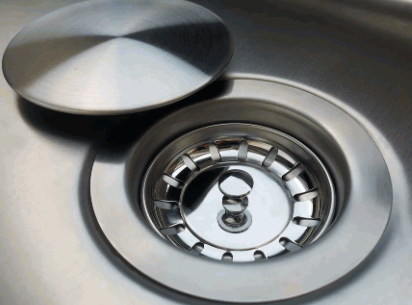
Use a Drain Cover
Installing a drain cover is a proactive approach to prevent debris, hair, and other particles from entering the drain and causing blockages.
By using a suitable drain cover, you not only safeguard your plumbing system from blockages but also ensure the efficient flow of water. For shower drains, choose covers with fine mesh to trap small particles like hair. In outdoor drains, select heavy-duty covers that can withstand outdoor elements and prevent leaves and twigs from blocking the drain. Pool drains should have safety covers to prevent accidents. These simple additions can go a long way in maintaining a clean and functional drainage system.
Avoid Pouring Grease And Oil Down The Drain
Avoiding the disposal of grease and oil down the sink can prevent blockages and maintain the smooth flow of wastewater in kitchen sinks and utility sinks.
When grease and oil are poured down the sink, they may appear fluid, but as they cool, they solidify and adhere to the inside of the pipes, leading to blockages that can be challenging to remove. These blockages not only disrupt the proper drainage of water but can also create foul odors and attract pests.
The build-up of grease and oil can cause long-term damage to the plumbing system, resulting in costly repairs. Therefore, it is essential to adopt alternative methods for disposing of grease and oil, such as collecting them in a container and disposing of them in the bin.
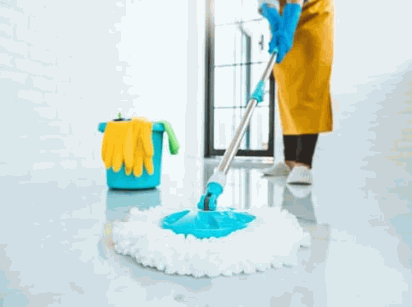
Regularly Clean Your Drains
Regular cleaning of drains with bicarbonate of soda and vinegar can prevent build-up and ensure the smooth flow of water in sink drains.
In addition to maintaining optimal drainage performance, routine drain cleaning also helps in avoiding foul odors and minimizing the risk of blockages and clogs. Eco-friendly solutions like using enzyme-based cleaners or hot water flushes are gentle on the pipes while effectively breaking down organic matter.
To keep your drains in top condition, it is recommended to perform a thorough cleaning at least once a month. This proactive approach not only extends the lifespan of your plumbing system but also reduces the need for costly repairs in the long run.
Use A Garbage Disposal Properly
Proper use of a waste disposal unit can help prevent blockages by breaking down food particles efficiently, reducing the risk of blockages in kitchen sink drains.
By grinding up food scraps into smaller pieces, a waste disposal unit can facilitate smoother flow through the drainage system, preventing build-up that can lead to costly repairs. Maintaining a clean disposal unit is essential for its optimal functioning; avoid disposing of non-food items or hard materials like bones and fruit stones, as these can damage the blades. Running cold water while using the disposal helps flush out the ground-up particles and keeps the system running smoothly, promoting a clean and hygienic environment in the kitchen.