• Skip to primary navigation
  • Skip to main content
  • Skip to primary sidebar
  • Skip to footer
  • Home
  • Interior Decor
    • D.I.Y
    • DIY Interior
    • Tips
  • Hobbie Crafts
    • Furniture Upcycle
  • Garden
  • News
  • Write For Us
  • Contact Details

A2B Crafts

DIY Crafts & Upcycling

Hobbie Crafts

13th May 2021 Hobbie Crafts

How to Make a Bath Bomb: Ingredients, Smells and Types

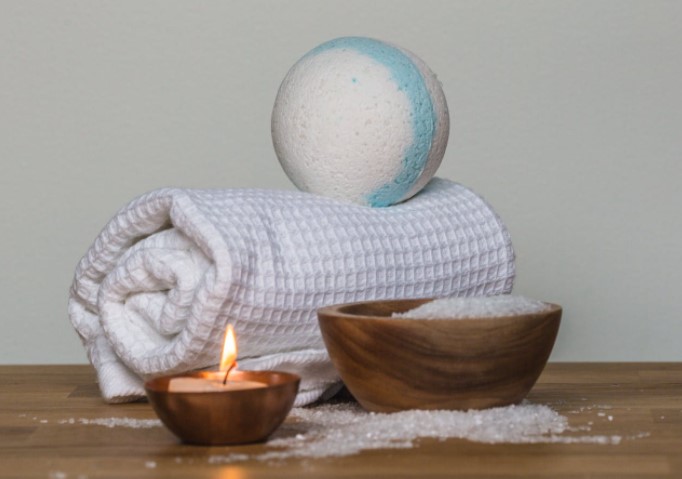
Have you ever wondered what it would be like to make your own bath bomb? Well, in this blog post we will talk about how to make a bath bomb. There are five easy steps that you can follow in order to create the perfect bath time experience for yourself or someone else. We will discuss ingredients, smells and types of bath bombs. 

Bath bombs have been popular since the early 1900s when they were first created by an American company called “Luna.” They became more mainstream after 2000 and now there is a huge market for them!

What ingredients do I need to make bath bombs?

  • Baking Soda – This is an alkali that loosens dirt and grime in the pores. It also fights odours, so it can be used to make your bath smell fresh!
  • Citric Acid – This ingredient will provide a citrusy scent for you when you’re scrubbing away at those rough spots on your skin. The acid also helps with breaking down oils and fats from food and other substances which makes some of them dissolve better than others. Citrus fruits contain citric acid naturally, but if you don’t want any brightening effects (or prefer not to use products made with natural ingredients) then this is something we recommend avoiding since it’s one of the main factors that causes discolouration.)
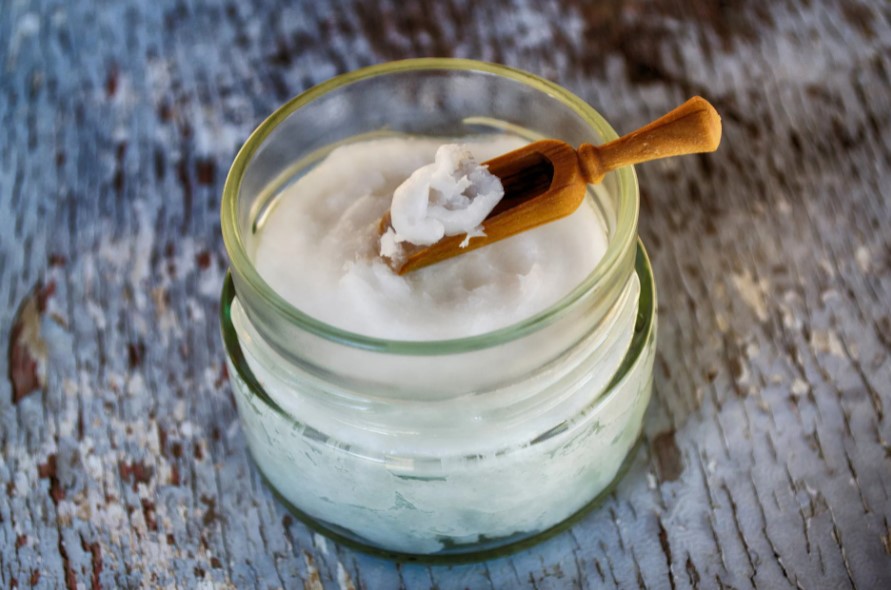
  • Coconut Oil – This is a nice addition to your bath bomb because it helps with moisturising the skin. It also has antibacterial properties, which means that you can use this oil for disinfecting and soothing minor burns.
  • Essential Oils – These provide fragrance (and therapeutic benefits) but they come in many different scents such as lavender or peppermint! Lavender offers calming qualities while Peppermint provides an invigorating experience!
  • Glycerine – This ingredient will give your skin some extra moisture when combined with coconut oil! It’s usually found near products like soaps and lotions. Glycerine is used in these instead of water because it maintains its consistency better over time.
  • Gelatine – Flavourless starches like gelatine help bind ingredients together because they act as thickening agents when mixed with water or liquid. They also make bath bombs softer which leads to better shape retention (i.e., not flattening out).
  • Mica Powder – This powder gives off sparkles in the tub, but it has many more benefits besides just being pretty! It’s used as a moisturiser, it has a cleansing effect on your skin because of the abrasive particles that are in it.
  • Almond Oil – This is a great choice for both sweet and savoury scents! It’s also good to use when making bath bombs with soothing essential oils because almond oil will help strengthen and soothe any fragrances you’re trying to create. Plus, this ingredient can moisturise dry skin as well!
Coconut Oil in Clear Glass Jar

How do you make a simple bath bomb?

To make a bath bomb, you will need:

  • Baking soda
  • Citric acid
  • Epsom salt or sea salt

Mix the baking powder, citric acid and Epsom (or sea) salts together in a bowl. Add to this mixture your desired colourant of choice, whether it’s food colouring or powdered clay! Next add oils from a few different scents because smelling like flowers all day can be overwhelming sometimes. 

Mix these ingredients until they are fully combined and then roll them into balls with small amounts of water at room temperature for about three minutes before chilling in the refrigerator for hours on end. When chilled enough, take them out and package as desired.

If you want an even more moisturising bath bomb, feel free to add in a few tablespoons of cocoa butter or shea butter!

Read our previous article on how to clean a dressing table with sugar soap

Other ways to make bath bombs

Use a candy mould to make your bath bomb. You can use any type of candy that is hard and will hold the shape (i.e., rock candy, chocolate or clear). The downside with this method is you have less control over ingredients since it’s already mixed together in the moulds. Plus, some people don’t like eating their bath bombs!

If using these types of moulds, I recommend adding cocoa butter for moisturising purposes too!

Instead of rolling them into balls before chilling in the refrigerator, add all your dry ingredients and oils into a bowl first then pour boiling water over top before mixing at room temperature until combined – then let it chill overnight instead.

Silicone Cake Moulds

Are bath bombs toxic?

Bath bombs are not toxic in any way.

There are a few different types of chemicals that can be used to make bath bombs, and the only ingredients you should be worried about when it comes to toxicity is baking soda.

Baking soda is something that I would personally avoid or use sparingly if sensitive skin – especially because some people find them itchy. The fragrances and dyes are the most common ingredients that may cause irritation for some people, but if you don’t have sensitive skin then they should do just fine. 

Bath bombs are safe to use around kids and pets as long as you’re careful with them – especially because bath time is a lot of fun for everyone!

Do you need baking soda for bath bombs?

In order to make a bath bomb it is necessary to have baking soda.

Baking soda is the main ingredient of bath bombs and for them to work you need it in there so that they can dissolve quickly.

Otherwise, your bathroom will be covered with a powdery mess! Without this chemical other ingredients would not do their job but you can use alternative ingredients.

What can you use instead of baking soda for bath bombs?

Instead of baking soda you can use Epsom salts or baking powder.

Epsom salt is a type of mineral that has been used for its medicinal purpose in therapeutic baths and soaks since the 19th century! It’s known to help relieve muscle aches, joint pain, swelling, and even reduce fever.

Bath bomb with Towel, Salt and Candle

22nd December 2020 D.I.Y

How To Upcycle Your Old Dressing Table

If you’re struggling to find exactly what you’re looking for, you want to save a bit of money or you’re desperate for a new project, then upcycling an old dressing table could be for you. You will save lots of money and have plenty of fun in the process. So, before buying something new, look for an old piece of furniture that will have more character than anything you can buy in the shops and get started!

Find A Dressing Table

For those of you who don’t already have an old dressing table to upcycle, it’s time to find one! Contact friends and family, search online or try flea markets to find a dressing table that is full of character and has lots of potential. Shop around to find what you’re looking for and you will save so much money in the long run.

Make Any Repairs

Now that you have your dressing table, it’s time to start the upcycle! Pre-loved pieces of furniture are likely to have been around for a little while, so might need some TLC. It’s best to repair any broken or damaged bits before starting the rest of the upcycle. You may need to use wood filler to help get rid of any large scratches or dents that won’t be removed with sanding. Maybe you need to fix a stuck drawer or a broken leg, too. Once you have painted your table, you won’t want to have to be worrying about these things, so making any repairs at the beginning is the best way forward.

Clean With Sugar Soap

Once you’ve repaired any broken bits, it’s time to start cleaning. The first step is to remove any metal handles as they will be cleaned separately, then get out the sugar soap. Sugar soap is a cleaning product that prepares surfaces for repainting, as it gently washes any unwanted chemicals from the top layer of your furniture. With any cloth or sponge, clean the entire dressing table with the sugar soap and wipe afterwards with warm water. It is non-abrasive so won’t damage the dressing table, but it gets furniture in the best possible condition to give you a smooth finish once it is painted.

Bring Handles Back To Life

If the metal handles are dirty, grimey or generally very dirty, you’ll need to give them a good soak in equal parts of tomato ketchup and vinegar. Yes, this sounds really strange, but the acidic content of the two products helps to dissolve any grime. Leave to soak for a few hours before cleaning well (very well) and you’ll have brand new looking handles. For those of you with handles beyond repair, invest in some new ones that will bring the dressing table to life even more!

Sand It Down

Next, get some medium-grit sandpaper and go over the entire piece of furniture. It’s so important not to leave any lumps or bumps as they will be even more obvious when painted. Try to get things looking as even as possible all over, but it definitely won’t look perfect at this stage. Take a wet cloth to wipe away all the dust and leave to dry properly before moving on to the next stage.

Apply Primer

Whilst this stage isn’t essential as some paints have primer built in, applying a separate primer will ensure you have a nice smooth surface before painting, that the paint will stick to really well. Primer also helps to keep the paint intact for longer, meaning you won’t need to do another upcycle for a good few decades!

Firstly, put a sheet or newspaper underneath your dressing table in case things get messy. Take a small brush to get into any fiddly areas and use a larger brush for the open areas. Don’t expect a perfect coat the first time, as this is only a base for when you start applying the top layers of paint. Just take your time and evenly cover the entire dressing table. Once you’ve finished, leave it to dry according to the instructions on the paint and once dry, gently sand down any drip marks or lumpy bits and wipe away all the dust.

Time To Paint!

Once your primer has completely dried, it’s time to start painting. Now, when it comes to choosing a colour, your options are endless. In another post we written it included Dulux chic shadow silk & Dulux goose down paint which has been in trend for a couple of years now and still looks great. You could go for a simple white, a sleek black or add a pop of colour with pastel pink, sage green or teal blue. The darker you go, the more coats you might need, but you shouldn’t need any more than 3, especially with the primer.

Follow the same steps as with the primer, using the smaller brush for areas that are intricate and a bigger brush for the larger surfaces. Take your time and gradually work your way around the dressing table. Again, the first coat won’t be perfect, but you will notice such a big difference after the second coat. No matter how many coats it needs, repeat the same process. It is so important that you leave enough time for the paint to dry properly in between coats, or you risk ending up with bobbly and lumpy areas of paint.

Try using a colour that contrasts the rest of the dressing table on the drawers or on the top. If you’re feeling brave, why not try using stencils to create something completely unique? This is your chance to be creative, so find some inspiration and go wild. Reattach your handles or fit your new ones, and you’ve got your brand new dressing table!

Delux chic shadow silk paint in grey

Check Dulux chic shadow paint here

Dulux Goose Down Paint Matt

Check Dulux goose down paint here

Summary

So, there you have it! A brand new piece focal point for your room that everyone will think is from a designer furniture shop. Taking some time and care to renovate an old piece of furniture into exactly what you were looking for is not only cost effective, but extremely environmentally friendly. Prepared to feel proud every time you enter the room when you look at your new dressing table.

29th June 2017 DIY Interior

Flower Chandeliers & Hanging Flower Arrangements

A fabulous trend going from coast-to-coast is hanging flowers.  From the ceremony to the reception, these hanging blooms, are making a statement.

  1. One of the trends is called the upside-down garden.  It’s where you take hundreds of flowers, and hang them from the ceiling, making a sea of  of flowers, transforming your ceremony or dance floor into a lush garden above them.  Almost like your floating above the ground.
  2. Another flora trend is flower chandeliers.   Imagine gorgeous blooms, overflowing and draping down off of a chandeliers, or circle hoops over your heads, or dance floor.  They are sure to set the mood, to your nuptials and will have your guests staring in awe!
  3. Inverted Centerpieces.  Does your venue have tall ceilings? A great idea is to have inverted centerpieces, which where you suspend your table center pieces above your guest, drawing their eyes upward.  These look great with long tables, and can really take your wedding to the next level!
  4. Curtain of flowers.  Have a curtain of flowers draped as your backdrop for your ceremony looks stunning.  You can even have it as your back drop of your sweetheart table.  Flowers draping from top to bottom, add a bit of modern flair.  A great idea is to have them monochromatic, and start lighter at the top, and grow dark, as it goes to the bottom.  Another idea is to hang them in picture frames.  They will look like framed works of art.
  5. Hanging glass globes look very modern, and look absolutely amazing.  You can have them as your backdrop of your ceremony, or suspend them across guest tables.  In each globe your can put a single flower for bright glam look, or add more lush greens and succulent for a more of a garden look.


The article Hanging Flower Arrangements was first posted by  http://leighflorist.net

28th February 2017 DIY Interior

Do It Yourself Furniture Using Old Storage Pallets

What a wonderful experience it is to design your furniture using your own hands. This is all possible to do using the DIY ideas of pallet furniture wherein you can reshape the wooden pallet and turn them into useful furniture in your home. Designing furniture with the wooden pallet is becoming popular today. The ideas about the DIY pallet furniture are a good way on how to make your own furniture in your homes. The wood used in pallets is often oak or southern yellow pine as they are both known for their strength and density which of course is ideal for stacking weight.

Some of the popular ideas for pallet furniture are the pallet chairs, pallet sofa, pallet bed, and the pallet tables. You can design, reshape and remodel the furniture in your homes or in your workshops. You can make all of these in your own with the pallet DIY ideas. These DIY ideas can be very useful in a lot of things. The wooden pallet is usually used in shopping but this is actually a material that can be very useful in order for you to make perfect and fit furniture in your homes.

The wooden pallet became very popular due to the amazing and creative designs that you can make out of this. It can be disassembled into wooden planks and use it in any size of projects that you want. You can turn it into something you need for your children. It can also be turned into clever furniture and other things for your house.

For decades, the wooden pallets are a mechanism for storing bigger items. These are also useful when shipping. Nevertheless, the wooden pallets are a useful resource in the designs and decors in your homes.


Wood Pallet Tables

You can create your original tables just by using four pieces of wood pallets. Pallet tables are also considered to be functional for indoors or outdoors use. With the rustic look and a simple look of this pallet table, its size can also be customized. You may as well change its design that depends on kind of designs you want. Make sure that you choose those wood pallets that are not chemically treated. You can wax it with oil or use polyurethane for its durability and for weather proofing purposes.

You can also make an easy rolling table from the wood pallet. This can be used as a table in your outdoor activities. This can also be used when you want to relax outside your house with your friends or with your family.

In addition to that, you can make this kind of table through the use of two wood pallets and one beam which are cut into four pieces, L – brackets, caster wheels, gray strain and screws. Through the use of these things, you can have a fabulous rolling table as your coffee table outside the house. This is also great to use while you eat your snacks with your friends.


Pallet Swing Chairs

You can make a pallet swing chair using wood pallets. You will just craft the wooden pallet and make a quality swing chairs from a wood pallet. You can also make a unique and cozy swing chair in your home. This can also be made useful for you and for your family. This is especially true if you have kids. You can enjoy it during the summer sitting outside your homes with your family and your friends. Here is a great tutorial on how to make a pallet swing chair. Of course this is one of the more challenging pieces of furniture to make at least compared to floor-standing boxy types so if you are flush with cash then there are some fairly cheap yet quality patio swings here at The Patio Depot.

22nd December 2016 DIY Interior

How To Create The Shabby Chic Look In Your Home

Shabby Header
One of the easiest, cheapest and most charming interior design ideas, shabby chic is definitely in style. What is more, by making use of old furniture and other items, this look helps us to move towards a more eco-friendly existence. Anyone can achieve a ‘shabby chic’ look in their home, it just takes a little bit of imagination, a magpie tendency and a lick of paint – of course Annie Sloan Chalk Paint rises perfectly to the occasion when you decide to give those old pieces of furniture a new lease of life.

What is Shabby Chic Anyway?
Shabby chic is the name given to a style of interior decoration that values age and wear-and-tear. If something does not look as though it has been loved by generations, it is made to look as though it were. This is a soft, opulent and yet down-to earth, cottagey style that can really make a house feel like a home. While it does incorporate genuinely old items, this style is more about imaginative re-creation than it is about genuine antiques. Shabby chic styling gives an interior that you will really love and that is really aesthetically pleasing but not one that you have to be precious about. So shabby chic can be great for messy, chaotic, loving homes with kids and/or pets. It is a styling that can work in real life, not just on the pages of a glossy magazine.


Shabby Room
Elements of Shabby Chic and How To Integrate Them:

Paintwork:
If you have an old piece of wooden furniture that you have fallen out of love with then why not give it a new lease of life by simply painting it? Painting old pieces of furniture is the best way to rejuvenate them. In the shabby chic style, paintwork is often in off-white or pastel shades. Annie Sloan chalk paint in Original, Old White or Cream all make a great colour for wooden furniture.

Distressing:
In the shabby chic look, paintwork is often distressed, rustic or worn. After painting, sanding off sections in areas that would naturally have suffered the most wear over time can allow you to achieve this effect. You can sand down to bare wood or, if you would rather, paint different layers of coloured chalk paint and distress so that you can see all the different layers of paint coming through.

Painted Motifs:
If you are artistic you may like to try your hand at painting delicate motifs on your shabby chic furniture. Roses and other floral emblems, hearts, doves, leaves and other vintage inspired designs are often painted onto items to personalise the look. Stencils can help to create a stunning effect if you are less than expert with a paint brush.

Soft Furnishings:
In a shabby chic home there is usually an abundance of soft-furnishings in faded, vintage-style fabrics. Home made items fit into the style especially well. Crochet, appliqué, hand sewn natural fabrics – all these are often found in a home decorated in this way. Hand sewn cushions are placed on painted chairs, for example, and a unique tablecloth may be placed on a worn old table.


Shabby Collage

A Little Vintage and Unique Clutter:
Putting the finishing touches on a shabby chic home is all about collecting items with a quirky vintage charm or homespun, hand-made appeal. These little touches are what make your shabby chic home really come alive. Put your own personality into your collection and it cannot fail to delight those who see it.


This post ” How to create the shabby chic look in your home ” was first seen on http://www.loverestored.co.uk

Primary Sidebar

Keep up to date with our latest posts

Subscribe to our newsletter for free and be the first to be notified about all our latest content!

Welcome to A2B Crafts

At A2B Crafts we make it our duty to bring you the latest in shabby chic design and Do it yourself furniture. If you’re new to the craft or a long time expert, A2B crafts is perfect for you. With every new post we hope to bring you something new and exciting which gives you the inspiration to try something new with your home
furnishings. If you feel inspired after reading any of our posts or you’ve even tried these tips for yourself, please feel free to let us know through our contact page or our other social channels!

Footer

Stay Connected

  • Facebook
  • Instagram
  • Pinterest
  • Tumblr
  • Twitter
  • YouTube

Contact Information

Tel: Thursday – Saturday 01328 856001

or mobile 07917606039 at other times

Address: Wheelspeed Unit 1, Cattle Market Street, Fakenham, Norfolk, NR21 9AW

Please feel free to contact at anytime, however at present we work part-time so may not get back to you immediately,
but will make contact as soon as possible.

Categories

  • DIY Interior
  • Furniture Upcycle
  • Hobbie Crafts
  • Interior Decor
  • News
  • D.I.Y
  • Garden

Helpful Links

  • Contact Details
  • Conditions of Use
  • Privacy Notice
  • Shipping & Returns

Copyright© 2025 · Cookd Pro Theme by Shay Bocks