• Skip to primary navigation
  • Skip to main content
  • Skip to primary sidebar
  • Skip to footer
  • Home
  • Interior Decor
    • D.I.Y
    • DIY Interior
    • Tips
  • Hobbie Crafts
    • Furniture Upcycle
  • Garden
  • News
  • Write For Us
  • Contact Details

A2B Crafts

DIY Crafts & Upcycling

Garden

6th January 2024 Garden

What Is The Best Fencing For A Garden

When it comes to enhancing the beauty, security, and privacy of your garden, choosing the right fencing is crucial. With various types of garden fencing available, from classic wood to durable metal, selecting the best option to suit your needs can seem like a daunting task.

In this comprehensive guide, we will explore the different types of garden fencing, the factors to consider when choosing the best fencing for your garden, the pros and cons of each type, and the steps involved in the installation process. Whether you are looking to define boundaries, keep pets and children safe, or simply add a touch of elegance to your outdoor space, this article will provide you with the valuable insights needed to make an informed decision. So, let’s dive into the world of garden fencing and discover the perfect solution for your outdoor sanctuary.

Why Do You Need Fencing For Your Garden?

The need for fencing in your garden goes beyond mere aesthetic appeal; it serves as a crucial element in ensuring garden security, defining property boundaries, enhancing property value, contributing to garden design and landscape, and providing safety for both the garden and its occupants.

A well-designed garden fence acts as a deterrent to intruders, ensuring the security and privacy of your outdoor space. It also clearly demarcates the limits of your property, preventing disputes with neighbors. A quality fence not only adds curb appeal but also increases the overall value of your property. Incorporating fences into garden design can seamlessly blend functionality with aesthetics, enhancing the overall landscape. The presence of a sturdy fence ensures the safety of children and pets, creating a secure environment for leisure and relaxation.

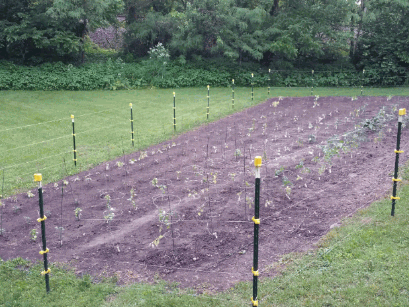
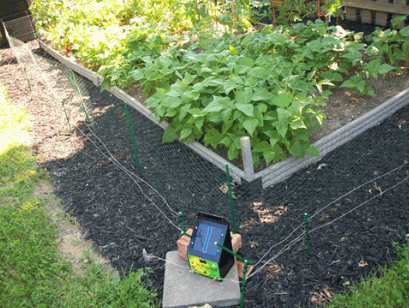
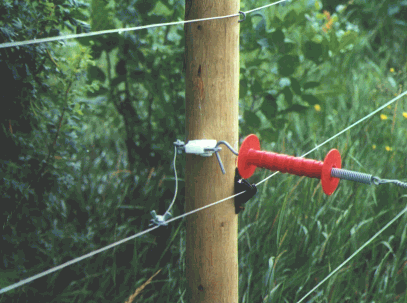
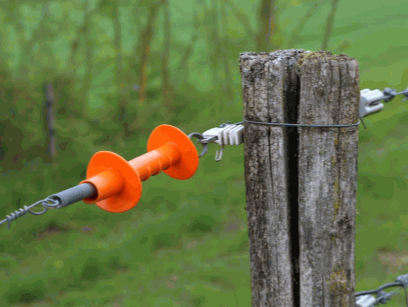
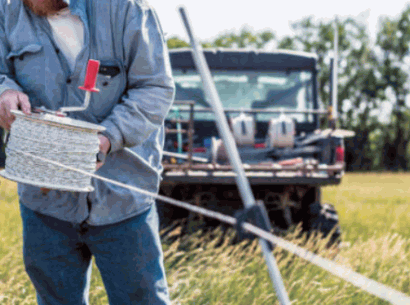
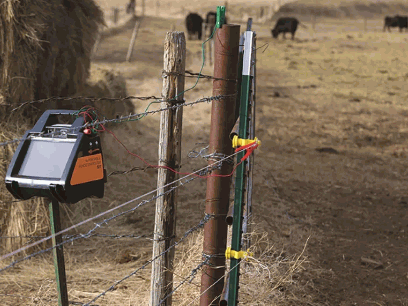
Dig Deeper: How To Install An Electric Fence Around A Garden

What Are The Different Types Of Garden Fencing?

When considering garden fencing, various types and materials come into play, each offering distinct advantages and visual appeal. Common options include wood fencing, metal fencing, vinyl fencing, chain link fencing, and decorative fencing.
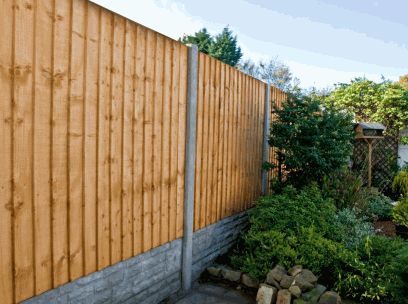
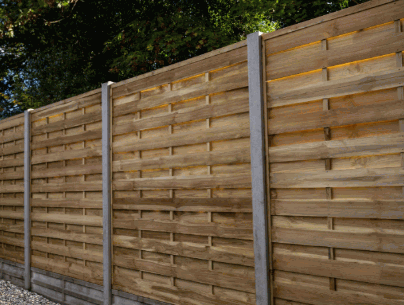
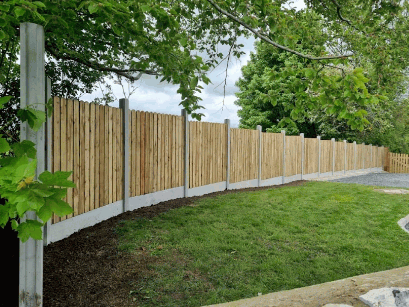
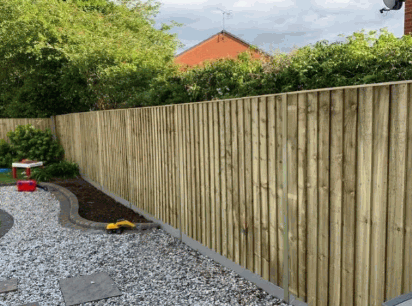
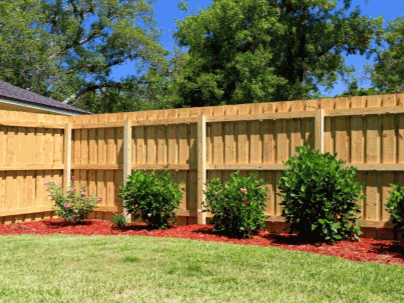
Wood Fencing

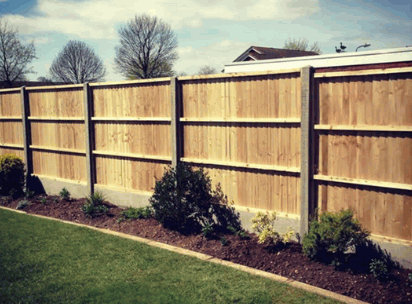
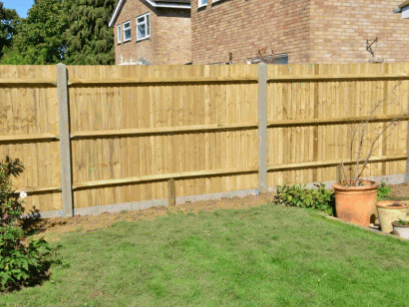
Wood fencing is a popular choice for gardens, offering privacy, natural aesthetics, and the ability to create aesthetic harmony with surrounding plant life, ensuring compatibility with the garden’s overall design and landscape.

It provides a warm and inviting atmosphere, blending seamlessly with the natural surroundings. The natural textures and earthy tones of wood fencing effortlessly complement the plants and flowers in the garden, forming a cohesive and picturesque outdoor space.

In addition to its visual appeal, wood fencing adds a sense of seclusion and tranquility, allowing homeowners to enjoy their outdoor space in privacy. The versatility of wood fencing also allows for customization, accommodating various design preferences and architectural styles.
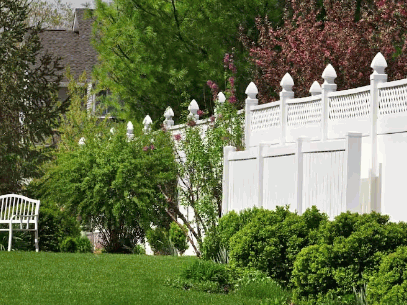
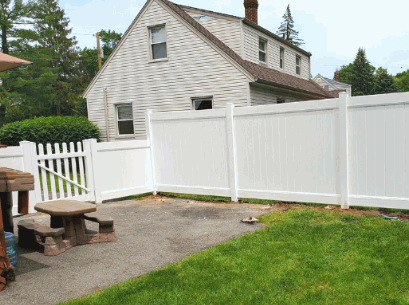
Vinyl Fencing

Vinyl fencing stands out for its exceptional durability, weather resistance, and minimal maintenance requirements, making it a reliable and long-lasting option for garden boundaries and security.

It is constructed to withstand various weather conditions, from extreme heat to heavy rainfall, without deteriorating or requiring constant upkeep. The material’s resistance to rot, rust, and insects ensures that it maintains its integrity over the long term. Unlike wood fencing, vinyl does not need painting or staining, saving homeowners time and money on maintenance. Its low-maintenance nature makes it an attractive option for those seeking a hassle-free and durable fencing solution.
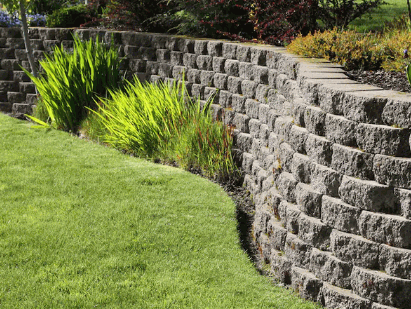
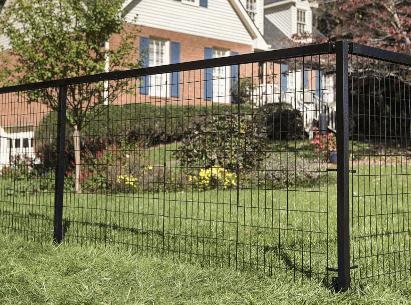
Metal Fencing

Metal fencing offers robust security, protection against pests, and exceptional strength, making it an ideal choice for safeguarding garden areas and enhancing overall property security.

It serves as a reliable deterrent against intruders and wildlife, ensuring a safe and secure environment for plants and outdoor spaces. The durability of metal fencing provides long-term peace of mind, requiring minimal maintenance while withstanding harsh weather conditions. Its ability to resist corrosion and wear ensures that the aesthetic appeal remains intact, contributing to the overall value of the property. The versatility of metal fencing allows for various designs and styles, complementing the landscape and architectural elements.
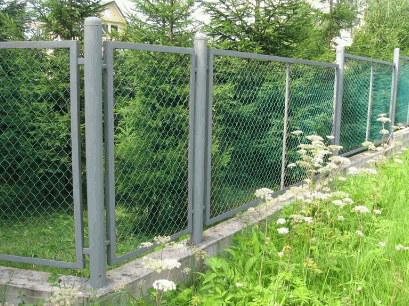
Chain Link Fencing

Chain link fencing is valued for its cost-effectiveness, functional attributes, and ease of installation, providing a practical and efficient solution for garden boundaries and security needs.

It represents a cost-effective investment in comparison to other fencing options, offering durability and low maintenance. Its functional design allows air and light to pass through, preserving the openness of the garden space. The ease of installation further adds to its appeal, making it a popular choice for both residential and commercial properties.

With its versatility and long-term reliability, chain link fencing proves to be an excellent choice for addressing various security and boundary requirements.

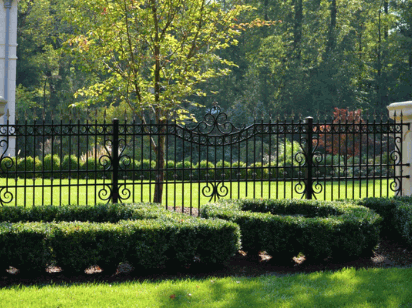
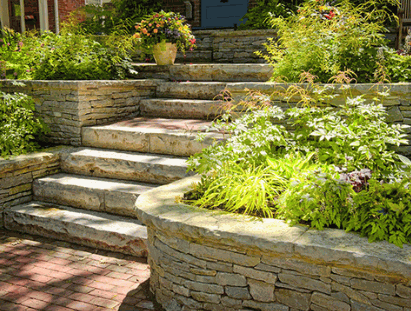
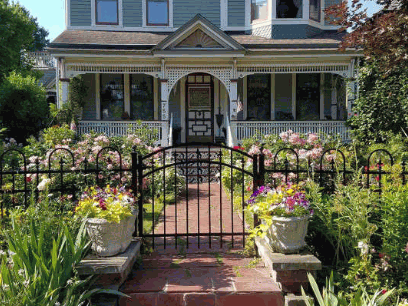
Wrought Iron Fencing

Wrought iron fencing serves as a captivating decorative fencing option that enhances the aesthetics of property boundaries, adding elegance and visual appeal to garden landscapes.

The intricate designs and patterns of wrought iron fences offer a timeless allure, transforming an ordinary perimeter into a statement piece. The strong and durable nature of wrought iron ensures its longevity and resilience against outdoor elements, making it a practical and lasting choice for both residential and commercial properties.

The versatility of wrought iron allows for customization, enabling property owners to showcase their unique style while maintaining security and beauty.

What Are The Factors To Consider When Choosing The Best Fencing For Your Garden?

Selecting the best fencing for your garden involves considering various factors such as the purpose of the fence, budget constraints, desired aesthetic appeal, maintenance requirements, durability, and the level of security it can provide.

It’s essential to determine the primary purpose of the fence, whether it’s for privacy, decorative enhancement, or to keep pets and children safe within the garden. Being conscious of budget constraints aids in selecting the most cost-effective yet durable fencing material.

Aesthetic appeal plays a significant role in enhancing the overall visual appeal of the garden. Maintenance requirements vary based on the chosen material, and durability is crucial for withstanding various weather conditions. Considering the level of security the fence can offer is paramount to ensure the safety of your garden.

Purpose Of The Fence

Understanding the intended purpose of the fence is crucial, whether it is for garden security, privacy, or purely decorative elements, as it directly influences the choice of fence types and materials.

The purpose of the fence determines whether a solid barrier like a privacy fence or an open design like a picket fence is more suitable. For instance, if the primary goal is to enhance privacy, a solid fence made from materials such as wood or vinyl would be the best choice. On the other hand, if the purpose is to protect the garden from wildlife, a sturdy metal or wire fence might be more appropriate.

Identifying the intended use guides homeowners in making informed decisions about the most effective and aesthetically pleasing fence for their specific needs.

Budget

Setting a clear budget for the fencing project is essential, considering the costs of materials, installation, and the option for DIY installation or professional services.

Material costs play a crucial role in budgeting, as different types of fencing materials vary widely in price. It’s important to research and compare prices for materials such as wood, vinyl, aluminum, or chain link.

Installation expenses should be factored in, especially when deciding between DIY and professional installation. While a DIY approach can be cost-effective, professional installation ensures expertise and saves time and effort, making it important to weigh the pros and cons of each option when planning your fencing project budget.

Aesthetic Appeal

Aesthetic appeal plays a vital role in the selection process, as the chosen fencing should complement the overall garden design, add value to the property, and contribute to the desired visual appeal.

It is essential to consider the style and material of the fencing in relation to the existing landscape, ensuring that it enhances the outdoor spaces without overpowering them. Aesthetically pleasing fencing can greatly elevate the curb appeal of a property, making it more attractive to potential buyers and adding to its overall value.

By integrating the right fencing, homeowners can create a visually cohesive and harmonious outdoor environment, fostering a sense of tranquility and beauty within their garden.

Maintenance

Considering the maintenance requirements, weather resistance, and overall durability of the fencing materials is crucial for long-term functionality and cost-effectiveness.

It is essential to choose fencing materials that require minimal maintenance, as this can significantly impact the long-term costs and overall functionality. Opting for materials with high weather resistance is vital, especially in areas prone to harsh weather conditions, as it ensures the durability and longevity of the fencing. By prioritizing these factors during the selection process, one can make a wise investment that offers both practicality and cost-effectiveness in the long run.

Durability

The durability of the chosen fencing materials, along with their resistance to weather elements and protection against pests, significantly influences the longevity and reliability of the garden fencing.

This is particularly important as garden fencing is subjected to various environmental stressors, including exposure to sunlight, rain, wind, and potential damage from insects or animals. Durable materials such as treated wood, vinyl, or metal have the ability to withstand these challenges, ensuring that the fence remains sturdy and intact for an extended period.

Weather-resistant coatings or treatments help to prevent deterioration and maintain the aesthetic appeal of the fencing. The integration of pest protection further safeguards the structure, preserving its functionality and appearance over time.

Security

Ensuring adequate security measures, defining property boundaries, and prioritizing safety considerations are essential aspects to consider when choosing garden fencing for residential or commercial properties.

This selection process involves assessing the level of security required for the property, whether it’s a residential garden or a commercial facility. The fencing should effectively demarcate boundaries, providing a clear separation between the property and its surroundings.

Prioritizing safety considerations ensures that the chosen fencing not only provides security and privacy but also minimizes potential risks such as accidental falls or unauthorized access. These factors contribute significantly to creating a secure and safe environment for occupants and visitors alike.

What Are The Pros And Cons Of Each Type Of Garden Fencing?

Each type of garden fencing comes with its set of advantages and drawbacks, making it essential to evaluate the pros and cons of wood, vinyl, metal, chain link, and decorative fencing options before making a selection.

What Are The Steps To Install Garden Fencing?

The process of installing garden fencing involves several crucial steps, including:

  1. Measurement and planning
  2. Material and tool gathering
  3. Ground preparation
  4. Fence post installation
  5. Panel placement
  6. The final touches to ensure a secure and visually appealing outcome

Once you have determined the dimensions of the area to be fenced, the next step involves gathering the necessary materials such as fence panels, wooden or metal posts, concrete, screws, and tools like a tape measure, spirit level, post hole digger, and a saw.

Ground preparation is essential and requires clearing the area of any debris, leveling the ground, and marking out where the fence posts will be placed. After preparing the ground, the installation of the fence posts is the next crucial step, ensuring they are securely anchored and evenly spaced. These steps lay the groundwork for an effective and durable garden fence.
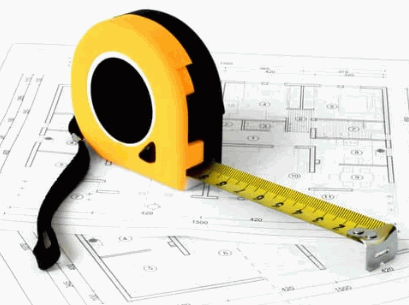
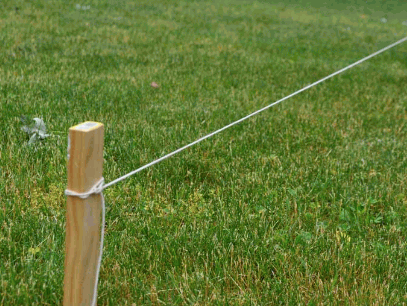
Measure And Plan

The installation process begins with thorough measurement and planning, ensuring precise alignment with the garden boundaries and the desired fencing layout.

This stage sets the foundation for a successful installation, as accurate measurements and comprehensive planning are crucial in determining the exact placement of the fencing panels, gates, and posts. By meticulously measuring the dimensions of the garden area and considering any irregularities in the terrain, the installation can seamlessly align with the boundaries, creating a cohesive and visually appealing fencing layout.

This attention to detail not only enhances the overall aesthetic of the garden but also contributes to the functionality and security of the fencing system.

Gather Materials And Tools

Gathering the necessary materials and tools, including fencing supplies and equipment, is a crucial early step in the installation process, ensuring readiness for the subsequent stages.

This preparation is essential for a smooth and efficient installation. By having all the required materials at hand, such as posts, panels, and fasteners, the installation process can proceed without delays or interruptions. Adequate preparation also minimizes the risk of errors and ensures that the fencing project progresses seamlessly. Having the right tools and supplies on hand helps in maintaining safety standards and achieving a professional finish. Therefore, investing time in gathering the necessary materials and tools is fundamental to the success of the fencing installation.
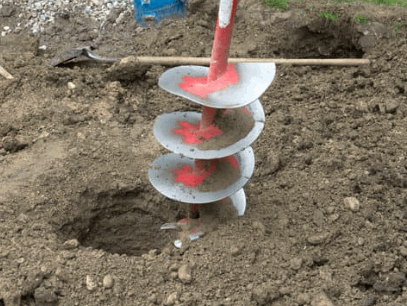
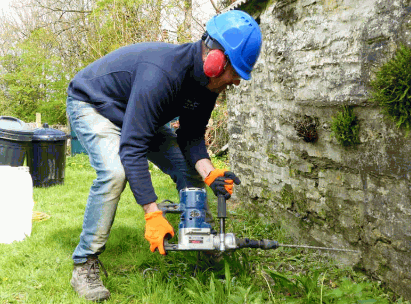
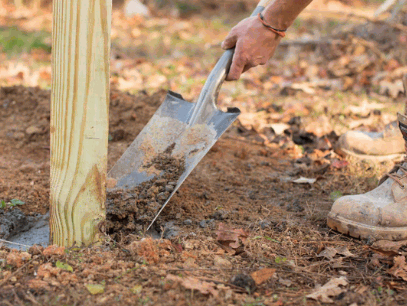
Prepare The Ground

Ground preparation is essential for ensuring proper fencing alignment, stability, and secure installation, requiring attention to soil condition and appropriate groundwork.

It is crucial to examine the soil type before digging the fence post holes to ensure they are deep enough and the soil is firm. Proper ground preparation also involves clearing the area of any debris or rocks that may interfere with the installation.

Leveling the ground and correctly positioning the posts are vital for the structural integrity of the fence. Neglecting these steps can lead to an uneven fence line, and compromised stability and security, ultimately impacting the overall effectiveness of the fencing system.
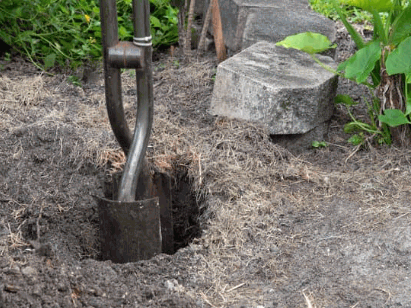
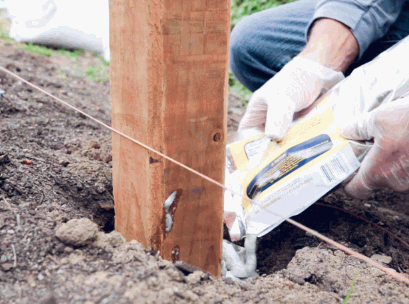
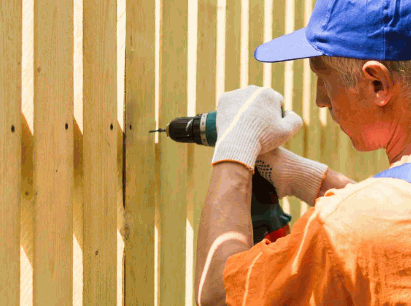
Install Fence Posts

The installation of fence posts is a critical step that determines the stability and anchoring of the entire fencing structure, requiring precision and attentiveness to achieve a secure foundation.

It is essential to ensure that the fence posts are installed at proper intervals and depths to provide the necessary support and stability. Properly installed fence posts help in distributing the weight and pressure evenly along the fence line, preventing potential leaning or sagging of the structure.

Secure and correctly placed posts also enhance the overall appearance and longevity of the fence, ensuring that it remains intact and sturdy over time, especially in challenging weather conditions.

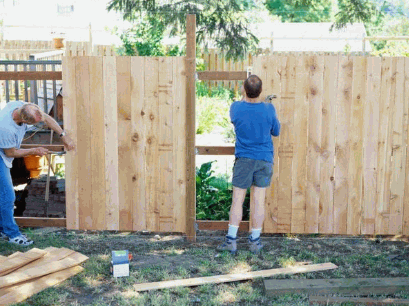
Install Fence Panels

Installing fence panels involves ensuring precise alignment, secure attachment, and attention to the overall aesthetics, contributing to the visual appeal and functionality of the garden fencing.

This process begins with accurately measuring and marking the layout for the fence panels, ensuring that they align perfectly with the desired boundaries. Once the alignment is confirmed, the secure attachment of each panel is crucial to enhance the structural integrity, using appropriate fasteners and supports.

Attention to aesthetics involves selecting complementary materials and colors, as well as considering the landscaping and surroundings to ensure the fence seamlessly integrates into the overall visual appeal of the garden.

Secure The Fence Panels

Securing the fence panels effectively ensures the security, durability, and long-term maintenance requirements of the garden fencing, warranting attention to fasteners and structural integrity.

This step is crucial because loose or unsecured panels can compromise the security of the property, making it vulnerable to unauthorized entry and potential intrusions. Properly fastened fence panels also contribute to the overall durability of the fence, ensuring it can withstand varying weather conditions and external pressures over time. By investing in strong and secure fasteners, homeowners can reduce the need for frequent maintenance and repairs, ultimately saving on long-term maintenance costs.

Finishing Touches

Applying the finishing touches to the garden fencing involves attention to aesthetics, ensuring functionality, and seamlessly integrating the fencing with the property boundaries for a visually appealing and cohesive outcome.

This final step can transform a mere enclosure into a beautifully curated element of the overall landscape. The finishing touches, such as elegant post caps, decorative accents, or a fresh coat of paint, can elevate the visual appeal of the fencing, imparting a sense of charm and character to the entire garden. These aesthetic elements complement the functionality of the fencing, contributing to its durability and weather resistance. Their seamless integration with the property boundaries ensures a harmonious blend with the surrounding architecture and landscape design, resulting in a polished and inviting outdoor space.

6th January 2024 Garden

How To Install An Electric Fence Around A Garden

An electric fence can be a game-changer for your garden, providing a reliable barrier against unwanted animals and protecting your precious plants from grazing. If you’ve been considering installing an electric fence but aren’t sure where to start, you’ve come to the right place.

In this comprehensive guide, we’ll cover everything you need to know about installing and maintaining an electric fence around your garden. From the essential materials required to the step-by-step installation process, we’ve got you covered. So, let’s jump right in and explore the world of electric fencing for gardens.

What Is An Electric Fence?

An electric fence is a barrier that uses electric shocks to deter animals or people from crossing a boundary. It creates a psychological and physical deterrent to unwanted intrusions, providing protection for the enclosed area.

The voltage in an electric fence delivers a non-lethal shock upon contact, effectively teaching animals and potential intruders to avoid attempting to breach the perimeter. This method of protection is particularly useful in agricultural settings, where it safeguards crops and livestock. The shock serves as a reliable means of deterring wildlife, offering a humane and efficient solution to prevent damage or harm. The effectiveness of electric fences in deterring human trespassers makes them a popular choice for securing residential and commercial properties.

Why Install An Electric Fence Around A Garden?

Installing an electric fence around a garden offers a reliable solution to safeguard the enclosed area, ensuring the safety of plants, deterring unwanted animals, and providing a secure perimeter for pets and livestock.

The installation of an electric fence eliminates the need for physical barriers that can obstruct the view of the garden. It also acts as a visual and psychological deterrent for animals, effectively protecting the delicate foliage from being trampled or eaten.

With the secure perimeter, it creates, pet owners can be assured that their furry companions are kept safe within the confines of the garden, reducing the risk of them wandering off or encountering potentially harmful situations.

Keeps Out Unwanted Animals

An electric fence around a garden effectively keeps out unwanted animals, preventing damage to plants and preserving the garden’s integrity.

The electric fence serves as a vital barrier, creating a protective perimeter that deters animals from encroaching on the garden. Its effectiveness lies in the delivery of a harmless but memorable shock, conditioning animals to avoid the area. This not only safeguards the garden’s plants but also reduces the need for harmful pesticides or physical barriers.

The fence acts as a sustainable solution, ensuring that the garden thrives without constant human intervention while maintaining a harmonious ecosystem.

Protects Plants From Grazing Animals

The installation of an electric fence around a garden provides essential protection for plants, safeguarding them from grazing animals and potential damage caused by livestock or wildlife.

It acts as a deterrent to prevent animals from entering the garden and disrupting the natural ecosystem. The electric shock administered by the fence serves as a gentle but effective reminder for animals to stay away, ensuring the safety and flourishing of the plant life within. This protective barrier is particularly crucial in areas with a high presence of wild animals or nearby livestock, minimizing the risk of trampling or foraging. The electric fence thus plays a vital role in maintaining the harmony between agricultural activities and the surrounding wildlife.

Easy To Install And Maintain

An electric fence around a garden is easy to install and maintain, providing a cost-effective and practical solution for perimeter protection.

With DIY potential, the installation process can be completed with basic tools and straightforward instructions. Once in place, the low-maintenance requirements make it a hassle-free option for property owners. Troubleshooting any issues, such as connectivity or power fluctuations, can usually be addressed through simple steps outlined in the user manual. The electric fence offers a convenient and reliable means of safeguarding the garden or property.

What Are The Materials Needed To Install An Electric Fence?

The installation of an electric fence requires several essential materials including:

  • wire,
  • posts,
  • an energizer, and
  • grounding components

to ensure effective functionality and safety.

The wire serves as the primary conductive element for transmitting electric pulses throughout the fence system, while the posts provide structural support and stability. The energizer is responsible for generating the electric charge that runs through the wire, enabling the fence to act as a deterrent.

Proper grounding components are crucial to ensure the safe dispersal of excess electricity and maintain the effectiveness of the electric fence system.

Electric Fence Charger

The electric fence charger, powered by a battery or solar energy, serves as the energizer unit responsible for providing the necessary electrical pulse to the fence wire, ensuring its effectiveness as a deterrent.

It plays a crucial role in the overall installation process, as it provides the power source needed to maintain the electrification of the fence. By delivering periodic pulses of electricity, the charger keeps the fence functional, making it an essential component for maintaining security and safety.

Whether it’s for agricultural purposes, livestock containment, or perimeter security, the fence charger’s job is to ensure that the entire fence system operates as intended, providing reliable protection and peace of mind for the property owner.

Electric Fence Wire

The electric fence wire, available in various types such as tape or rope, is essential for creating a barrier with optimal spacing and tension, ensuring effective perimeter protection for the garden.

Using the right type of wire, whether it’s polytape, polyrope, or high-tensile wire, is crucial for maintaining the integrity of the fence. Proper spacing is also key; for example, a good rule of thumb is to keep wire spacing at around 10-12 inches. This helps prevent animals from squeezing through or getting tangled.

Ensuring the wire tension is correct is vital for the overall effectiveness of the electric fence. Insufficient tension can lead to sagging, while excessive tension may cause the wire to break prematurely. Therefore, regular maintenance to adjust the wire tension is important to keep the fence performing optimally. Proper installation of the wire, including burying any underground cable at the right depth, is essential to prevent damage and ensure the electric fence’s longevity.

Fence Posts

Fence posts play a crucial role in the installation of an electric fence, providing the necessary support and structure for securing the fence wire, and requiring specific tools for proper installation.

They are the backbone of the fence, serving as the foundation on which the entire structure relies. The right tools, such as a post hole digger, level, and tamping bar, are essential for ensuring the posts are securely and evenly installed. These tools assist in digging the holes, aligning and leveling the posts, and compacting the soil around them, ensuring stability and durability for the fence.

From marking the post locations to bracing and tightening the wires, the installation of fence posts involves precise techniques for a reliable and effective electric fence.

Insulators

Insulators are essential components that provide weatherproofing and electrical isolation for the electric fence, ensuring its effectiveness and safety in various environmental conditions.

They play a crucial role in preventing the electric current from leaking into the ground or being diverted by moisture, thereby maintaining the integrity of the fence’s electric charge. In addition, insulators also contribute to the longevity and durability of the fencing system by safeguarding it against the damaging effects of weather elements such as rain, snow, and UV radiation.

Without proper insulation, the electric fence would be susceptible to short circuits, power loss, or even safety hazards, making insulators a fundamental aspect of its functionality.

Grounding Rod

The grounding rod is a critical component of the electric fence system, ensuring proper grounding and safety measures to optimize the functionality and effectiveness of the fence.

It acts as a crucial link between the fence and the ground, preventing the buildup of excess electrical charge and reducing the risk of shocks or short-circuits. By securely grounding the fence, the grounding rod protects both people and animals from potential harm. Its role in providing a stable and reliable electrical grounding also contributes to the overall longevity and performance of the electric fence system.

Without a properly installed and maintained grounding rod, the effectiveness and safety of the entire electric fence system can be compromised.

Step-By-Step Guide To Install An Electric Fence Around A Garden

Installing an electric fence around a garden involves a step-by-step process that includes:

  1. Planning the fence layout
  2. Installing fence posts and insulators
  3. Positioning the electric fence wire with proper spacing
  4. Connecting the energizer and grounding components to ensure functionality

Begin by outlining the dimensions of your garden and identifying potential entry points for a gate, ensuring that the fence layout encompasses the entire perimeter. Then, install the fence posts at regular intervals, ensuring they are secure and level. Attach insulators to the posts to prevent electric current from grounding into the earth. Next, place the electric fence wire with appropriate spacing for your specific application, typically 6-8 inches above the ground. Connect the energizer to the fence wire, ensuring proper grounding to complete the installation.

Learn more: How To Install A Garden Fence

Step 1: Plan Your Fence Layout

The first step in installing an electric fence around a garden is to carefully plan the layout, considering the perimeter protection requirements and the specific areas to be enclosed within the fence boundaries.

This planning process is crucial for ensuring that the fence effectively encloses the entire garden area, providing protection against intruders and wildlife. By carefully considering the specific areas within the garden, such as vegetable beds, flower gardens, or play areas, the layout can be tailored to provide the necessary protection for each of these designated spaces, allowing for a well-rounded and comprehensive perimeter protection solution.

Step 2: Install Fence Posts

The installation of fence posts is a crucial step in the process, requiring the use of specific tools and techniques to ensure proper support and stability for the electric fence wire within the garden perimeter.

For a successful installation, you will need essential tools such as a post-hole digger or auger to create appropriate holes for the fence posts. Once the holes are dug, it’s important to use a level to ensure that the posts are installed perfectly vertically, providing a sturdy foundation for the electric fence wire. Using concrete to secure the posts further enhances their stability.

Proper spacing between the posts is also crucial, ensuring uniform support for the electric fence wire across the entire perimeter of the garden.

Step 3: Install Insulators

The installation of insulators is essential for providing weatherproofing and electrical isolation, ensuring the effective and safe operation of the electric fence in various environmental conditions within the garden.

Insulators play a crucial role in safeguarding the fence against moisture and ensuring that the electrical current remains isolated, preventing any potential hazards. By creating a barrier between the conductive wire and the supporting fence posts, insulators prevent energy loss and interference from external elements, thus maintaining the fence’s functionality. They contribute to the longevity of the fence by reducing the risk of corrosion and deterioration caused by weather exposure. Hence, the proper installation of insulators is paramount for the effective functioning and durability of the electric fence.

Step 4: Install Electric Fence Wire

The installation of the electric fence wire involves positioning it with proper tension and spacing, ensuring a secure and effective barrier for the garden while following the designated layout and requirements.

Proper tension is crucial for ensuring the wire remains taut and secure, preventing it from sagging or being easily compromised. Correct spacing between the wires prevents unauthorized access while allowing for effective coverage of the garden perimeter.

By adhering to these guidelines, the electric fence wire serves as a reliable deterrent, protecting the garden from unwanted intruders and wildlife, and effectively safeguarding the plants and produce within.

Step 5: Connect The Fence Charger And Grounding Rod

The final step involves connecting the fence charger and grounding components to the electric fence wire, ensuring proper functionality, safety, and the delivery of electrical pulses to deter unwanted intrusions effectively.

When connecting the fence charger, it is crucial to follow the manufacturer’s installation guidelines to ensure optimal performance. The energizer should be securely mounted and connected to the electric fence wire using appropriate insulated cables. The grounding components play a vital role in dispersing excess electrical energy into the ground to prevent potential hazards. Proper grounding is essential for safety and to facilitate the charger’s efficient operation. By integrating these components effectively, the electric fence system can provide reliable deterrence while maintaining safety standards.

How To Maintain An Electric Fence?

Maintaining an electric fence involves regular inspections for damage, clearing vegetation to prevent interference, and conducting routine tests to ensure its proper functionality, thus avoiding potential problems or malfunctions.

Regular inspections are crucial for identifying any wear and tear, such as broken wires or damaged insulators, which can be repaired promptly to prevent further issues. In addition, managing vegetation around the fence is essential to avoid plants or trees interfering with the electric current.

Routine testing involves checking the voltage levels and ensuring that the grounding system is functioning effectively, providing peace of mind for the fence’s reliability.

Regularly Check For Damage

Regularly checking for damage is a critical aspect of maintaining an electric fence, ensuring early detection and prompt repair of any issues to maintain its effectiveness and functionality.

This maintenance routine helps in troubleshooting potential faults before they escalate, preventing livestock from escaping or intruders from gaining access to the property. By conducting regular inspections, owners can identify weak spots, damaged wires, or malfunctioning components, allowing for timely fence repair.

Neglecting maintenance could result in reduced security and increased risks, making it essential to prioritize routine checks and necessary repairs. Thus, incorporating regular maintenance into the routine can significantly extend the fence’s longevity and overall security.

Keep Vegetation Clear

Keeping vegetation clear around the electric fence is crucial to prevent interference and potential safety hazards, ensuring the unobstructed functionality and effectiveness of the fence.

This maintenance practice not only reduces the risk of short circuits and power outages caused by branches or overgrown plants touching the fence but also enhances visibility, allowing for proper monitoring and detection of any potential issues. Clearing vegetation around the electric fence contributes to the overall safety of the area, preventing fire hazards and interference with wildlife, thereby ensuring a secure and reliable perimeter for the desired protection.

Test The Fence Regularly

Regular testing of the electric fence using a fence tester or voltage meter is essential to verify its proper functionality, identify potential issues, and address them promptly to maintain its effectiveness.

These devices play a crucial role in monitoring the voltage levels across different parts of the electric fence. By regularly using a fence tester or voltage meter, potential problems such as shorts or breaks in the fence can be quickly identified. This proactive maintenance can save both time and resources by preventing larger issues from developing. Therefore, integrating these tools into the regular maintenance routine ensures that the electric fence consistently operates at its optimal capacity.

6th January 2024 Garden

How To Install A Garden Fence

In the realm of gardening and landscaping, a garden fence serves as a crucial element, providing both practical and aesthetic benefits. From delineating property lines to protecting your precious plants from unwanted intruders, a well-chosen garden fence can elevate the overall appeal and functionality of your outdoor space.

In this comprehensive guide, we will delve into the various aspects of garden fences, including their significance, different types, factors to consider before installation, and the tools and materials required. We will provide a step-by-step walkthrough on how to install a garden fence, empowering you to embark on this project with confidence. Whether you’re a seasoned gardener or a novice enthusiast, the information presented here will equip you with the knowledge needed to make informed decisions and execute your garden fence installation effectively. So, let’s embark on this journey to discover the essentials of garden fencing and unleash the potential of your outdoor sanctuary.

What Is A Garden Fence?

A garden fence is a structure designed to enclose a specific outdoor area, typically a garden or yard, providing a physical barrier and aesthetic enhancement to the space.

It serves multiple purposes, including demarcating property boundaries, enhancing privacy, and adding a decorative element to the landscape. The installation of a garden fence not only defines the limits of a property but also offers a sense of security and seclusion. By choosing the right type of fence, homeowners can create an inviting outdoor space while safeguarding their property.

A well-maintained garden fence contributes to the overall visual appeal of the property, making it a valuable addition to any home.

Find out more: What Is The Best Fencing For A Garden

Why Is A Garden Fence Important?

A garden fence plays a crucial role in enhancing privacy, providing security, and ensuring the durability of outdoor spaces.

It creates a sense of seclusion and intimacy, shielding the garden from prying eyes and unwanted intrusions. With the right design and construction, a garden fence acts as a barrier, deterring trespassers and enhancing the security of the property.

It helps in preserving the structural integrity of outdoor areas, safeguarding them from external elements and potential damage. As a result, garden fences offer a well-rounded solution for maintaining privacy, boosting security, and increasing the longevity of outdoor spaces.

What Are The Different Types Of Garden Fences?

Garden fences come in various types, including wooden fences, metal fences, vinyl fences, and chain-link fences, each offering unique characteristics and aesthetic appeal.

Wooden fences are popular for their classic and rustic charm, adding a natural warmth to the garden. They can be painted or stained to complement the outdoor surroundings.

Metal fences, such as wrought iron or aluminum, offer durability and a timeless elegance. On the other hand, vinyl fences are low-maintenance and come in a variety of styles, including picket and privacy designs.

Chain-link fences provide a budget-friendly option with practical durability, often used for securing areas without obstructing the view.”

Wooden Fences

Wooden fences are a popular choice for garden enclosures, known for their natural aesthetics and weather resistance, making them a timeless addition to outdoor spaces.

Their organic appeal blends seamlessly with the surrounding greenery, creating a warm and inviting atmosphere. Wooden fences have the advantage of being resilient in various weather conditions, standing strong against wind, rain, and sun exposure. The rich textures and warm hues of wood offer a charming visual contrast to vibrant flowers and lush foliage, adding a touch of rustic elegance to the garden. These fences also provide a sense of privacy while maintaining an open, welcoming feel.

Vinyl Fences

Vinyl fences offer low maintenance requirements and cost-effective solutions for garden boundaries, making them a practical and durable choice for outdoor enclosures.

These fences require minimal upkeep, avoiding the need for annual staining or painting. Vinyl fences are resistant to rot, mold, and pests, making them a long-lasting option for homeowners and businesses. Their durability ensures that they withstand harsh weather conditions, reducing the likelihood of costly repairs or replacements. With various styles and colors available, vinyl fences can complement the aesthetic of any property while offering a budget-friendly alternative to traditional fencing materials.

Metal Fences

Metal fences provide a balance of security and aesthetic appeal, offering a robust solution for garden enclosures that prioritizes both safety and visual enhancement.

They are known for their durability and strength, making them an excellent choice for securing residential and commercial properties. The sleek and modern look of metal fences adds a touch of elegance to any outdoor space, blending seamlessly with various architectural styles.

Their low maintenance requirements make them a convenient option for homeowners looking for long-lasting solutions for their fencing needs. With various design options available, metal fences can complement the aesthetic of a garden while providing a strong and reliable barrier.

Chain-Link Fences

Chain-link fences are known for their affordability and visibility, providing a practical solution for garden boundaries that ensures both cost-effectiveness and clear visibility.

These types of fences are a popular choice for many homeowners due to their low initial cost and minimal maintenance requirements, making them an economical option for enclosing gardens and yards. The open weave design allows for unobstructed views, maintaining an open feel while still providing a secure and defined outdoor space. The galvanized steel construction ensures durability, making chain-link fences a long-lasting and practical solution for garden enclosures.

What Are The Factors To Consider Before Installing A Garden Fence?

Before installing a garden fence, it is essential to consider factors such as planning, accurate measurements, and obtaining necessary permits to ensure compliance with local regulations.

Proper planning involves determining the purpose of the fence, whether it’s for security, aesthetics, or defining boundaries. Precise measurements ensure that the fence fits the designated area and aligns with property lines. Obtaining permits is crucial to avoid legal issues and fines. Municipalities may have specific requirements, such as maximum height and material restrictions, so understanding the permit process is vital. By adhering to these considerations, homeowners can confidently proceed with their garden fence installation.

Purpose Of The Fence

Determining the purpose of the garden fence, whether it’s for defining a property boundary, enhancing privacy, or providing security, is crucial in planning the installation.

It is essential to understand that garden fences play a pivotal role in defining property boundaries, safeguarding the privacy of the inhabitants, and providing a sense of security against potential intruders. By clearly delineating the perimeter of a property, the fence not only establishes the limits of one’s land but also contributes to the overall aesthetics of the landscape.

It serves as a deterrent to trespassers, ensuring that the property remains secure and safe. Thus, comprehending the intended function of the garden fence is fundamental to creating a space that fulfills both practical and aesthetic needs.

Budget

Establishing a budget for the garden fence project is essential, considering the cost of materials, installation, and any additional expenses that may arise during the process.

It is crucial to carefully allocate funds for the necessary materials, such as the type of wood or metal for the fence, as it accounts for a significant portion of the budget. Factoring in the installation expenses, which might involve hiring professionals or allocating time for DIY options, is critical to ensure the budget covers all aspects.

Anticipating potential additional costs like permits, maintenance, and landscaping around the fence also helps in creating a comprehensive budget plan that caters to all financial considerations.

Material And Style

Selecting the appropriate material and style for the garden fence is crucial, as it directly impacts the aesthetics, durability, and overall appeal of the outdoor space.

The choice of material, such as wood, vinyl, wrought iron, or composite, significantly influences the fence’s visual impact and longevity. For instance, wood adds a natural, rustic charm, while wrought iron imparts a timeless elegance. Similarly, the style of the fence, whether it’s classic picket, modern horizontal slats, or ornate lattice, contributes to the overall aesthetics and character of the garden.

By carefully considering both material and style, homeowners can enhance their outdoor space’s beauty and functionality.”

Property Lines And Permits

Understanding property lines and obtaining necessary permits in accordance with local guidelines are essential steps before installing a garden fence to ensure legal compliance and avoid potential issues.

Not adhering to property lines or obtaining permits can lead to legal disputes with neighbors and local authorities. By following the proper channels and obtaining the necessary permissions, homeowners can also ensure that their fence meets the local aesthetic standards and construction requirements, minimizing the risk of having to make costly adjustments. This adherence to regulations and guidelines not only ensures legal compliance but also contributes to maintaining a harmonious neighborhood environment.

What Tools And Materials Do You Need To Install A Garden Fence?

Installing a garden fence requires essential tools such as measuring tape, post hole digger, level, and materials including fence panels, ensuring a precise and well-structured installation process.

Taking accurate measurements is crucial for determining the right placement of posts and panels to ensure a balanced and seamless look. Using quality fence panels and sturdy posts can optimize the fence’s durability and overall performance.

The post-hole digger plays a vital role in creating stable foundations, and a level ensures that the fence is straight and even. By using these tools and materials effectively, you can create a beautiful and functional garden fence that enhances your outdoor space.

Measuring Tape

A measuring tape is an indispensable tool for obtaining accurate measurements that are essential for planning and installing a garden fence with precision and attention to detail.

It allows you to precisely determine the length of the fence panels, the exact distance between fence posts, and the height required for the fence. By using a measuring tape, you can ensure that the fence is installed evenly and securely, creating a polished and professional look for your garden. Accurate measurements are crucial for calculating the amount of materials needed for the project, preventing unnecessary wastage, and saving costs.

The measuring tape is a simple yet powerful tool that plays a vital role in the success of any garden fence installation.

Post Hole Digger

A post-hole digger is a fundamental tool for efficient digging and ground preparation, ensuring the proper placement of fence posts for a sturdy and secure garden enclosure.

It allows for precise and uniform holes to be dug, ensuring that the fence posts are set at the correct depth and alignment. By efficiently creating the necessary holes, a post-hole digger streamlines the process of installing a garden fence, enabling homeowners to establish a boundary that enhances the overall aesthetics and functionality of their outdoor space.

The proper use of a post-hole digger also contributes to the long-term stability and durability of the garden fence, providing peace of mind for the property owner.

Level

A level is essential for maintaining proper alignment and ensuring the straightness of the fence panels during the installation process, contributing to the overall structural integrity of the garden fence.

Without the use of a level, the fence panels may become uneven, leading to a visually unpleasing result and potential weaknesses in the structure. By consistently checking the level at various points along the fence, the installer can ensure that each panel is set at the correct vertical and horizontal alignment, creating a professional and polished finish that enhances the aesthetic appeal of the garden while also maximizing the fence’s functionality.

Fence Panels

Fence panels are integral components of a garden fence, contributing to its installation, structural stability, and overall visual aesthetics, making them a key consideration in the installation process.

Their role in providing a sturdy framework for the fence cannot be understated, as they offer support and durability to the structure. Fence panels play a crucial part in enhancing the visual appeal of the garden, as they come in various designs, materials, and colors, allowing homeowners to customize their outdoor space according to their preferences.

The installation of fence panels also adds a layer of privacy and security to the property, creating a tranquil and safe environment for families and pets. The careful selection and proper installation of fence panels are essential in achieving a well-designed and functional garden fence.

How To Install A Garden Fence?

The installation process for a garden fence involves:

  1. Marking the fence line using stakes and string, ensuring straight and accurate positioning.
  2. Digging post holes using a post hole digger, making sure they are evenly spaced.
  3. Setting the posts securely in place, using cement to provide stability.
  4. Attaching the fence panels using screws or nails, depending on the material of the panels.
  5. Applying finishing touches such as caps for the posts and protective sealant for wooden panels to ensure longevity and durability.

This makes it an achievable DIY project with the right tools and materials.

Marking The Fence Line

Marking the fence line accurately using string and precise measurements is the initial step in ensuring a well-defined and aesthetically pleasing garden enclosure.

This process starts by identifying the exact perimeter of the garden area where the fence will be installed. Then, using a measuring tape, the distance between each fence post is carefully marked. Once the measurements are in place, sturdy wooden stakes are inserted at each planned post location. The string is then tied to these stakes, following the measurements precisely. This ensures a straight and even fence line, providing the framework for a visually appealing and structurally sound garden enclosure.

Digging Post Holes

Digging post holes at strategic intervals using a post-hole digger is essential for establishing the foundational support for the garden fence, ensuring stability and structural integrity.

This method serves as the groundwork for a sturdy and long-lasting fence. Placing the holes at the correct distance apart is crucial to distribute the weight and pressure evenly along the fence line, preventing leaning or sagging over time. A post-hole digger allows for precise and efficient digging, ensuring that the holes are deep enough to securely anchor the fence posts.

By carefully measuring and positioning the post holes, the entire fencing structure can withstand various weather conditions and maintain its durability.

Setting The Posts

Setting the posts securely in place using cement and ensuring their alignment with a level is a critical step in the installation process, contributing to the overall stability and durability of the garden fence.

When setting the posts, it’s important to dig the holes to the correct depth and width to accommodate enough cement for a strong foundation. As the cement sets around the posts, it forms a solid bond, preventing the posts from shifting or leaning over time. Using a level to ensure the posts are perfectly straight not only enhances the fence’s appearance but also prevents future issues. Properly set posts are essential for the overall integrity and longevity of the fence structure.

Attaching The Fence Panels

Attaching the fence panels securely with appropriate screws is crucial for the structural integrity and visual appeal of the garden fence, ensuring a sturdy and well-constructed enclosure.

The process of attaching fence panels begins with selecting the right type and size of screws that are suitable for outdoor use and compatible with the material of the panels. The screws not only hold the panels firmly in place, but they also contribute to the overall stability and durability of the fence.

Properly secured panels create a cohesive and polished look, enhancing the aesthetic appeal of the outdoor space while providing a sense of security and privacy.

Finishing Touches

Applying the finishing touches such as paint or sealant not only enhances the aesthetics of the garden fence but also contributes to its long-term durability and maintenance.

These final details play a crucial role in protecting the fence from weather elements, preventing decay, and maintaining its structural integrity over time. The right finishing touches can add a personal touch to the outdoor space, creating a cohesive look and complementing the overall design of the garden.

By considering the type of finish and regular maintenance, the fence can continue to enhance the outdoor surroundings for years to come.

4th October 2023 Garden

How To Damp Proof A Retaining Garden Wall

Damp-proofing a retaining garden wall is key to preserving both its structural integrity and the surrounding landscape. Taking preventative measures can guarantee your garden wall stands firm against moisture damage.

Retaining garden walls are useful and attractive additions to any outdoor space. They stop soil erosion, create differing levels in the landscape, and add visual appeal. However, these walls are exposed to different weather conditions, such as rainwater and humidity, which can lead to dampness issues over time.

To properly damp-proof a retaining garden wall, starting with correct construction methods is essential. Utilizing quality materials like waterproof mortar or cement mixtures can raise the wall’s resistance to moisture penetration. Additionally, including a damp-proof membrane during construction or applying an outside tanking system after construction provides extra protection.

Regular maintenance is also an important element in avoiding dampness issues in garden walls. Keeping the wall clean of dirt and debris allows for better water runoff and reduces the odds of moisture accumulation. Inspecting the wall for cracks or gaps periodically and fixing them swiftly helps preserve its durability.

Damp-proofing a retaining garden wall needs careful consideration and proactive measures. By utilizing proper construction techniques, conducting regular maintenance checks, and seeking professional guidance when needed, you can guarantee your garden wall remains strong and attractive for years to come. Let’s now explore the various methods and techniques that can help damp-proof your retaining garden wall efficiently.

Understanding The Importance Of Damp Proofing For A Retaining Garden Wall

A damp-proof barrier is a must for any retaining garden wall. Without it, moisture can seep in, weakening the wall and causing structural issues. Plus, mold, mildew, and other bad microorganisms can grow and cause health issues.

The right materials must be used depending on the soil composition and water table levels in your area. For maximum protection, consult a professional who specializes in waterproofing systems. They will identify problem areas and provide tailored solutions.

Assessing The Condition Of The Retaining Garden Wall

Assessing a garden wall’s condition is essential to deciding the amount of damp-proofing needed. Here’s a 4-part guide to assess your wall:

  1. Look for cracks or damage: Check the entire area for chips, crumbling mortar, or any cracks. These can show weaknesses that may let in moisture.
  2. Check for water stains or white powdery residue: Spot water seepage discoloration on the wall or white powdery residue – ‘efflorescence’. This implies that water has been evaporating from within the masonry.
  3. Observe soil movement near the wall: See if there are signs of soil shifting or bulging close to the wall. Unstable soils can cause lateral pressure, leading to structural instability and possible dampness.
  4. Monitor drainage conditions: Check gutters, downspouts, and surface runoff paths to see how well the drainage system works. Poor drainage can cause too much moisture around the retaining wall.

Plus, note any damp issues that occurred before and make sure they have been taken care of before doing anything else.

Pro Tip: Get professional assistance when assessing the wall’s condition to make sure damp problems and proper measures are identified and taken immediately.

Gathering The Necessary Materials And Tools

To damp-proof your retaining garden wall, gather the following materials and tools:

  1. Waterproof membrane: Purchase a high-quality, outdoor-resistant version.
  2. Damp-proofing paint or sealant: Choose one that creates a barrier against water infiltration.
  3. Paint roller or brush: To apply the paint or sealant evenly.
  4. Cleaner/brush: To clean the wall’s surface.
  5. Protective gear: Wear goggles, gloves, and a mask.

Research and select the best materials and tools according to the wall’s material and condition. Consult with experts for tailored recommendations. Opt for high-quality products with good adhesion, long-lasting protection, and UV resistance. Use an appropriate painting tool for optimal coverage. With these materials and tools, you can provide your wall with effective damp-proofing and long-lasting protection.

Preparing The Retaining Garden Wall For Damp Proofing

For any home improvement project, proper preparation is vital. This is especially true for protecting your garden wall from dampness. By following these steps and investing in suitable products, your structure will stay dry and you can enjoy your outdoor space for years.

Steps to take:

  1. Clean the wall surface with a stiff brush or pressure washer, to remove dirt, debris, and loose materials.
  2. Look for cracks or damage that can let in moisture and repair them with filler or mortar.
  3. Apply a waterproofing primer using a brush or roller, to create a barrier against water penetration.
  4. Install a damp-proof membrane on the entire wall.
  5. Finish off with a weather-resistant render or coating.

Plus, take into account drainage and landscaping around the wall, to prevent water accumulation and damage.

Applying A Damp Roofing Solution

  1. Clean the wall properly, using a wire brush or scraper for tough debris.
  2. Find a damp-proofing product suitable for the wall material. Ask a professional if you’re not sure.
  3. Follow the manufacturer’s instructions to mix the solution.
  4. Apply an even layer of the product with a brush or roller.
  5. Let the solution dry fully before applying more layers.
  6. Check the wall for coverage.
  7. Inspect regularly for moisture and damage.
  8. Don’t neglect damp-proofing – it can cause mold and instability.
  9. Take action to protect your retaining garden wall and have a durable structure!

Uncover more: How To Damp Proof Wood Walls DIY

Adding Additional Protective Measures

To protect your retaining garden wall, extra steps are needed. These can ensure its durability and structural integrity for years. Here’s a 6-step guide:

  1. Evaluate the wall’s condition and check for any damage or weaknesses.
  2. Clean the surface with a water and detergent mix. This is for proper adhesion of protective materials.
  3. Apply a waterproof coating for masonry surfaces. Use a brush or roller.
  4. Add drainage systems, such as weep holes or French drains, at regular intervals along the base of the wall. These help redirect excess water away.
  5. Consider adding a waterproof membrane for extra protection. Put this on the entire wall before backfilling with soil.
  6. Implement proper landscaping techniques. Grade and slope away from the wall to prevent water accumulation. Place plants and shrubs near the wall for water absorption and erosion prevention.

These measures help make the wall stronger against dampness and deterioration. They also reduce maintenance requirements and prolong their lifespan.

Maintaining The Damp Proofed Retaining Garden Wall

  1. Regularly inspect the wall for cracks & fill them.
  2. Monitor drainage nearby. Clear any blockages.
  3. Clean the wall surface from time to time.
  4. Maintain landscaping: avoid planting trees too close.
  5. Redirect water flow away from the wall.
  6. Schedule professional inspections.
  7. Be attentive to details and design.
  8. For persistent dampness, consult a specialist.

Conclusion

Ensuring the durability and strength of a retaining garden wall is essential and can be done with proper damp-proofing. Here are some steps to follow:

  1. Pick a high-quality waterproof material, such as damp-proof bricks or concrete blocks.
  2. Moreover, coat the external surface with a waterproof coating to provide an extra layer of protection.
  3. Additionally, install drainage systems and weep holes to enable water drainage.
  4. Furthermore, slope or grade the area around the wall to divert rainfall away from it.
  5. Lastly, inspect and maintain the wall regularly. Fix any cracks or damages and clear any debris or vegetation near it.

Doing so will ensure your wall remains damp-proofed and intact.

4th September 2019 Garden

How to Organise Your Garden Shed

Organising your garden shed is often harder than it sounds. Garden sheds sometimes turn into a dumpsite for garden equipment and items we don’t want to store in the house, but don’t want to do away with completely either. However, the accumulated items in our garden shed can be very inconvenient, especially if we’re looking for something important. Freeing up shed space can also help you be a more efficient gardener.

So let’s have a look at the best ways to organise a garden shed.

Start with decluttering

The first step to organising your garden shed is by tackling the clutter. Start by taking everything out of the shed, and be ruthless in weeding out the things you can part with. If you haven’t used the item in over a year, it’s safe to say it’s fine to give or throw away. The English Garden recommends devoting a whole day to cleaning your shed to ensure that the decluttering is done properly. In setting aside a good amount of time to organise your shed, you save yourself the hassle of constantly looking for items in the future. In the long-term you will save yourself a lot of effort.

What not to store in your shed

When you’re deciding what to keep and what to throw away, it is best to know which items shouldn’t be stored in a shed. Country Living explains that temperature and moisture must be considered when storing something in a shed. Insulation, mould and humidity means that there are some household items that won’t store well. Canned food, wine, photographs, paint and glue are all subject to damage due to the temperature and humidity. Clothing and bedding can also be damaged by moths, and electronics run the risk of rusting. When decluttering your shed, make sure that none of these items are left behind. If you are using your shed as a storage space it should be functional and not a dumping ground.

Making the most of storage space

After you’ve decluttered your shed, the next step is to create storage space. There are many DIY upcycling projects that can create more effective storage units for your shed. Instead of placing small wooden crates on the floor, consider hanging some of them on the wall by suspending them on sturdy hooks. You can place anything from small tools to plants in them for easy access. You can also use hooks to hang larger tools on the wall, giving you more floor space. If you have fruit crates, you can also consider mounting them to the wall for extra shelves. With a fresh coat of paint and some woodwork, you can also transform an old ladder into shelves for a storage unit that maximises vertical space.

Storing valuable items

If you are leaving valuable items such as bikes or expensive garden equipment in your shed, it’s best to make sure that they’re properly stored and protected. This may mean upgrading your shed, especially if the current structure needs a lot of repairs. Investing in or building a metal shed is the best way to keep these types of items safe. Screwfix’s collection of metal sheds details how most models come with multiple padlock points for extra security. Aside from keeping your valuables secure, metal sheds are much harder to break into from the sides compared to wooden structures. This is something to keep in mind if you want to keep valuables safe and secure in your garden shed.

Repurposing a garden shed

With a decluttered and properly organised garden shed, you should consider using it for more unique purposes. You can transform freed up garden sheds into a small home bar, a tiny summer house, an indoor garden, or even a hobby room—the possibilities are endless. When it comes to DIY shed building creating or repurposing a shed on your own means that you have complete control over the design. However, it’s still vital to be thorough in order to achieve quality results. Being hands on with organising your garden shed means that you now have free reign on how to make the best use of your space. Just be careful that bad habits don’t creep back in and a year later you are back to square one.

1st September 2017 D.I.Y

DIY shed building – should you do it?

A shed is simple roofed structure or building usually made of wood where gardening equipment or tools can be kept. This building is usually made within the homes back garden for particular purposes depending on the intentions of the owner. The sheds differ in the simplicity of their structure and to the size, from the small sized roofs to the large structures with either windowless walls or toughened plastic or glass. Some people have also been known to turn them into bars which is a trendy idea that people keen on home brewing tend to do as a hobby and are a great way to relax after a hard days work, often referred to as a man cave.

The sheds are made from different materials, including metals or wood, while others made from pure rocks which is a lot less common than wood or metal due to the precision needed and the extra cost although it definitely looks amazing done with rocks. While those made for farming materials or for industrial storage are in most cases large and are built over wooden frames, those for home and garden storage tend to be wooden flat-pack or custom built from wood as it is much cheaper and easier to do and can last a very long time when properly protected from the elements with a protective covering like creosote and felt.

Shed Design Using Rocks


Pros and Cons of building own outdoor sheds

Advantages

The top most advantage of building a shed is that the individual will have complete control over its structural and aesthetic design. Doing this means that you can build in added features that fit your exacts needs based on the items you intend to store there or for the plan you have in mind overall, whereas with a bought shed your constricted by its preset dimensions and features.

In addition to this you may take your time when building the structure according to your own schedule rather than that of a professional who may be booked up for weeks which is quite common for local tradesmen. Be cautious of the weather though in this approach as you may attract spores and damp if left exposed during a rough, wet and windy period. It is a good choice to use pressure treated wood. Pressure treating is a preservative process that helps wood withstand the elements and wards off termites, microorganisms and fungal decay.

These are chemicals likely to be used in pressure treated wood:

  • Alkaline Copper Quaternary (ACQ)  (click here to learn about ACQ)
  • Copper Azole (CA)  (click here to learn about CA)
  • Micronized Copper Azole (MCA)  (click here to learn about MCA)


Cladded Shed Design With Plastic Windows

Disadvantages

Christopher Loft from Cad Joinery says that “the major disadvantage of having your typical home owner build their own shed is the lack of professionalism and training they have”. A professional will always have their work done according to the specifications required in the field of joinery. However, if an individual who lacks the professional training tries to build a shed from scratch, even a flat-pack, the result may not be as appealing or structurally sound as that of someone in the joinery profession, because of a lack of understanding in the construction process and lack of proper standards. A professional joiner will almost always be listed on bwf.org.uk and so must abide by a professional process to ensure they can be trusted to do a good job, especially since their reputation is at stake.

A number of things can, therefore, be noted from this, for example, the general resulting quality of the shed may be poor. This may result from the usage of low-quality materials which would not have been used if it was a professional carrying out the build. This could in turn incur more cost for repairs as more money might be needed to correct issues or replace wrongly used materials.

Moreover, the choice of location of the site also comes into play. A professional builder will be able to detect locations suitable for building such structures depending on its nature, whether wooden or metallic sheds and spot any potential risks hazardous to the structure in the long term such as subsidence, rot or incorrect placement which may hinder future maintenance like being too close to a wall or fence.

Where minimal skills are held by the homeowner, it becomes difficult for the individual to detect such minute precautions which may lead to bigger and more dangerous problems, if not prevented. For example, a wooden shed cannot be built in a higher place prone to heavy winds. The winds may bring down the structure affecting the cost to the owner.

A Selection Of DIY Tools

Tools & Materials

If you are going to do this yourself you have the added cost of materials and tools, a builder will already own their tools and can cost the build efficiently. A home owner if doing something like this for the first time might not have all these tools or materials and the cost of doing a one off build would be highly inflated and maybe not worth the hassle unless you plan on doing more D.I.Y projects in the future and being able to reuse your tools.

Here are a few reviews and tips of various tools you may need to buy:

  • Cordless Drills
  • Handsaws
  • Pressure Treated Wood
  • Wood Stain
  • Tool Belts


Decision

Whereas the individual always has an upper hand of creativity in the choice of design in building their own shed, it is required that the individual in question should plan more thoroughly  in doings so. The individual need to have a plan for materials, layout, maintenance, organization and must be aware and be ready for challenges which may arise during the whole process.

Primary Sidebar

Keep up to date with our latest posts

Subscribe to our newsletter for free and be the first to be notified about all our latest content!

Welcome to A2B Crafts

At A2B Crafts we make it our duty to bring you the latest in shabby chic design and Do it yourself furniture. If you’re new to the craft or a long time expert, A2B crafts is perfect for you. With every new post we hope to bring you something new and exciting which gives you the inspiration to try something new with your home
furnishings. If you feel inspired after reading any of our posts or you’ve even tried these tips for yourself, please feel free to let us know through our contact page or our other social channels!

Footer

Stay Connected

  • Facebook
  • Instagram
  • Pinterest
  • Tumblr
  • Twitter
  • YouTube

Contact Information

Tel: Thursday – Saturday 01328 856001

or mobile 07917606039 at other times

Address: Wheelspeed Unit 1, Cattle Market Street, Fakenham, Norfolk, NR21 9AW

Please feel free to contact at anytime, however at present we work part-time so may not get back to you immediately,
but will make contact as soon as possible.

Categories

  • DIY Interior
  • Furniture Upcycle
  • Hobbie Crafts
  • Interior Decor
  • News
  • D.I.Y
  • Garden

Helpful Links

  • Contact Details
  • Conditions of Use
  • Privacy Notice
  • Shipping & Returns

Copyright© 2025 · Cookd Pro Theme by Shay Bocks