• Skip to primary navigation
  • Skip to main content
  • Skip to primary sidebar
  • Skip to footer
  • Home
  • Interior Decor
    • D.I.Y
    • DIY Interior
    • Tips
  • Hobbie Crafts
    • Furniture Upcycle
  • Garden
  • News
  • Write For Us
  • Contact Details

A2B Crafts

DIY Crafts & Upcycling

A2Bcrafts

18th May 2024 Tips

Can You Put Resin On Wood Floors

Resin is a versatile material that can be used for a variety of purposes, including coating wood floors.

We will explore the different types of resin available, such as epoxy, polyurethane, polyester, and acrylic resin.

We will discuss the steps involved in applying resin to wood floors, the benefits it offers, as well as the potential drawbacks and how to maintain resin-coated wood floors.

Join us as we uncover the ins and outs of using resin on wood floors.

What Is Resin?

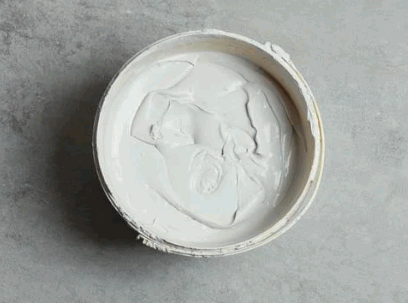
Resin is a viscous substance derived from various plants or synthesized chemically, commonly used as a coating or adhesive. Epoxy resin, for example, is a popular choice due to its durability and chemical resistance.

Another common form of resin is polyester resin, known for its versatility in applications such as mould-making, crafts, and composite materials. Most resins have a chemical structure that includes a polymer matrix, allowing them to harden into a solid form through curing processes. These curing processes can be catalyzed by heat, ultraviolet light, or chemical additives, depending on the specific resin type. Resins are widely used in industries ranging from construction, automotive, and marine, to electronics due to their properties like adhesion, insulation, and water resistance.

What Are The Types Of Resin?

Resins come in various types, including epoxy, polyurethane, polyester, and acrylic. Each type has unique properties and applications in coating, sealing, or adhesive processes.

  1. Epoxy resin is known for its excellent adhesion and chemical resistance, making it ideal for high-performance coatings and electronic encapsulations. It can be brittle if not properly cured.
  2. Polyurethane resin, on the other hand, offers great flexibility and UV resistance, making it suitable for outdoor applications like marine coatings and furniture finishes.
  3. Polyester resin is cost-effective but prone to yellowing and can shrink upon curing, mainly used in fibreglass applications.
  4. Acrylic resin provides clarity, weatherability, and scratch resistance, commonly used in paints, adhesives, and dental materials.

Gain insights: How To Clean A Resin Floor

Epoxy Resin

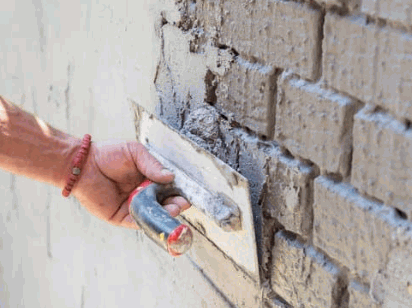
Epoxy resin is a versatile material known for its strong bonding capabilities and durability. It is commonly used in concrete repair and as a primer before applying coatings.

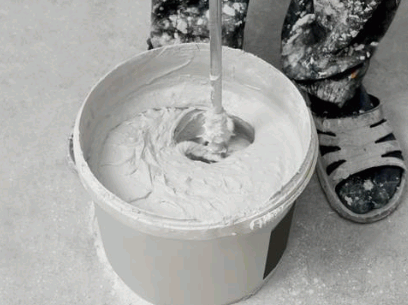
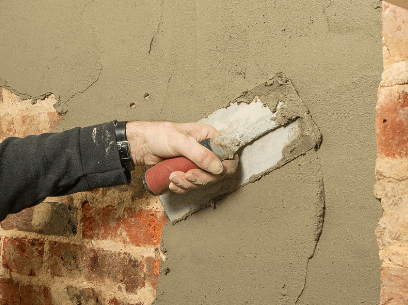
Epoxy resins, composed of resin and hardener components, are designed to create a tough and long-lasting surface when applied to concrete. The mixture of these two components initiates a chemical reaction resulting in a strong bond with the substrate. When using epoxy on concrete surfaces, proper surface preparation is crucial to ensure adhesion.

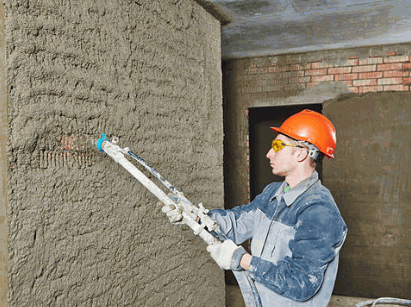
Application methods for epoxy resin can vary, including brush, roller, or spray application. The versatility of epoxy allows it to be used for various purposes, such as coating floors, sealing surfaces, or repairing cracks.

The curing process of epoxy involves a specific timeframe for the material to harden and develop its full strength. Epoxy primers can enhance the bonding properties and adhesion of subsequent coatings on concrete surfaces.

Polyurethane Resin

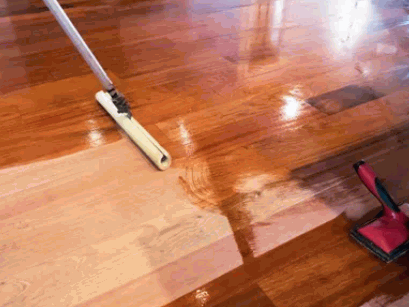
Polyurethane resin is a popular choice for coating wooden floors due to its flexibility and moisture resistance. It is often applied as a protective layer over wooden surfaces.

Polyurethane resin provides a durable shield against wear and tear, making it ideal for high-traffic areas in homes or commercial spaces. Its moisture-blocking properties help prevent warping or damage from spills or humidity, enhancing the longevity of the wooden floor. The application process involves meticulous sanding of the wooden surface, followed by multiple coats of the resin to ensure a smooth and glossy finish that not only protects the wood but also accentuates its natural beauty.

Polyester Resin

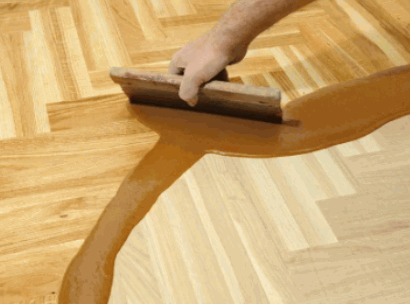
Polyester resin is commonly used for sealing and protecting wooden surfaces. Its application creates a durable finish that enhances the longevity of the wood.

  1. When applying polyester resin on wooden surfaces, it is crucial to ensure a clean and dry surface to promote adhesion.
  2. Begin by mixing the resin with a hardener according to the manufacturer’s instructions.
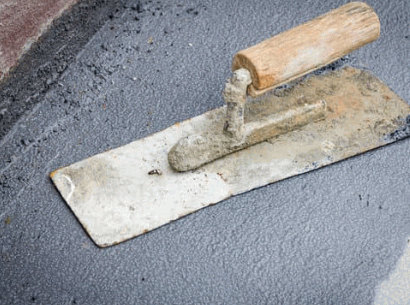
  3. Using a brush or roller, evenly spread the resin over the wood, working in small sections to prevent drips and uneven coverage.

The sealing properties of polyester resin are exceptional, forming a protective barrier that shields the wood from moisture, UV rays, and abrasions. This helps prevent warping, rotting, and discoloration, prolonging the life of the wood.

One of the key benefits of using polyester resin on wooden surfaces is its durability. Once cured, the resin forms a strong, hard finish that is resistant to scratches and impacts, providing long-lasting protection for the wood.

Acrylic Resin

Acrylic resin is known for its durability and protective qualities, making it an ideal choice for sealing and enhancing the appearance of various surfaces.

One of the significant benefits of acrylic resin is its exceptional durability, ensuring that the surface it covers remains protected for an extended period. This durability translates to long-lasting results, reducing the need for frequent maintenance or replacements. Acrylic resin offers a high-quality finish that enhances the aesthetic appeal of surfaces, providing a sleek and professional look. Users should be aware of potential risks associated with improper application, such as uneven finishes or reduced adhesion, which can impact the overall effectiveness of the resin.

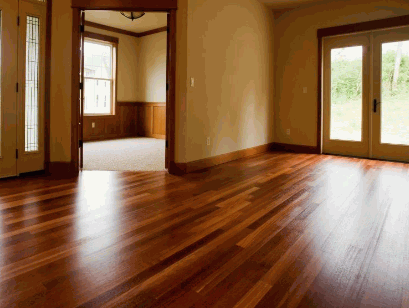
Yes, you can put resin on wood floors. Resin can be used to coat and protect wooden floors, providing a durable and glossy finish. It can help enhance the appearance of the wood and make the floors more resistant to scratches and damage. However, proper preparation and application are key to ensuring a successful outcome when using resin on wood floors.

Applying resin on wooden floors is a practical option to enhance their durability and appearance. The process involves proper preparation, resin selection, and meticulous application techniques.

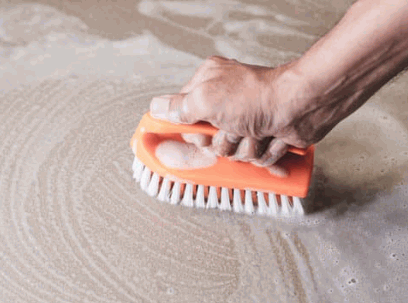
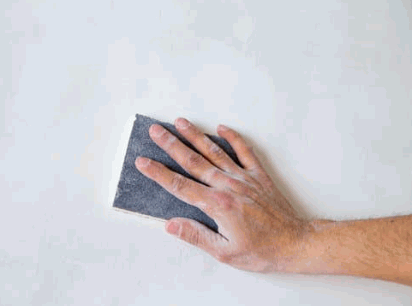
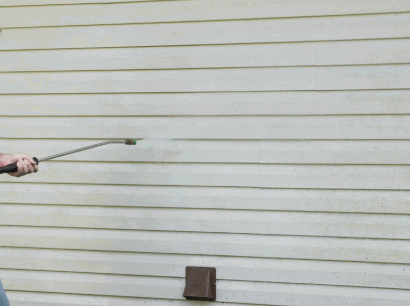
  1. One of the crucial steps in the installation process is the thorough cleaning and sanding of the wooden surface to ensure proper adhesion of the resin. Any imperfections or existing finishes need to be addressed before starting the resin application.
  2. When selecting the resin, it is important to consider factors such as the type of wood, the level of traffic the floor will endure, and the desired finish. Epoxy resin is commonly used due to its durability and resistance to moisture and chemicals, making it ideal for wooden floors.
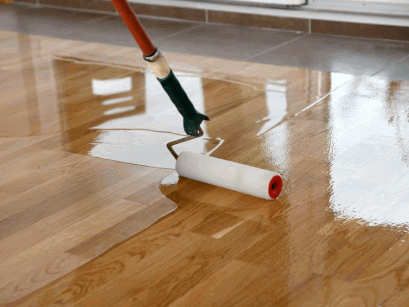
  3. Application methods vary, with options like pouring, brushing, or rolling the resin onto the surface. It is essential to follow the manufacturer’s guidelines for mixing ratios and curing times to achieve a seamless and long-lasting finish.

Preparation Of The Wood Floor

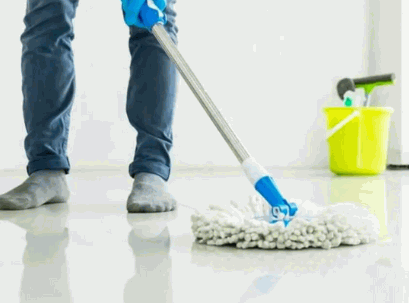
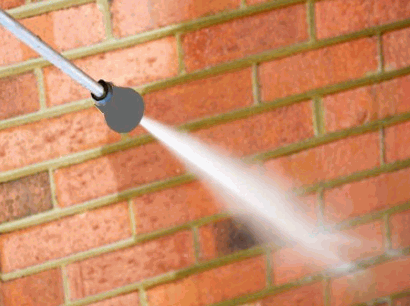
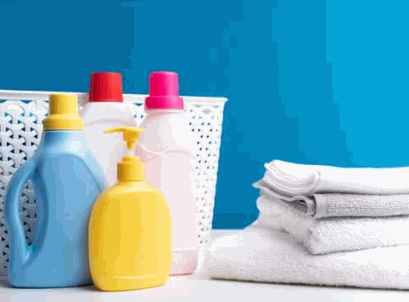
To start the process, begin by sweeping and hoovering the wooden floor to remove all dust and debris. Next, use a wood-friendly cleaner to remove any stubborn stains or residues. Once the surface is clean, allow it to fully dry before proceeding.

It is crucial to check the moisture content of the wood using a moisture meter. If the moisture levels are too high, a dehumidifier may be necessary to reduce the moisture content. Proper moisture control is essential to prevent issues like warping or adhesion problems with the resin.

Ensure that there is proper air circulation in the room by opening windows or using fans. This will help the resin cure evenly and prevent any potential air bubbles. By following these steps diligently, you can create a suitable base for the resin application on the wooden floor.

Choosing The Right Resin

Selecting the appropriate resin for wooden floors is crucial to ensure a durable and long-lasting finish. Consulting with resin specialists can help in determining the best sealing options.

When considering resin for wooden floors, the type of epoxy used plays a significant role in the overall quality and durability of the finish. Epoxy options are known for their strength and resistance to wear and tear, making them popular choices for high-traffic areas. These specialists have the expertise to assess the specific needs of the wooden floors and recommend the most suitable resin for the job. An effective sealing process is vital to protect the wooden surface from moisture, scratches, and other damages, ensuring longevity and maintaining the aesthetic appeal of the floors.

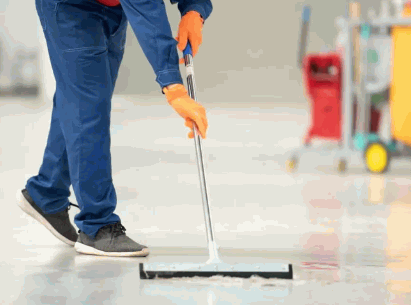
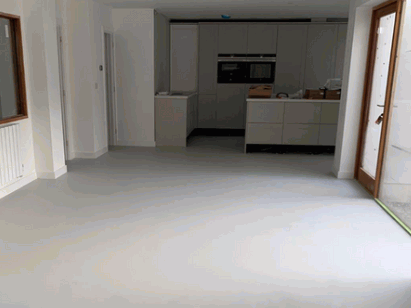
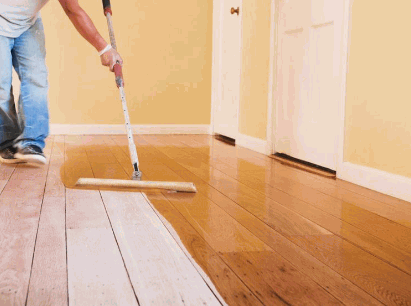
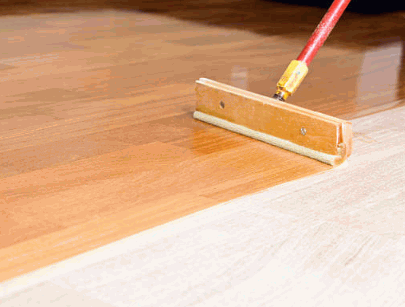
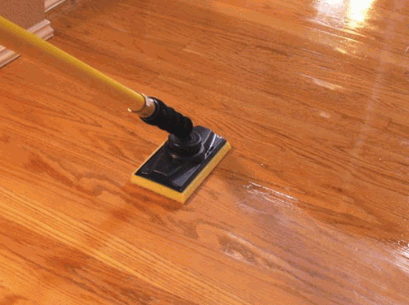
Applying Resin On Wood Floors

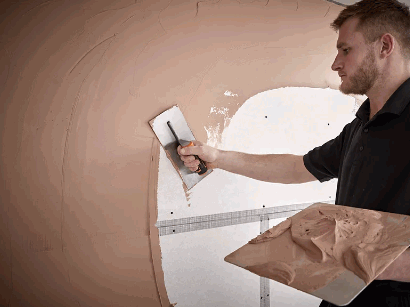
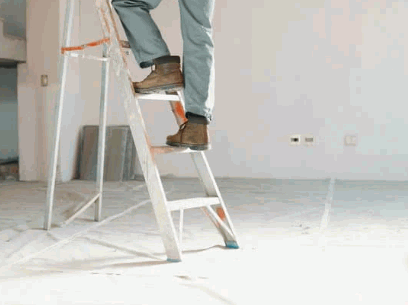
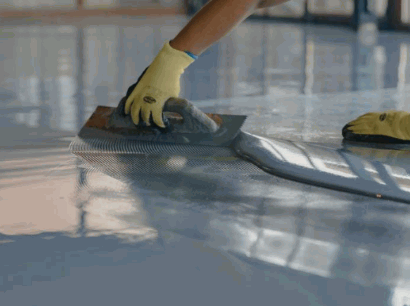
The process of applying resin on wood floors requires precision and expertise to achieve a smooth and durable coating. Hiring professional installers can ensure a high-quality finish.

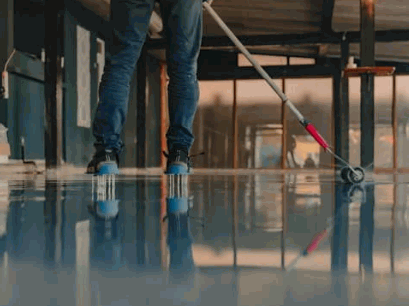
Professional installation begins with thorough preparation of the wood surface to ensure adhesion of the resin coating. This involves sanding the floor to remove any imperfections and applying a primer to create a strong bond.

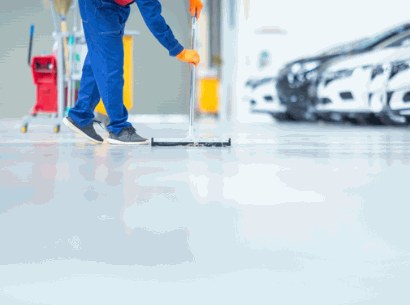
Once the surface is ready, the resin is mixed according to manufacturer specifications and applied evenly to the floor. Professionals use techniques like pouring, spreading, and leveling to achieve a seamless finish.

A professionally applied resin coating not only enhances the aesthetic appeal of the wood floors but also provides protection against wear, scratches, and moisture damage. The durability of the finish ensures long-lasting beauty and functionality for the space.

What Are The Benefits Of Using Resin On Wood Floors?

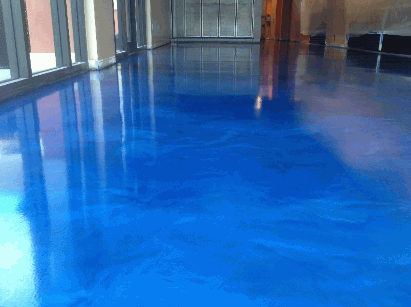
Using resin on wooden floors offers various benefits, including enhanced durability, a smooth finish, effective sealing, and protection against wear and tear.

Applying resin to wooden floors not only increases their longevity but also provides a sleek and polished appearance. This protective layer acts as a shield, preventing scratches, stains, and moisture damage, thereby maintaining the beauty of the wood for years to come. The durability of the resin ensures that the floor remains resilient to daily use, making it ideal for high-traffic areas.
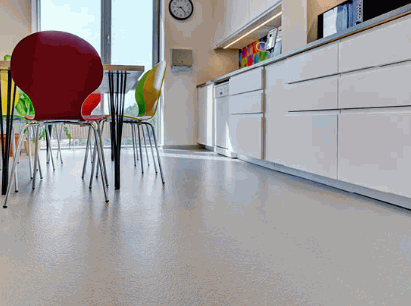
Durability

One of the key benefits of using resin on wood floors is the enhanced durability it provides. The resin coating acts as a protective layer that increases the longevity of the wood.

Resin-coated wood floors are particularly resistant to scratches, stains, and moisture damage, making them a perfect choice for high-traffic areas. This durable resin layer seals the wood underneath, safeguarding it from everyday wear and tear. The process of applying resin on wood floors enhances their resistance to UV rays, preventing discolouration and fading over time.

Water And Stain Resistance

Resin-coated wood floors exhibit excellent water and stain resistance due to the sealing properties of the resin. This protection helps maintain the pristine appearance of the wood.

The resin coating acts as a barrier, preventing moisture from seeping into the wood and causing warping or mold growth.

Regarding chemical spills, the resin creates a shield that repels them, safeguarding the surface from permanent damage.

Thanks to these protective qualities, resin coatings on wood floors are highly sought after for areas prone to spills or high humidity levels.
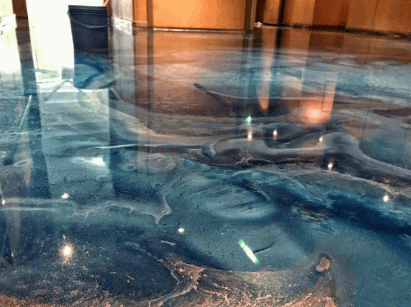
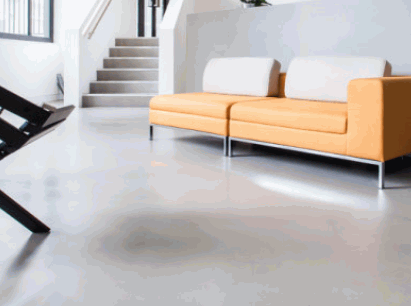
Enhanced Appearance

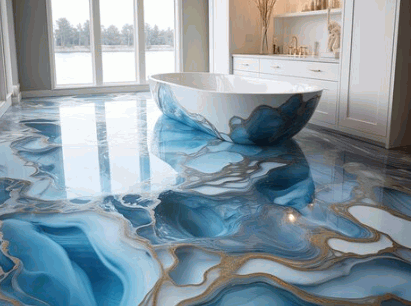
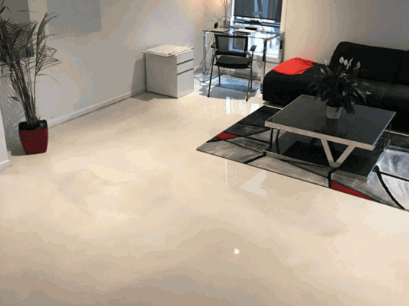
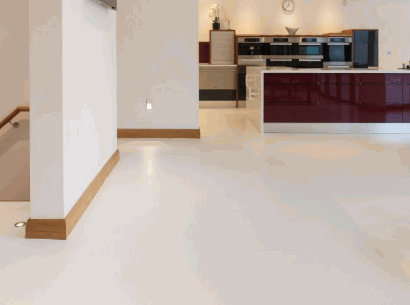
Applying resin on wood floors enhances their appearance by providing a smooth and glossy finish. The coating process can transform the surface, giving it a fresh and modern look.

When resin is applied to wood floors, it not only adds a protective layer but also brings out the natural beauty and grain of the wood, enhancing its overall aesthetic appeal.

This process creates a seamless and durable finish that is not only visually pleasing but also easy to maintain. Resin coatings can revive tired or worn-out surfaces, making them look new and vibrant again. The glossy sheen achieved through this coating process reflects light and adds depth, further elevating the appearance of the surface.

What Are The Drawbacks Of Using Resin On Wood Floors?

Whilst resin coatings offer several benefits, there are some drawbacks to consider when using them on wooden floors. These include potential health hazards, a time-consuming process, and the risk of damage to the wooden surface.

One significant concern with resin coatings on wooden floors is the potential health risks they pose. The chemicals used in resins can emit volatile organic compounds (VOCs) that may lead to respiratory issues and irritation, particularly during the application process.

Applying resin to wooden floors requires meticulous preparation and multiple layers, making it a time-intensive endeavour that may not suit everyone’s schedule.

If the resin application is not done correctly, there is a risk of damaging the wooden surface underneath, requiring costly repairs or even replacement.

Time-Consuming Process

One drawback of using resin on wood floors is the time-consuming application process. Proper installation and curing of the resin coating require patience and precision.

During the installation process, meticulous attention to detail is vital to ensure the resin adheres properly to the wood surface. This entails thorough cleaning, sanding, and priming the floor before applying the resin. Each step must be executed meticulously to prevent imperfections and ensure a flawless finish. Risks associated with rushing through the installation include poor adhesion to the wood, uneven surfaces, and premature wear and tear due to inadequate curing.

Potential Health Hazards

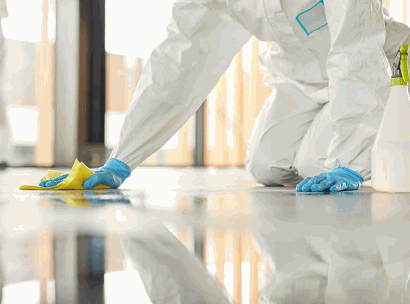
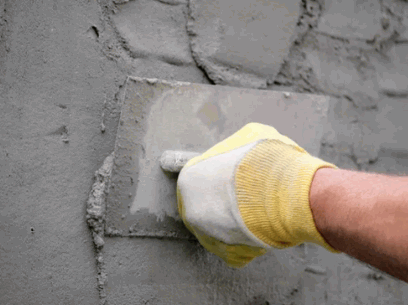
Another drawback of resin coatings on wood floors is the potential health hazards posed by the chemicals used. It is essential to take safety precautions, such as wearing Nitrile gloves and ensuring proper ventilation during application.

Chemicals present in resin coatings can emit fumes that, if inhaled, may lead to respiratory irritation, headaches, and dizziness. Using protective gear like Nitrile gloves not only safeguards the skin from direct contact with the chemicals but also minimises the risk of skin irritation or sensitisation.

Properly ventilating the area is crucial as it helps in dispersing the fumes, reducing the concentration of harmful substances in the air. This can significantly lower the chances of experiencing adverse health effects due to chemical exposure.

Risk Of Damage To Wood Floors

Improper application or maintenance of resin coatings can pose a risk of damage to wooden floors, especially in cases where moisture seepage or surface abrasions occur.

Exposure to moisture can lead to swelling and warping of the wood, causing irreparable damage over time. Surface abrasions from heavy furniture or improper cleaning techniques can wear down the coating, leaving the wood vulnerable to further harm.

Incorrect application techniques, such as not allowing sufficient drying time between coats or applying too thick a layer, can result in an uneven finish or poor adhesion, increasing the likelihood of peeling or flaking.

How To Maintain Resin Coated Wood Floors?

Maintaining resin-coated wooden floors involves regular cleaning to remove dirt and debris, periodic sealing to protect the surface, and prompt attention to any signs of wear or damage.

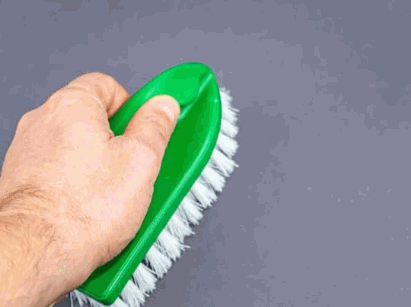
Regarding cleaning resin-coated wooden floors, using a gentle cleanser diluted in warm water can help maintain the shine without causing damage. Avoid harsh chemicals or abrasive scrubbers that may scratch the surface.

Sealing the floor every few years is crucial to ensure that the resin coating remains intact and protected from moisture and daily wear and tear. Make sure to follow the manufacturer’s recommendations for the best sealant for your specific type of flooring.

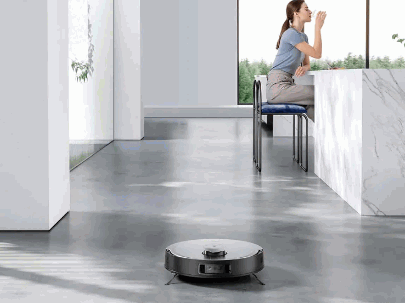
To protect the floor from scratches, place felt pads under furniture legs and avoid dragging heavy items across the surface. Regularly sweeping or vacuuming with a soft brush attachment can prevent dirt build-up and prolong the floor’s lifespan.

18th May 2024 Tips

How To Clean A Resin Floor

Resin floors are a popular choice for many homes and businesses due to their durability and sleek appearance.

Proper cleaning and maintenance are essential to keep them looking their best.

In this article, we will discuss the importance of cleaning a resin floor, the tools and materials needed for the job, how to prepare the floor for cleaning, step-by-step instructions on cleaning the floor, and tips on maintaining its cleanliness.

If you want to keep your resin floor looking as good as new, keep reading!

What Is A Resin Floor?

A resin floor is a type of flooring made from a combination of a clear resin and a variety of materials. It is known for its durability, seamless finish, and resistance to chemicals and wear.

Resin floors are composed of multiple layers, including a primer, the resin itself, and a topcoat, creating a strong and long-lasting surface. The flexibility of resin allows for customisation in terms of colours, patterns, and textures, making it a versatile choice for various spaces.

Resin floors are commonly used in industrial settings, commercial spaces, and even residential areas due to their ability to withstand heavy machinery, high traffic, and harsh chemicals. Their ease of maintenance and exceptional hygiene make them popular in healthcare facilities, laboratories, and food processing plants.

Explore in-depth: How Much Does It Cost For A Resin Floor

Why Is It Important To Clean A Resin Floor?

Cleaning a resin floor is essential to maintain its integrity, prolong its lifespan, and provide a safe and hygienic environment for employees and visitors. Regular cleaning helps prevent dirt buildup, and water damage, and ensures the floor’s aesthetic appeal.

Proper cleaning and maintenance play a vital role in preserving the quality of a resin floor. Neglecting regular care can lead to an accumulation of grime, which not only impacts the floor’s appearance but also poses safety risks such as slip hazards. Without proper maintenance, the resin floor may deteriorate more quickly, resulting in costly repairs or even replacement. Creating a consistent cleaning schedule, including sweeping, mopping, and periodic deep cleaning, is crucial for sustaining the durability and attractiveness of the floor.

What Are The Tools And Materials Needed To Clean A Resin Floor?

To effectively clean a resin floor, you will need specific tools and materials such as a cleaning solution, warm water, a scrubbing brush, a vacuum for debris removal, and appropriate solutions for handling chemical spills on the surface.

Regarding selecting the right cleaning solution for resin floors, it is crucial to opt for a product that is gentle yet effective to avoid damaging the surface. Warm water helps to break down dirt and grime without causing any harm to the resin material.

Proper maintenance of resin floors involves regular scrubbing using a soft-bristled brush to prevent scratches and maintain the floor’s glossy finish. A vacuum cleaner equipped with a suitable attachment is ideal for removing dust and debris that accumulate on the surface over time.

Broom Or Vacuum Cleaner

A broom or hoover is essential for removing loose dirt, debris, and dust from the resin floor surface. Vacuum cleaners equipped with HEPA filters are ideal for efficient spot cleaning and maintaining a clean environment.

When using a broom for initial debris removal on a resin floor, opt for one with soft bristles to avoid scratching the surface. Start by sweeping in straight lines, gradually working towards the edges to collect all particles.

For a more thorough clean, utilise the hoover on a low setting to suck up fine dust particles that the broom may miss. Ensure to empty the hoover bag or cylinder regularly to prevent debris from being recirculated back onto the floor.

Mop Or Microfiber Cloth

Using a mop or microfibre cloth with water is effective for wet mopping resin floors to remove stains and spills. Dry mopping with a microfibre cloth helps maintain the floor’s cleanliness and shine.

When wet mopping resin floors, it’s essential to prepare the cleaning solution carefully. Diluting a neutral pH cleaner in water is recommended to avoid any damage to the resin surface. Start by thoroughly sweeping or vacuuming the floor to remove any loose debris. Then, dip the mop or microfibre cloth into the cleaning solution and wring it out until it’s damp but not dripping. Gently mop the floor in small sections, ensuring even coverage and paying extra attention to high-traffic areas or spots that are heavily soiled.

Neutral PH Cleaner

A neutral pH cleaner mixed with warm water is recommended for deep cleaning resin floors without causing damage to the surface. Avoid strong detergents that can degrade the resin over time.

Using a neutral pH cleaner is crucial as it helps to maintain the integrity and longevity of resin floors. The correct dilution ratio is usually one part cleaner to four parts warm water. This ensures efficient cleaning while still being gentle on the resin surface. When applying the solution, use a soft mop or sponge to avoid scratching the floor.

Water

Warm water is a versatile and effective cleaning agent for resin floors, helping to dissolve dirt and grime while being gentle on the surface. It is essential for diluting cleaning solutions and rinsing the floor after cleaning.

When using warm water for cleaning, it’s crucial to note that the temperature plays a significant role in the process.

Hot water can aid in breaking down stubborn stains and residues, whereas cool water might not be as effective. The warmth of the water can also help to loosen dirt particles and make them easier to remove. The use of warm water promotes faster drying times, preventing any potential water damage on the resin floor.

Scrub Brush Or Soft Bristled Broom

A scrubbing brush or soft-bristled brush is useful for scrubbing tough stains on resin floors.

When dealing with larger areas or industrial settings, a more powerful cleaning solution is needed. This is where a mechanical scrubber comes into play, offering a quicker and more thorough cleaning process. The mechanical scrubber’s rotating brushes can effectively tackle stubborn stains and dirt embedded in the resin floor surface.

Choosing the right cleaning solution is crucial to ensure the best results. For light stains, a mild detergent mixed with warm water can be sufficient. For tougher stains, such as oil or grease, using a degreaser or specialised resin floor cleaner is recommended.

How To Prepare The Resin Floor For Cleaning?

Before cleaning a resin floor, it is essential to prepare the surface by removing any loose debris through sweeping or vacuuming. Establishing a regular cleaning schedule helps maintain the floor’s cleanliness and prolong its lifespan.

Once the loose debris has been cleared, proceed to a more thorough cleaning by mixing a mild detergent with warm water. Use a soft-bristle brush or mop to scrub the floor gently, ensuring all areas are covered.

Rinse the floor thoroughly with clean water and allow it to dry completely before walking on it to prevent streaking or water marks from forming.

Remember to use gentle cleaning agents and avoid harsh chemicals that can damage the resin surface. A combination of routine cleaning and periodic deep cleaning will keep your resin floor looking pristine for years to come.

Remove Any Loose Debris

Before cleaning, ensure to remove any dust and debris from the resin floor surface to prevent scratches and maintain a smooth finish. Use a broom or vacuum cleaner for effective debris removal.

Clearing away loose debris from the resin floor surface is crucial before engaging in the cleaning process. Failure to do so can result in scratches on the floor, compromising its overall appearance and longevity. Dust and debris can act as abrasives, causing damage to the smooth finish of the resin floor over time. It is recommended to diligently sweep or vacuum the floor to eliminate any loose particles that can hinder the cleaning efficiency and effectiveness.

Sweep Or Vacuum The Floor

Sweeping or hoovering the resin floor is crucial to eliminate dirt, dust, and debris that can accumulate and damage the surface over time. Regular sweeping or vacuuming helps maintain a clean and well-preserved floor.

Ensuring that the floor is free from particles not only enhances its aesthetic appeal but also prevents scratches and wear caused by gritty materials. By incorporating a routine cleaning schedule, you can prolong the lifespan of your resin flooring and retain its glossy finish. Avoiding the buildup of debris reduces the risk of stains and makes subsequent cleaning tasks more efficient. The use of a soft-bristled broom or a vacuum with a soft brush attachment is recommended to protect the surface from potential damage during the cleaning process.

Dilute The Cleaner With Water

When preparing the cleaning solution for resin floors, ensure to dilute the cleaner with warm water as per the manufacturer’s instructions.

Following the recommended dilution ratios is crucial in maintaining the integrity of the resin flooring material and ensuring a thorough cleaning process. Deviating from these guidelines can lead to ineffective cleaning, streaking, or even potential damage to the floors.

Manufacturers typically provide specific instructions on the appropriate water-to-cleaner ratio to achieve optimal results. This tailored advice takes into account the composition of the resin and the cleaning agent to prevent any adverse effects on the surface.

How To Clean A Resin Floor?

Cleaning a resin floor involves starting from the furthest corner and using appropriate tools like a mop, microfibre cloth, or scrub brush to remove dirt and stains. Rinsing the floor with warm water ensures a thorough clean surface.

Once you have gathered the necessary tools, remember to sweep or vacuum the floor first to remove loose debris. Then, focus on each area individually, applying a suitable cleaning solution to lift tough stains.

For spot cleaning, gently scrub the affected area with a soft-bristle brush, moving in circular motions to loosen the dirt. Be mindful of chemical reactions and always follow manufacturer guidelines for cleaning products.

After scrubbing stubborn stains, rinse the area with clean water several times to ensure all residue is removed. It’s crucial to prevent slippery surfaces and create a safe environment for employees.

Start From The Farthest Corner

When cleaning a resin floor, it is advisable to start from the furthest corner and move towards the exit to avoid treading on the cleaned areas. Using warm water for cleaning ensures effective removal of dirt and contaminants.

It is essential to prioritise employee safety during the cleaning process. Ensure that appropriate safety equipment such as gloves and goggles are worn to protect the skin and eyes from any potential contact with cleaning agents or residues. Regular training on safe cleaning practices should be given to employees handling the cleaning tasks to minimise the risk of accidents or injuries.

Use A Mop Or Microfiber Cloth To Clean The Floor

Utilise a mop or microfibre cloth with the appropriate cleaning solution to clean the resin floor, focusing on removing dirt and grime effectively. Warm water can help loosen tough stains for better cleaning results.

When cleaning resin floors, using warm water in conjunction with a mop or microfibre cloth can aid in achieving a deeper clean. The heat from the warm water helps to soften stubborn dirt and grime, making them easier to lift off the surface.

Microfibre cloths are particularly effective due to their ability to trap and hold onto microscopic particles, preventing them from being spread around during the cleaning process. This makes them an excellent choice for maintaining the cleanliness of resin flooring surfaces.

Scrub Stubborn Stains With A Scrub Brush Or Soft Bristled Broom

For stubborn stains on resin floors, a scrubbing brush or soft-bristled broom can be used along with warm water and a suitable cleaning solution. Gently scrub the affected areas to lift the stains without damaging the floor.

To effectively tackle tough stains, consider using a mixture of mild soap and warm water as a cleaning solution. Avoid strong chemicals that might harm the resin floor’s surface.

  • Start by moistening the affected area with a cleaning solution to loosen the stain.
  • Next, gently scrub the stain in a circular motion using the soft-bristled brush or broom until it begins to lift.
  • Rinse the area thoroughly with fresh water to remove any residue, ensuring a spotless finish.

Rinse The Floor With Clean Water

After cleaning the resin floor, rinse it thoroughly with clean water to remove any residue or cleaning solution. Using warm water for rinsing helps ensure a residue-free and sparkling finish.

Rinsing with warm water not only aids in removing any leftover dirt or chemical residue but also helps to maintain the integrity and appearance of the resin floor. The warm water can effectively dissolve and wash away any remaining particles, leaving the surface clean and sanitized.

How To Maintain The Cleanliness Of A Resin Floor?

To preserve the cleanliness of a resin floor, regular sweeping, mopping, and spot cleaning are vital. Focus on high-traffic areas, utilise wet and dry mopping techniques, and implement a cleaning schedule to ensure consistent maintenance.

Regarding sweeping, it’s important to use soft-bristled brooms to avoid scratching the surface of the resin floor. For mopping, consider using a mild detergent solution and warm water, making sure not to oversaturate the floor which could damage the resin finish. For spot cleaning, promptly attend to spills and stains using gentle cleaning agents suitable for resin surfaces.

In high-traffic zones, consider placing protective mats or rugs to minimise dirt and debris tracked onto the floor. By incorporating targeted cleaning methods in these areas, you can prevent the buildup of grime and maintain the aesthetic appeal of the resin floor.

Sweep Or Vacuum Regularly

Regularly sweeping or vacuuming resin floors helps prevent dirt accumulation and maintains a clean environment for employees. Ensuring consistent cleaning routines reduces the risk of slips, falls, and surface damage.

A clean floor contributes to a more professional and aesthetically pleasing workplace, which can positively impact employee morale and overall satisfaction. Employee safety should always be a top priority, and a well-maintained resin floor plays a crucial role in creating a safe working environment for everyone. By removing debris and contaminants regularly, the resin floor’s longevity and durability are preserved, saving costs on potential repairs or replacements in the long run. It’s important to establish a cleaning schedule that aligns with the specific needs of your workplace, ensuring that the floors remain in optimal condition for years to come.

Mop Or Wipe Up Spills Immediately

Promptly mopping or wiping up spills on resin floors is crucial to prevent stains, damage, and slip hazards. Addressing spills immediately minimizes the risk of accidents and maintains the floor’s pristine condition.

Spills left unattended not only pose a threat to the appearance and durability of the resin floor but can also create safety risks for anyone walking on the surface. Immediate spill clean-up is particularly important in areas with heavy foot traffic or where chemicals are frequently used, as prolonged exposure can lead to permanent discoloration or even deterioration of the floor. By having a proactive approach to spill management, you can ensure that your resin floor retains its quality and remains a safe environment for all occupants.

Use Mats Or Rugs In High Traffic Areas

Placing mats or rugs in high-traffic areas of resin floors helps protect the surface from excessive wear and tear, reducing the frequency of cleaning and maintenance while preserving the floor’s appearance.

These protective coverings act as a barrier, intercepting dirt, moisture, and debris that would otherwise directly impact the resin floor. By trapping these particles, mats or rugs prevent scratches, scuffs, and stains from forming on the flooring surface, thus extending its life span.

The use of mats or rugs can enhance safety by providing a non-slip surface in areas prone to moisture or spills, minimising the risk of accidents. Their versatility in design also allows for customisation and style incorporation, adding aesthetic value to the overall space while serving a practical purpose.

Schedule Professional Cleaning And Maintenance

Regularly scheduled professional cleaning and maintenance services for resin floors ensure thorough care, longevity, and optimal performance. Professional cleaners equipped with scrubbing brushes and suitable solutions can tackle deep cleaning effectively.

These expert cleaners have the knowledge and experience to address specific challenges that arise with resin floors, such as removing stubborn stains and maintaining the integrity of the flooring material. They can also apply specialised treatments to protect the floor from wear and tear, prolonging its lifespan. Plus improving the aesthetics of the floor, professional cleaning services ensure a hygienic environment by eliminating bacteria and contaminants that can accumulate over time. Investing in regular professional maintenance not only keeps the floor looking pristine but also contributes to a healthier and safer living or working space.

18th May 2024 Tips

How Much Does It Cost For A Resin Floor

Resin floors have become increasingly popular in recent years due to their durability, easy maintenance, and versatility.

We will explore the different types of resin floors available, such as epoxy, polyurethane, acrylic, and methyl methacrylate (MMA).

The benefits of resin floors, including their chemical resistance, will be discussed.

We will delve into the factors that affect the cost of resin floor installation and provide tips on how to save money on this type of flooring.

Whether you are considering a resin floor for your home or business, this article will provide you with valuable information to help you make an informed decision.

What Is A Resin Floor?

Resin flooring is a popular choice for homeowners and commercial spaces due to its durability, design versatility, and easy maintenance. These floors are created using various types of resin materials, offering a seamless and attractive finish to any space.

One of the key benefits of resin flooring is its exceptional durability, making it ideal for high-traffic areas that require a long-lasting flooring solution.

The design versatility of resin flooring allows for endless customisation options, from bold colours to intricate designs, enabling individuals to create unique spaces that reflect their style.

Along with its aesthetic appeal, resin flooring is also highly practical, as it is easy to clean and maintain, requiring minimal effort to keep it looking as good as new.

What Are The Different Types Of Resin Floors?

Resin floors come in various types, such as Epoxy, Polyurethane, Acrylic, and Methyl Methacrylate (MMA), each offering distinct properties and designs. Suppliers like Isabel Dennis and Sphere8 provide different resin flooring systems tailored to specific needs and preferences.

Epoxy resin floors are known for their high durability and chemical resistance, making them ideal for industrial settings like warehouses and factories. They are available in a wide range of colours and finishes, allowing for customisable designs to suit various aesthetics.

Polyurethane resin floors, on the other hand, offer excellent abrasion resistance and are often used in commercial spaces due to their easy maintenance and seamless finish. These floors can withstand heavy foot traffic and are available in matte or gloss options.

Epoxy Resin Floors

Epoxy resin floors are known for their high durability and strength, making them ideal for high-traffic areas. The EconoSphere system by Natasha offers a cost-effective epoxy flooring solution with multiple layers for added protection and longevity.

These floors are not only tough but also highly resistant to chemicals, stains, and impacts, making them perfect for industrial and commercial spaces. The installation process involves meticulous surface preparation to ensure a strong bond between the existing floor and the epoxy resin layers. The system components typically include epoxy resin, hardener, and aggregate, which are mixed on-site and applied in an even coat.

Various types of epoxy resin floors are available, ranging from self-levelling epoxy to decorative metallic epoxy, catering to different aesthetic preferences and functional requirements. The versatility of epoxy flooring allows for customisation in terms of colours, patterns, and finishes, ensuring that every project is unique.

Learn more: Can You Put Resin On Wood Floors

Polyurethane Resin Floors

Polyurethane resin floors offer excellent durability and chemical resistance, making them suitable for a wide range of applications. Homeowners in Kent often choose Polyurethane floors for their easy maintenance and long-term performance.

One of the key benefits of Polyurethane resin flooring is its seamless surface, which not only enhances the aesthetics of a space but also prevents the accumulation of dirt and bacteria, making it easy to clean and maintain.

The durability of Polyurethane floors is ideal for high-traffic areas like commercial kitchens and workshops, where heavy machinery and constant foot traffic can take a toll on traditional flooring materials.

In addition, the chemical resistance of Polyurethane resin floors makes them perfect for environments that require resistance to oils, grease, and other harsh chemicals, such as industrial facilities and laboratories.

Acrylic Resin Floors

Acrylic resin floors offer a wide range of design possibilities with customisable colours, patterns, and effects. The brecciaSphere system from Sphere8 provides innovative Acrylic resin solutions for unique and stylish flooring designs.

The flexibility of Acrylic resin floors allows homeowners and designers to create visually stunning spaces that reflect their individual styles and preferences. From sleek and modern monochromatic designs to bold and vibrant patterns, Acrylic resin flooring offers endless aesthetic options to suit any interior décor.

What Are The Benefits Of Resin Floors?

Resin floors offer numerous benefits, including exceptional durability, easy maintenance, design versatility, and chemical resistance. These features make them a popular choice for both residential and commercial spaces.

One of the key advantages of resin flooring is its incredible durability it can withstand heavy foot traffic and daily wear and tear without losing its appeal. This durability not only ensures a long-lasting investment but also reduces the need for frequent repairs or replacements, saving time and money in the long run.

Durability

One of the key benefits of resin flooring is its exceptional durability, ensuring longevity and wear resistance even in high-traffic areas. The use of quality materials like Polyurethane and Epoxy contributes to the long-lasting performance of resin floors.

Resin floors are known for their ability to withstand heavy foot traffic and frequent use without showing signs of wear and tear. This durability makes them ideal for commercial spaces, industrial facilities, and even residential areas prone to high activity. The application of Polyurethane and Epoxy in resin flooring not only provides a protective layer but also enhances its overall strength, making it highly resistant to scratches, stains, and chemical damage.

Easy Maintenance

Resin floors are known for their easy maintenance requirements, requiring simple cleaning routines to keep them looking fresh and new. Regular sweeping and occasional mopping are usually sufficient to maintain the appearance of resin floors.

One of the key advantages of resin flooring is its ability to resist stains and water damage. This makes cleaning spills a breeze, as they can simply be wiped away with a damp cloth. The smooth surface of resin floors makes them easy to sweep, preventing the build-up of dirt and debris.

For deeper cleaning, a gentle pH-neutral cleaner can be used with warm water. Avoid harsh chemicals or abrasive cleaners, as they can damage the resin finish. By following these simple maintenance practices, resin floors can retain their lustre and durability for years to come.

Versatility

Resin floors offer great versatility in design, allowing for customised colours, patterns, and effects to suit any interior style. Homeowners can choose from a wide range of design options to create unique and personalised flooring solutions.

The beauty of resin flooring lies in its ability to mimic various materials like marble, granite, or even metallic surfaces, offering a sophisticated aesthetic appeal. With seamless application, these floors provide a sleek and modern look that enhances any space. Whether you prefer a minimalist Scandinavian design or a bold industrial style, resin floors can be tailored to complement your chosen interior theme perfectly. The durability and easy maintenance of resin floors make them a practical and stylish choice for any home.

Chemical Resistance

Resin floors exhibit excellent chemical resistance, making them ideal for spaces where exposure to various chemicals is a concern.

The properties of resin materials like Polyurethane and PMMA contribute significantly to the resistance against chemical damage.

Polyurethane, a popular choice for resin flooring, forms a durable protective layer that shields the floor against harsh chemicals.

PMMA, on the other hand, boasts exceptional resistance to acids, alkalis, and solvents, ensuring the longevity and durability of the resin floors in industrial settings.

How Much Does A Resin Floor Cost?

The cost of a resin floor can vary based on several factors, including the type of resin used, the dimensions of the area, and any additional design features like metallic effects. Homeowners can request quotes from suppliers like Natasha and Sphere8 to get an accurate estimate of the total cost.

When considering the pricing of resin flooring, the resin type plays a crucial role in determining the overall costs. Epoxy resin, polyurethane resin, and polyaspartic resin are common options with varying price points.

  • The dimensions of the space to be covered also impact pricing, as larger areas require more material and labour.
  • Special design elements, such as intricate patterns or metallic finishes, can add a premium cost to the project.

Suppliers like Natasha and Sphere8 have expertise in providing tailored quotes based on these specific factors, ensuring homeowners have a clear understanding of the expenses involved.

Factors That Affect The Cost

Several factors can impact the cost of resin flooring, including the location of the installation, the amount of preparatory work required, and any cost reduction strategies employed. Proper planning and budgeting are essential to manage costs effectively.

Location plays a crucial role in determining the overall cost of resin flooring, as prices can vary based on geographical factors and accessibility to materials.

The extent of prep work needed, such as surface preparation and repairs, can significantly influence the total expenses involved.

Cost reduction techniques, like bulk purchasing or choosing less expensive materials, can help in cutting down the project costs without compromising on quality.

Average Cost Of Different Types Of Resin Floors

The average cost of resin floors varies depending on the type chosen, with Epoxy floors generally being more cost-effective compared to other options. Understanding the cost implications of different resin flooring types can help homeowners make informed decisions about their installations.

For example, when comparing Epoxy floors to Polyurethane floors, Epoxy typically has a lower material cost due to its composition. On the other hand, Polyurethane floors might require additional coatings or finishes, increasing the overall installation expenses.

When assessing the overall cost-effectiveness of resin floors, it’s crucial to consider not only the initial cost but also the long-term maintenance requirements. Epoxy floors, known for their durability and resistance to chemicals and abrasion, often result in lower maintenance costs over time.

How To Save Money On Resin Floor Installation?

Homeowners can explore several strategies to save money on resin floor installation, such as obtaining multiple quotes from different suppliers, opting for cost-effective sealants and coatings, and considering DIY options for simpler installations.

When seeking quotes, it’s important for homeowners to be clear about their requirements and discuss any customisation options that could affect the overall cost. Additionally, cost-effective sealants and coatings play a vital role in ensuring the durability and longevity of the resin floor. By carefully selecting these products, homeowners can ensure that their investment lasts for years to come without the need for frequent repairs or replacements.

Get Multiple Quotes

Obtaining multiple quotes from different resin flooring suppliers is essential to compare pricing, services offered, and overall value. Homeowners should request detailed quotes that include all installation costs and material expenses for an accurate cost assessment.

Comparing quotes allows homeowners to ensure they are getting the best deal for their resin floor installation project. It’s not just about the cost but also about the quality of materials, the reputation of the supplier, and the level of customer service provided.

By gathering several quotes, individuals can assess the market rates, identify any hidden charges, and make an informed decision. Looking for guarantees, warranties, and after-sales support in the quotes can help determine the overall value proposition offered by each supplier.

Taking the time to analyse and compare quotes can lead to a successful resin flooring installation that meets both budget and quality expectations.

Choose A Reputable Contractor

Selecting a reputable contractor for resin floor installation is crucial to ensure quality workmanship and a smooth installation process. Homeowners should research potential contractors, check reviews, and verify credentials before making a hiring decision.

One of the key factors to consider when choosing a contractor for your resin flooring project is their level of experience and expertise in handling such installations. A professional contractor with years of experience will have the skills and knowledge to tackle any challenges that may arise during the installation process. Homeowners should inquire about the types of materials and tools the contractor plans to use, ensuring they are of high quality and suitable for the job.

Consider DIY Options

For cost-conscious homeowners, exploring DIY options for resin floor installations can be a viable solution. DIY kits and materials are available for simpler projects, allowing homeowners to save on installation costs and personalise their flooring design.

  • Start by preparing the existing floor surface by cleaning and levelling it.
  • Follow the manufacturer’s instructions carefully when mixing and applying the resin.
  • Ensure proper ventilation during the installation process for safety.
  • Consider experimenting with different colours or patterns to create a unique flooring design.

When considering a DIY resin floor project, it is crucial to measure the space accurately and plan the layout beforehand. DIY resin flooring installations can be a rewarding and cost-effective way to upgrade your home’s interior.

Opt for Lower Cost Resin Materials

Choosing lower-cost resin materials can help homeowners reduce overall expenses without compromising on quality.

Resin flooring comes in various types such as epoxy, polyurethane, and acrylic, each with its own set of advantages and characteristics. Epoxy resin, known for its durability, is a popular choice for high-traffic areas. On the other hand, polyurethane resin offers excellent UV resistance, making it ideal for outdoor applications. Acrylic resin, while less durable, provides a cost-effective solution for light-duty use.

By weighing the cost versus quality aspects of these materials, homeowners can achieve a balance that meets their specific needs. Lower-cost resin materials can be a cost-efficient option for those looking to achieve a quality finish without overspending.

18th April 2024 Tips

Is Plaster And Stucco The Same

When it comes to home construction and design, plaster and stucco are often used interchangeably. But are they really the same?

In this article, we will explore the key differences between plaster and stucco, from their composition and application process to durability, cost, and aesthetics.

We will also discuss whether plaster can be used as a substitute for stucco, and vice versa. By the end, you will have a better understanding of which material may be better suited for your specific project.

What Is Plaster?

Plaster is a building material used for coating walls and ceilings. It consists of a mixture of materials like gypsum, lime, or cement combined with water to form a paste that hardens over time.

Historically, plaster has been a go-to material for finishing interior surfaces due to its versatility and durability. Dating back to ancient civilizations like the Egyptians and Romans, plaster was used not only for its practical benefits but also for its decorative properties, allowing for intricate designs and reliefs to embellish walls and ceilings.

In modern construction, gypsum plaster has become a popular choice for its ease of application and quick drying time, making it a convenient alternative to traditional lime plaster. Gypsum plaster offers good fire resistance and sound insulation, making it a practical option for contemporary buildings.

When applying plaster to surfaces, skilled craftsmen use specialised tools to create a smooth and even finish. The process involves applying multiple layers of plaster, allowing each coat to dry before adding the next layer to ensure a strong and durable surface.

Both traditional and modern uses of plaster showcase its exceptional properties, from providing a seamless finish to enhancing the aesthetic appeal of interior spaces, making it a timeless and versatile construction material.

Explore in-depth: How To Do Plastering On Brick Wall

What Is Stucco?

Render is a material commonly used for exterior and interior finishes on buildings. It is made by mixing Portland cement, sand, water, and sometimes fibres to create a durable and textured surface.

Origins of render can be traced back to ancient civilizations like the Greeks and Romans, who used it as a versatile building material. Its composition, combining cement and sand, gives it strength and longevity, making it ideal for architectural applications.

In comparison to plaster, render is typically rougher and more durable, suitable for outdoor surfaces due to its weather-resistant properties. Its versatility extends to interior walls as well, providing an aesthetically pleasing finish.

The render comes in different textures like smooth, rough, or patterned finishes, allowing for customised designs. It is valued for its fire resistance, low maintenance, and ability to breathe, preventing moisture build-up and mould growth.

This material’s characteristics make it a popular choice for builders looking for both aesthetic appeal and durability.

What Are The Differences Between Plaster And Stucco?

Plaster and stucco differ in their composition and application processes. Plaster typically contains gypsum or lime and is used for interior walls and ceilings, while stucco is a mix of cement, sand, and water primarily used for exterior surfaces.

Plaster offers a smooth and flat finish ideal for creating a polished indoor look, while stucco provides a more textured and rugged appearance suitable for outdoor environments.

The addition of fibres, such as straw or synthetic materials, reinforces stucco, enhancing its durability against weathering. The role of sand in both materials is crucial, as it acts as a filler to create a workable mix. Water is essential for activating the binding properties of the materials and aiding in the application process.

The distinct compositions of plaster and stucco cater to specific aesthetic and functional requirements, making them versatile choices for different surfaces and applications.

Composition

The composition of plaster and stucco sets them apart. Plaster commonly contains gypsum or lime, providing a smooth finish for interior walls and ceilings. Stucco, on the other hand, is composed of Portland cement mixed with sand and water, ideal for durable exterior surfaces.

These distinct compositions result in unique properties and applications for plaster and stucco. Regarding lime in plaster, it offers excellent workability and adhesion to surfaces, making it a popular choice for delicate decorative elements. Portland cement in stucco, known for its strength and durability, creates a solid foundation resistant to weathering and impact. Gypsum, frequently found in plaster, contributes to its fire-retardant properties, making it suitable for high-heat areas.

Application Process

The application processes for plaster and stucco vary significantly. Plaster is typically applied in multiple coats with trowels to achieve a smooth finish on interior walls. In contrast, stucco is often sprayed or trowelled onto exterior surfaces to create a textured appearance.

When applying plaster, the first step involves mixing the plaster with water in a bucket until it reaches a smooth, workable consistency. This mixture is then applied to the wall using a trowel, starting from the top and working downwards.

On the other hand, the stucco application requires a different approach. The stucco mix is prepared by combining cement, sand, and water to form a thick paste. This mixture can be applied using a sprayer for larger surface areas or a trowel for intricate detailing.

Durability

Durability is a key factor that separates plaster and stucco. Stucco, reinforced with fibres, is highly durable and suitable for withstanding external elements, making it a popular choice for exterior finishes. Plaster, while robust, may require more maintenance in high-traffic interior areas.

Stucco’s fibre reinforcement plays a pivotal role in enhancing its longevity by providing added strength and flexibility, reducing the likelihood of cracking or chipping. This makes stucco particularly resilient against harsh weather conditions such as heavy rains, snow, and UV exposure.

In contrast, plaster, though durable itself, may show signs of wear and tear more readily, especially in areas prone to frequent impact or moisture, necessitating periodic repairs to maintain its integrity. Properly installed and maintained stucco, on the other hand, can endure for decades without significant deterioration, offering a long-lasting and low-maintenance exterior solution.

Cost

When comparing plaster and stucco, cost considerations play a significant role. Plaster tends to be more expensive, especially for decorative finishes, due to the intricate application process. Stucco, being primarily used for exterior surfaces, may offer a more cost-effective option for certain projects.

Plaster installations often require skilled artisans to achieve the desired custom designs, which adds to the labour expenses. On the other hand, stucco applications can be more straightforward, reducing overall labour costs. The material cost of stucco is generally lower than that of plaster, making it a budget-friendly choice for many homeowners.

Aesthetics

Aesthetically, plaster and stucco offer distinct choices for interior and exterior designs. Plaster allows for smooth, elegant finishes that can be further enhanced with decorative features. Stucco, known for its textured appearance, adds depth and character to building exteriors.

Plaster, with its versatility, can be moulded into intricate designs, creating a sense of sophistication and luxury. On the other hand, stucco’s rough texture adds a rustic charm, particularly popular in Mediterranean and Spanish-style architecture. Both materials can be customised in a wide range of colors, giving architects and homeowners the freedom to express their unique style preferences. The juxtaposition of plaster’s refined sleekness and stucco’s earthy roughness often creates a visually appealing contrast that enhances the overall aesthetic of a building.

Can Plaster Be Used As A Substitute For Stucco?

Whilst plaster and stucco share some similarities, plaster is not an ideal substitute for stucco due to its composition and durability differences. Plaster is better suited for interior applications, whilst stucco’s resilience makes it a preferred choice for exterior surfaces.

Plaster, typically composed of gypsum, lime, or cement mixed with water, offers a smooth finish that works well for indoor walls and ceilings. Its versatility allows for intricate designs and detailing, making it a popular choice for decorative purposes.

On the other hand, stucco, made of cement, sand, and lime, boasts incredible durability and weather resistance, making it perfect for withstanding outdoor elements and providing a protective shell for buildings. Its rough texture and ability to handle moisture well make it a top pick for exteriors in various climates.

Can Stucco Be Used As A Substitute For Plaster?

Stucco can serve as a substitute for plaster in certain scenarios, particularly for exterior finishes where durability and weather resistance are crucial. Stucco’s textured surface and robust composition make it a viable alternative to traditional plaster in suitable applications.

One of the key advantages of choosing stucco over plaster is its exceptional durability. Stucco’s tough exterior can withstand harsh weather conditions, making it a preferred choice for outdoor surfaces such as walls and facades. The application process of stucco differs significantly from plaster. While plaster is typically applied in multiple coats, stucco is often spread in a single layer, reducing both time and labour costs.

Stucco’s weather-resistant properties also make it an excellent choice for areas prone to moisture exposure, such as bathrooms, kitchens, and basements. Its ability to repel water effectively can help prevent mould and mildew growth, ensuring a healthier indoor environment. In the realm of architectural design, stucco offers versatility in aesthetics, allowing for various textures and finishes to be achieved, enhancing the overall visual appeal of a structure. Stucco’s low maintenance requirements and longevity contribute to its popularity as a durable and cost-effective option for both residential and commercial projects.

Which Is Better: Plaster Or Stucco?

Determining whether plaster or stucco is better depends on the specific application and desired outcome. Plaster excels in creating smooth interior finishes with decorative features, while stucco offers durability and textured exteriors suitable for various architectural styles.

  • Plaster, a traditional material made of gypsum, lime, or cement, provides excellent insulation qualities and is ideal for indoor applications due to its smooth, elegant appearance. The intricate detailing achievable with plaster brings a touch of sophistication to interior spaces.
  • On the other hand, stucco, composed of cement, sand, and lime, stands out for its resilience against harsh weather conditions, making it a popular choice for exterior cladding.

How To Tell The Difference Between Plaster And Stucco?

Distinguishing between plaster and stucco involves examining factors like texture, application location, and material composition. Plaster tends to have a smoother finish and is commonly used for interior surfaces, while stucco exhibits a textured appearance and is predominantly found on exterior walls.

Regarding texture, plaster usually feels softer to the touch compared to stucco, which often has a rougher and more rugged surface. Additionally, plaster is typically applied in thin layers, providing a polished look, while stucco is applied more coarsely, resulting in a more pronounced texture.

Another key distinction lies in their application areas. While plaster is favoured for indoor environments due to its elegant finish, stucco’s durability and weather resistance make it a popular choice for protecting and decorating the exterior of buildings.

What Are The Common Uses Of Plaster And Stucco?

Plaster and render serve distinct purposes in construction. Plaster is commonly used for interior walls and ceilings to create smooth finishes, while render is preferred for exterior facades, providing durability and weather resistance.

Plaster’s versatility allows it to be used not only for creating sleek indoor surfaces but also for ornate decorations, intricate mouldings, and even artistic detailing. On the other hand, the render’s rugged composition makes it ideal for withstanding the harsh outdoor elements, such as rain, wind, and sun exposure, ensuring the longevity of a building’s exterior appearance. These materials not only protect structures but also add character and charm to architectural designs, enhancing kerb appeal and making a lasting impression on viewers.

How To Maintain Plaster And Stucco?

Maintaining plaster and stucco involves regular inspections, cleaning, and repairs to ensure their longevity. Plaster may require occasional touch-ups for minor damages, while stucco often benefits from protective coatings to safeguard against environmental wear.

Regular inspections play a crucial role in detecting early signs of deterioration in plaster and stucco surfaces. Look for cracks, chips, or discoloration that may indicate underlying issues.

Cleaning methods vary based on the material; for plaster, use a gentle cleanser and soft brush to avoid damaging the surface, while stucco can be power washed carefully to remove dirt and debris.

Regarding repairs, address small cracks in plaster promptly to prevent them from spreading. For stucco, reapplying a fresh coat of protective sealant every few years can significantly increase its lifespan.

18th April 2024 Tips

How To Do Plastering On Brick Wall

Plastering is a crucial step in ensuring the durability and aesthetics of brick walls.

There are various methods to choose from, including traditional, machine, and spray plastering.

We will explore the different types of plastering, the necessary materials, the process of plastering on a brick wall, and how to maintain and repair the plaster.

Let’s learn all about the art of plastering on brick walls!

What Is Plastering?

Plastering is a crucial step in the renovation process where a skilled plasterer applies a smooth, durable finish to interior walls.

A professional plasterer plays a vital role in enhancing the aesthetics and longevity of a building by expertly applying plaster and ensuring a seamless finish. They meticulously prepare surfaces, apply the plaster mix evenly, and meticulously smooth out imperfections to achieve a flawless look. Expertise in various plastering techniques, such as skimming, floating, and rendering, is crucial to cater to different surface requirements.

A skilled plasterer possesses an eye for detail and precision, ensuring that the final finish is both visually appealing and structurally sound. Their expertise goes beyond the mere application, as they also understand the properties of different plaster materials and how they interact with various surfaces.

Uncover more: How To Plaster DIY

Why Is Plastering Necessary?

Plastering is essential in both new builds and renovation projects to provide a protective and aesthetic coating over surfaces like plasterboard or brickwork.

Applying plaster not only enhances the structural integrity of walls by adding a protective layer that can withstand wear and tear but also contributes significantly to the overall appearance of a room. Techniques like skim coating are instrumental in achieving a smooth, flawless finish, covering imperfections, and creating a clean canvas for paint or wallpaper. Beyond functionality, plastering allows for customisation through various textures and designs, adding depth and character to walls.

What Are The Benefits Of Plastering?

The benefits of plastering walls extend beyond aesthetics, offering advantages such as soundproofing, improved thermal insulation, and the use of materials like gypsum for a durable finish.

Soundproofing is a crucial aspect where plastering plays a significant role. By adding an extra layer of material to the walls, plaster helps reduce noise transmission, creating a more peaceful and quiet indoor environment.

In terms of DIY applications, plastering is a versatile skill that homeowners can learn and apply themselves. With the right tools and materials, individuals can achieve professional-looking results while saving on labour costs.

Using specific materials like gypsum in plastering not only ensures a durable finish but also contributes to better indoor air quality. Gypsum is known for its fire-resistant properties and mould resistance, making it a safe and reliable choice for wall finishes.

What Are The Types Of Plastering?

There are different types of plastering techniques used in renovation projects, including traditional plastering, machine plastering, and spray plastering, each offering unique benefits and applications.

Traditional plastering, often referred to as wet plastering, involves the manual application of plaster to walls or ceilings. It is a time-tested method known for its durability and ability to create a smooth finish.

On the other hand, machine plastering utilises mechanical tools to apply plaster quickly and efficiently, making it suitable for large-scale projects.

Spray plastering, as the name suggests, involves spraying a mix of plaster and water onto surfaces, providing fast and uniform coverage. Each of these methods has its own advantages depending on the specific requirements of the renovation project.

Traditional Plastering

Traditional plastering involves the manual application of plaster mixes such as sand and cement render, often reinforced with bonding agents like Thistle Bond to enhance adhesion and durability.

In the process of traditional plastering, skilled artisans meticulously apply the plaster mix onto walls and ceilings, using specialised tools like trowels and floats to achieve a smooth finish. The bonding agents play a crucial role in ensuring a strong bond between the plaster and the substrate, preventing cracking and improving longevity.

Before applying the plaster mix, the surface is prepared by cleaning and dampening it to promote better adhesion. The mix is then spread evenly and compacted to eliminate air pockets, creating a solid and uniform surface.

Machine Plastering

Machine plastering utilises specialised equipment to apply plaster quickly and efficiently, with products like Blue Grit ensuring a strong bond between the plaster and the substrate.

Blue Grit, a bonding agent commonly used in machine plastering, plays a crucial role in enhancing the adhesion of plaster to various surfaces. The process starts with preparing the surface and eliminating any dust or debris that could affect adhesion. Once the surface is prepped, the plaster is mixed to the desired consistency and fed into the plastering machine.

This machine then pumps the plaster onto the surface, spreading it evenly and quickly. The use of specialised equipment not only speeds up the plastering process but also ensures a more consistent and uniform finish.

Spray Plastering

Spray plastering involves the use of a PVA solution and products like British Gypsum to create a fine mist of plaster that is sprayed onto walls, offering a quick and smooth finish.

This technique is highly favoured for its efficiency and time-saving properties. By utilising specialised pumps, the plaster mixture is evenly distributed across the surface, resulting in a seamless coat. The application is not only quick but also ensures a consistent thickness throughout, eliminating the need for manual leveling. The use of PVA solutions plays a crucial role in enhancing the adhesion of the plaster to the substrate, promoting a durable and long-lasting finish.

What Materials Are Needed For Plastering On Brick Wall?

Plastering a brick wall requires essential materials such as plastering sand for the mix, safety equipment like gloves and glasses, and tools such as a margin trowel for application.

To effectively plaster a brick wall, you will need a hawk to hold the plaster mix, a plastering float for spreading the plaster smoothly, and a water sprayer to keep the surface damp for better adhesion.

Don’t forget to have a bucket for mixing the plaster, a spirit level to ensure a flat finish, and a sponge for cleaning up any excess plaster. A brush can be handy for finishing touches and clean-up after the plastering process.

Plastering Trowel

A plastering trowel is a crucial tool for spreading and leveling plaster mixes on surfaces, along with other mixing equipment like buckets for preparation.

When applied skilfully, a plastering trowel ensures that the plaster mixture adheres evenly and smoothly to the surface, creating a perfect base for further finishing touches. A seasoned plasterer uses the trowel to achieve a seamless and flawless finish, eliminating any imperfections or air bubbles that may appear during the application process.

The design of the trowel allows for easy manoeuvrability, aiding in the precise application of the plaster mix on corners and edges. By adeptly controlling the pressure and angle of the trowel, one can achieve a uniform thickness of plaster across the entire surface.

Bucket

A bucket is essential for mixing plaster materials with water to achieve the right consistency before application, ensuring a smooth and workable plaster mixture.

By using a bucket, you can carefully control the amount of water added to the mix, preventing the plaster from becoming too thin or too thick. Maintaining the correct water-to-material ratio is crucial for achieving the desired strength and adhesion of the plaster once it has been set. Using a bucket helps minimising waste and mess during the mixing process, allowing for a more efficient and cleaner work environment.

Water

Water is a vital component in the plastering process, used to activate cement render mixes and achieve the right consistency for applying plaster on surfaces like brick walls.

When water is combined with the dry mix of cement and sand, a chemical reaction occurs, binding the particles together and forming a workable paste. This paste not only helps the plaster adhere securely to the substrate but also allows for proper workability during application. The amount of water added is crucial as it directly affects the setting time, strength, and durability of the plaster finish.

Plastering Sand

Plastering sand is a key ingredient in creating plaster mixes, especially when combined with products like the Gyproc Drywall Sealer to enhance the bond and finish of the plaster.

One of the primary functions of plastering sand is to provide a stable base for the plaster mix, ensuring proper adhesion to the surface. When mixed with additives such as Gyproc Drywall Sealer, the sand not only improves the workability of the mix but also helps in achieving a smoother finish. The fine particles of plastering sand aid in filling gaps and voids, thus increasing the overall strength and durability of the plaster. This compatibility with additives like the Gyproc Drywall Sealer further enhances the performance and longevity of the plastered surface.

Plastering Cement

Rendering cement is a versatile material used in DIY projects and renovation works to create a strong and smooth finish on various surfaces like brick walls.

One of the key benefits of using rendering cement is its ability to easily adhere to different types of surfaces, providing a durable and long-lasting finish. Rendering cement can be moulded and shaped to fit intricate designs or create decorative elements, making it a versatile choice for enhancing the aesthetic appeal of a space.

Whether you are patching up cracks and holes or completely resurfacing a wall, rendering cement offers a cost-effective solution for achieving a professional look without the need for specialised skills.

Mixing Equipment

Mixing equipment such as respiratory masks is essential during the preparation of plaster mixes, particularly with cement renders that may emit fine particles.

Proper mixing equipment is crucial for ensuring the safety of individuals involved in construction projects where dust and particles can pose health risks.

The use of respiratory masks helps to protect the respiratory system from inhaling harmful substances that are released during the mixing process. Along with respiratory masks, other essential equipment includes goggles to safeguard the eyes from irritation caused by airborne particles.

By investing in quality mixing equipment, construction workers can perform their tasks efficiently while prioritising their health and well-being.

How To Prepare The Brick Wall For Plastering?

Preparing a brick wall for plastering involves cleaning the surface, wetting it adequately, and applying a bonding agent like Thistle Bond for better adhesion, especially in heritage settings like a Victorian terrace.

The surface of the brick wall needs to be thoroughly cleaned to remove any dirt, dust, or debris that could hinder the bonding process. This is crucial for ensuring a smooth and even finish once the plaster is applied. It is important to control the moisture levels in the bricks by wetting them adequately before applying the bonding agent. This helps prevent the bricks from absorbing moisture from the plaster too quickly, which can lead to cracking or poor adhesion.

The application of a bonding agent such as Thistle Bond is essential, especially in environments like Victorian terraces where the walls may be old or uneven. The bonding agent helps the plaster adhere firmly to the surface, creating a strong and durable finish that can withstand the test of time.

Clean The Wall

Cleaning the brick wall is essential before plastering, involving tasks like sanding to remove imperfections or old paint that may affect the adhesion of the plaster.

Another crucial step in preparing the surface is to thoroughly clean the wall to eliminate any dust, dirt, or grease that could compromise the bond between the plaster and the bricks. This can be achieved by scrubbing the wall with a mixture of water and mild detergent, ensuring all areas are free from contaminants. Any loose mortar should be carefully removed to create a smooth and even surface for the plaster to adhere to.

Inspecting the wall for cracks or damage is also imperative before proceeding with the plastering process. Any structural issues should be addressed and repaired to prevent future problems with the plaster finish. To further enhance the cleanliness of the brick surface, using a pressure washer can help remove stubborn stains or residues that may be present. By diligently preparing the brick wall in this manner, you can ensure a durable and flawless plaster application that will stand the test of time.

Wet The Wall

Wetting the brick wall before plastering helps control its absorbency and improves the bond with materials like cement render by applying a PVA solution to seal the surface.

By wetting the brick wall, you create a damp barrier that prevents the rapid absorption of the plaster, allowing it to cure properly. This step not only enhances the adhesion of the plaster but also prevents it from drying out too quickly, which can lead to cracks and a weaker finish.

Using a PVA solution further reinforces this adhesion by forming a protective layer that promotes better cohesion between the wall and the plaster. This solution acts as a primer, ensuring that the plaster adheres securely to the wall without being absorbed too quickly.

Apply Bonding Agent

Applying a bonding agent on the brick wall requires safety precautions like wearing gloves and glasses to protect against chemical exposure whilst ensuring a secure bond for the plaster.

Before starting the application, make sure to clean the surface thoroughly to remove any dust or debris that could hinder adhesion. The bonding agent acts as a bridge between the existing substrate and the fresh plaster, promoting better bonding and reducing the risk of delamination over time.

Proper application techniques are essential to ensure uniform coverage and maximum effectiveness. Using a brush or roller, apply the bonding agent evenly across the surface, making sure to follow the manufacturer’s instructions for drying times and curing processes. This meticulous approach sets the foundation for a long-lasting and durable plaster finish.

What Is The Process Of Plastering On Brick Wall?

Rendering a brick wall involves a systematic process that includes mixing the plaster, applying the first coat, followed by subsequent coats, and finally smoothing and finishing the surface to achieve a polished look.

First and foremost, the key to a successful rendering project is to prepare the plaster mix using the right proportion of plaster and water to ensure a smooth consistency that is easy to work with. Once the mix is ready, start by applying the first coat of plaster evenly across the wall using a trowel. Allow it to set before applying subsequent coats, building up the thickness gradually. After the final coat, focus on smoothing out any imperfections and achieving a uniform surface texture. To finish off, use a trowel or float to create a sleek, polished look that enhances the overall appearance of the brick wall.

Mixing The Plaster

Mixing the plaster for a brick wall involves combining plaster, water, and additives like cement render to achieve the desired consistency and bonding strength for application.

It is crucial to maintain the correct ratios of each ingredient to ensure that the plaster sets properly and provides durable support to the brickwork. Cement render acts as a stabilizer, enhancing the adhesion of the plaster to the bricks and preventing it from cracking or peeling off over time.

Additives such as lime can improve the workability of the mixture, making it easier to apply smoothly onto the walls. Properly mixing these components in a clean and appropriately sized container is essential to avoid any lumps or inconsistencies in the plaster.

Applying The First Coat

The first coat of plaster on a brick wall is crucial, requiring skilled application techniques by a plasterer while using safety gear like gloves to ensure a smooth and even base layer.

Before starting the application process, the plasterer must thoroughly prepare the surface by ensuring it is clean and free of debris. Next, a mix of plaster and water is carefully blended to create the right consistency for optimal adhesion. The skilled professional then expertly applies the plaster onto the wall using a hawk and trowel, using precise movements to achieve uniform coverage.

Protective gear, including gloves and goggles, is essential to prevent skin irritation and exposure to dust particles. This not only ensures the safety of the plasterer but also contributes to the quality of the finished surface. With attention to detail and craftsmanship, the first coat of plaster sets the foundation for a durable and visually appealing wall finish.

Applying The Second Coat

The second coat of plaster on a brick wall involves applying a skim coat or refining the surface with cement renders to achieve a uniform and polished finish for subsequent smoothing.

Skim coating is a popular technique that involves applying a thin layer of plaster or joint compound to the surface of the wall. This method helps to fill in any imperfections or uneven areas left after the first coat. By using a trowel or a drywall knife, the skim coat is spread evenly, providing a smooth and consistent texture.

On the other hand, cement renders offer a more robust solution by using a mixture of cement, sand, and water. This mixture is applied to the wall in layers, allowing for greater control over the final thickness and texture. Cement renders are ideal for achieving a durable and long-lasting finish on exterior walls.

Smoothing And Finishing The Plaster

The final stage of plastering a brick wall involves smoothing the surface with tools like trowels and applying finishing touches such as paint or sealants to enhance durability and aesthetics, with products like Thistle Bond providing additional reinforcement.

When smoothing the plaster, it is essential to achieve a uniform and level finish by carefully working in small sections at a time. The trowel should be held at a consistent angle to avoid creating uneven patches or lines.

  • Once the plaster is evenly spread, a sponge or damp cloth can be used to refine the surface further, removing any imperfections or excess material for a flawless result.
  • After allowing the plaster to fully dry and cure, applying a sealant or bonding agent is crucial to protect the surface from moisture and potential damage. This step not only enhances the longevity of the plaster but also strengthens its adhesion to the brick wall, ensuring a professional and long-lasting finish.

How To Maintain And Repair Plaster On Brick Wall?

Maintaining and repairing plaster on a brick wall involves inspecting for damages, patching cracks, and applying fresh coats of plaster as part of regular upkeep and renovation efforts.

Before starting any repair work, it’s crucial to thoroughly examine the entire surface for signs of damage such as hairline cracks, water stains, or areas where the plaster is peeling off.

Once identified, utilise a chisel or scraper to gently remove loose or damaged plaster to create a smooth base for repairs.

Using a suitable plaster mix, carefully fill in the cracks, making sure to blend the new layer seamlessly with the existing surface.

In cases of extensive damage, consider applying a bonding agent before reapplying plaster to ensure a strong and lasting repair.

18th April 2024 D.I.Y

How To Plaster DIY

Ready to tackle a DIY plastering project but unsure of where to start?

In this comprehensive guide, we will walk you through everything you need to know about plastering walls and ceilings.

From the tools and materials required to step-by-step instructions on how to plaster like a pro, we’ve got you covered.

Learn about common mistakes to avoid, helpful tips for success, and how to finish and paint over your newly plastered surfaces.

Get ready to enjoy your newly transformed walls and ceilings!

What Tools And Materials Do You Need For Plastering?

For a successful plastering project, you need a variety of tools and materials. These include a trowel, hawk, brushes, buckets, water, PVA, and the appropriate plaster mix to achieve a smooth and flawless finish on your walls or ceilings.

Each of these items plays a crucial role in the plastering process. The trowel, for example, is used to apply and smooth out the plaster mixture, ensuring even coverage. A hawk functions as a portable platform to hold the plaster, making it easier to transfer onto the trowel. Brushes are essential for detailing and cleaning up excess plaster, while buckets are necessary for mixing the plaster to the right consistency.

Water is a key component in adjusting the texture of the mixture, and PVA serves as a bonding agent between the plaster and the surface.

Choosing the correct plaster mix is vital for achieving the desired finish, with variations available for different surfaces and applications. When these tools and materials are used skillfully and combined appropriately, they result in a professional and durable plastering job.

Tools Needed For Plastering

Regarding plastering, the essential tools you need include a float for applying the plaster mix, a plasterer’s board to hold the plaster, and various brushes for smoothing and detailing the coat.

A float is a versatile tool available in different sizes, with the larger ones used for applying the first coats of plaster and the smaller ones for intricate details.

A plasterer’s board serves as a portable surface for holding the plaster, allowing you to easily access the material as you work on various sections.

Different types of brushes are utilised based on the texture and finish required, such as soft-bristled brushes for creating smooth surfaces and wire brushes for roughening up areas for better adhesion.

Materials Needed For Plastering

Plus tools, the materials crucial for plastering include the plaster mix itself, water for consistency, PVA for adhesion, and the final finish to achieve the desired look and texture.

Regarding plastering, the choice of materials plays a vital role in determining the quality and longevity of the finished surface.

Plaster mix forms the foundation of the plastering process, serving as the primary substance that covers and smoothens the wall or ceiling.

Water is essential for adjusting the consistency of the plaster mix, ensuring it spreads evenly and adheres well to the surface.

Adding PVA adhesive helps improve the bond between the plaster and the substrate, enhancing durability and preventing cracks over time.

Selecting the right finish, whether it’s textured, smooth, or decorative, is crucial for achieving the desired visual appeal of the plastered area.

Preparation For Plastering

Before starting the plastering process, thorough preparation is key to ensuring a successful DIY project. Proper preparation steps can make the application of plaster smoother and more effective.

One important step in preparing for plastering is to thoroughly clean the surface to be plastered. This helps in removing any dust, debris, or grease that can affect the adhesion of the plaster. Next, applying a primer such as PVA is crucial to seal the surface and provide a good base for the plaster to adhere to.

  • Masking off areas that you don’t want to plaster, such as windows and trim, is essential to ensure clean edges and a professional finish.

Each of these preparation steps plays a significant role in creating a smooth and durable plastered surface that looks polished and well done.

Preparation Steps For Plastering

The preparation steps for plastering involve cleaning the wall or ceiling surface, applying a PVA primer for better adhesion, and ensuring that the area is ready for the plaster application.

Before starting the cleaning process, it is crucial to remove any dust, dirt, or debris from the surface to prevent contamination and ensure a smooth plaster finish.

  1. Applying a PVA primer serves as a bonding agent between the surface and the plaster, promoting better adhesion and reducing the chances of cracks or peeling over time.

Ensuring that the area is adequately prepared before plaster application is essential for achieving a professional-quality finish that will stand the test of time.

How To Plaster A Wall

Plastering a wall involves applying layers of plaster in a specific technique to achieve a smooth finish. Paying attention to details like brushing and edging ensures a seamless look across the entire surface.

  1. Begin by preparing the wall surface, ensuring it is clean and free of any dust or debris. Apply a primer if needed to promote better adhesion of the plaster.
  2. Next, mix the plaster according to the manufacturer’s instructions, aiming for a creamy consistency.
  3. Start applying the plaster using a hawk and trowel, spreading it evenly in upward strokes. Focus on maintaining a consistent thickness throughout to avoid uneven drying and cracking. Smooth out the surface with a plasterer’s float, using circular motions to achieve a polished look.
  4. When dealing with edges, take your time to carefully blend the plaster with the rest of the wall, ensuring a seamless transition. Finishing touches like feathering the edges will create a professional finish that enhances the overall appearance of the wall.

Step-By-Step Guide To Plastering A Wall

To plaster a wall effectively, start by preparing the surface, applying the plaster in thin coats, and using a brush to smooth out any imperfections. Pay special attention to the edges for a seamless finish.

  1. After the initial surface preparation, mix the plaster according to the manufacturer’s instructions, ensuring a smooth and lump-free consistency.
  2. Begin by applying the first thin layer of plaster evenly across the wall surface, using a plastering trowel for a uniform distribution. Working in small sections, continue adding subsequent layers, allowing each coat to dry before applying the next to avoid cracking.

Once the plaster is set but not fully dried, use a damp sponge to gently smooth out any bumps or ridges, maintaining a consistent texture. Feather the edges of each layer to blend them seamlessly with the existing surface, creating a cohesive and polished look. Don’t forget to keep the tools clean and wipe off excess plaster for a neat final result that enhances the aesthetic appeal of the room.

How To Plaster A Ceiling

Plastering a ceiling requires specific techniques and tools to ensure a flawless finish. Applying the plaster coat evenly and smoothly is crucial for achieving professional results on ceilings.

When working on ceilings, it’s essential to start by preparing the surface thoroughly. Check for any cracks, holes, or imperfections that need to be filled before applying the plaster. Repairing these issues beforehand will prevent them from showing through the plaster layer later on.

Another challenge when plastering ceilings is managing the material overhead. Gravity can make it trickier to control and spread the plaster evenly, so using the right tools like a specialised ceiling plastering tool can help maintain consistency.

Discover more: Is Plaster And Stucco The Same

Step-By-Step Guide To Plastering A Ceiling

Plastering a ceiling involves using the right tools to apply the plaster evenly and smoothly, ensuring a uniform finish. Mastering the technique is essential for achieving a professional result on ceilings.

  1. One key consideration when plastering a ceiling is the overhead nature of the surface, which can pose challenges in terms of accessibility and arm fatigue. To tackle this, it is important to have sturdy scaffolding or a reliable platform that provides a stable working surface.

Proper preparation of the ceiling is crucial before applying the plaster. This involves cleaning the surface thoroughly, repairing any cracks or imperfections, and ensuring it is completely dry to promote adhesion. Using the correct type of plaster is also vital, as different formulations are suited to varying conditions.

Common Mistakes To Avoid When Plastering

In the plastering process, it is crucial to be aware of common mistakes that can compromise the quality of the finish. By avoiding these errors, you can ensure a successful DIY plastering project.

  • One frequent mistake is improper surface preparation, which can lead to adhesion issues, causing the plaster to crack or peel off. Flat surfaces are essential for a smooth finish. Make sure to clean the wall thoroughly and repair any cracks or damage before applying the plaster.
  • Another common error is improper mixing of the plaster. It is crucial to follow the manufacturer’s instructions regarding the correct water-to-plaster ratio. Consistency is key for a strong and lasting finish. Failure to mix properly can result in weak, crumbly plaster that will not adhere well.

Tips For A Successful DIY Plastering Project

To achieve success in a DIY plastering project, consider incorporating key tips and strategies that can enhance the quality of your finish. These tips can streamline the process and help you avoid common pitfalls.

One crucial aspect to begin with is proper surface preparation. Ensure that the walls are clean, dry, and free of any debris before starting the plastering process.

Preparing the surface adequately will lay a strong foundation for a smooth and durable finish.

You can use a primer or bonding agent to improve the adhesion and longevity of the plaster. Investing in high-quality plastering tools, such as trowels and floats, can significantly impact the final result.

How To Finish And Smooth Plaster

The final step in the plastering process involves finishing and smoothing the plaster to achieve a flawless surface. Using the right techniques and processes is essential for creating a polished and professional look.

  1. One important method for achieving a smooth finish is to apply a thin coat of plaster using a trowel. This helps fill in any remaining imperfections and levels out the surface.
  2. Careful sanding with fine-grit sandpaper is then crucial to further refine the texture and ensure a seamless appearance.
  3. Employing a sponge to gently wet and smooth the surface can help address any minor flaws before the final drying process.

Taking these meticulous steps guarantees a high-quality finish that is both visually appealing and durable.

How To Paint Over Plaster

Once the plaster has dried and cured, the next step is to paint over it to enhance the aesthetics of your walls or ceilings.

Applying paint after plastering requires attention to detail and a systematic approach for a professional finish. Before you start painting, it is crucial to ensure that the surface is clean and free of any dust, debris, or imperfections. Use a damp cloth to wipe down the plastered area and let it dry completely. Prime the surface with a high-quality primer suitable for the plaster to promote better adhesion and durability of the paint. Choose a top-quality paint that is recommended for plaster surfaces, and mix it well before applying.

How To Clean Up After Plastering

After completing the plastering process, proper clean-up is essential to maintain a tidy workspace and ensure the longevity of your tools. Cleaning up after plastering involves disposing of waste materials, washing tools, and restoring the area to its original condition.

  1. One key aspect of post-plastering clean-up is the efficient handling of waste materials. It is crucial to gather all debris, including leftover plaster, dust, and worn-out protective materials. Utilising a sturdy bin bag or container can help contain the mess effectively.
  2. Once the waste is collected, it’s important to dispose of it properly. Environmentally-friendly options such as recycling or using designated disposal sites are recommended to minimise the impact on the environment.
  3. After waste disposal, focus on cleaning your tools. Remove any dried plaster from tools using a brush or scraper, then wash them with warm, soapy water. Properly drying and lubricating your tools will help prevent corrosion and maintain their functionality.

Conclusion: Enjoy Your Newly Plastered Walls And Ceilings

The process of plastering can transform your walls and ceilings, adding a fresh and polished look to your living space. By following the right techniques and using quality materials, you can achieve professional results and enjoy the beauty of newly plastered surfaces.

When you take on a plastering project, not only do you elevate the aesthetics of your home, but you also create a sense of accomplishment. The smooth and flawless finish achieved through plastering can completely rejuvenate the atmosphere of a room, making it more inviting and sophisticated.

The durability of plaster ensures that your walls and ceilings remain stylish and resistant to wear over time. As you step back and admire your handiwork, you’ll feel a sense of pride knowing that you’ve transformed a humble wall into a stunning centrepiece of your home.

15th March 2024 Tips

How To Clean External Cladding

External cladding plays a crucial role in protecting the exterior of a building from the elements, but it also requires regular cleaning to maintain its appearance and functionality.

We discuss the importance of cleaning external cladding, the different types of cladding materials, the tools and materials needed for cleaning, and step-by-step guides on how to clean vinyl, wood, brick, and metal cladding.

Discover tips for effectively maintaining clean external cladding to keep your cladding looking its best!

What Is External Cladding?

External cladding serves as an outer protective layer attached to buildings to safeguard them against external elements and enhance their appearance and thermal insulation.

  • The choice of cladding materials such as metal, wood, vinyl, or fibre cement greatly influences the aesthetic appeal and functionality of the building.
  • For instance, metal cladding offers a modern and sleek look, while wood cladding provides a warm and natural appearance.

External cladding plays a crucial role in shielding structures from harsh weather conditions, preventing moisture infiltration, and reducing heat loss or gain, thus improving energy efficiency.

The durability and maintenance requirements of different cladding options impact the long-term performance and cost-effectiveness of the building envelope.

Why Is It Important To Clean External Cladding?

Regular cleaning of external cladding is essential to preserve its appearance, protect against damage, and ensure the longevity of buildings, especially in regions with variable weather conditions and pollution.

Professional cleaning services play a crucial role in maintaining the integrity of external cladding surfaces. With the advancement of innovative cleaning technologies, such as low-pressure washing systems and eco-friendly cleaning agents, it is now possible to effectively combat environmental factors like pollution and weather effects. These advanced methods not only ensure a thorough cleaning process but also minimise the risk of damage to the cladding materials. Scheduled maintenance provided by professional cleaners can significantly extend the lifespan of cladding, preserving its visual appeal and structural integrity.

Maintain Aesthetics

Regular cleaning of external cladding helps maintain its visual appeal and prevents the accumulation of dirt, grime, and organic matter, which can detract from the overall aesthetics of a building.

Thorough cleaning using professional-grade products and techniques is essential for restoring the original beauty of cladding materials. By opting for specialised cleaners designed for specific surfaces, you can effectively remove stubborn stains and mould, enhancing the exterior’s elegance.

When undertaking this task, remember to prioritise safety. Wear appropriate protective gear, such as gloves and goggles, to shield yourself from potentially harmful chemicals. Using equipment like pressure washers can help achieve a deep clean, but it’s crucial to follow manufacturer instructions to avoid damaging the cladding.

Take a look: Can You Pressure Wash Solar Panels

Prevent Damage

Cleaning external cladding regularly is crucial in preventing potential damage caused by dirt buildup, moisture retention, or exposure to harsh elements, thus extending the lifespan of the cladding materials.

Improper cleaning can lead to various types of damage, including staining, which can make the cladding look unsightly and detract from the building’s overall aesthetic appeal. Without regular maintenance, corrosion may develop, especially in metal cladding, compromising its structural integrity and longevity. Inadequate cleaning routines can also result in the degradation of the cladding materials over time, reducing their efficiency in protecting the building from external factors such as weather conditions and pollutants. By adhering to proper maintenance practices, not only can the warranty of the cladding be preserved, but the overall structural integrity of the building can also be safeguarded in the long run.

Improve Energy Efficiency

Clean external cladding contributes to improved energy efficiency by maintaining proper insulation properties, reducing the strain on heating and cooling systems, and potentially saving money on utility bills in the long run.

Regularly scheduled cleaning of cladding not only preserves its aesthetic appeal but also plays a crucial role in ensuring its thermal performance remains optimal. By keeping the cladding free from dirt, grime, and debris, the insulation properties of the building envelope are protected, thereby reducing heat loss in the winter and heat gain in the summer. This, in turn, lessens the workload on HVAC systems, leading to lower energy consumption and operational costs over time.

What Are The Different Types Of External Cladding?

External cladding comes in various materials such as vinyl, wood, brick, and metal, each requiring specific cleaning methods and maintenance to preserve their integrity and appearance.

For instance, vinyl cladding is relatively low maintenance, requiring periodic cleaning with mild soapy water and a brush. On the other hand, wood cladding demands more delicate care to prevent rot and mould growth, necessitating specialised cleaners and sealants. Brick cladding may benefit from gentle pressure washing to remove accumulated dirt and grime, while metal cladding often requires professional cleaning services to avoid corrosion and damage.

Choosing the right cleaning equipment, such as soft brushes or special metal-safe detergents, is crucial to prevent surface scratches and maintain the material’s longevity. Employing professional services tailored to the specific needs of each cladding type ensures thorough cleaning without compromising the material’s structure or finish.

Vinyl Cladding

Vinyl cladding requires gentle cleaning using a mild detergent solution and a soft-bristled brush or a gentle wash system, followed by applying a protective sealant to maintain its longevity and appearance.

To effectively clean vinyl cladding, start by mixing a small amount of mild detergent with warm water in a bucket. Take a soft-bristled brush or a gentle wash system and dip it into the solution. Gently scrub the surface of the cladding to remove any dirt, grime, or mould buildup. Rinse thoroughly with clean water to ensure all detergent residue is removed. After cleaning, dry the cladding with a soft cloth to prevent water spots.

Wood Cladding

Cleaning wood cladding involves using a mixture of hot, soapy water and a soft sponge to remove dirt and stains gently, ensuring regular maintenance to preserve the natural beauty and durability of the material.

Regular cleaning of wood cladding is essential to prevent the accumulation of grime and mould, which can lead to decay if left unchecked. It is recommended to avoid harsh chemicals or abrasive tools that can scratch or damage the wood surface.

Inspecting the cladding periodically for any signs of wear or damage is also crucial in maintaining its structural integrity. By addressing minor issues promptly, you can prevent more extensive and costly repairs down the line.

Brick Cladding

Brick cladding can be cleaned using a gentle wash system with a diluted washing-up liquid solution and a soft-bristled brush while avoiding high-pressure washing to prevent damage to the mortar and bricks.

When cleaning brick cladding, it’s important to choose a cleaning solution that is mild yet effective. Mixing washing-up liquid with water is a safe option that won’t harm the bricks. The soft-bristled brush should be used in a circular motion to dislodge dirt gently without scratching the surface.

Safety measures should always be observed. Wear protective gloves and eyewear to shield yourself from any splashes of cleaning solution. Avoid using abrasive tools or strong chemicals that can erode the brick’s surface over time.

Metal Cladding

Metal cladding maintenance involves periodic cleaning with a suitable cleaning solution like acetic acid or hydrogen peroxide, followed by the application of a protective sealant to prevent corrosion and maintain the metallic finish.

In terms of the specialised care required for cleaning metal cladding, using the right cleaning agents is crucial to ensure the effective removal of dirt and grime without damaging the surface. Acetic acid is ideal for dissolving mineral deposits and rust stains, while hydrogen peroxide is excellent for removing organic stains and oxidation.

Professional cleaning services offer expert knowledge and access to industrial-grade cleaning agents that are specifically formulated for metal surfaces. The application of a protective coating after cleaning helps to shield the metal from environmental factors such as UV rays, moisture, and pollutants, extending the lifespan of the cladding.

What Tools And Materials Are Needed For Cleaning External Cladding?

Cleaning external cladding efficiently requires essential tools such as a pressure washer, soft-bristled brush, mild detergent, and a stable ladder for safe access to higher areas, with the option of professional cleaning services for optimal results.

It is crucial to have safety gear like gloves, eye protection, and non-slip footwear to prevent accidents and injuries during the cleaning process. Regular maintenance of the equipment is also vital to ensure longevity and efficient performance. For more intricate or high-rise cladding structures, employing professional cleaning companies not only guarantees a thorough and meticulous cleaning process but also saves time and effort on your end.

Soft-Bristled Brush

A soft-bristled brush is an essential tool for delicate cladding surfaces, allowing gentle cleaning and removal of dirt without causing scratches or damage to the material.

When selecting a brush for sensitive cladding, opt for bristles made of natural materials like horsehair or soft synthetic fibres, avoiding stiff or abrasive brushes that can mar the surface.

Regular maintenance of the brush is key to ensuring effective cleaning – rinse it after each use, remove any debris, and allow it to air dry completely to prevent mould growth.

Proper technique is also crucial; use gentle, circular motions and avoid applying excessive pressure to safeguard the integrity of the cladding.

Mild Detergent

A mild detergent is effective in removing dirt and grime from external cladding surfaces without causing damage or leaving residues, ensuring a thorough yet gentle cleaning process.

When selecting a mild detergent for cladding cleaning, it is essential to consider its composition. Opt for eco-friendly detergents that are biodegradable and non-toxic to prevent harm to the environment and building materials. These formulations are gentle on the cladding yet powerful enough to break down stubborn stains.

The application method plays a crucial role in achieving optimal results. Dilute the detergent as per the manufacturer’s instructions in water and apply it using a soft brush or sponge to prevent scratches or damage to the surface.

Regular cleaning with mild detergents not only enhances the visual appeal of the cladding but also extends its longevity by preventing the accumulation of corrosive substances that can deteriorate the material over time.

Ladder

A stable ladder is essential for accessing elevated areas of external cladding, ensuring safe and secure cleaning operations, with the option of using specialised access equipment like the Reach and Wash system for added convenience.

When using a ladder for cladding cleaning, always ensure it is placed on a flat and stable surface, with all four legs firmly planted on the ground. Perform regular checks for signs of wear and tear, such as loose screws or damaged rungs, to maintain its structural integrity. To maximise safety, position the ladder at the correct angle, approximately one-fourth of the ladder’s working length away from the surface it is leaning against.

For efficient cladding cleaning on high-rise buildings, professionals often rely on advanced access systems like the Reach and Wash system. This innovative solution utilises purified water and telescopic poles to reach difficult spots without the need for ladders or scaffolding, ensuring thorough cleaning while maintaining safety standards.

How To Clean Vinyl Cladding?

Cleaning vinyl cladding involves using a mild cleaning solution, a sponge or soft brush for gentle scrubbing, and applying a protective sealant to enhance durability and appearance.

  1. To start the cleaning process, mix water with a gentle, non-abrasive cleaning agent or washing-up liquid. Remember, harsh chemicals can damage the vinyl, so always opt for milder solutions.
  2. Dip the sponge or soft brush into the cleaning solution and scrub the vinyl cladding in a gentle circular motion to remove dirt and grime effectively. Ensure not to apply excessive pressure to prevent any scratches.
  3. Once cleaned, rinse the cladding thoroughly with clean water using a garden hose or a bucket of water.

How To Clean Wood Cladding?

Cleaning wood cladding requires a gentle approach using a cleaning solution of hot, soapy water, a soft brush for scrubbing, and regular maintenance to preserve its natural beauty and structural integrity.

When cleaning wood cladding, it’s crucial to avoid harsh chemicals that can strip off the protective finish and damage the wood fibers. Opt for mild solutions like vinegar and water or a mild detergent mixed in water for a safe and effective cleaning process. Wood cladding should be gently scrubbed in the direction of the grain to prevent any scratching or splintering. Regular inspections to identify any mold, mildew, or insect infestations are essential for maintaining the longevity of the material.

How To Clean Brick Cladding?

Cleaning brick cladding involves using a gentle cleaning solution with a pressure washer or soft brush, avoiding high-pressure settings to prevent damage to the bricks and mortar, with the option of using diluted dish soap for stubborn stains.

When cleaning brick surfaces, it is important to prioritize the longevity and aesthetics of the structure. To maintain the structural integrity of the bricks, ensure that the cleaning solution you use is compatible with the material. Consider a mixture of water and vinegar for a natural and effective cleaning solution. Moreover, when tackling tough grime or mildew, a mix of bleach and water can be effective, but remember to protect nearby vegetation as bleach can be harmful. Safety is paramount when using pressure washers; wear protective eyewear and clothing, and always test the pressure on a small inconspicuous area before proceeding with the full cleaning.

How To Clean Metal Cladding?

Cleaning metal cladding involves using specialised cleaning solutions like acetic acid or hydrogen peroxide to remove contaminants, followed by applying a protective sealant to prevent corrosion and maintain the metallic finish.

When considering professional cleaning services for metal cladding, it is crucial to opt for experts experienced in handling specific metal types to avoid damage.

Regular maintenance routines, including gentle washing with mild soapy water and soft cloths, can help extend the longevity of the metal cladding.

Periodic inspections for any signs of damage or wear can help identify issues early on, ensuring timely repairs and preserving the structural integrity of the cladding.

What Are Some Tips For Maintaining Clean External Cladding?

To maintain clean external cladding, establish a regular cleaning schedule, use appropriate cleaning products, inspect for damage periodically, and address any issues promptly to preserve the appearance and integrity of the cladding.

Regularly cleaning your cladding not only enhances its aesthetic appeal but also prolongs its lifespan. Scheduled cleaning prevents dirt buildup and potential staining, maintaining the overall look of your property.

  • When choosing cleaning products, opt for those recommended by the cladding manufacturer to avoid damaging the material.
  • Early damage detection is crucial to prevent minor issues from escalating into major repairs.

A professional inspection can provide a thorough evaluation of your cladding’s condition, offering valuable insights

and necessary maintenance recommendations.

15th March 2024 Tips

Can You Pressure Wash Solar Panels

Solar panels are a popular and eco-friendly way to generate electricity, but they require regular maintenance to operate at peak efficiency. In this article, we will explore what solar panels are, how they work, and why they need cleaning. We will also discuss whether pressure washing is a safe cleaning method, the risks involved, and alternative cleaning methods. We will provide tips on how to safely clean solar panels, how often they should be cleaned, the benefits of keeping them clean, signs of dirt buildup, common cleaning mistakes to avoid, and preventive measures to keep them free from debris. Join us as we dive into the world of solar panel maintenance and learn how to maximise their performance.

What Are Solar Panels?

Solar panels are an essential component of a solar energy system, responsible for harnessing sunlight and converting it into electricity. They are commonly used in both residential and commercial installations.

These panels work by absorbing sunlight through photovoltaic cells, which generate a flow of electrons and create an electric current. There are different types of solar panels, including monocrystalline, polycrystalline, and thin-film panels, each with its own set of advantages and efficiencies. The overall goal of solar panels is to reduce dependence on non-renewable energy sources and decrease carbon emissions, contributing to a more sustainable future.

How Do Solar Panels Work?

Solar panels work by absorbing sunlight through photovoltaic cells, which then generate direct current (DC) electricity. This electricity is converted into alternating current (AC) by an inverter for use in homes and businesses.

Photovoltaic cells, also known as solar cells, are typically made of semiconductor materials that release electrons when exposed to sunlight. These free electrons create an electric current, which is then collected and channeled through conductive materials within the solar panel. The inverter is a crucial component that transforms the DC electricity produced by the solar panels into AC electricity, which is the standard form of electricity used in households and commercial buildings.

The efficiency of solar energy systems depends on various factors such as the angle of sunlight, weather conditions, and the quality of the solar panels and inverters. Solar panels with higher efficiency ratings can generate more electricity from the same amount of sunlight, maximising the overall performance of the system.

Why Do Solar Panels Need Cleaning?

Solar panels need cleaning to maintain optimal performance by removing accumulated dirt, dust, and debris that can block sunlight absorption. Regular cleaning ensures maximum energy production from the solar system.

When dirt and debris cover the surface of the solar panels, they prevent sunlight from reaching the photovoltaic cells, which are responsible for converting sunlight into electricity. This obstruction can significantly reduce the efficiency of the panels and decrease the amount of energy they are able to generate.

If left uncleaned for an extended period, the accumulation of dirt can lead to permanent damage to the panels, impacting their longevity and performance. To ensure the longevity and efficiency of your solar panel system, regular cleaning is essential.

Can You Pressure Wash Solar Panels?

Whilst pressure washing can be effective for cleaning various surfaces, it is not recommended for solar panels due to the risk of damage. High-pressure water streams can harm the panels and their delicate components.

Pressure washing might lead to cracks or scratches on the surface of the solar panels, which can compromise their efficiency over time.

Alternative cleaning methods such as using a gentle brush with mild soap and water or utilising specialised solar panel cleaning kits are safer options that ensure the panels are cleaned without causing any harm. These methods are designed to maintain the integrity of the panels and prevent any debris buildup that could obstruct sunlight absorption. Regular maintenance and monitoring of the panels’ condition play a crucial role in preserving their longevity and performance.

Check out: What Is Power Washing

What Are The Risks Of Pressure Washing Solar Panels?

The risks of pressure washing solar panels include potential damage to the glass surfaces, frames, and electrical components of the panels. Safety hazards may arise from improper handling of high-pressure equipment.

Structural damage can occur when too much pressure is applied, leading to cracks in the glass or weakening the frame, which can compromise the panel’s efficiency and lifespan. Water entering the electrical components due to high-pressure washing may cause short circuits or other malfunctions, posing electrical hazards.

Caution is crucial when considering pressure washing solar panels. It is recommended to consult with a professional or manufacturer to ensure proper cleaning methods are followed, minimising the risks associated with this process.

What Are The Alternatives To Pressure Washing Solar Panels?

  • Alternative methods to pressure washing solar panels include gentle hosing with water, manual cleaning with a soft bristle brush, or using mild cleaning solutions to remove stubborn dirt and debris.

These non-invasive cleaning techniques offer a safer approach to maintaining the efficiency of your solar panels while avoiding potential damage that harsh cleaning methods can cause.

  • Gentle hosing with water is a simple yet effective way to rinse off surface dust and grime without the risk of scratches or impact on the panel’s performance.
  • Manual cleaning with a soft bristle brush allows for targeted removal of tougher stains or residues, ensuring a thorough clean without abrasive actions.
  • Using mild cleaning solutions like a mixture of vinegar and water can dissolve organic build-up gently, preserving the longevity of your solar panels.

How To Safely Clean Solar Panels?

To safely clean solar panels, follow recommended safety precautions, use appropriate materials like a soft bristle brush or microfiber scrubber, and avoid harsh chemicals that can damage the panels.

Before starting the cleaning process, it is important to ensure that the panels are disconnected from the power source to avoid any potential electrical hazards. It is advisable to clean the panels early in the morning or late in the evening to prevent the cleaning solution from drying too quickly in the sun.

When choosing a cleaning solution, opt for a gentle mixture of soap and water or a specialised solar panel cleaner. Always test the cleaning solution on a small inconspicuous area of the panel first to check for any adverse reactions.

Remember to wear appropriate protective gear, such as gloves and safety goggles, while cleaning the panels to prevent any injuries. Use a gentle touch and avoid applying excessive pressure to the panels, as this could lead to scratches or other damage.

What Tools And Materials Do You Need?

The tools and materials needed to clean solar panels include a soft bristle brush, clean water, a gentle hose, and possibly a microfiber scrubber for tougher stains.

  1. Safety equipment such as gloves and protective eyewear are crucial to prevent any injuries while working with cleaning solutions or standing on ladders.
  2. Having a squeegee can help in removing excess water without leaving streaks on the panels, ensuring a pristine finish.
  3. A telescopic pole with an adjustable length enables you to reach panels in higher areas safely and efficiently.
  4. Using a mixture of mild soap and water can effectively dissolve dirt and grime without damaging the panel’s surface.
  5. A fabric cloth or chamois can be used for a final polish to achieve a spotless and gleaming appearance on the panels.

What Are The Steps To Cleaning Solar Panels?

  1. The steps to cleaning solar panels involve using soapy water or tap water with a soft brush to gently scrub the surfaces, followed by rinsing with clean water to remove any residue.
  2. After ensuring the panels are cool to the touch, start by preparing a mixture of soapy water using a mild detergent specifically designed for solar panels. Dip the soft brush into the solution and begin scrubbing the panels in a gentle circular motion, focusing on areas with visible dirt or grime. Take care not to use abrasive cleaning tools that could scratch the panels.
  3. Once the panels have been thoroughly scrubbed, rinse them using a hose or a bucket of clean tap water. This step helps to remove any leftover soap residue that could affect the panel’s efficiency.

How Often Should Solar Panels Be Cleaned?

Solar panels should be cleaned regularly to prevent the accumulation of dirt and debris that can reduce energy production. New installations may require more frequent cleaning initially.

The recommended frequency for cleaning solar panels often depends on various factors. For instance, solar panels in regions with high levels of dust or pollution may need to be cleaned more frequently compared to those in cleaner environments. Older installations might require more attention as ageing panels can be more prone to dirt buildup.

It is advisable to conduct a visual inspection regularly to check for any visible dirt or shading on the panels. Routine maintenance can help prolong the lifespan of the solar panels and ensure optimal energy generation efficiency.

What Are The Benefits Of Keeping Solar Panels Clean?

Keeping solar panels clean enhances their performance, maximizes energy production, and can result in long-term financial benefits through improved efficiency and output.

When solar panels get dirty, dust, bird droppings, and other debris can accumulate on the surface, blocking sunlight and reducing the amount of energy that can be converted. Regular cleaning not only ensures that panels receive optimal sunlight for energy generation but also helps prolong the lifespan of the system.

Clean panels operate more effectively, generating more electricity for your household or business needs. This increased energy production can translate into significant cost savings on electricity bills over time, making the initial investment in solar panels even more worthwhile.

What Are The Signs Of Dirty Solar Panels?

Signs of dirty solar panels include reduced energy output, visible dirt or stains on the surface, and shadows from debris blocking sunlight. Monitoring performance can help identify cleaning needs.

It is crucial to keep an eye on the overall energy production of your solar panels to ensure optimal performance. If you notice a drop in energy output over time, it could be an indication that your panels need cleaning. Inspect the surface of the panels regularly for any visible dirt or stains as these can hinder sunlight absorption. Shadows cast by debris on the panels can also be a clear sign that cleaning is necessary to maintain efficiency.

What Are The Common Mistakes When Cleaning Solar Panels?

Common mistakes when cleaning solar panels include using abrasive materials, harsh chemicals, or high-pressure washing methods that can damage the panels and compromise their performance.

It’s crucial to ensure safe practices and use gentle materials to avoid unintentional harm to the panels. Protecting the surface of the solar panels is essential for maintaining their efficiency and lifespan. By opting for soft brushes, sponges, or cloth along with mild soapy water, you can effectively remove dirt and grime without risking scratches or chemical damage. Understanding the proper cleaning techniques such as rinsing thoroughly and avoiding direct sunlight during the cleaning process can significantly impact the performance and longevity of solar panels.

How Can You Prevent Dirt And Debris From Accumulating On Solar Panels?

To prevent dirt and debris build-up on solar panels, consider installing them at an angle for self-cleaning rainwater runoff, trimming nearby trees to minimise shading, and regular inspection for potential obstructions.

Another crucial factor to maintain optimal solar panel performance is to ensure proper landscaping around the installation site. Landscaping considerations involve keeping the area clean from fallen leaves, bird droppings, and other debris that could accumulate on the panels. This not only enhances the efficiency of the panels but also prolongs their lifespan.

Along with strategic installation and landscaping, establishing a routine monitoring schedule is essential. Regular monitoring allows you to quickly address any issues that may arise, such as bird nests or dust accumulation, before they impact the panel’s efficiency. By incorporating these preventive measures into your solar panel maintenance routine, you can maximise energy production and overall system performance.

15th March 2024 Tips

What Is Power Washing

Are you tired of looking at the built-up dirt and grime on your home’s exterior surfaces? Power washing might just be the solution you’re looking for. In this article, we will explore what power washing is, how it works, the different surfaces that can be power washed, the benefits of power washing, the various types of power washing techniques, how often it should be done, and whether or not it is safe. We will provide tips on how to choose a professional power washing service. So, if you want to learn more about revitalising your property and increasing its curb appeal, keep reading!

What Is Power Washing?

Power washing is a cleaning method that utilises high-pressure water to remove dirt and grime from various surfaces.

Power washing, also known as pressure washing, is a versatile cleaning technique that uses a specialised machine to generate a powerful stream of hot water. This method is highly effective in eliminating stubborn stains, mould, mildew, and other residues from surfaces such as driveways, decks, fences, cladding, and even outdoor furniture.

  • Machine: The power washer machine pressurises water and propels it through a narrow nozzle at high speeds to create a forceful spray.
  • Heat: Some power washing machines also have the option to heat the water, enhancing the cleaning power, especially for grease and oil stains.
  • Technique: Proper technique is crucial in power washing to avoid damaging surfaces; adjusting the pressure according to the material being cleaned is essential for optimal results.

How Does Power Washing Work?

Power washing works by using a high-pressure machine that forces water at elevated pressure onto surfaces, effectively removing dirt and grime.

The key component in a power washing system is the nozzle, which is responsible for directing the high-pressure water onto the surface being cleaned. These nozzles come in various sizes and spray patterns depending on the task at hand. Some power washing units also allow for the use of different products and soaps to enhance the cleaning process. The combination of high pressure and water, along with the help of specialised cleaning agents, ensures thorough and efficient cleaning of various surfaces, from driveways to buildings.

What Surfaces Can Be Power Washed?

Power washing is suitable for cleaning a variety of surfaces including concrete, wood, brick, and vinyl cladding.

Soft washing is particularly effective for delicate surfaces like stucco or painted wood, as it applies lower pressure but still effectively removes grime and dirt.

Whether it’s for the gleaming pavements, pristine decks, or sparkling cladding, power washing can breathe new life into outdoor spaces.

Utilising specialised surface cleaner solutions, power washing not only cleans but also helps prevent mould and mildew growth, extending the longevity of your outdoor surfaces.

Concrete

Concrete surfaces can be efficiently cleaned using power washing, which helps to remove dirt and grime effectively.

One of the specific benefits of power washing is its ability to penetrate deep into the pores of the concrete, ensuring a thorough cleaning that traditional cleaning methods may struggle to achieve. The high pressure combined with the use of hot water also helps to kill bacteria and mould that may be present on the surface.

When undertaking a power washing task, it is crucial to adjust the pressure and techniques according to the surface being cleaned. Using the wrong pressure can damage the concrete or result in ineffective cleaning. It is advisable to hire a professional company that understands the nuances of power washing to ensure the process is carried out effectively and safely.

Brick

Brick surfaces can be effectively cleaned using power washing with high pressure, ensuring a thorough removal of dirt and grime.

One of the major advantages of utilising power washing on brick surfaces is its ability to penetrate deep into the porous material, effectively lifting and washing away trapped debris. This method not only restores the appearance of the bricks but also helps prolong their lifespan by eliminating potentially damaging contaminants. Power washing is a time-efficient solution compared to manual scrubbing, making it ideal for large surface areas.

Wood

Wood surfaces benefit from high-pressure washing as it effectively cleans and rejuvenates the appearance of the material.

When high-pressure washing wood, it is crucial to consider the pressure settings and cleaning solutions used. Using a bleach-based cleaner can help eliminate mould, mildew, and other stubborn stains effectively. It is important to adjust the pressure of the high-pressure washer to avoid damaging the wood surface. A soft water system can also prevent any mineral buildup on the wood, ensuring a thorough and gentle cleaning process. By following these tips, you can achieve a beautifully cleaned and refreshed wood surface.

Vinyl Cladding

Vinyl cladding can be efficiently cleaned through power washing techniques, ensuring a thorough removal of dirt and grime from the surface.

One of the main benefits of using power washing on vinyl cladding is the ability to reach large surface areas quickly and effectively. The high-pressure water stream easily dislodges built-up dirt, mould, mildew, and other stubborn pollutants, leaving your home looking fresh and revitalised. A house wash through power washing can also prevent costly repairs by maintaining the condition of your cladding. It is essential to note that when cleaning vinyl cladding, special care must be taken to avoid damaging the material with too high pressure or excessive chemicals, emphasising the importance of seeking professional services for optimal and safe cleaning results.

Learn more: How To Clean External Cladding

What Are The Benefits Of Power Washing?

Power washing offers numerous benefits, including the removal of dirt and grime from surfaces, and enhancing the appearance of homes and properties.

One of the key advantages of power washing is its ability to efficiently clean various surfaces, such as cladding, driveways, and fences. This method not only improves the overall look of the house but also helps prevent long-term damage caused by built-up debris.

Regular power washing can significantly increase the property value by maintaining its visual appeal and structural integrity. By investing in a professional power washing service, homeowners can ensure their property stands out in the neighbourhood and leaves a lasting positive impression on visitors.

Removes Dirt And Grime

One of the key benefits of pressure washing is its ability to effectively remove dirt and grime from various surfaces, restoring their cleanliness and appearance.

When dirt, mould, mildew, and other contaminants build up on surfaces, they can not only be unsightly but also pose potential health risks.

Pressure washing ensures that these surfaces are not only clean but also free of harmful substances that could cause damage or degradation over time.

It is a preventative measure that helps maintain the integrity of different surfaces, such as driveways, fences, decks, and even outdoor furniture, prolonging their lifespan and enhancing their overall aesthetic appeal.

Increases Property Value

Pressure washing can increase the property value by maintaining a clean and well-kept exterior, attracting potential buyers or tenants.

When the outdoor areas of a property look pristine and well-maintained, it automatically creates a positive impression on anyone interested in purchasing or renting it. The kerb appeal plays a significant role in the overall perception of the property, and with a thorough pressure wash, you can easily enhance this aspect. The investment in pressure washing equipment is relatively small compared to the potential increase in property value. For example, some homeowners have reported a significant increase in resale value after implementing a regular pressure washing routine.

Prevents Damage

Power washing helps prevent damage to surfaces by removing built-up dirt, mould, and other harmful elements that can deteriorate the material over time.

By using high-pressure water sprays, power washing effectively blasts away debris, grime, and stains that have accumulated on surfaces, rejuvenating their appearance and prolonging their lifespan. Technique plays a crucial role in ensuring that the powerful jets of water do not harm delicate surfaces, making it a safe and efficient cleaning method for a variety of materials. Regular power washing maintenance not only safeguards against costly repairs but also enhances the overall aesthetics of homes, driveways, and outdoor spaces.

Improves Curb Appeal

Power washing enhances kerb appeal by giving homes a fresh and clean look, making them more inviting and attractive to visitors or passers-by.

Soft washing, a gentler approach to power washing, is ideal for delicate surfaces like vinyl cladding, ensuring a thorough cleaning without causing damage. The technique involves using low-pressure water combined with biodegradable cleaning solutions to remove dirt, grime, and mould effectively. This not only improves the appearance of the cladding but also helps in maintaining its longevity.

What Are The Different Types Of Power Washing?

There are various types of power washing techniques, including pressure washing, soft washing, hot water power washing, and cold water power washing.

Pressure washing utilises highly pressurised water to tackle tough grime and dirt on surfaces like concrete driveways, brick walls, and decks. It is ideal for heavy-duty cleaning tasks that require significant force to remove stubborn stains.

On the other hand, soft washing involves lower water pressure and specialised cleaning solutions to gently clean delicate surfaces, such as painted wood or vinyl siding, without causing damage.

Hot water power washing is effective for cutting through grease and oil stains because the heated water increases the cleaning power, making it suitable for industrial settings.

Cold water power washing, while not as powerful as hot water, is suitable for regular maintenance cleaning on surfaces like outdoor furniture, windows, and pavements.

Pressure Washing

Pressure washing utilises high-pressure water to clean surfaces effectively, making it ideal for removing tough stains and debris.

When using a pressure washing machine, it’s crucial to consider the surface you are cleaning. This method works wonders on hard surfaces like concrete driveways, brick walls, and metal fences due to its powerful force. It may not be suitable for more delicate materials like wood or certain types of cladding, as the intense pressure can cause damage. The heat and chemicals in some pressure washing products can enhance the cleaning process, but correct application is key to avoid any harm to the surface being cleaned. Technique plays a significant role in pressure washing, ensuring thorough cleaning without causing harm.

Soft Washing

Soft washing is a gentle power washing technique that uses lower pressure and specialised cleaning solutions to clean delicate surfaces without causing damage.

Unlike traditional power washing, soft washing is ideal for fragile surfaces such as roofs, cladding, and decks, where high-pressure water can cause harm. By utilising the right combination of cleaning solutions and advanced equipment, a professional soft washing company can effectively remove dirt, mould, mildew, and other contaminants without risking surface damage.

Hot Water Power Washing

Hot water power washing involves using heated water to clean surfaces more effectively, especially for removing grease, oil, and tough stains.

One of the advantages of hot water power washing is its ability to break down stubborn grime and dirt with the help of the high temperature. The heat aids in softening the grime, making it easier to wash away. The use of heated water enhances the cleaning power of detergent or soap, resulting in a more thorough cleaning process. This technique is particularly useful for surfaces such as driveways, pavements, and garden furniture that are exposed to heavy soiling and need intense cleaning.

Cold Water Power Washing

Cold water power washing uses unheated water under high pressure to clean surfaces efficiently, suitable for general cleaning tasks where heat is not necessary.

One of the key benefits of utilising cold water power washing is its versatility, making it a cost-effective and environmentally friendly cleaning method. The high-pressure water expelled through specialised nozzles can dislodge grime, dirt, and debris from a wide range of surfaces without the need for additional chemicals. This makes it an ideal choice for cleaning driveways, pavements, decks, and even vehicles. Cold water power washing is gentle enough not to damage delicate surfaces while still providing a thorough cleaning.

How Often Should Power Washing Be Done?

The frequency of power washing depends on factors like the type of surfaces, environmental conditions, and the level of dirt accumulation, typically recommended annually or bi-annually for most surfaces.

For surfaces exposed to high levels of dirt, such as driveways or decks, a more frequent cleaning schedule may be necessary. Factors like harsh weather conditions, the presence of mould or mildew, and surrounding vegetation can all impact how often you need to power wash.

When deciding whether to tackle the job yourself or hire a professional cleaning service, consider the complexity of the task and the potential risks involved, particularly when using high-pressure washing techniques.

Is Power Washing Safe?

Whilst power washing is an effective cleaning method, there are potential risks such as injury and damage if not used correctly or at excessive pressure.

When operating a power washing machine, it is crucial to avoid directing the high-pressure stream toward delicate surfaces like wood, glass, or painted areas as it can cause irreversible damage. Proper safety gear such as gloves, goggles, and sturdy footwear should always be worn to protect against any potential injuries from flying debris or splashes.

To prevent accidents, it is recommended to test the pressure on a small inconspicuous area first to ensure the machine is set at an appropriate level for the surfaces being cleaned. Maintaining a safe distance from the surface being tackled can help avoid unintentional marks or dents caused by holding the nozzle too close.

Potential For Injury

The use of power washing equipment can pose a risk of injury due to high-pressure water jets, requiring proper training and safety precautions to mitigate accidents.

When operating power washing equipment, it is crucial to be aware of the potential risks associated with high-pressure water, which can cause serious harm if not handled correctly. The force generated by power washers is strong enough to strip away layers of dirt and grime, but it can also penetrate the skin or cause eye damage if directed improperly. To minimise the chances of injury, operators should always wear protective gear such as goggles, gloves, and sturdy footwear to shield themselves from the high-pressure spray.

Potential For Damage

Improper use of power washing can lead to damage on surfaces such as etching, paint removal, or water ingress, emphasising the importance of correct technique and pressure.

One of the common risks associated with power washing is the potential to cause damage to delicate surfaces like cladding or wooden decks. Gentle washing can be a safer alternative for sensitive materials, as it uses lower water pressure to prevent harm. When done incorrectly, power washing can strip away layers of paint, leaving surfaces vulnerable to weathering and decay over time.

How To Choose A Professional Power Washing Service?

Selecting a professional power washing service involves considering factors such as experience, equipment quality, and customer reviews to ensure effective and reliable cleaning for your surfaces.

When looking for a trustworthy cleaning company, qualifications play a significant role in determining their expertise and professionalism. Ensure that the power washing service you choose has proper certification and follows industry standards for safety and quality. Verifying if the technicians are insured is crucial, as it protects you from liability in case of any accidents during the cleaning process.

Consider the materials of the surfaces you need to clean. Different surfaces require specific techniques and pressure levels to prevent damage. A reliable power washing service will assess the materials and tailor their cleaning approach accordingly, ensuring effective results without compromising the integrity of your surfaces.

Whether it’s your outdoor patio, driveway, or cladding, a reputable power washing service will have the right equipment and expertise to rejuvenate these areas effectively. They should understand the unique cleaning requirements of outdoor surfaces and use appropriate techniques to remove dirt, grime, and mould without causing damage.

Consider the usage you need. Whether it’s for routine maintenance or preparation for painting, communicating your specific needs with the power washing service is essential for achieving the desired results. A professional company will work closely with you to understand your expectations and deliver a customised cleaning solution to meet your requirements.

9th February 2024 Tips

How To Clean Drain On Whirlpool Dishwasher

Is your Whirlpool dishwasher not draining properly? It might be time to clean the drain. In this article, we will discuss the signs that indicate your dishwasher drain needs cleaning, the tools and materials needed for the job, and a step-by-step guide on how to clean the drain effectively.

We will provide maintenance tips to prevent future clogs and when it’s best to seek professional help. Keep reading to ensure your dishwasher is running smoothly and efficiently.

Signs That Your Whirlpool Dishwasher Drain Needs Cleaning

Recognizing the signs that indicate your Whirlpool dishwasher drain requires cleaning is essential to prevent potential issues and maintain optimal performance.

Common signs that your Whirlpool dishwasher drain may need cleaning include slow drainage, water pooling in the dishwasher after a cycle, and the presence of unusual noises during the draining process. If you notice any of these signs, it’s important to take action promptly to avoid potential blockages.

Regular maintenance, such as checking for food particles stuck in the drain, cleaning the filter and drain hose, and using a dishwasher cleaner periodically, can help prevent major issues and keep your dishwasher running smoothly.

Learn more: How To Fix Shower Drain Clog

Tools And Materials Needed For Cleaning The Drain

Having the right tools and materials on hand is crucial for effectively cleaning the drain of your Whirlpool dishwasher.

  • Some essential tools you’ll need include screwdrivers to remove any parts for thorough cleaning, soft brushes to dislodge debris and grime, and gloves to protect your hands.
  • In addition to tools, materials such as vinegar can help break down stubborn buildup, baking soda for odor removal, and a damp cloth for wiping down surfaces.

It’s important to use appropriate cleaning products to ensure a deep clean without damaging the appliance’s components or the environment.

Step-By-Step Guide To Cleaning The Drain On A Whirlpool Dishwasher

Follow these step-by-step instructions to effectively clean the drain on your Whirlpool dishwasher and restore optimal water flow.

  1. Start by unplugging your dishwasher to ensure safety during the cleaning process.
  2. Remove the bottom rack to access the filter located at the bottom of the appliance. The filter usually traps food particles and debris, causing clogs that hinder proper drainage.
  3. Gently clean the filter under running water to dislodge any buildup.
  4. Next, check the drain hose for any blockages by disconnecting it from the sink and running water through it. It is essential to remove all debris and blockages thoroughly to prevent future issues with water drainage.

Step 1: Unplug The Dishwasher

The first step in cleaning the drain of your Whirlpool dishwasher is to ensure the appliance is safely unplugged from the power source.

This is crucial for preventing any electrical accidents while working on your dishwasher.

  1. To safely unplug it, locate the power cord and follow it to the outlet.
  2. Carefully grasp the plug, not the cord, and pull it out gently.
  3. Make sure your hands are dry, and be cautious of any water near the outlet.

Safety should always come first when dealing with appliances that are connected to electricity, so be sure to follow these steps before attempting any maintenance on your dishwasher.

Step 2: Remove The Bottom Rack

Next, remove the bottom rack from your Whirlpool dishwasher to access the drain area effectively for cleaning and debris removal.

  1. To remove the bottom rack, start by pulling the rack outward until it reaches its fully extended position.
  2. Then, lift the front of the rack slightly and pull it towards you to disengage it from the sliding tracks. Be cautious while doing this to prevent any damage to the rack or the dishwasher.

Once the rack is removed, you will have clear access to the drain components, allowing you to thoroughly clean any accumulated debris or food particles. This step is crucial for maintaining the dishwasher’s efficiency and preventing blockages that can lead to odor or drainage issues.

Step 3: Locate the Drain

Identifying the location of the drain in your Whirlpool dishwasher is crucial before initiating the cleaning process for effective maintenance.

The drain in your dishwasher is typically located at the bottom of the appliance, near the back. It is important to remove the bottom rack to access the drain easily.

Common areas where debris tends to accumulate include the filter, the drain hose, and the drain pump. By inspecting and cleaning these areas regularly, you can prevent blockages and ensure that your dishwasher operates efficiently.

Pay close attention to any signs of blockages or strange odors emanating from the drain, as these are indicators that cleaning is required.

Step 4: Remove Debris From The Drain

Carefully remove any accumulated debris from the drain of your Whirlpool dishwasher to ensure smooth water flow and prevent blockages.

  1. Start by unplugging the dishwasher to avoid any risk of electric shock.
  2. Use a screwdriver to remove the screws holding the drain cover in place.
  3. Once the cover is off, visually inspect the drain for any visible blockages and remove them using a small brush or your gloved hands.
  4. For tougher blockages, create a mixture of hot water and vinegar and pour it down the drain to break up the debris.
  5. Remember to rinse the drain thoroughly before reassembling everything back in place to prevent future blockages.

Step 5: Clean The Filter

Cleaning the filter of your Whirlpool dishwasher is essential to ensure effective filtration of debris and prevent blocking in the drainage system.

Neglecting regular maintenance of the dishwasher filter can lead to issues such as unpleasant smells, subpar cleaning performance, and potential damage to the appliance.

To remove the filter, simply locate it at the bottom of the dishwasher and twist or unclip it, depending on the model. Once removed, gently scrub the filter under running water using a soft brush to dislodge any trapped food particles or dirt. Ensure thorough cleaning before reinstalling the filter back into its place to maintain the efficiency and longevity of your dishwasher.

Step 6: Check The Drain Hose

Inspecting the drain hose of your Whirlpool dishwasher is crucial to ensure unrestricted water flow and identify any potential blockages or leaks.

To effectively check the drain hose, first, switch off the dishwasher and pull it out from its place. Next, locate the drain hose at the back of the machine. Carefully inspect the entire length of the hose for any kinks, bends, or clogs. Ensure that the hose is not twisted or crushed, as this can significantly hinder the water drainage process. Regularly cleaning the drain hose, and removing any debris or obstructions, will help maintain efficient water flow and prevent potential issues with your dishwasher’s performance.

Step 7: Reassemble And Test The Dishwasher

After cleaning the drain components, reassemble your Whirlpool dishwasher carefully and conduct a test cycle to ensure proper functionality.

  • Start by positioning the filter back into place with a gentle push, making sure it is securely seated.
  • Next, reattach the spray arm by aligning it properly and twisting it to lock.
  • Then, carefully slide the lower rack back into the dishwasher.
  • Once everything is back in place, run a test cycle on your dishwasher to check the drainage system.
  • Regularly testing the appliance ensures that any issues with drainage are detected early, preventing potential problems in the future.

Maintenance Tips To Keep Your Whirlpool Dishwasher Drain Clean

Implementing these maintenance tips will help you keep the drain of your Whirlpool dishwasher clean and prevent potential blockages.

Regularly running hot water cycles through the dishwasher before using it for a full load can help wash away any residual food particles and grease that may have accumulated. Using a mixture of vinegar and water to clean the interior of the dishwasher, including the drain, can help break down deposits and prevent odors.

It’s crucial to avoid overloading the dishwasher and using excessive detergent, as these factors can contribute to blockages and faults. By following these preventive maintenance steps, you can prolong the lifespan of your appliance and save yourself from costly repairs down the line.

When To Seek Professional Help

Knowing when to enlist professional help for your Whirlpool dishwasher drain issues is crucial to address complex problems and ensure effective repairs.

Persistent blockages, leaks, or strange noises emanating from your dishwasher can signify underlying issues that may require professional intervention. If you find that no matter what you do, the drain remains blocked, or water leaks continue to be a problem, calling in a qualified technician could be the best course of action. When selecting a professional for maintenance and repair services, ensure they are certified, experienced, and have a good reputation for handling dishwasher issues efficiently.

Next Page »

Primary Sidebar

Keep up to date with our latest posts

Subscribe to our newsletter for free and be the first to be notified about all our latest content!

Welcome to A2B Crafts

At A2B Crafts we make it our duty to bring you the latest in shabby chic design and Do it yourself furniture. If you’re new to the craft or a long time expert, A2B crafts is perfect for you. With every new post we hope to bring you something new and exciting which gives you the inspiration to try something new with your home
furnishings. If you feel inspired after reading any of our posts or you’ve even tried these tips for yourself, please feel free to let us know through our contact page or our other social channels!

Footer

Stay Connected

  • Facebook
  • Instagram
  • Pinterest
  • Tumblr
  • Twitter
  • YouTube

Contact Information

Tel: Thursday – Saturday 01328 856001

or mobile 07917606039 at other times

Address: Wheelspeed Unit 1, Cattle Market Street, Fakenham, Norfolk, NR21 9AW

Please feel free to contact at anytime, however at present we work part-time so may not get back to you immediately,
but will make contact as soon as possible.

Categories

  • DIY Interior
  • Furniture Upcycle
  • Hobbie Crafts
  • Interior Decor
  • News
  • D.I.Y
  • Garden

Helpful Links

  • Contact Details
  • Conditions of Use
  • Privacy Notice
  • Shipping & Returns

Copyright© 2025 · Cookd Pro Theme by Shay Bocks